

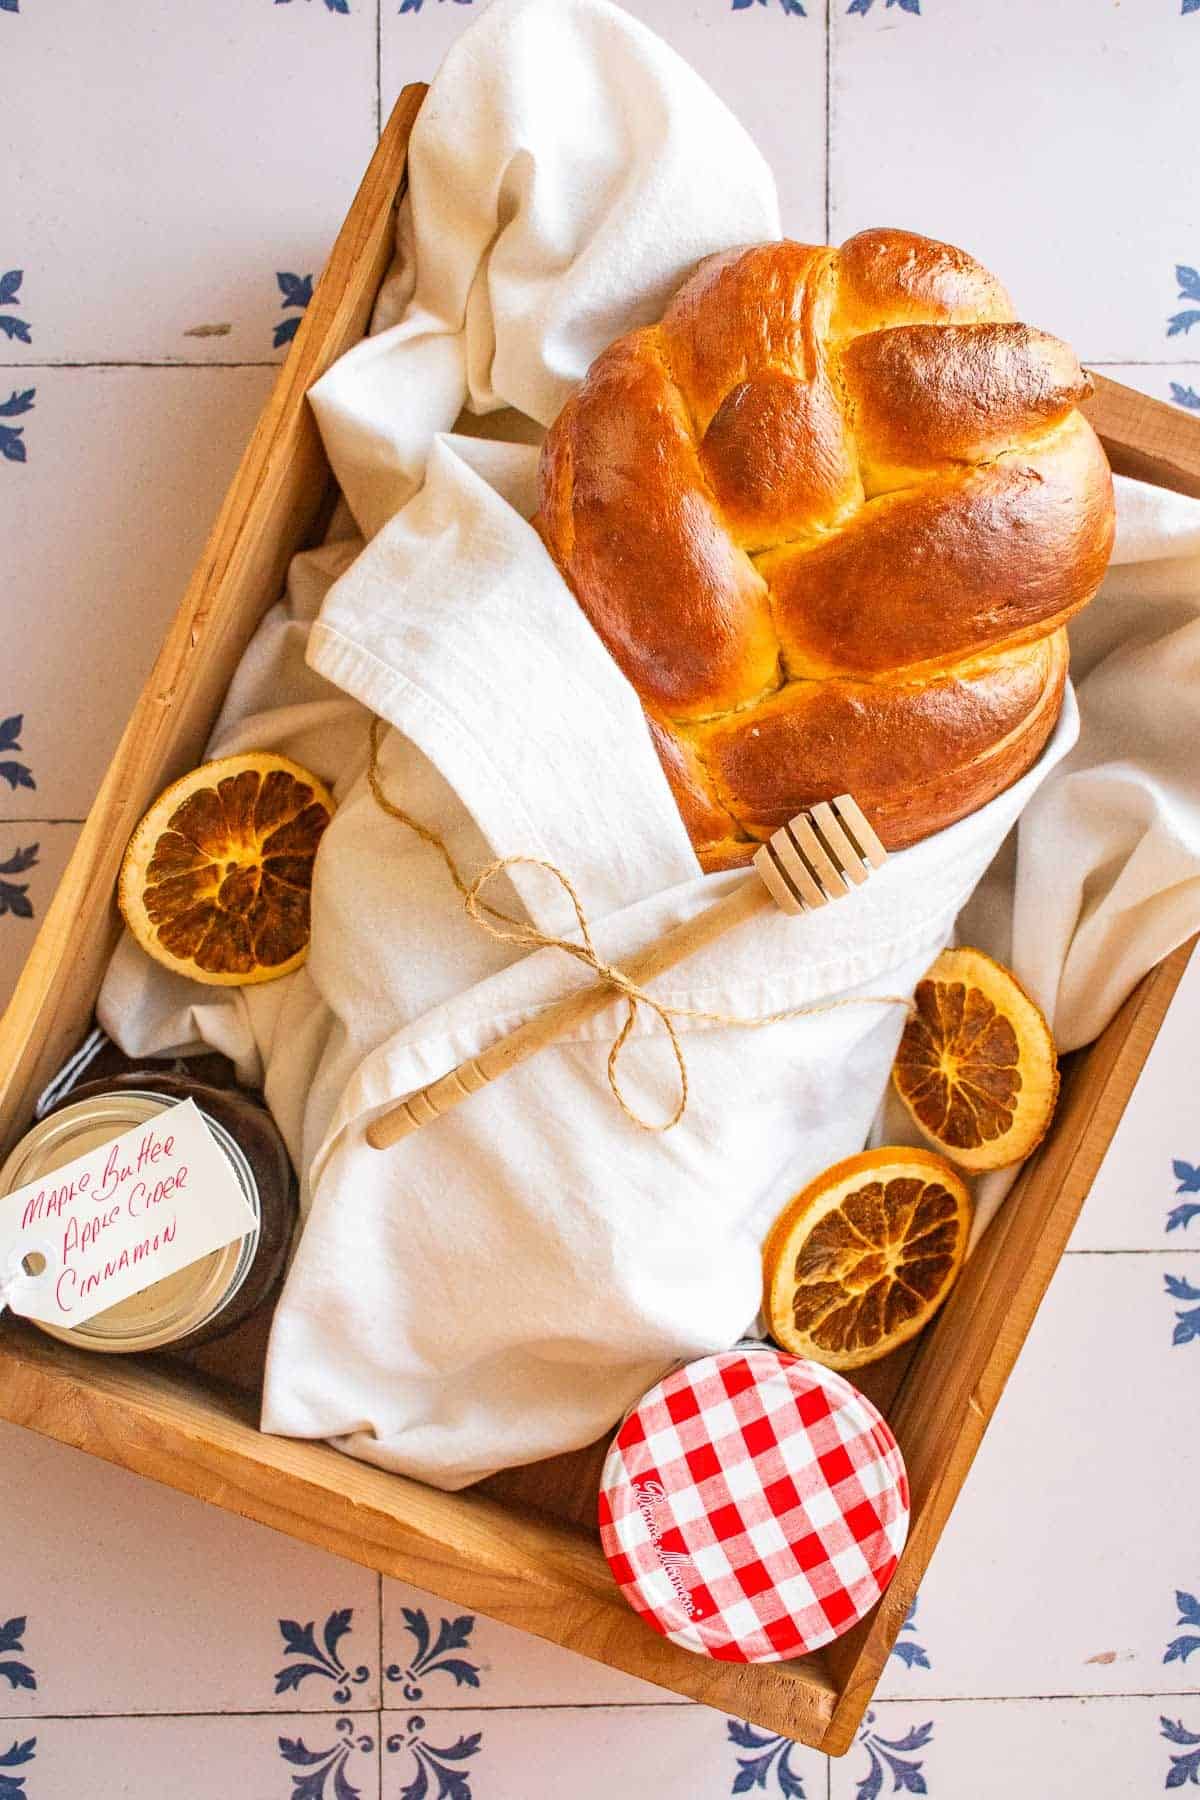
This beautiful braided bread is made with active dry yeast for a reliable rise, milk & butter for a soft, fluffy texture, and subtly sweetened with brown sugar and cinnamon. I've included step-by-step instructions and tips for braiding with three, four, and five strands!
This website uses affiliate links which may earn commission for purchases made at no additional cost to you.
The Braided Loaf I Make Every Week
Four years ago I stumbled onto braided challah when I wanted a beautiful loaf that didn't require lugging out my Dutch oven. It bakes right on a sheet pan, no special equipment, no steam, no fuss. And the moment I pulled that first glossy, golden braid out of the oven, I was completely hooked!
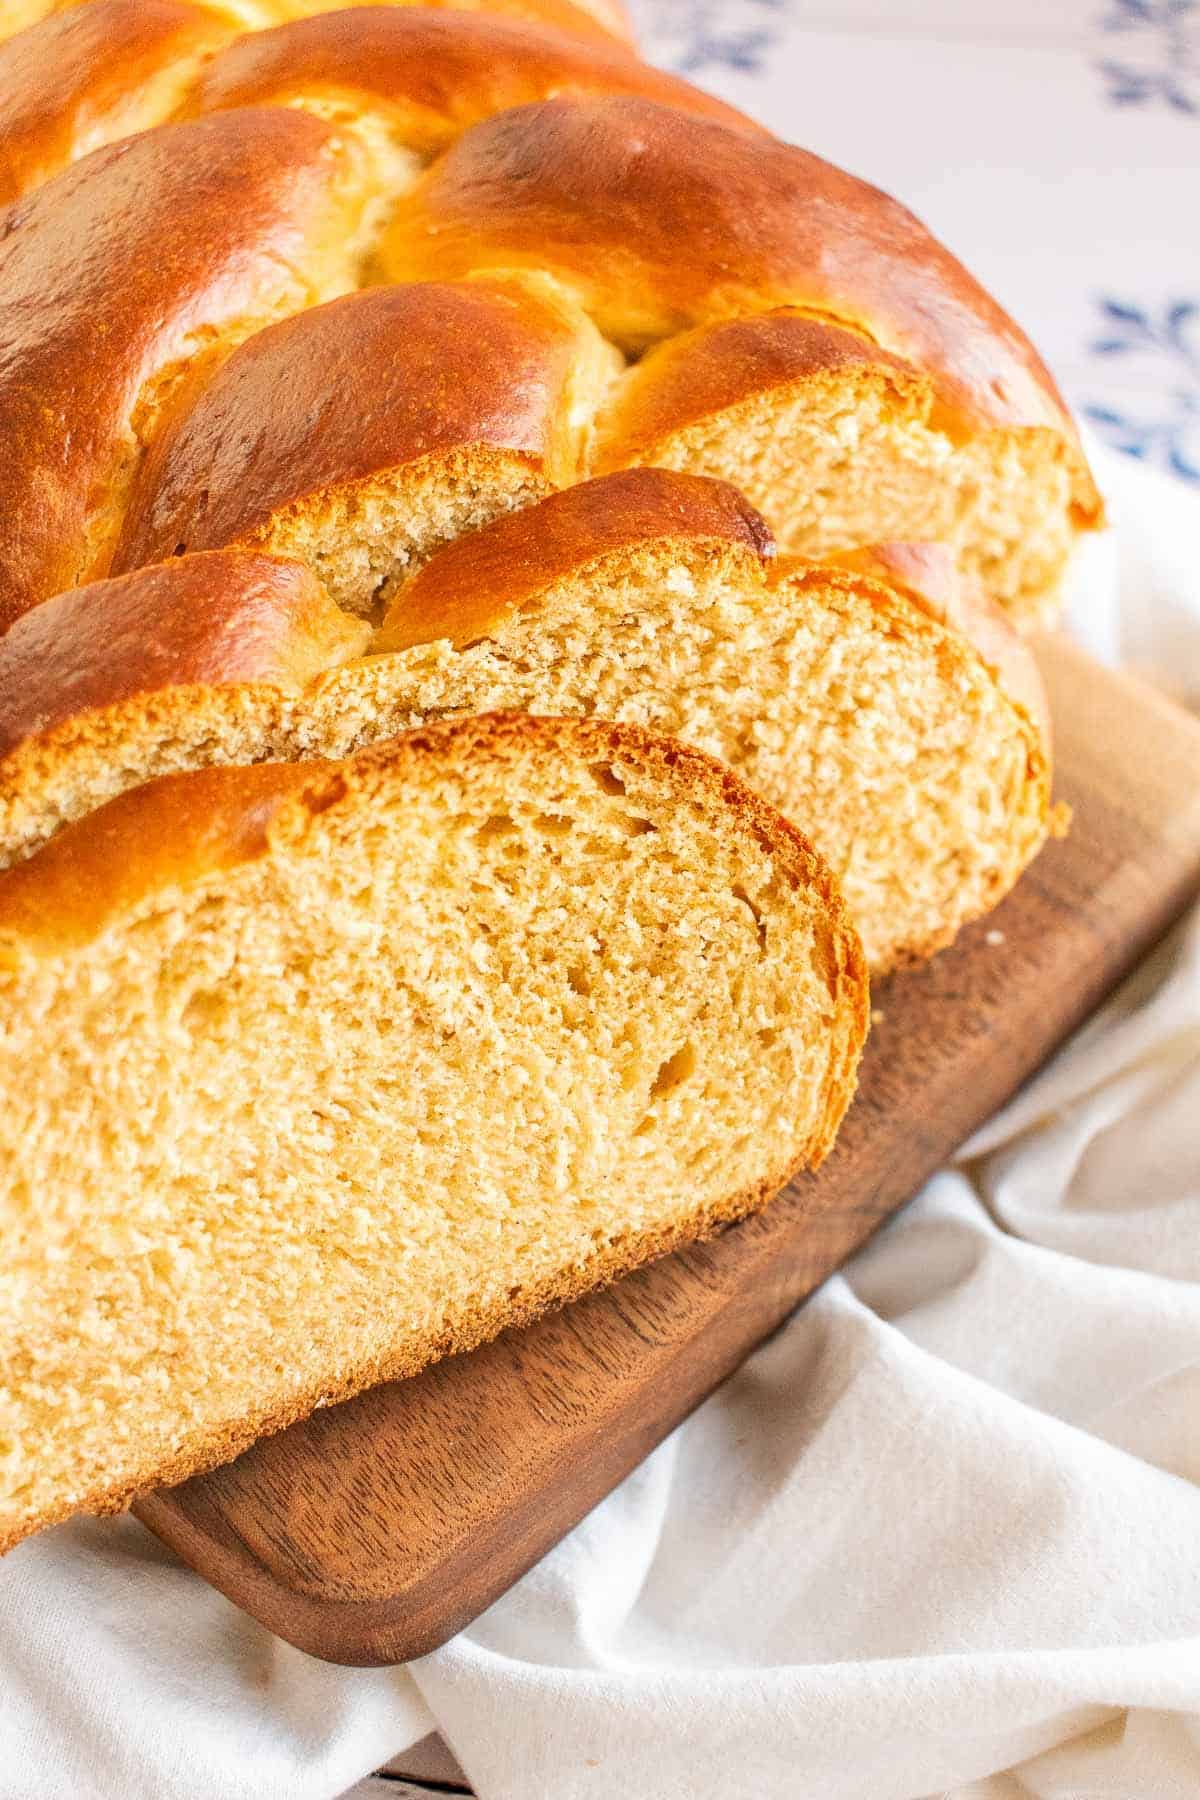
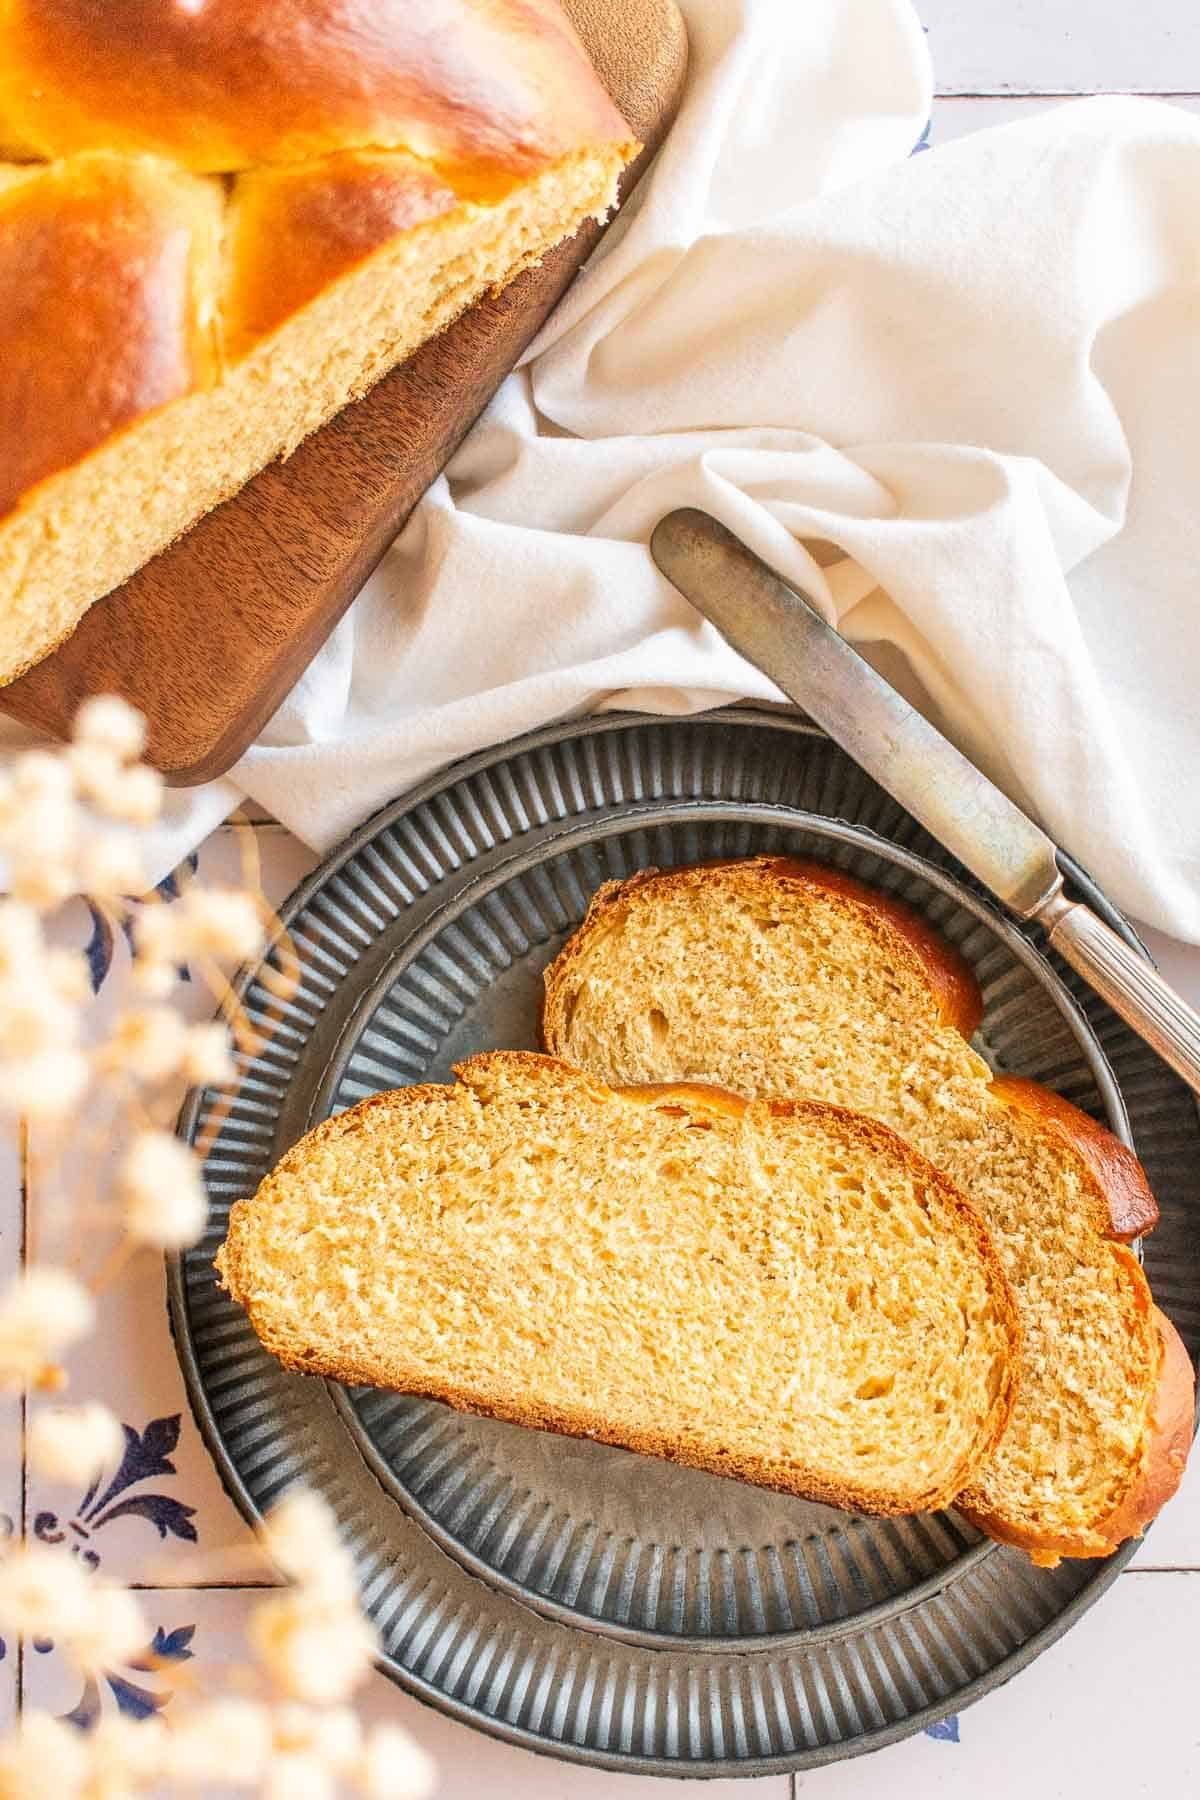
This is an enriched dough, slightly sweetened with brown sugar and a touch of cinnamon, with a pillowy soft interior and a chewy, glossy crust from a generous egg wash. Bonus: that same egg wash helps the braided strands hold their shape during baking, so your plait doesn't unravel.
And while most braided bread recipes I've come across are either vague about the braiding technique or skip the visual guidance entirely, I included step-by-step photos and instructions for three of my favorite braid styles, for 3-strand, 4-strand, and 5-strand plaits, so you can actually see what each step should look like before you dive in.
I designed this recipe to be forgiving enough for first-time bread bakers (no Dutch oven & no scoring) but impressive enough that I still bring it as a hostess gift and serve it at holidays, similar to my German braided Easter bread. It's one of those rare loaves that's easy enough to become a weekly staple and special enough that people always ask for the recipe.
Let's Braid Bread 3 Different Ways!
Jump To:
- 3-Strand Braided Bread (most beginner-friendly)
- 4-Strand Braided Bread (most complicated)
- 5-Strand Braided Bread (nice middle ground)
- Tips and Tricks
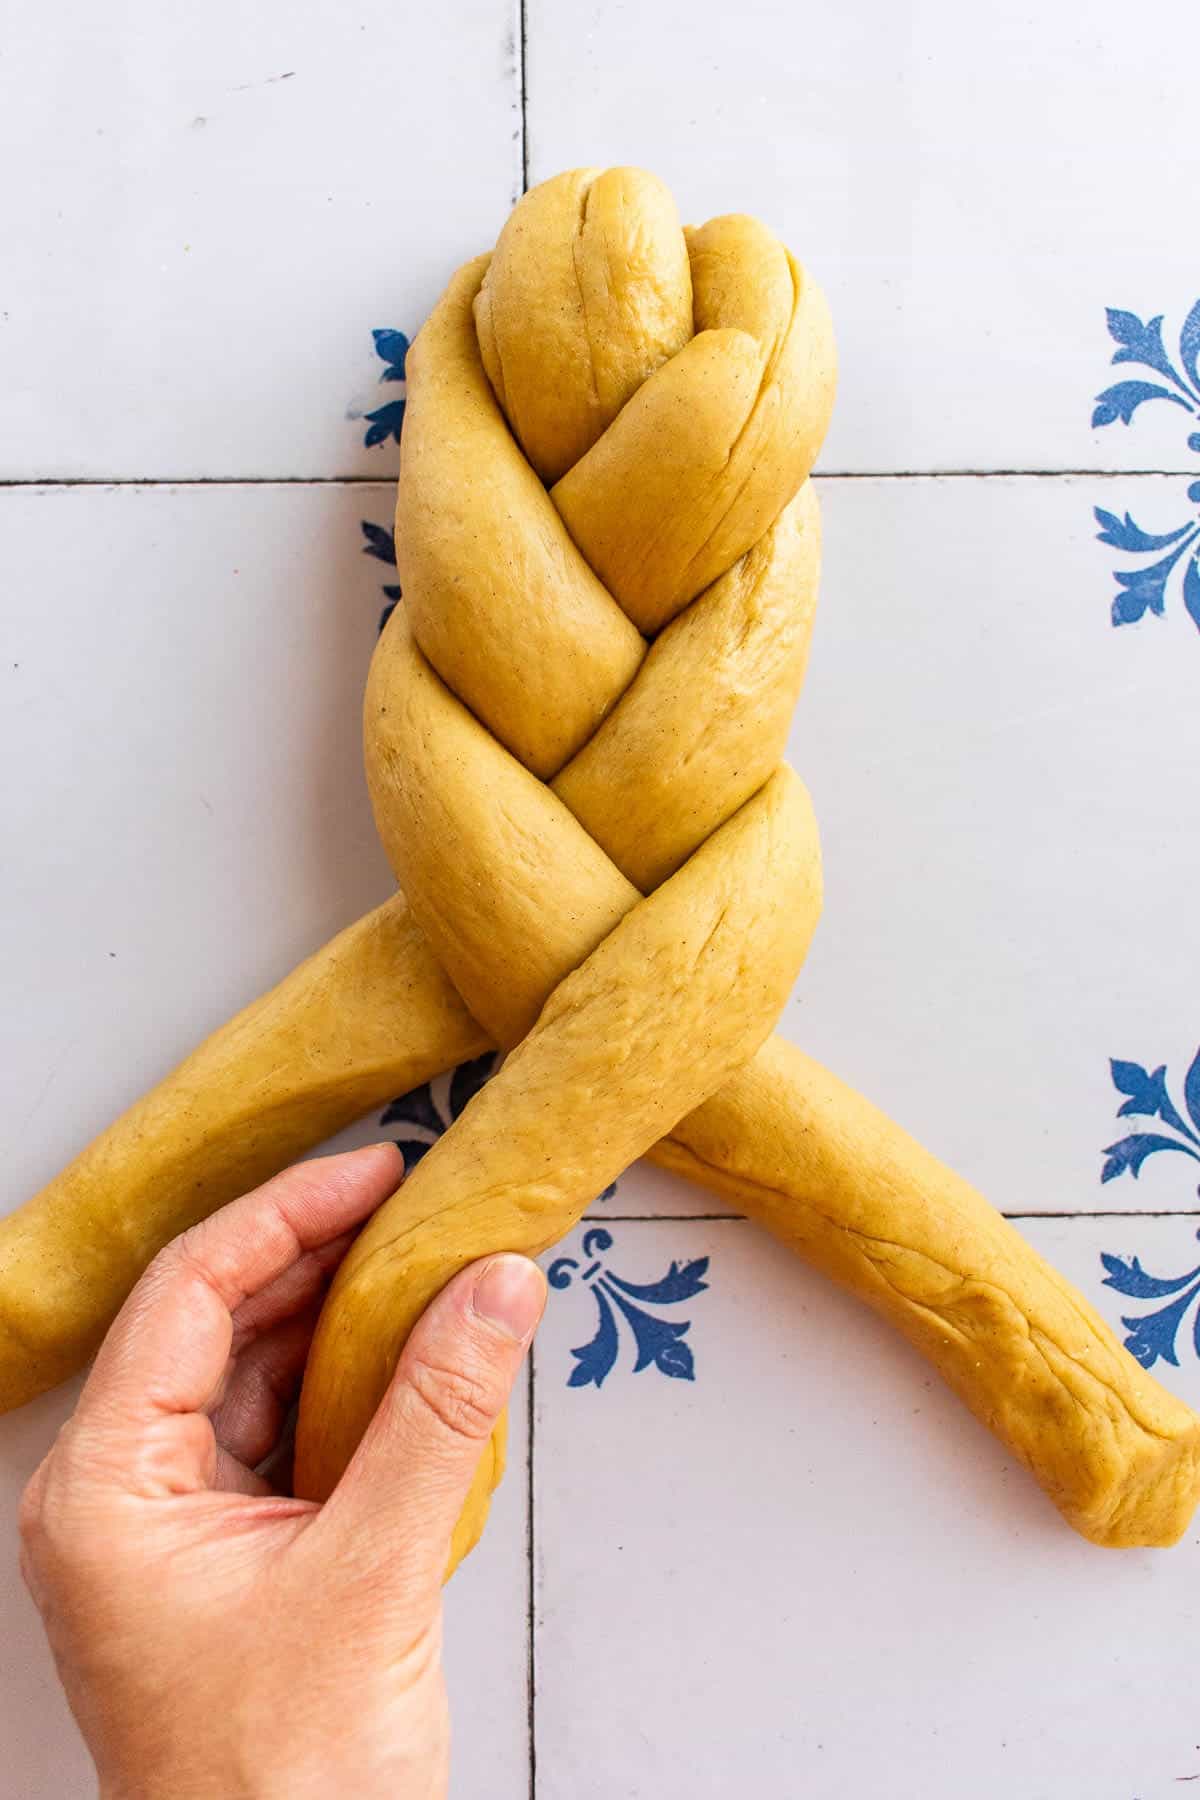
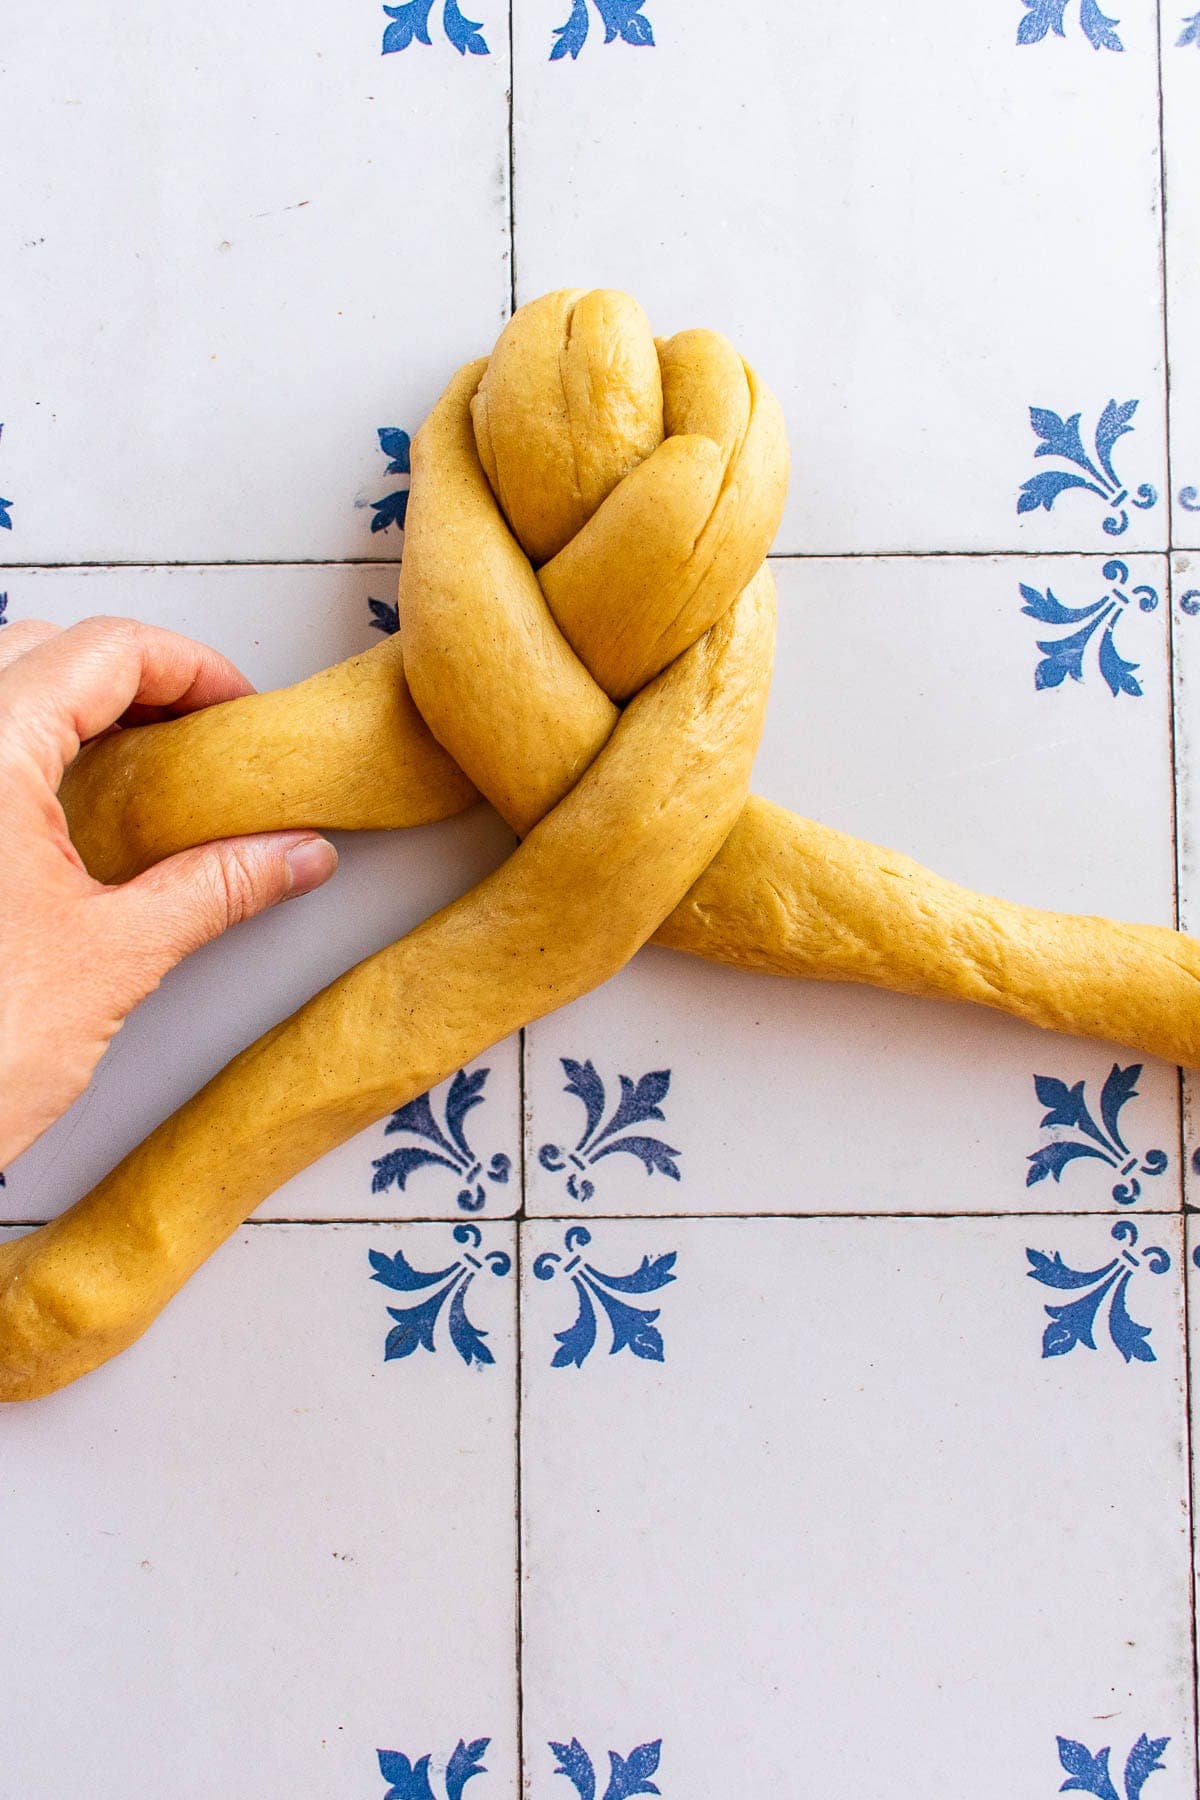
Three-Stranded Braid
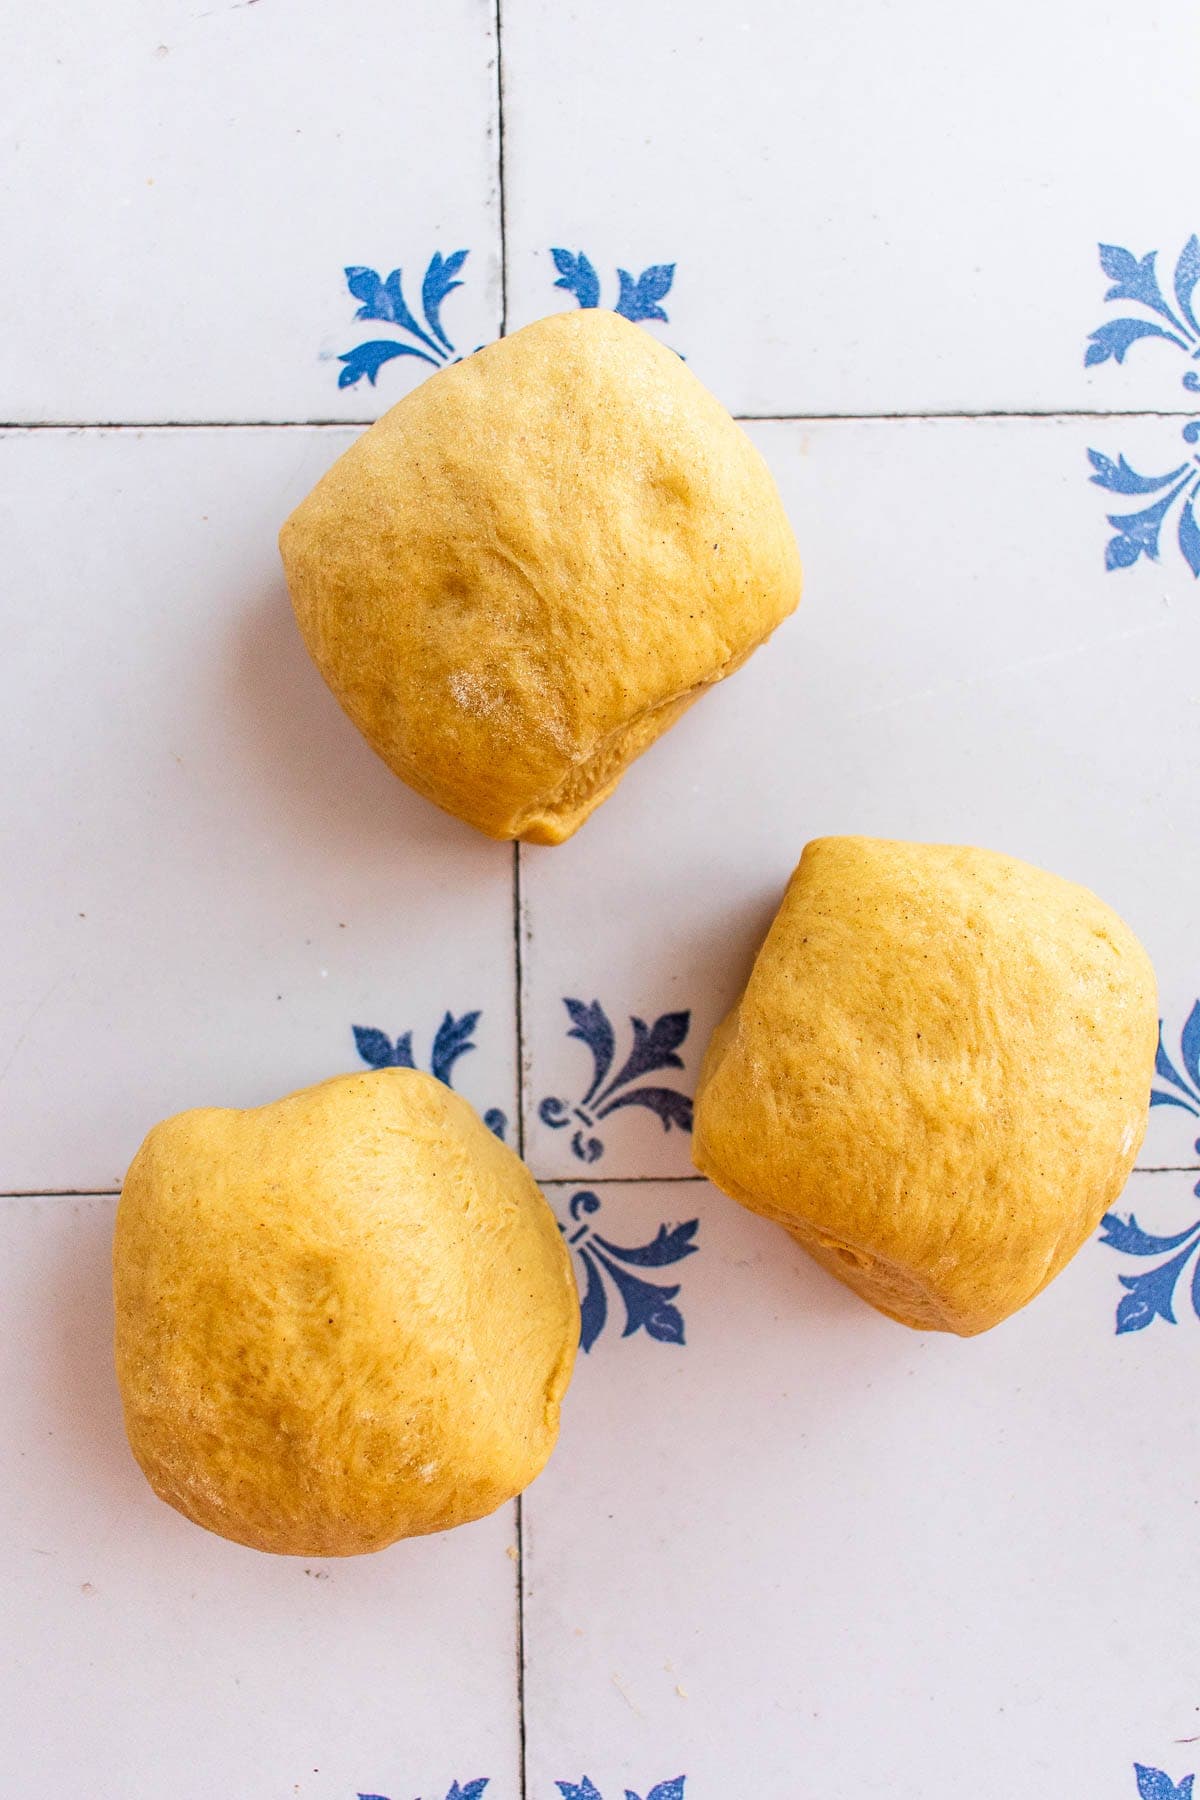
1. Divide the dough into 3 balls.
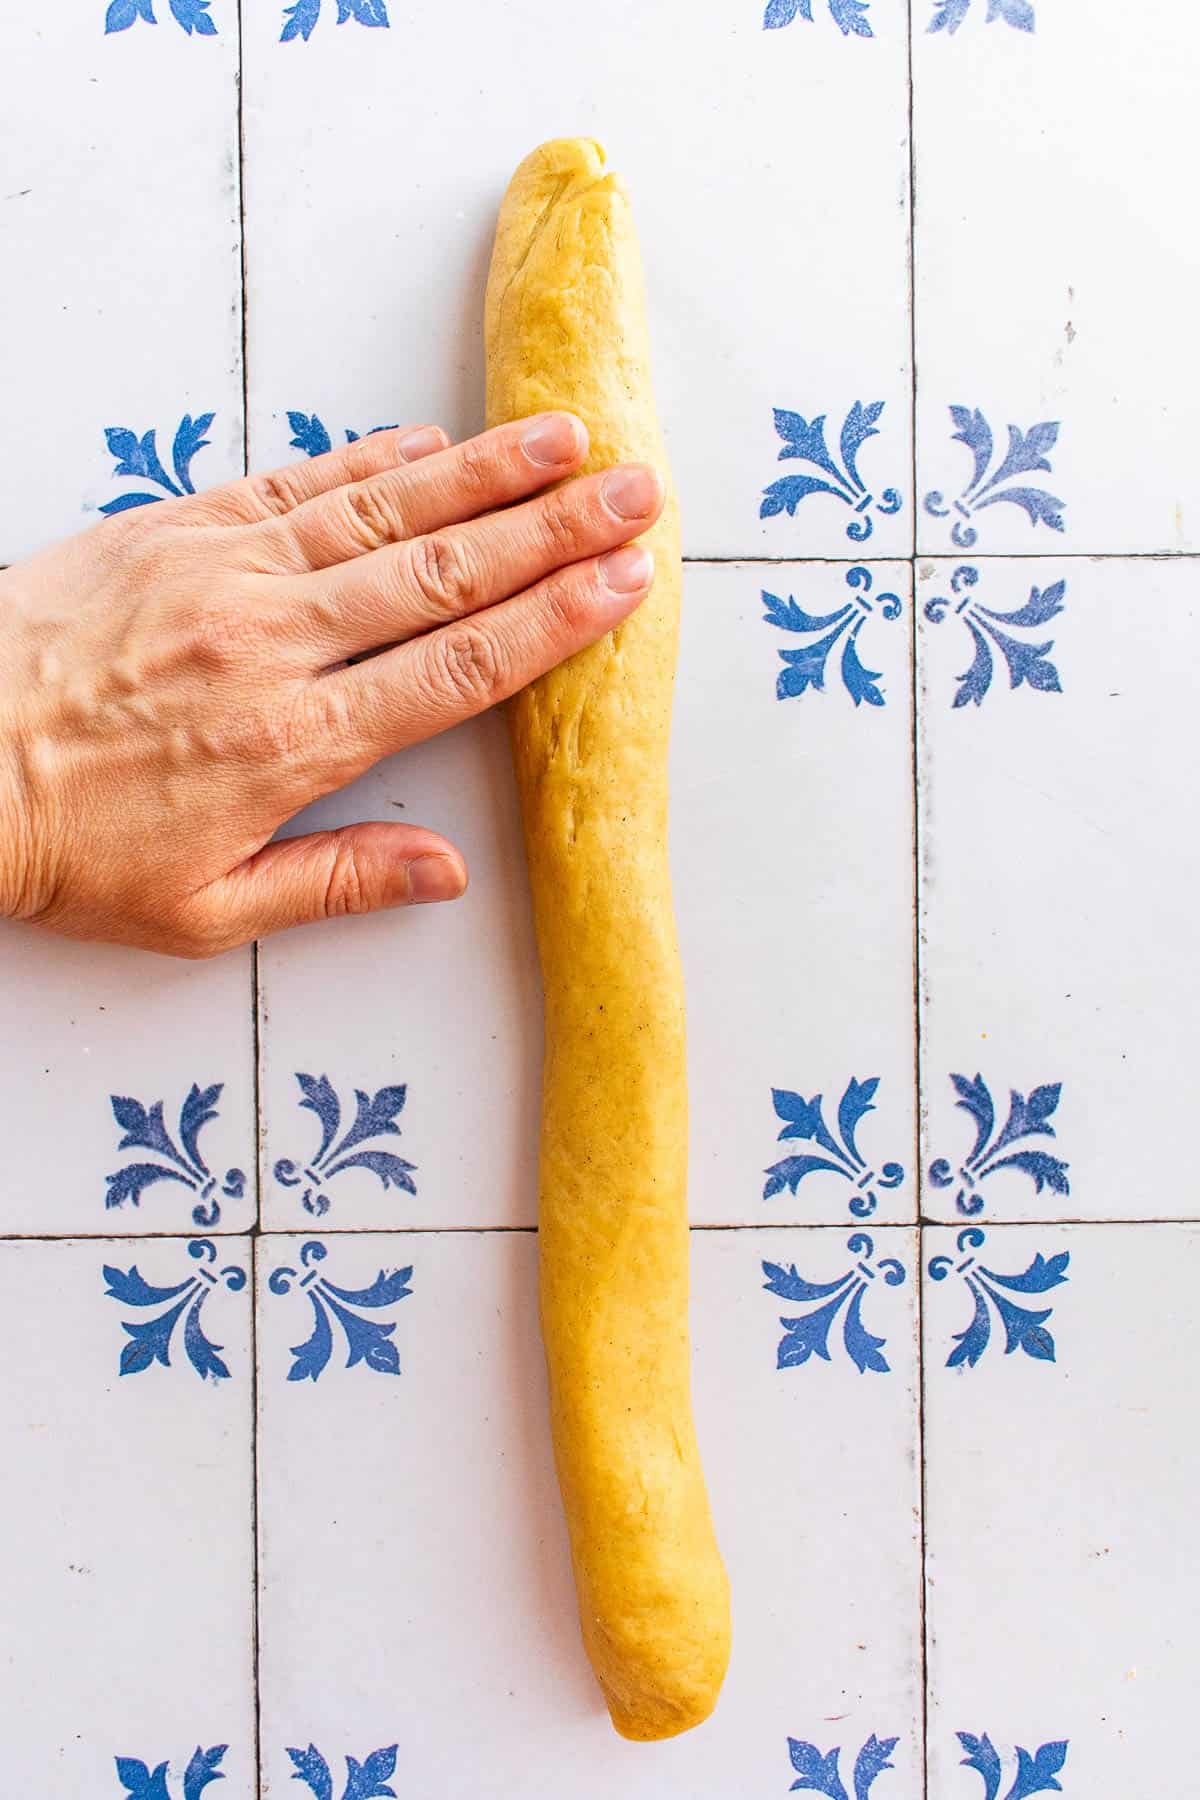
2. Roll each one into an even log.
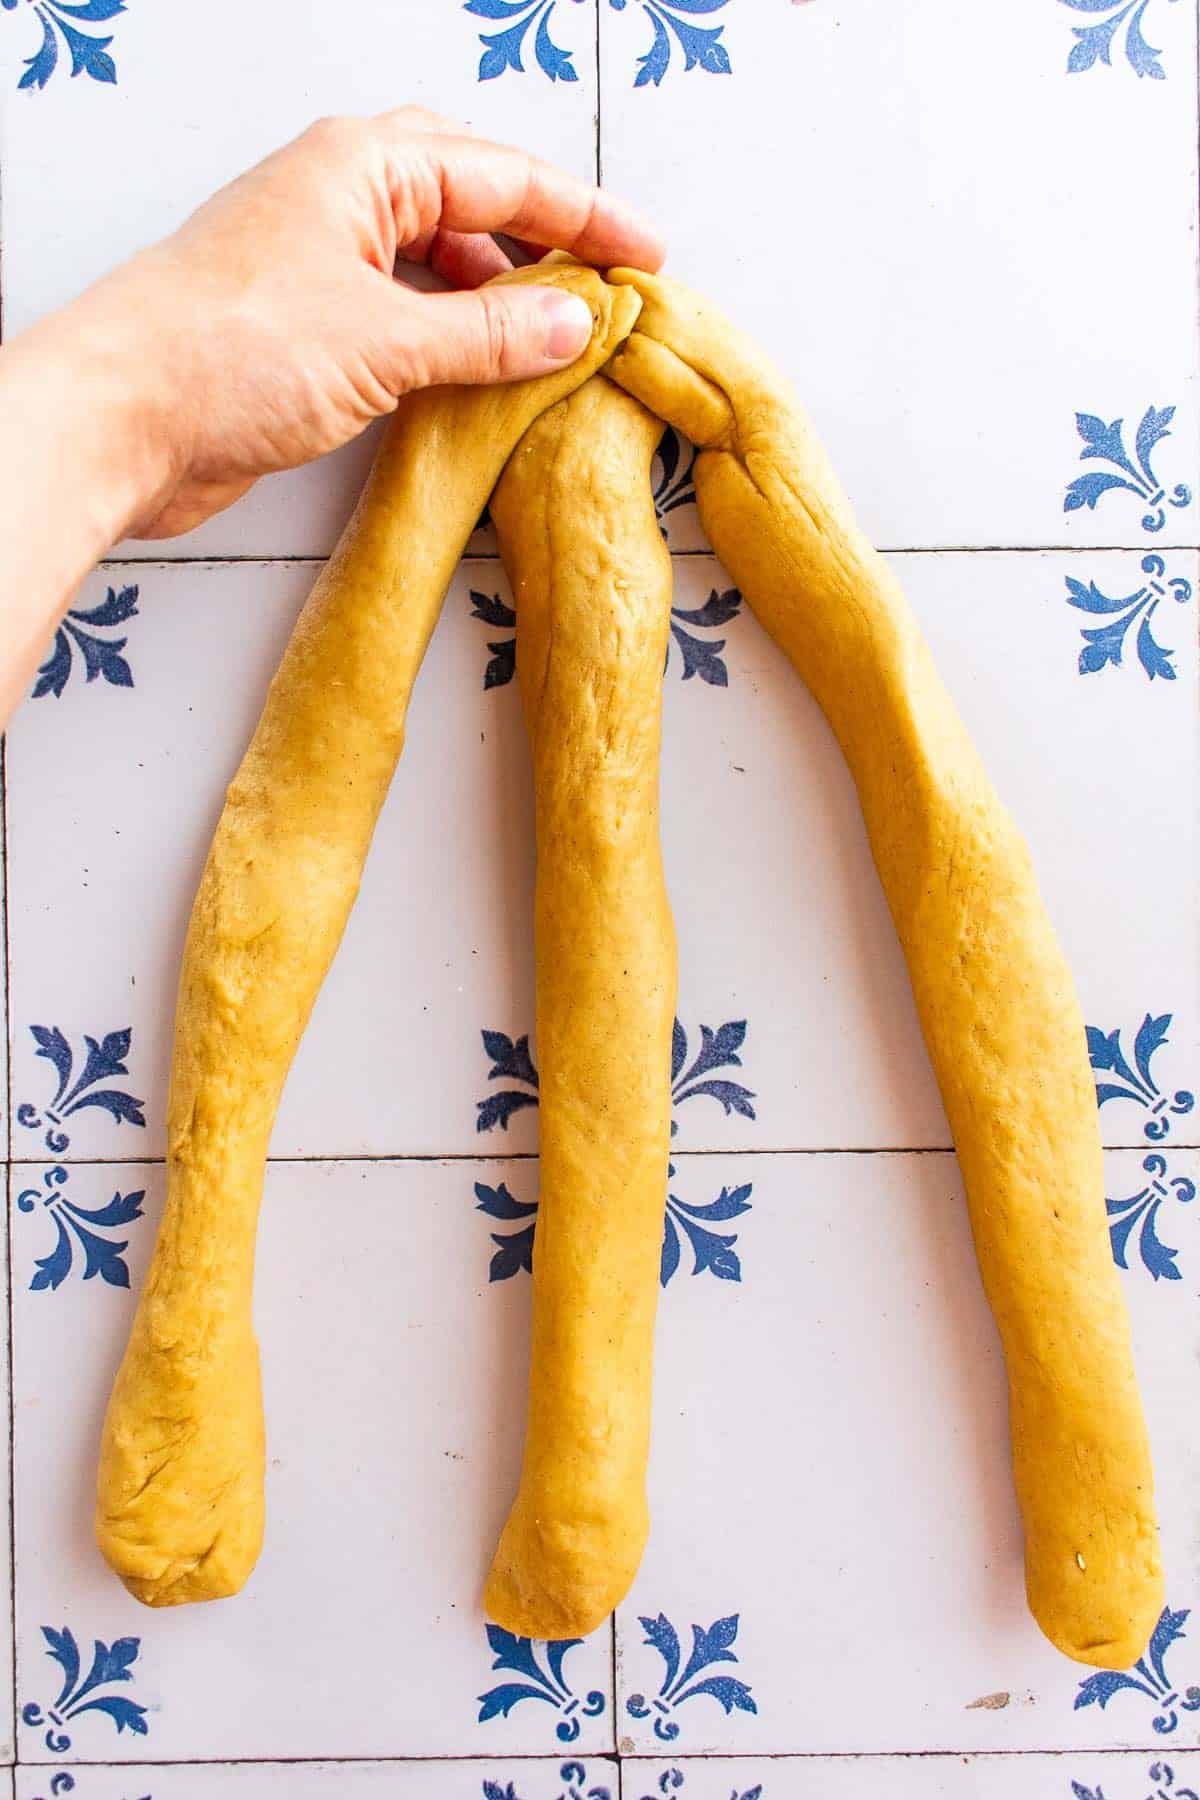
3. Pinch the top of 3 strands together.
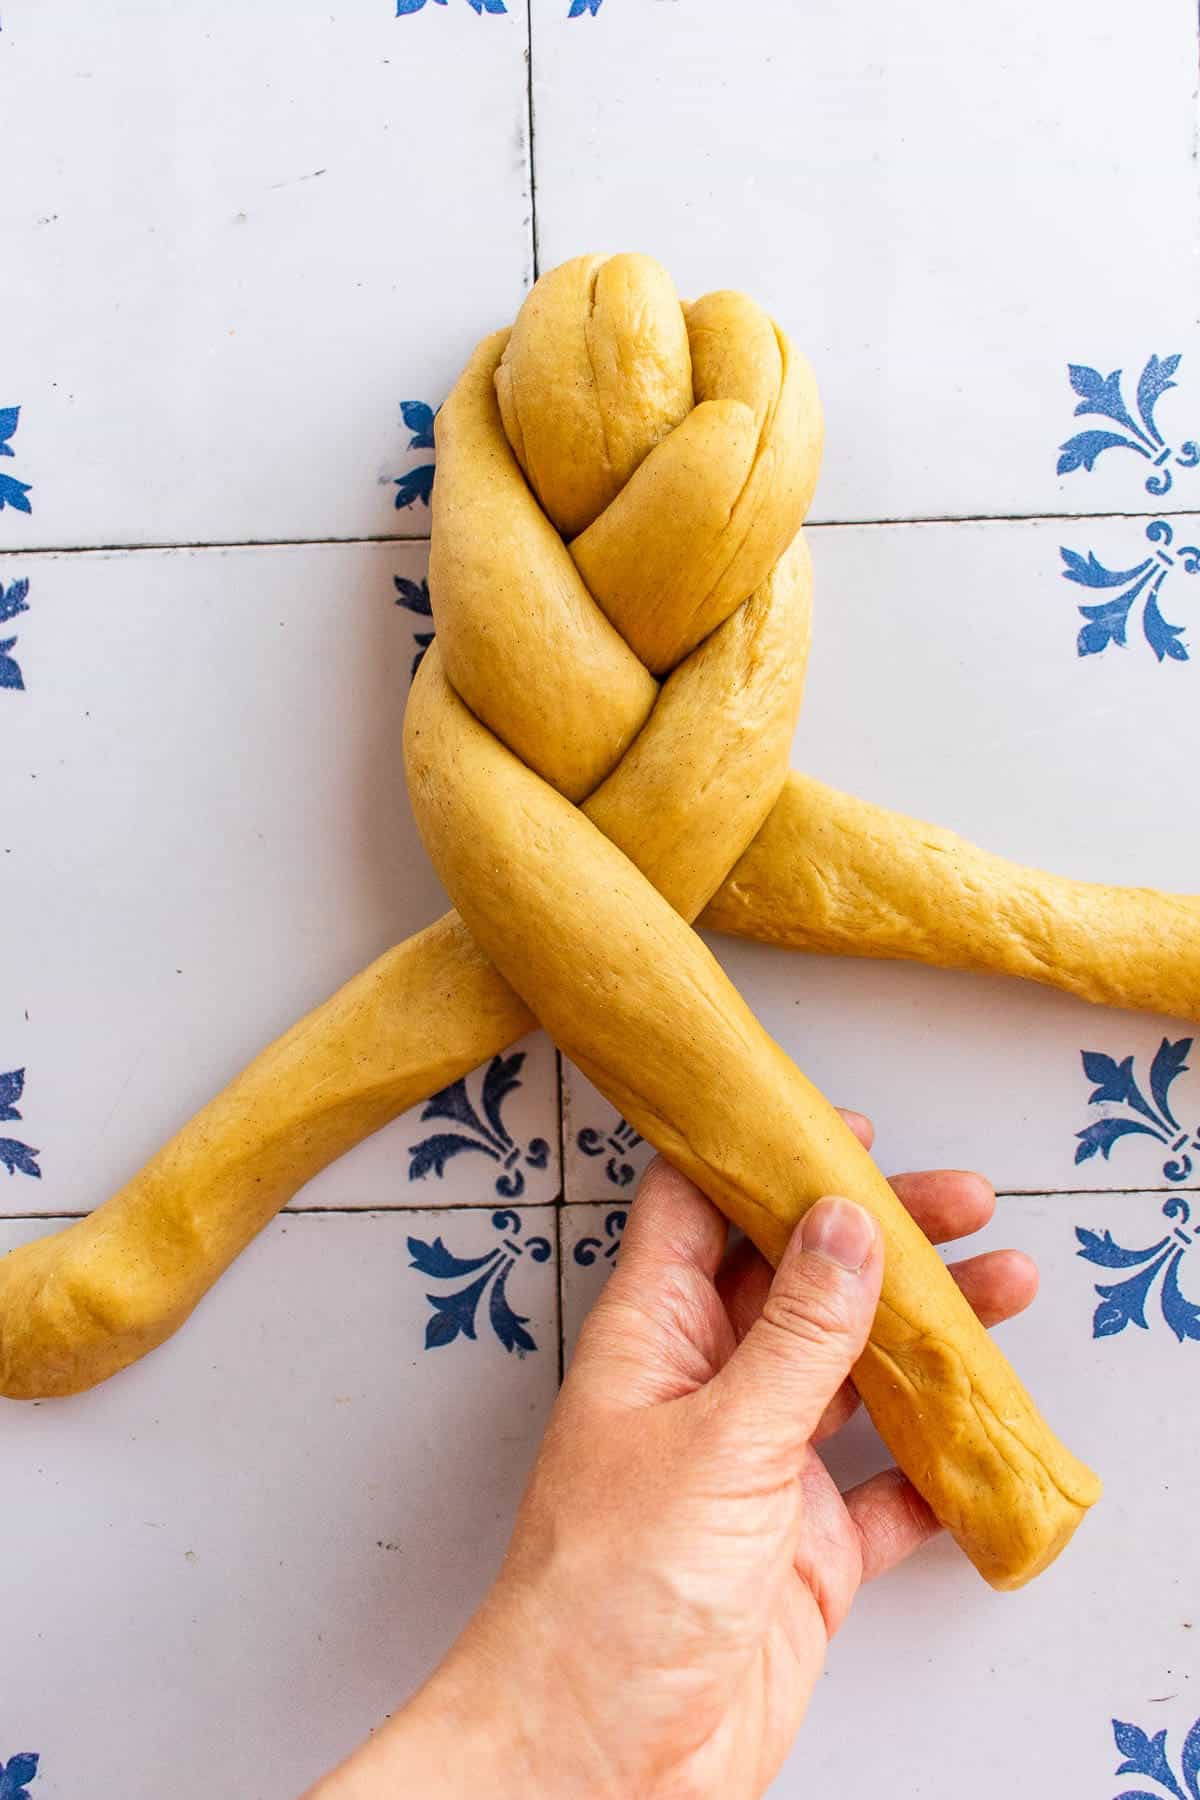
5. Cross over 1 strand & place it the middle.
7. Cross it over one strand to the middle.
4. Pick up the far left strand.
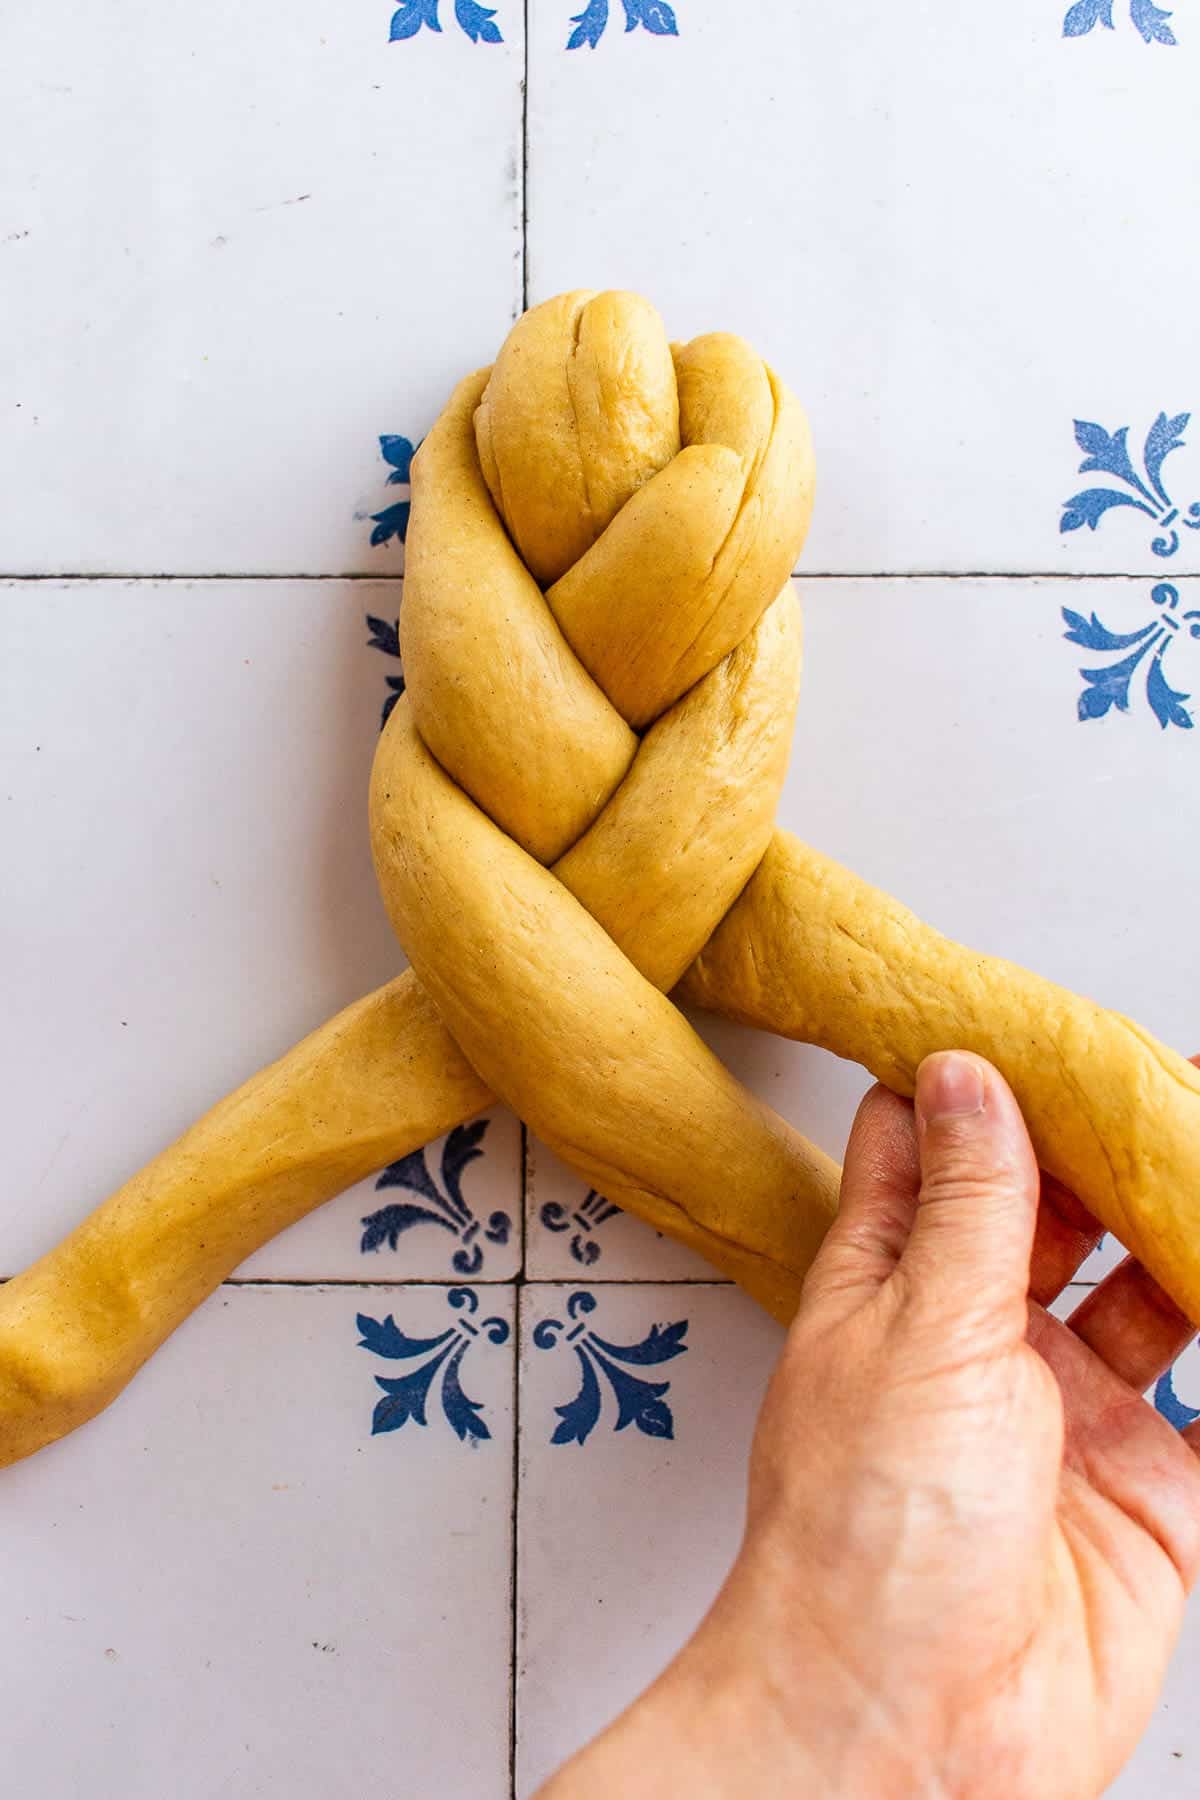
6. Then pick up the far left strand of dough.
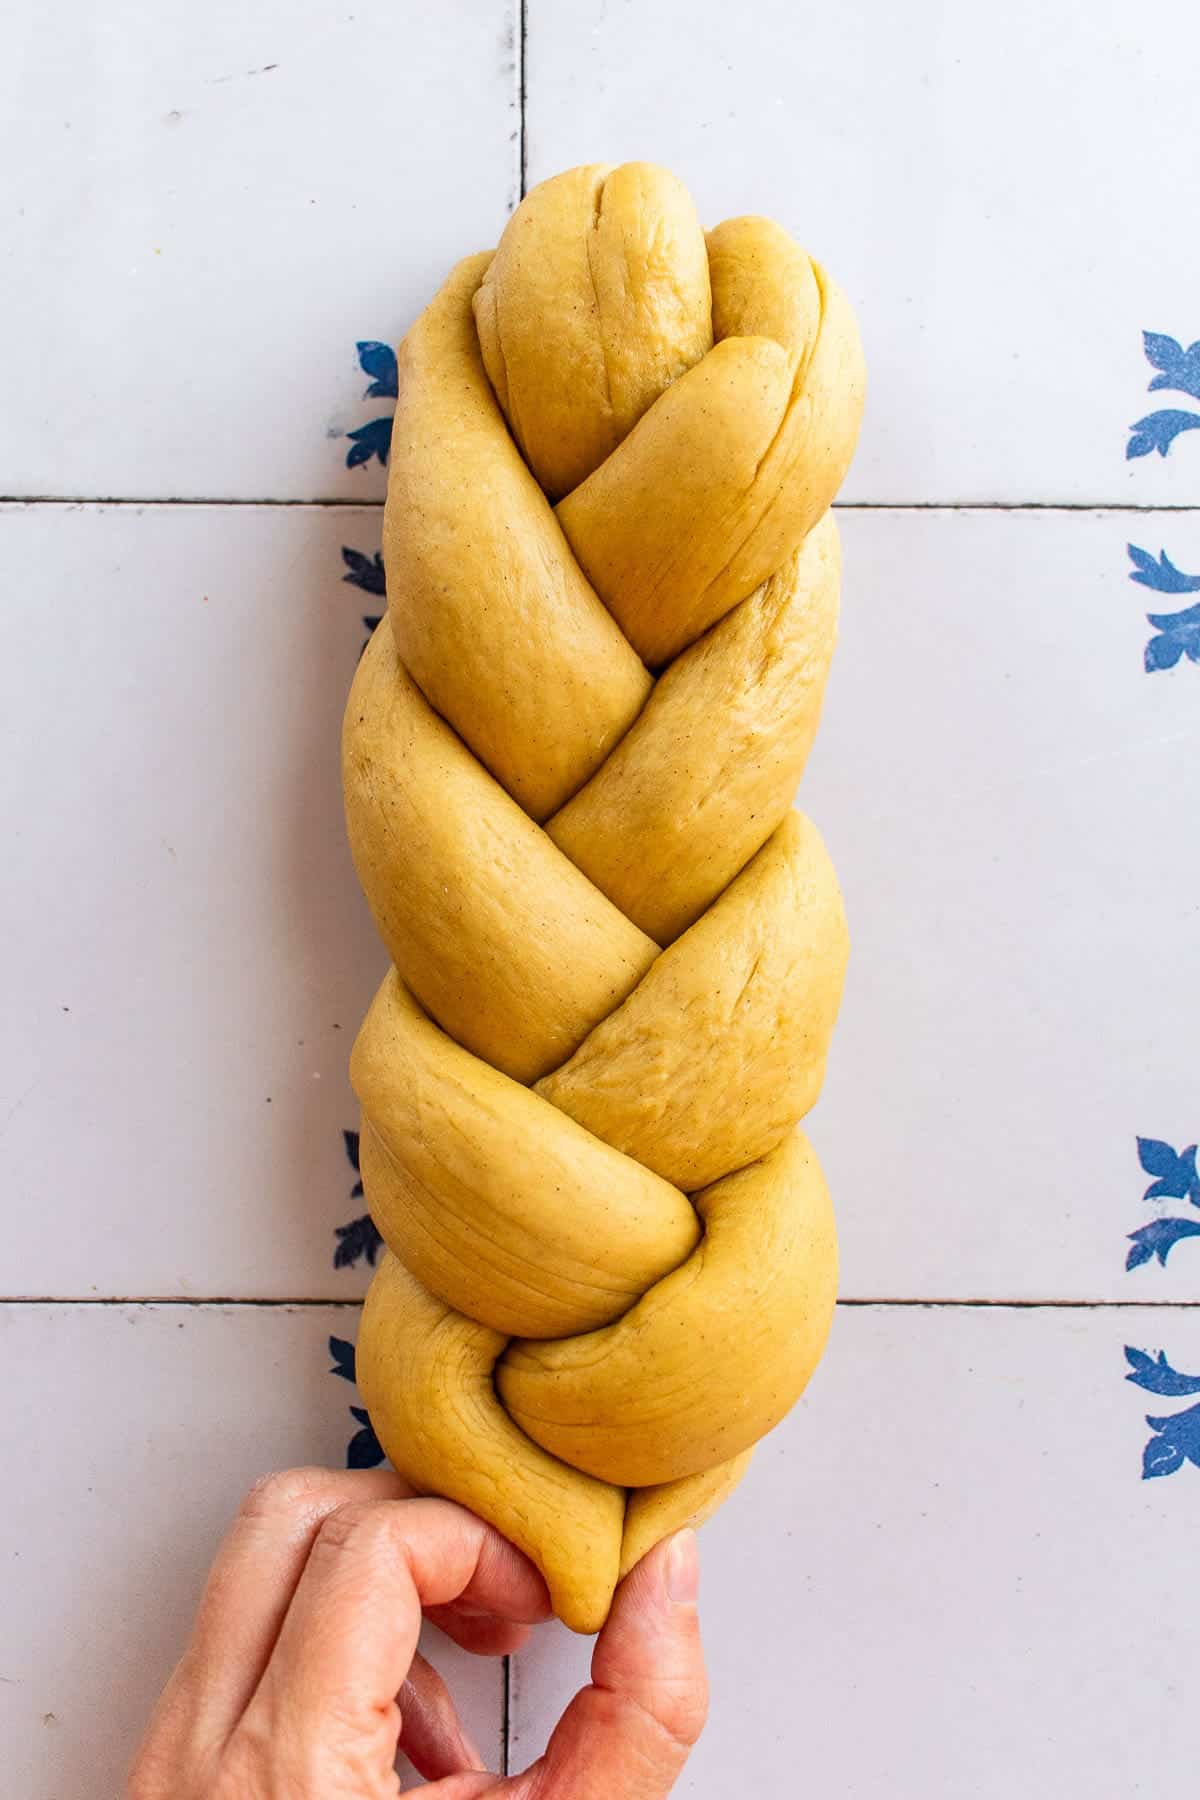
8. Repeat the pattern. Pinch & tuck the ends.
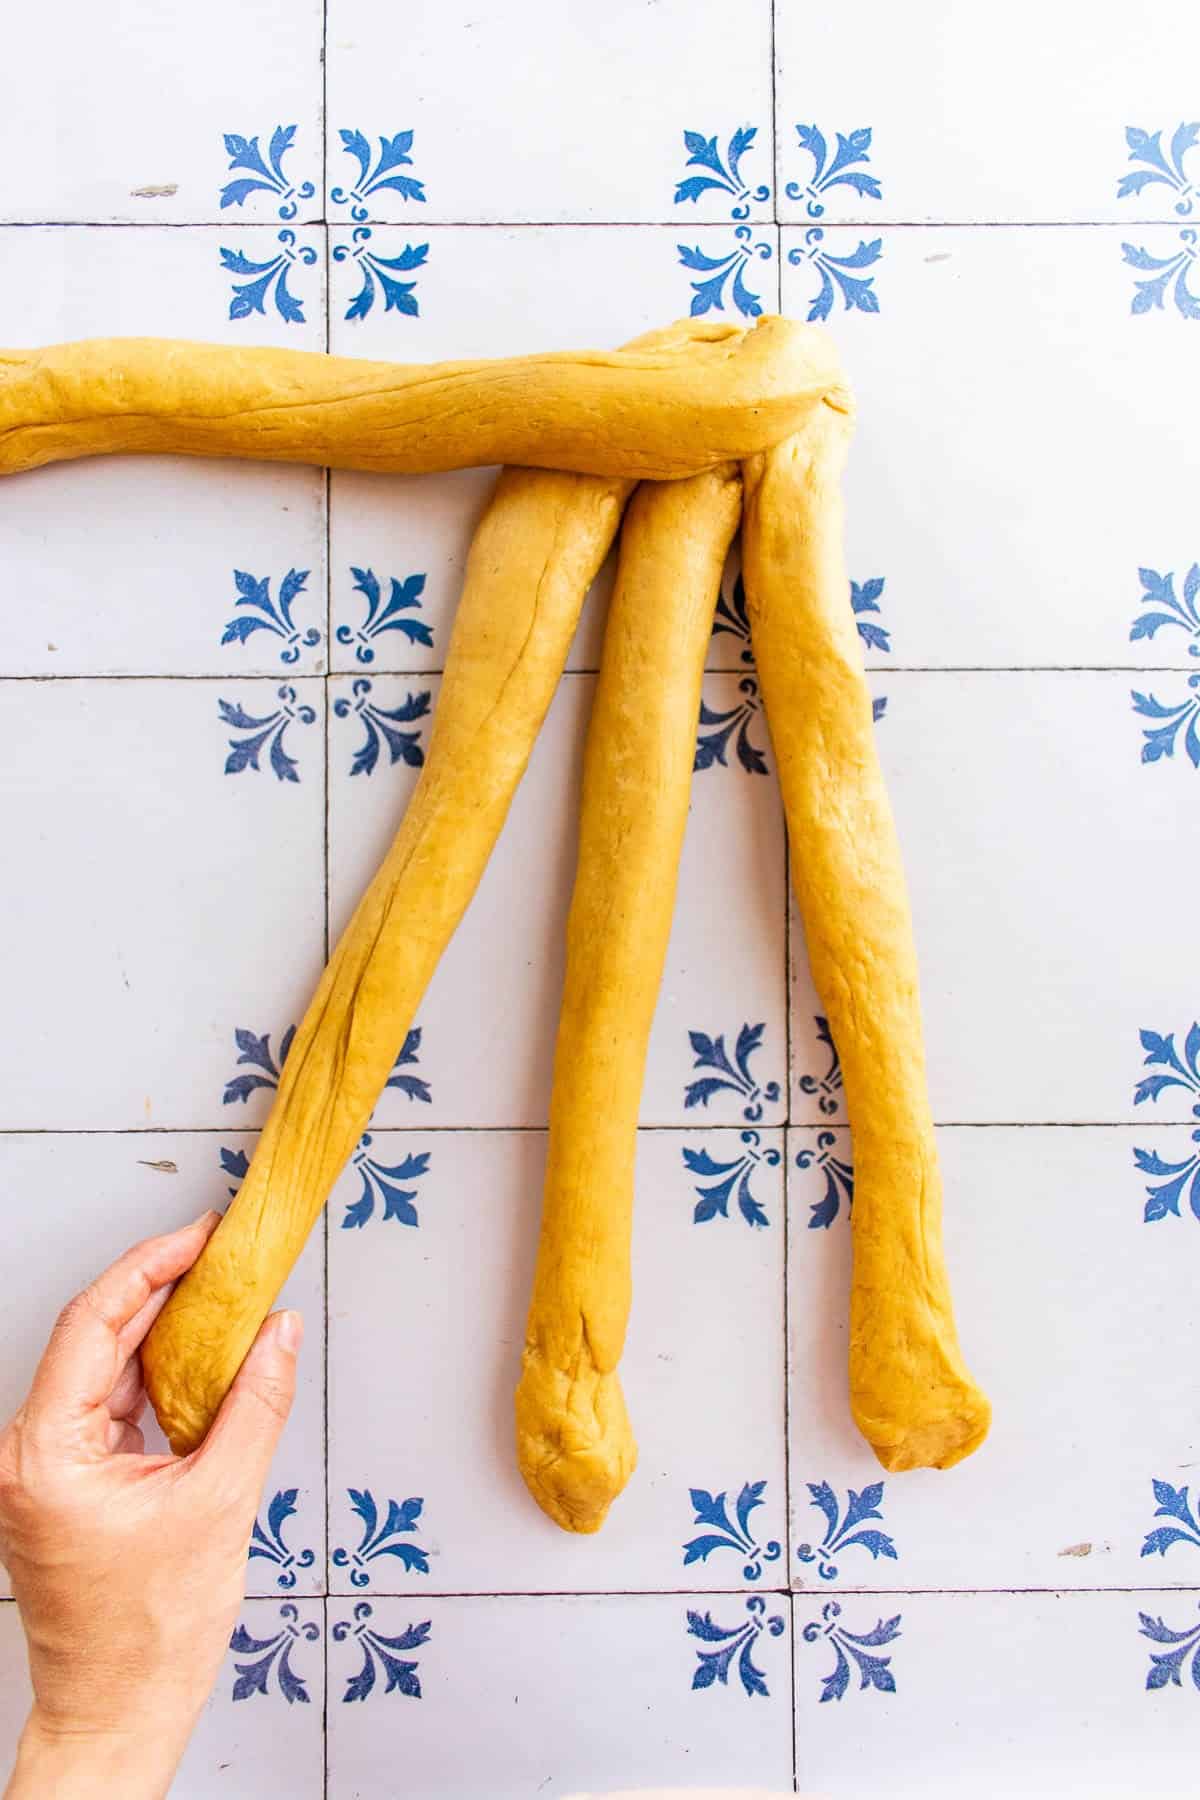
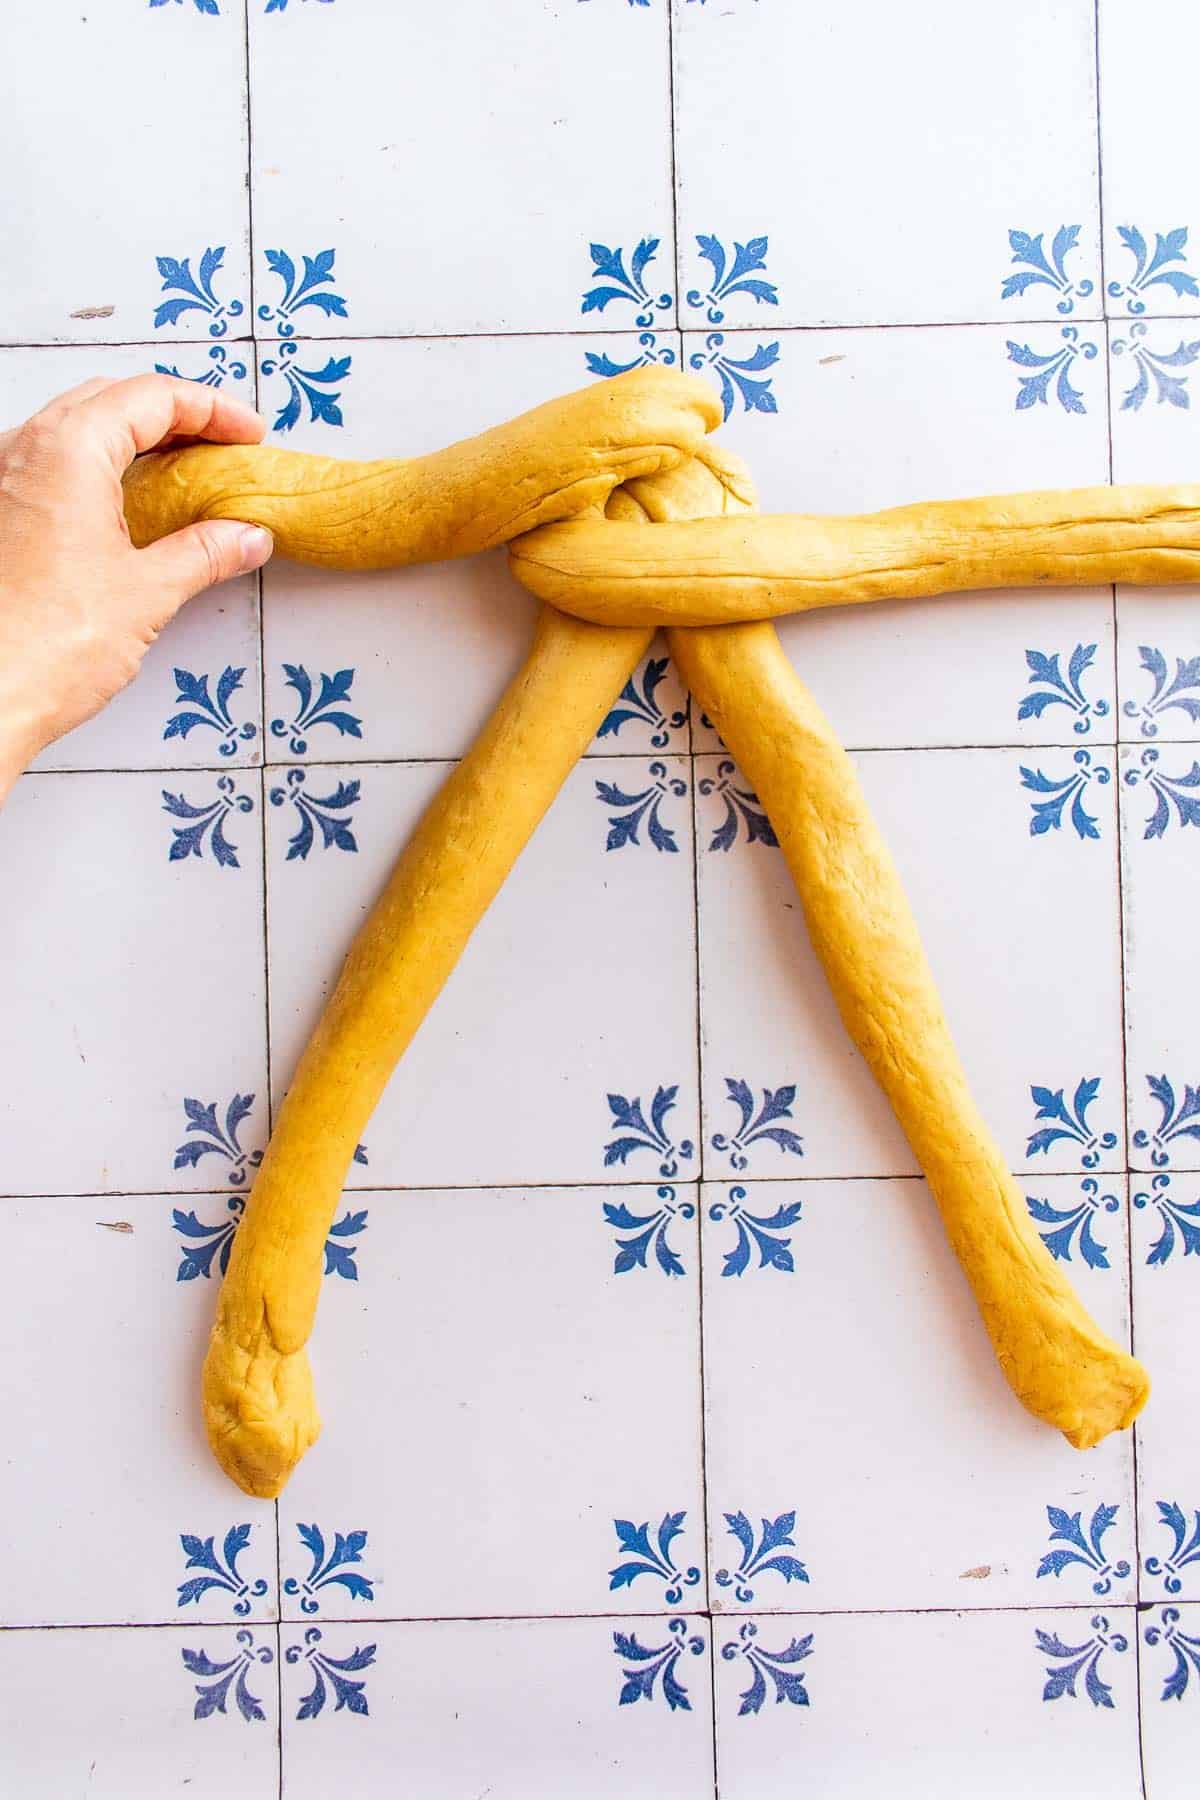
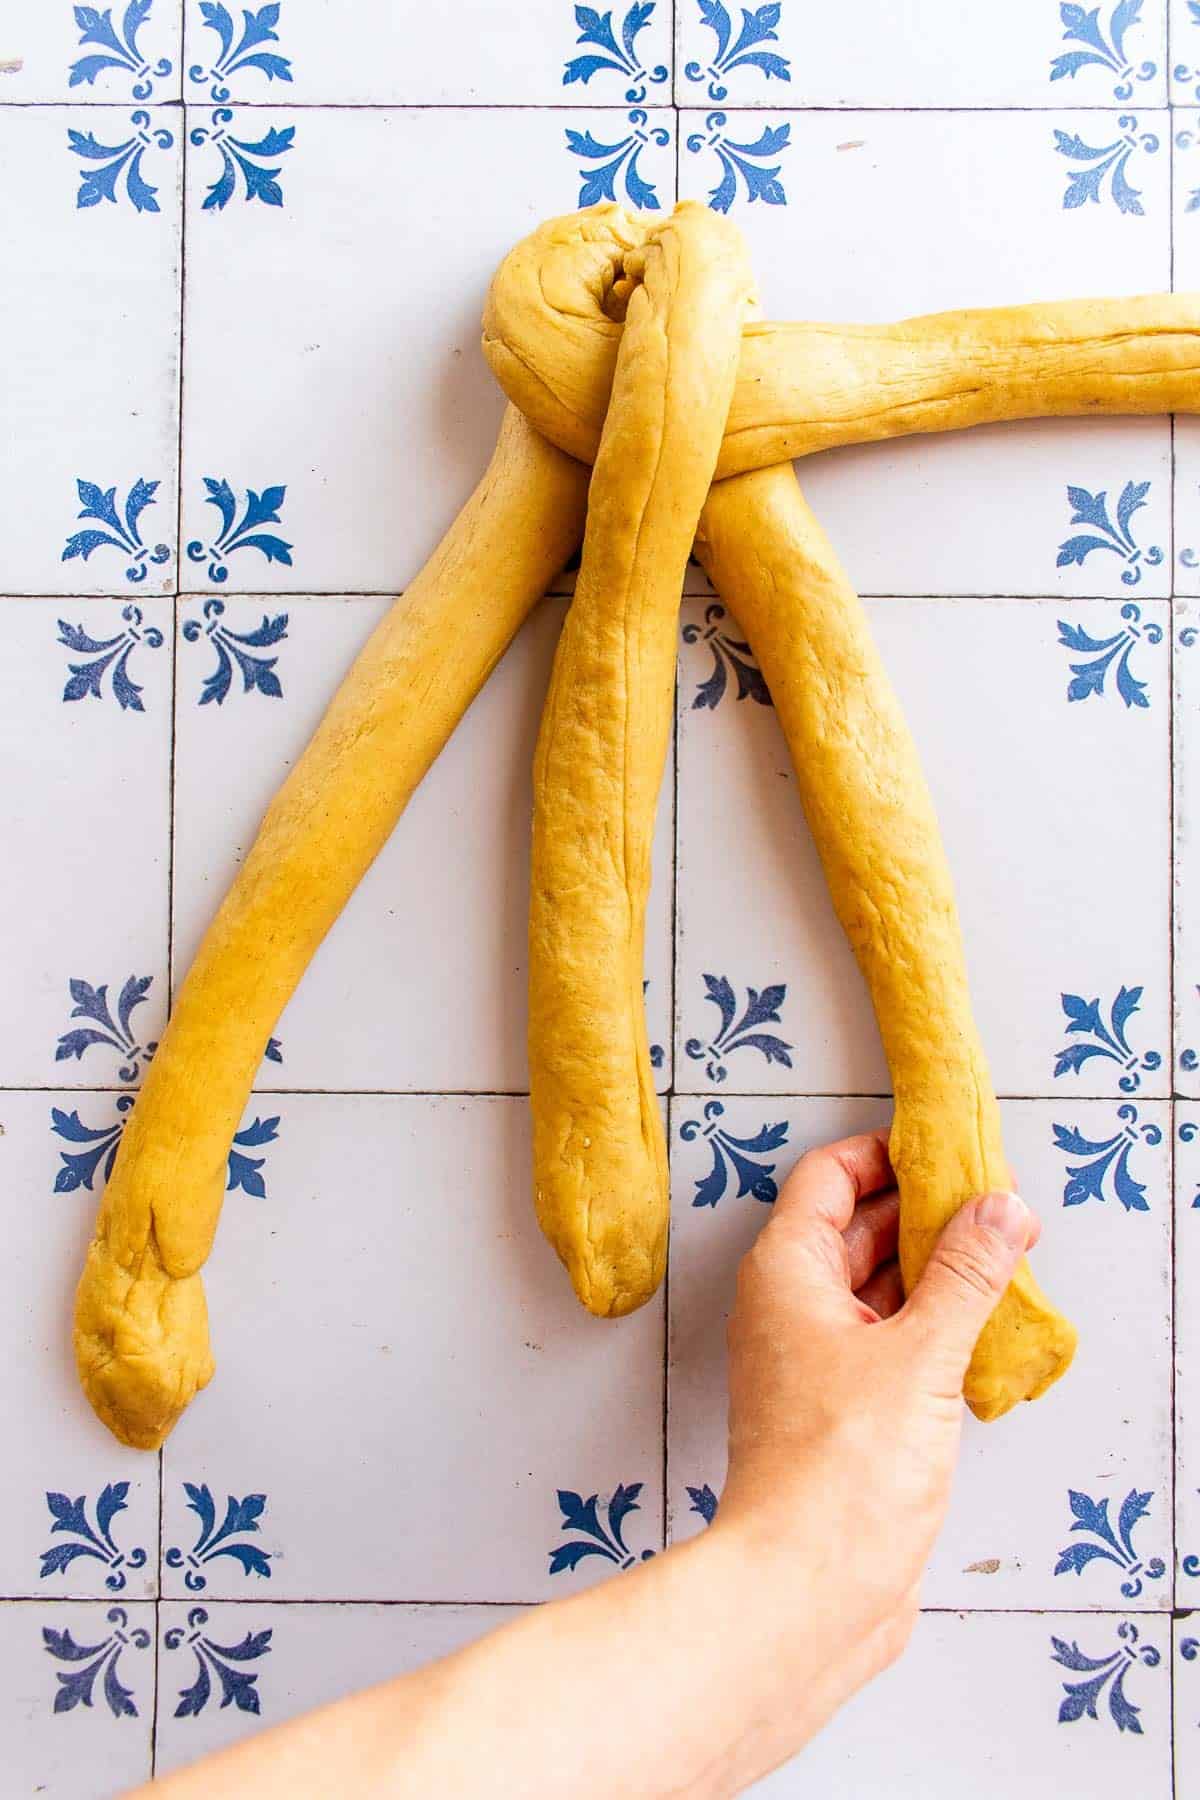
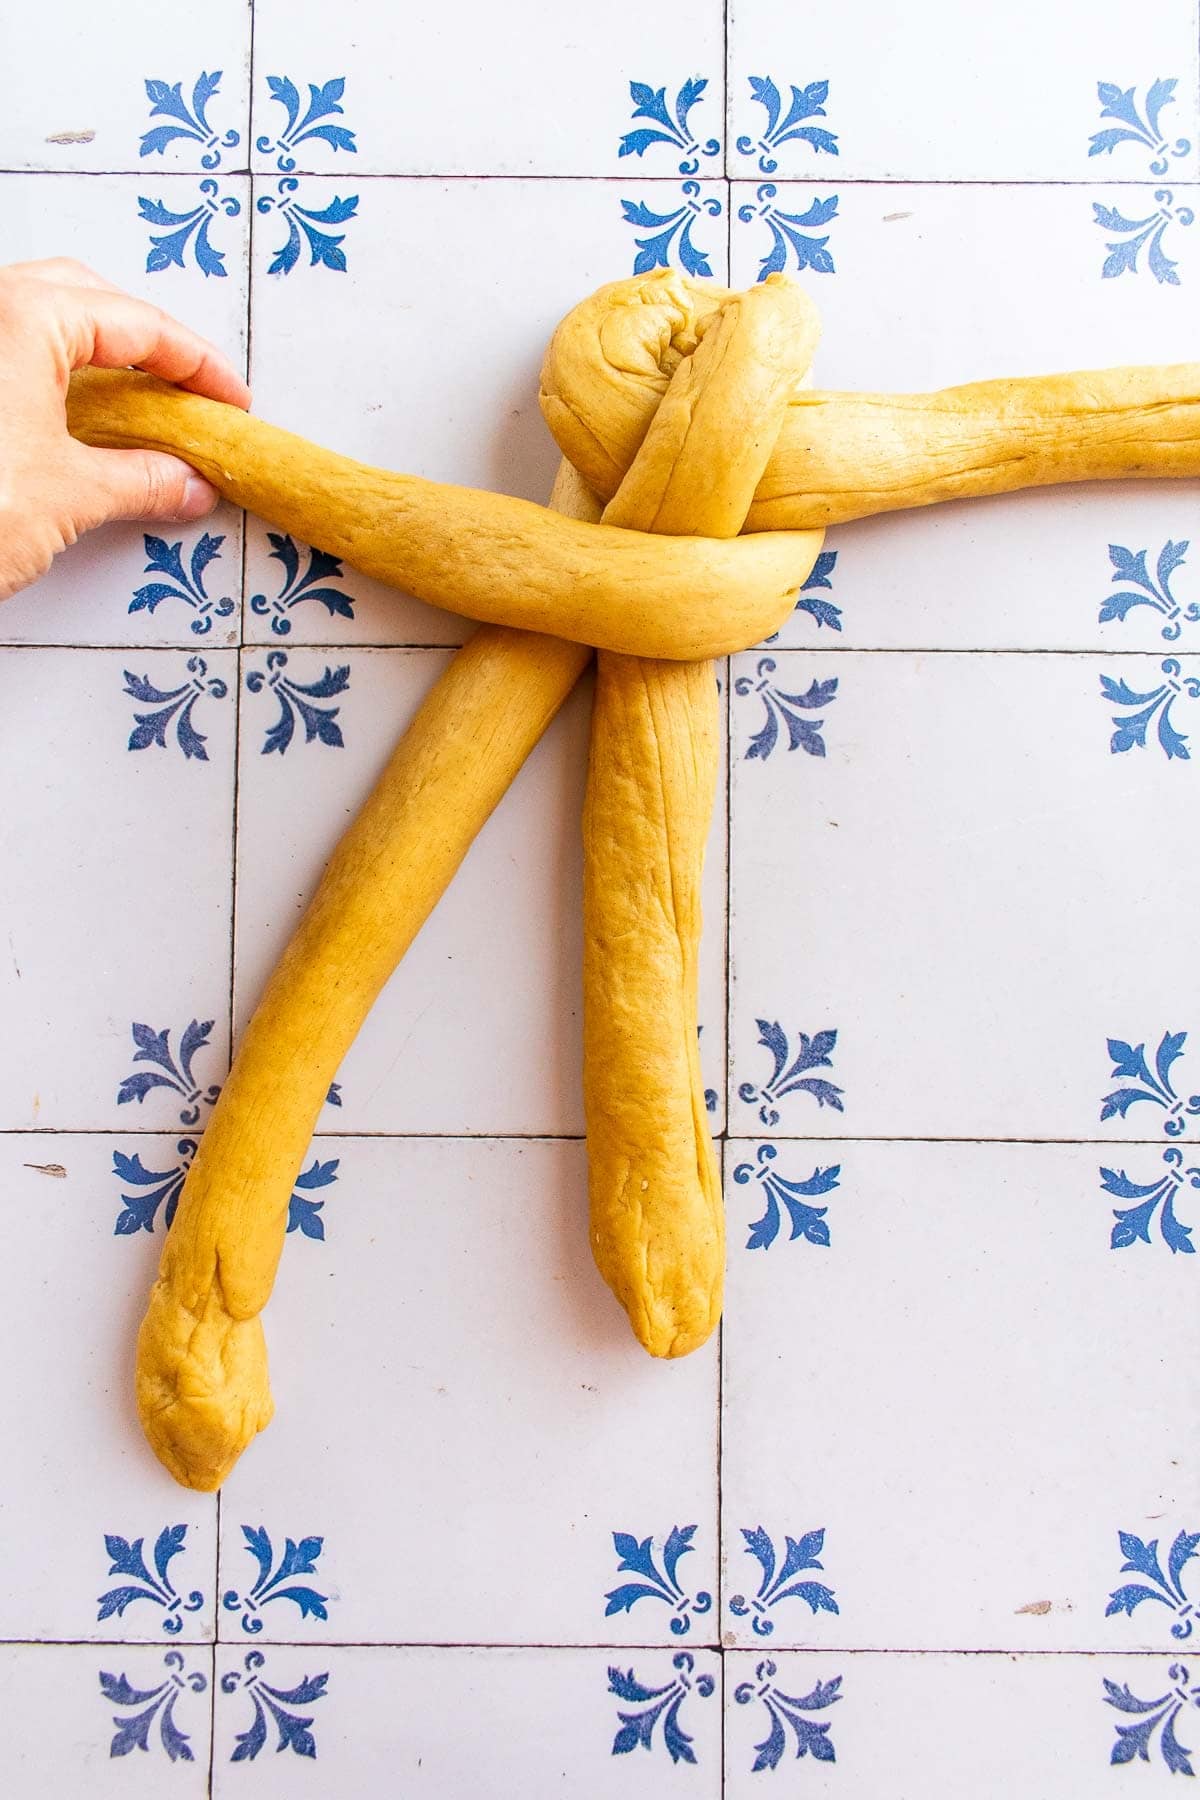
Four Stranded Braid
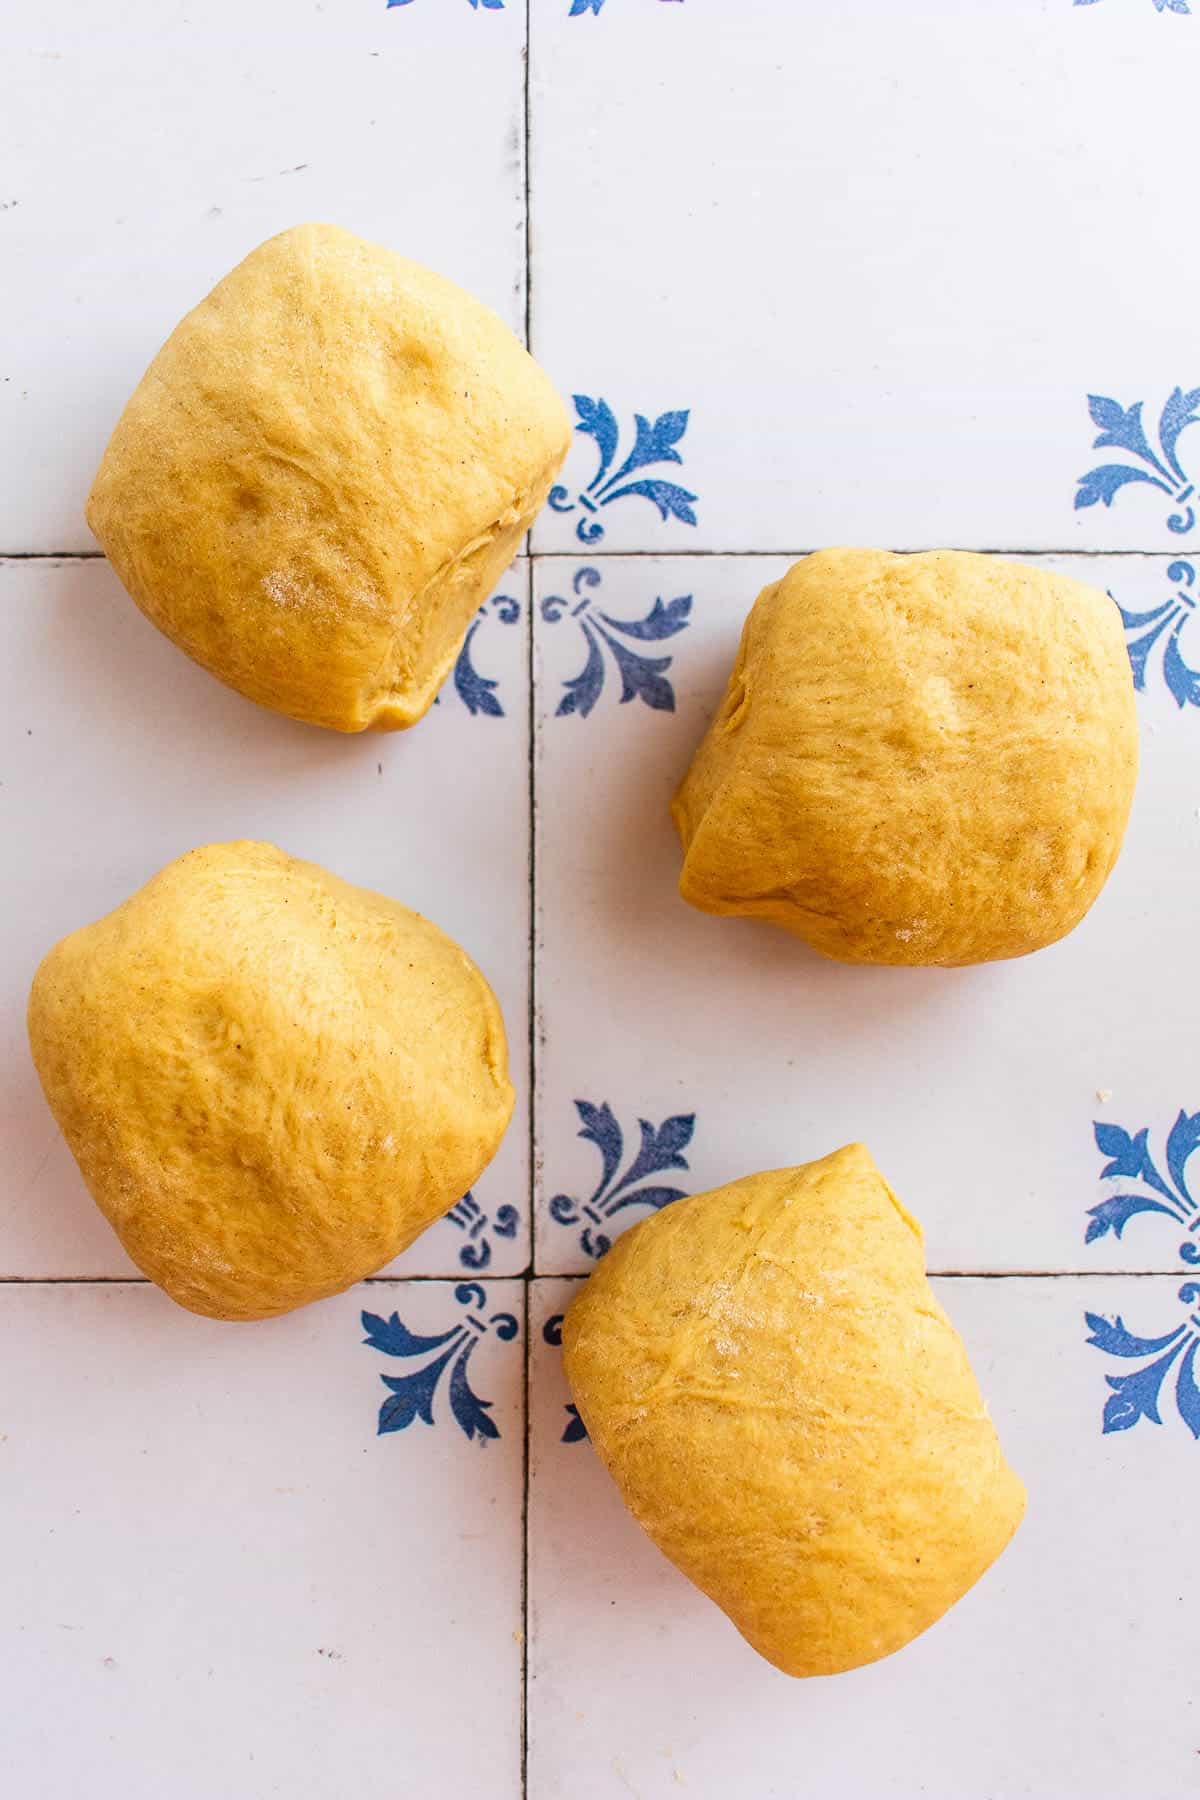
1. Divide the dough into 4 balls.
3. Pick up the far right strand of dough.
5. Pick up the strand to its immediate right.
7. Pick up the far left strand of dough.
9. Pick up the strand to its immediate right.
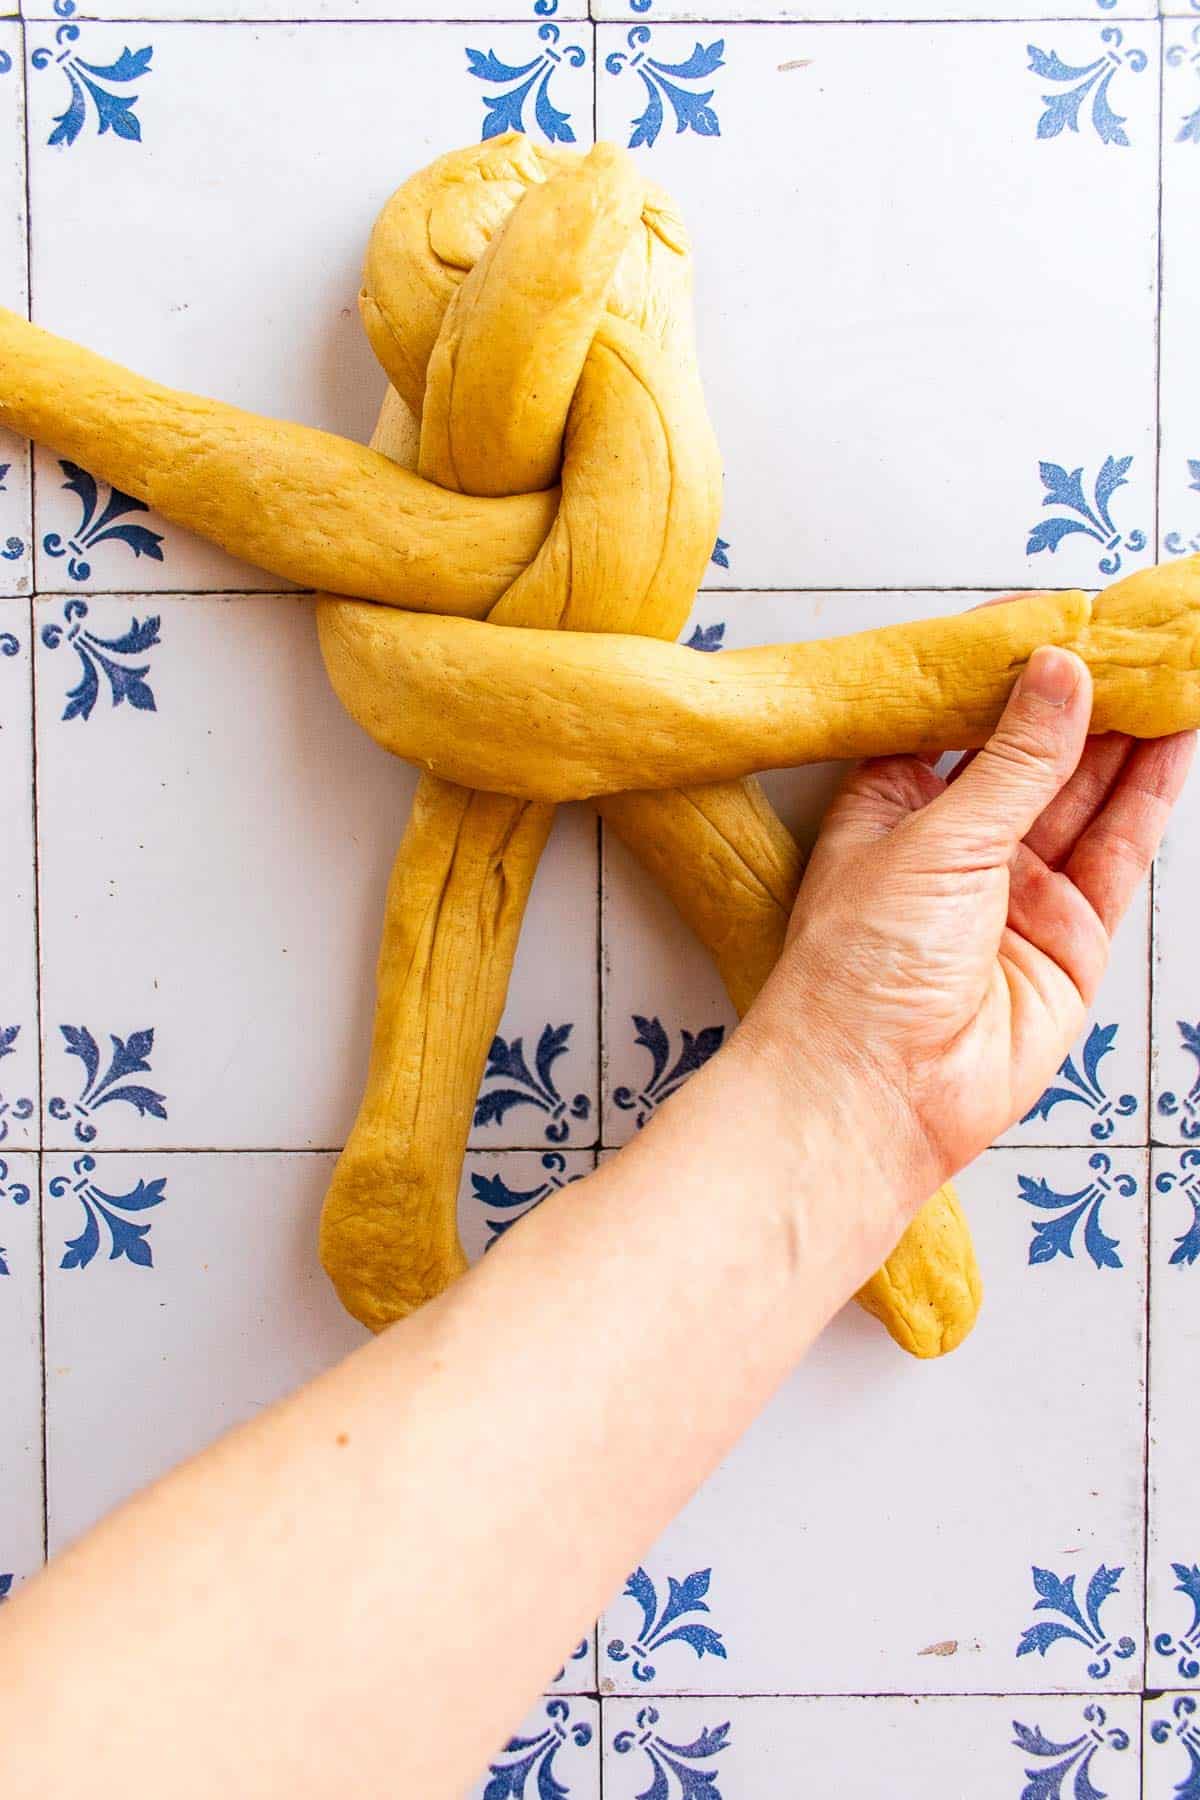
11. Continue repeating this pattern.
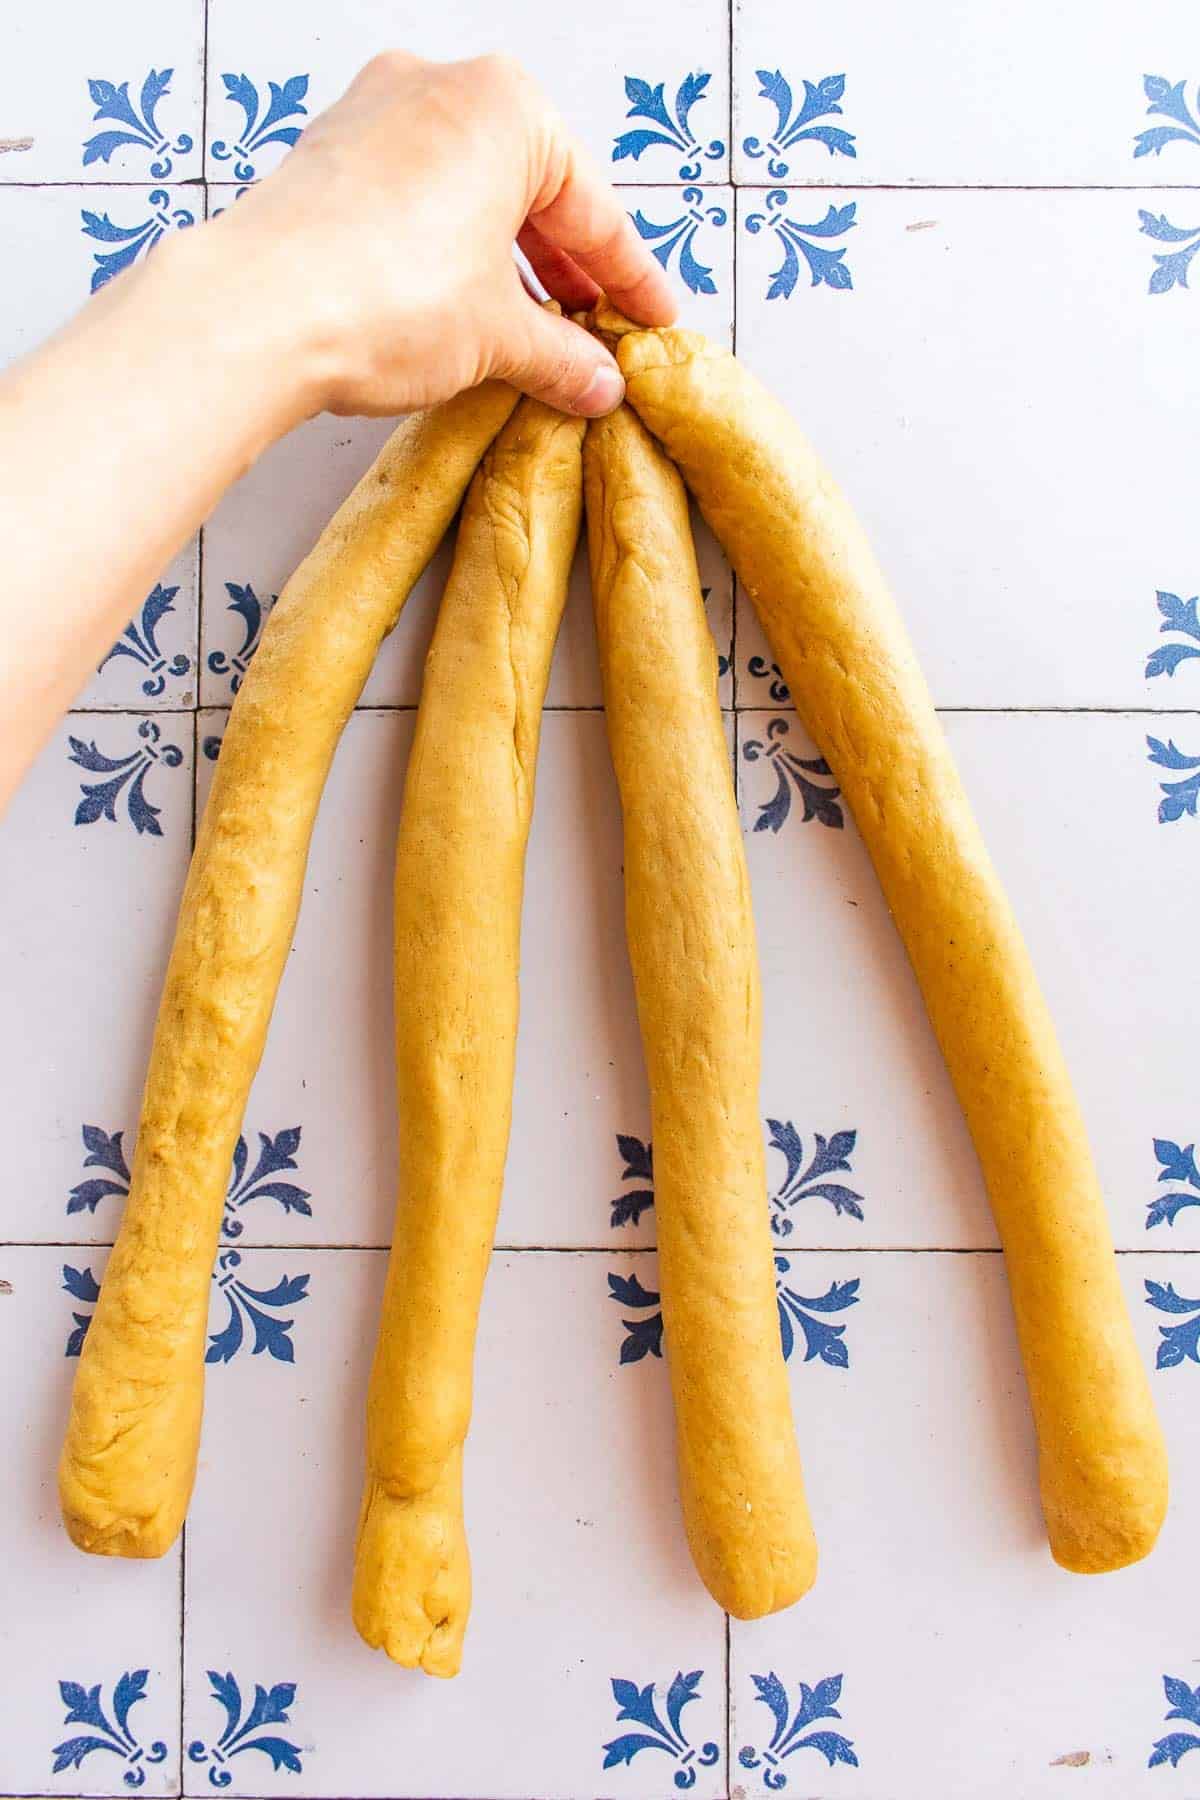
2. Roll into logs & pinch together.
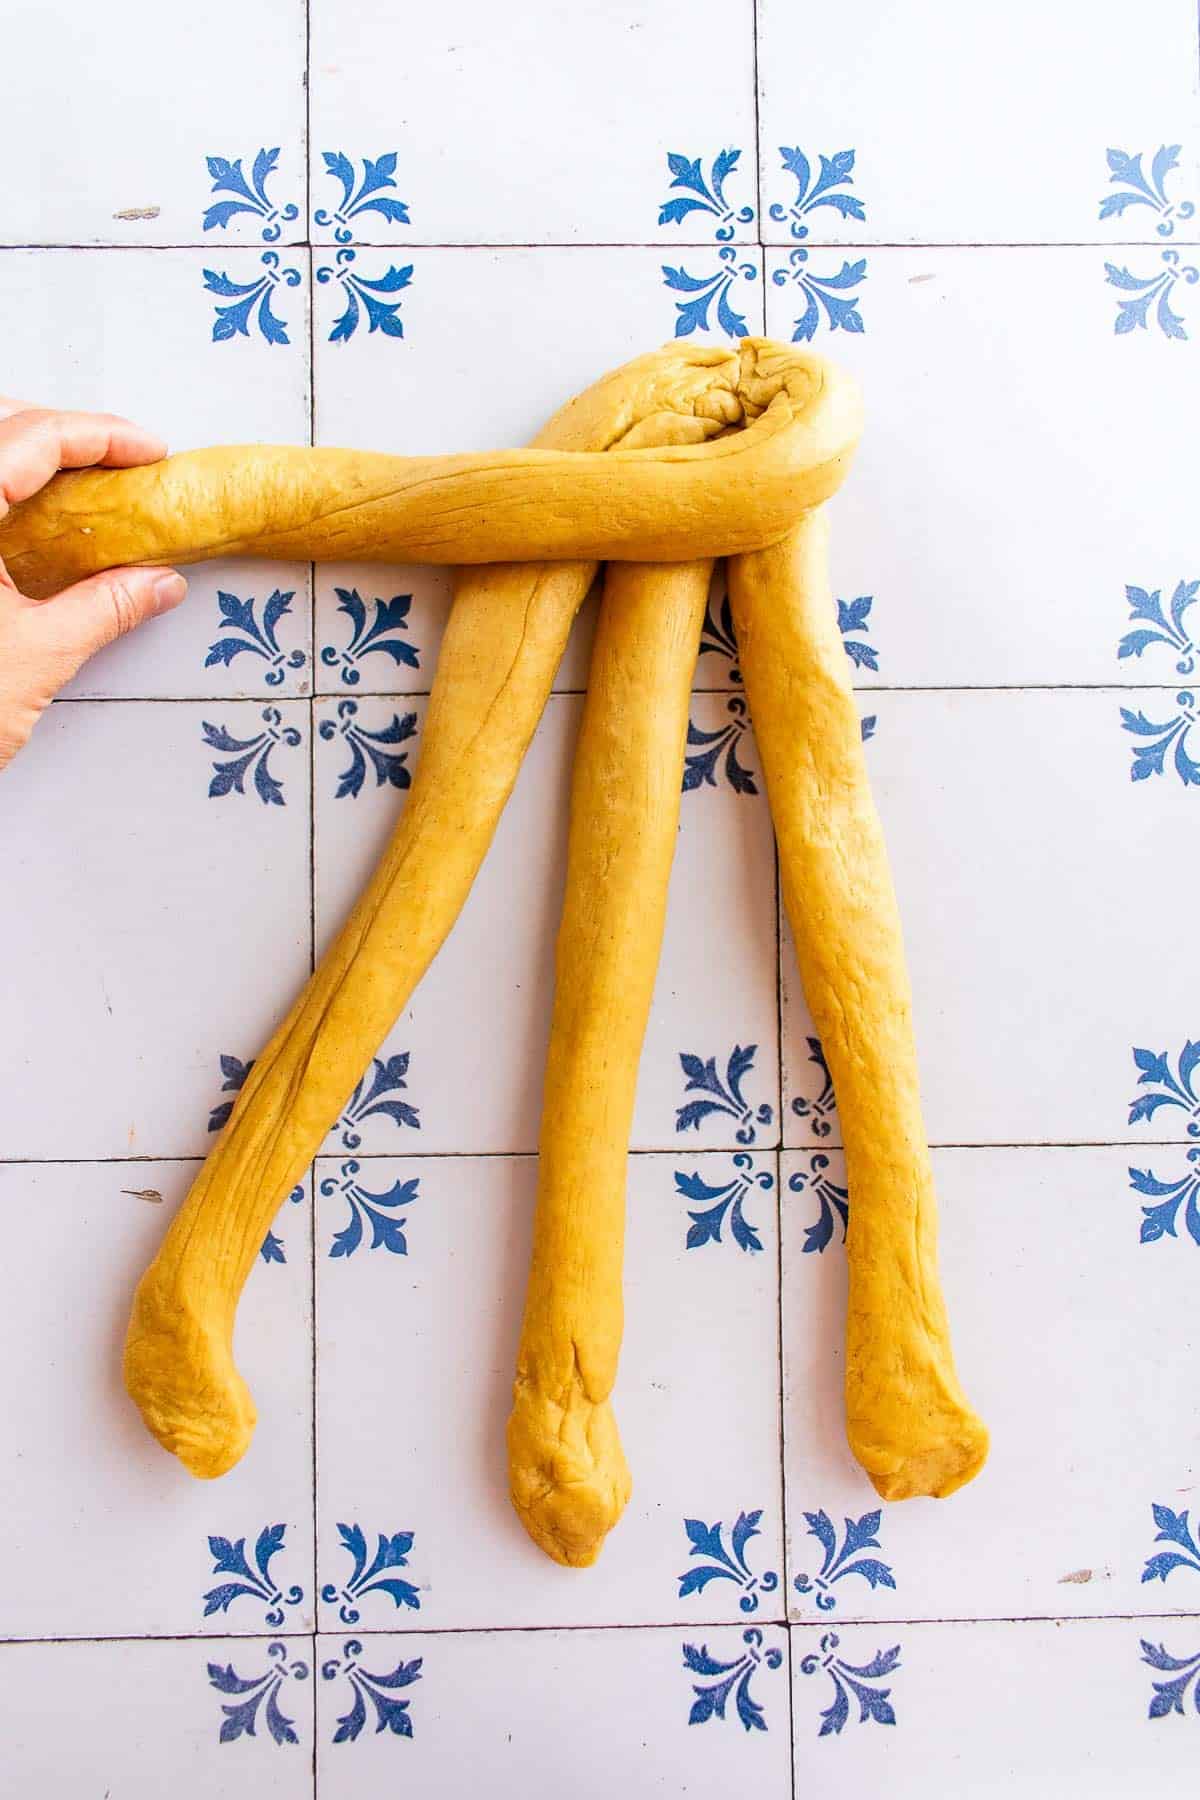
4. Cross it all the way over to the far left.
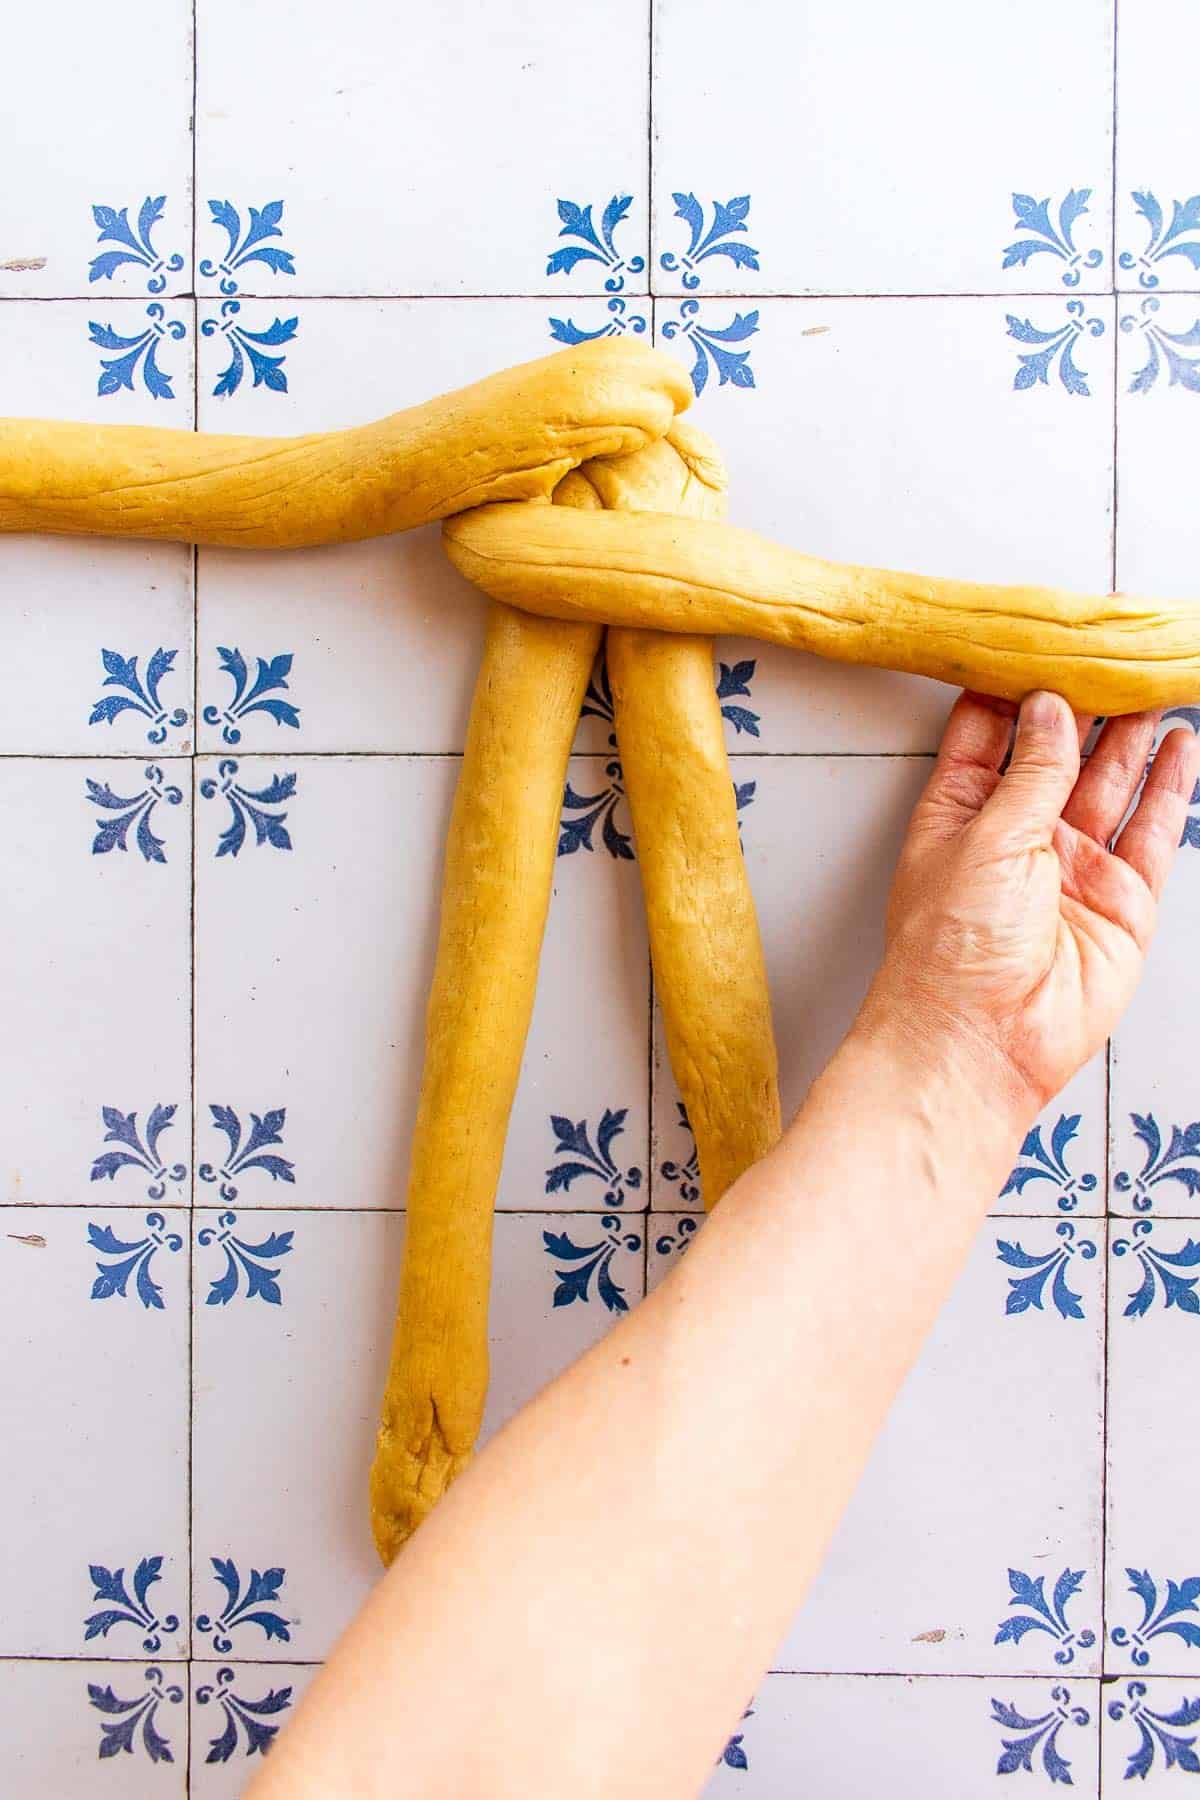
6. Cross it all the way over to the far right.
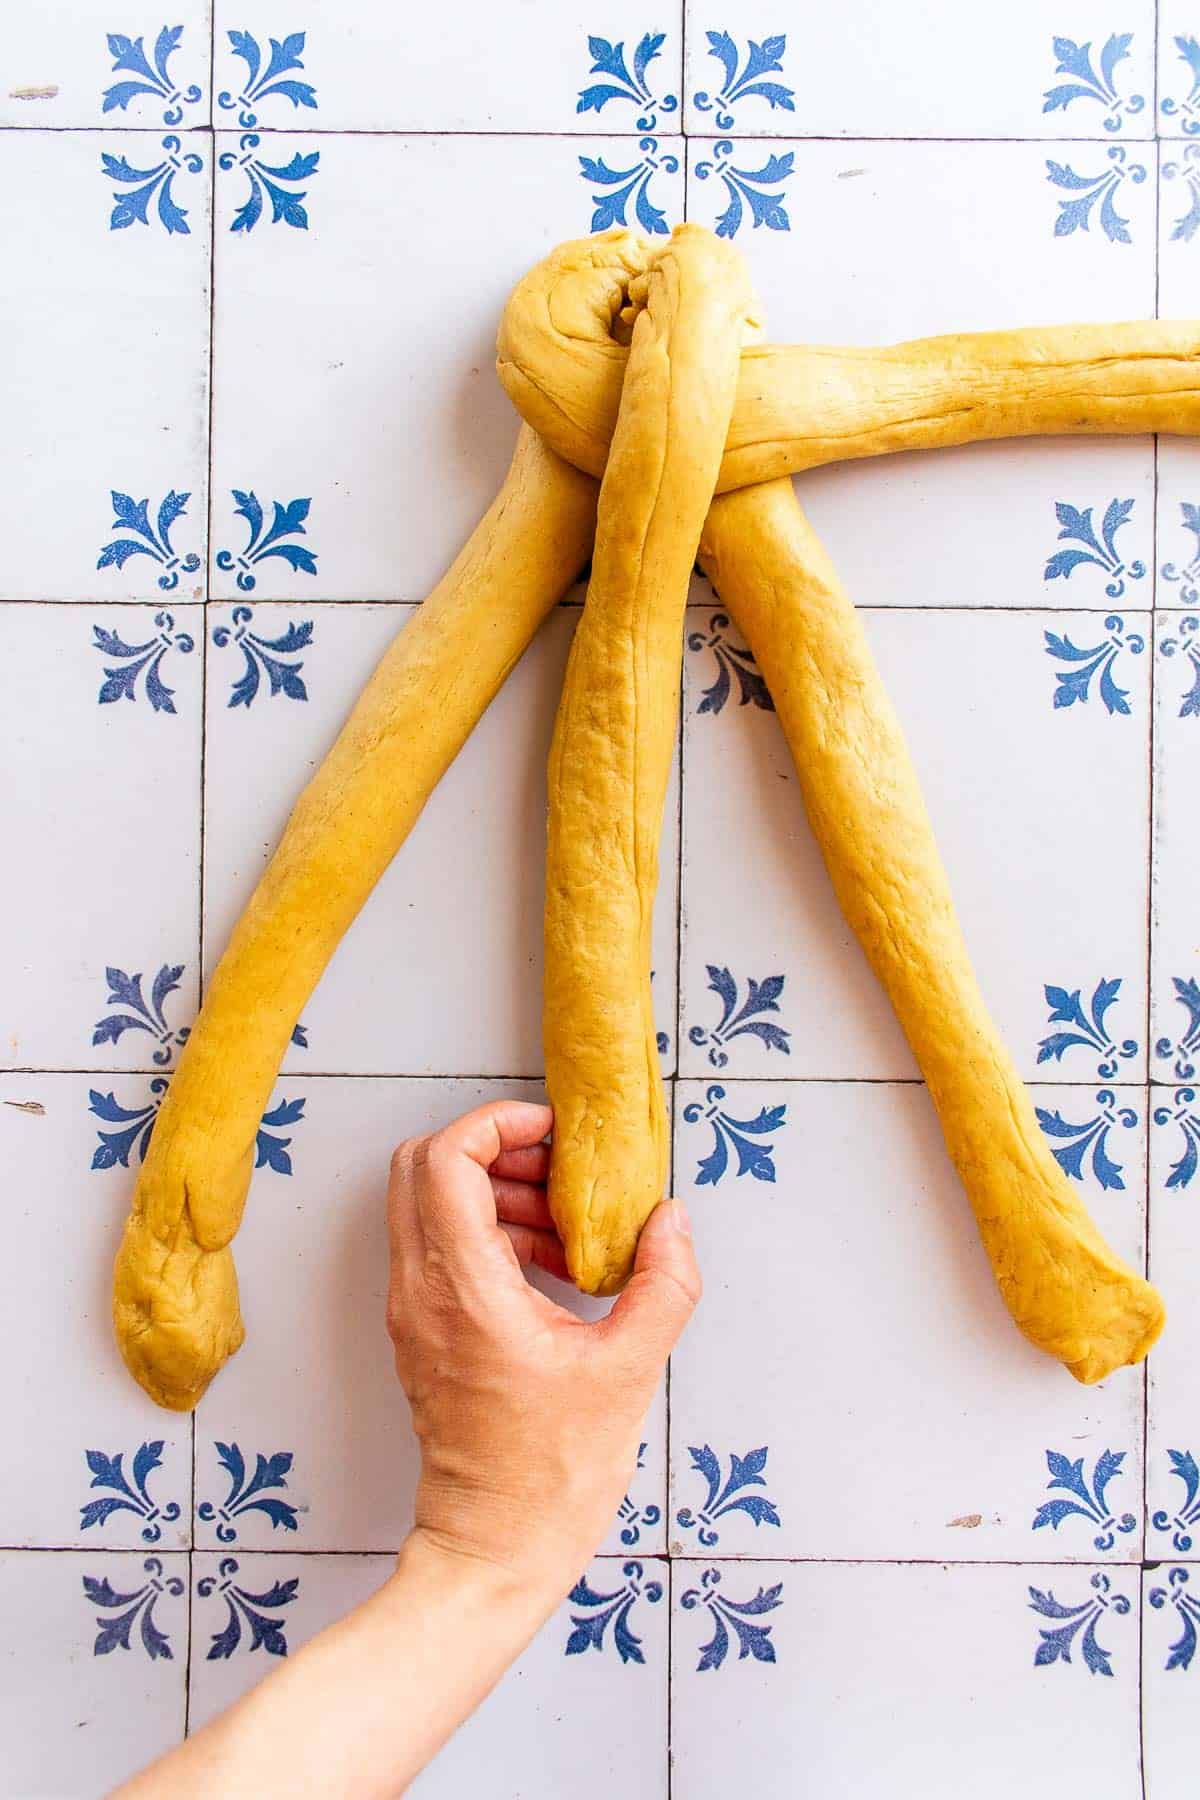
8. Cross over one strand to the right.
10. Cross it all the way over to the far left.
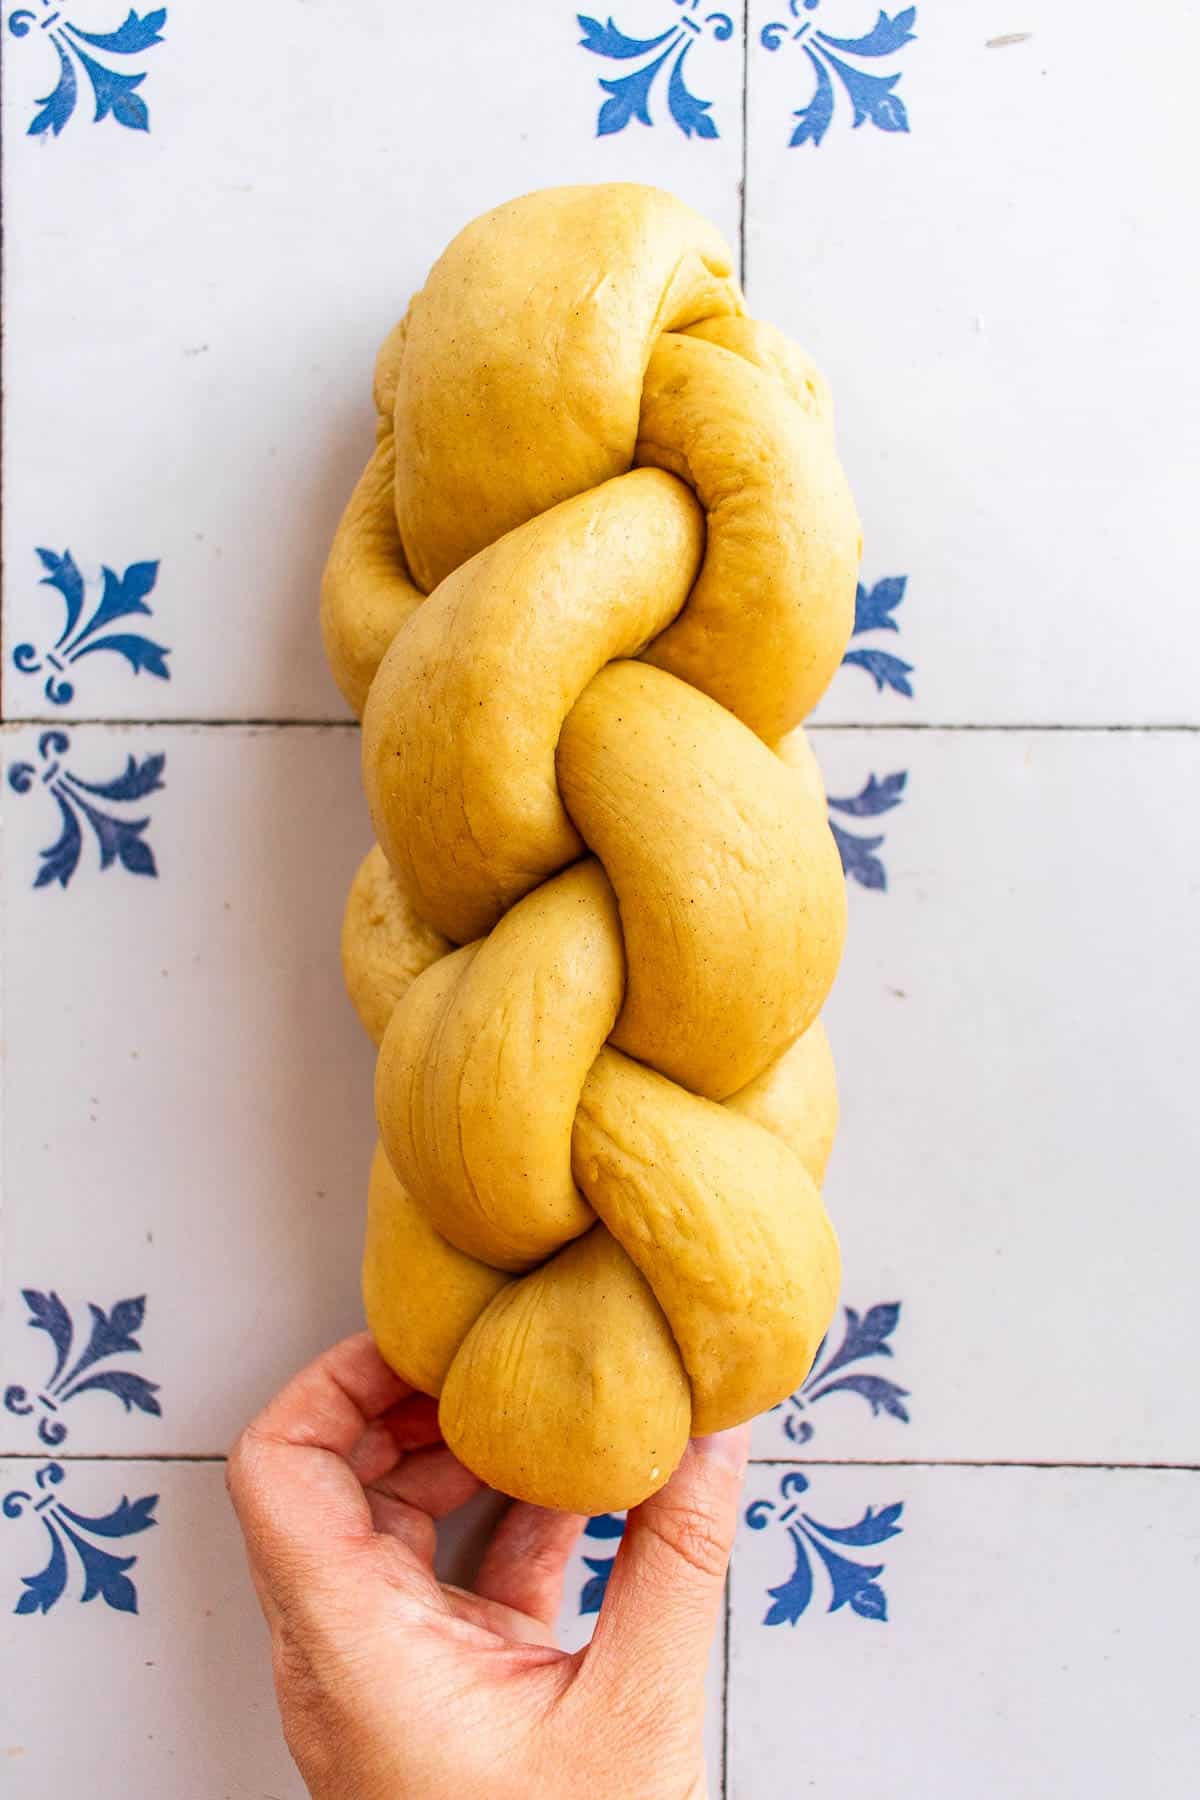
12. Pinch & tuck under the ends.
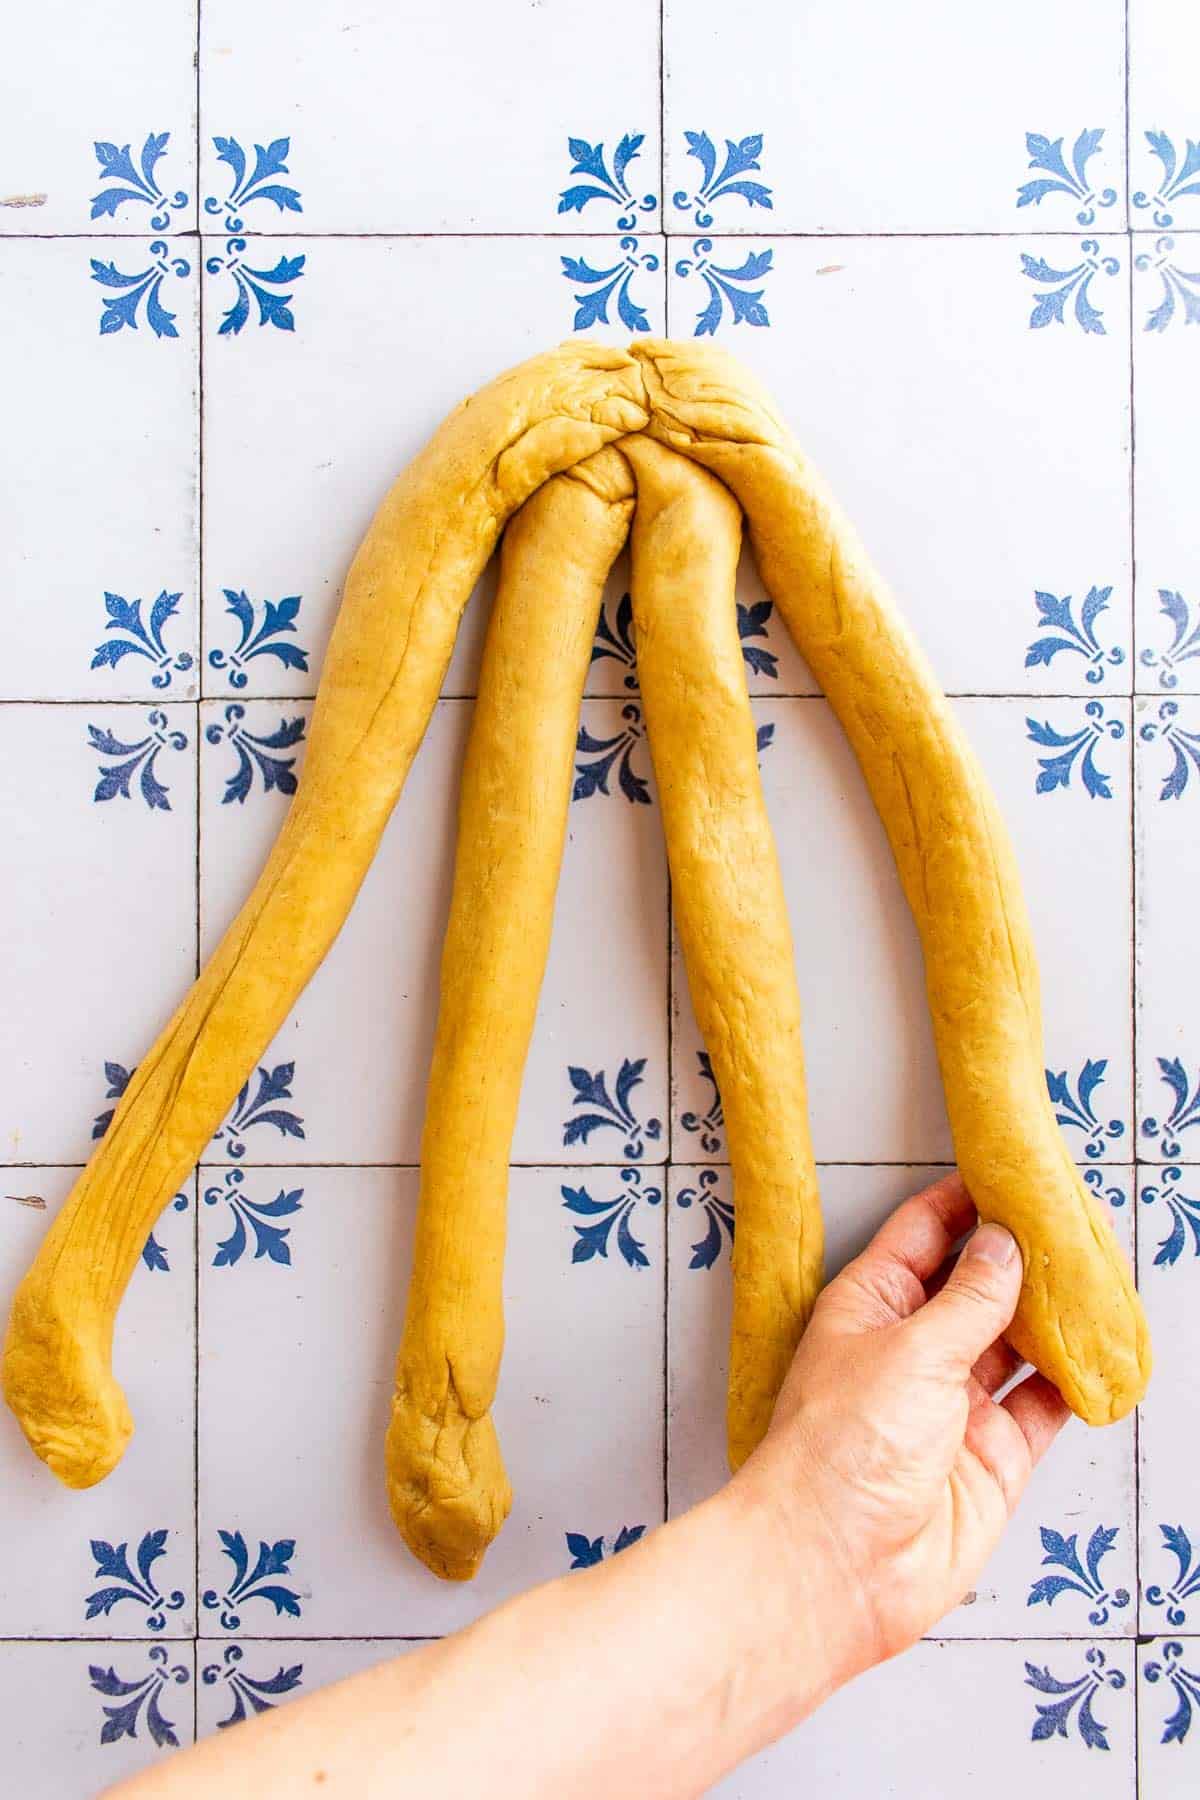
Five Stranded Braid
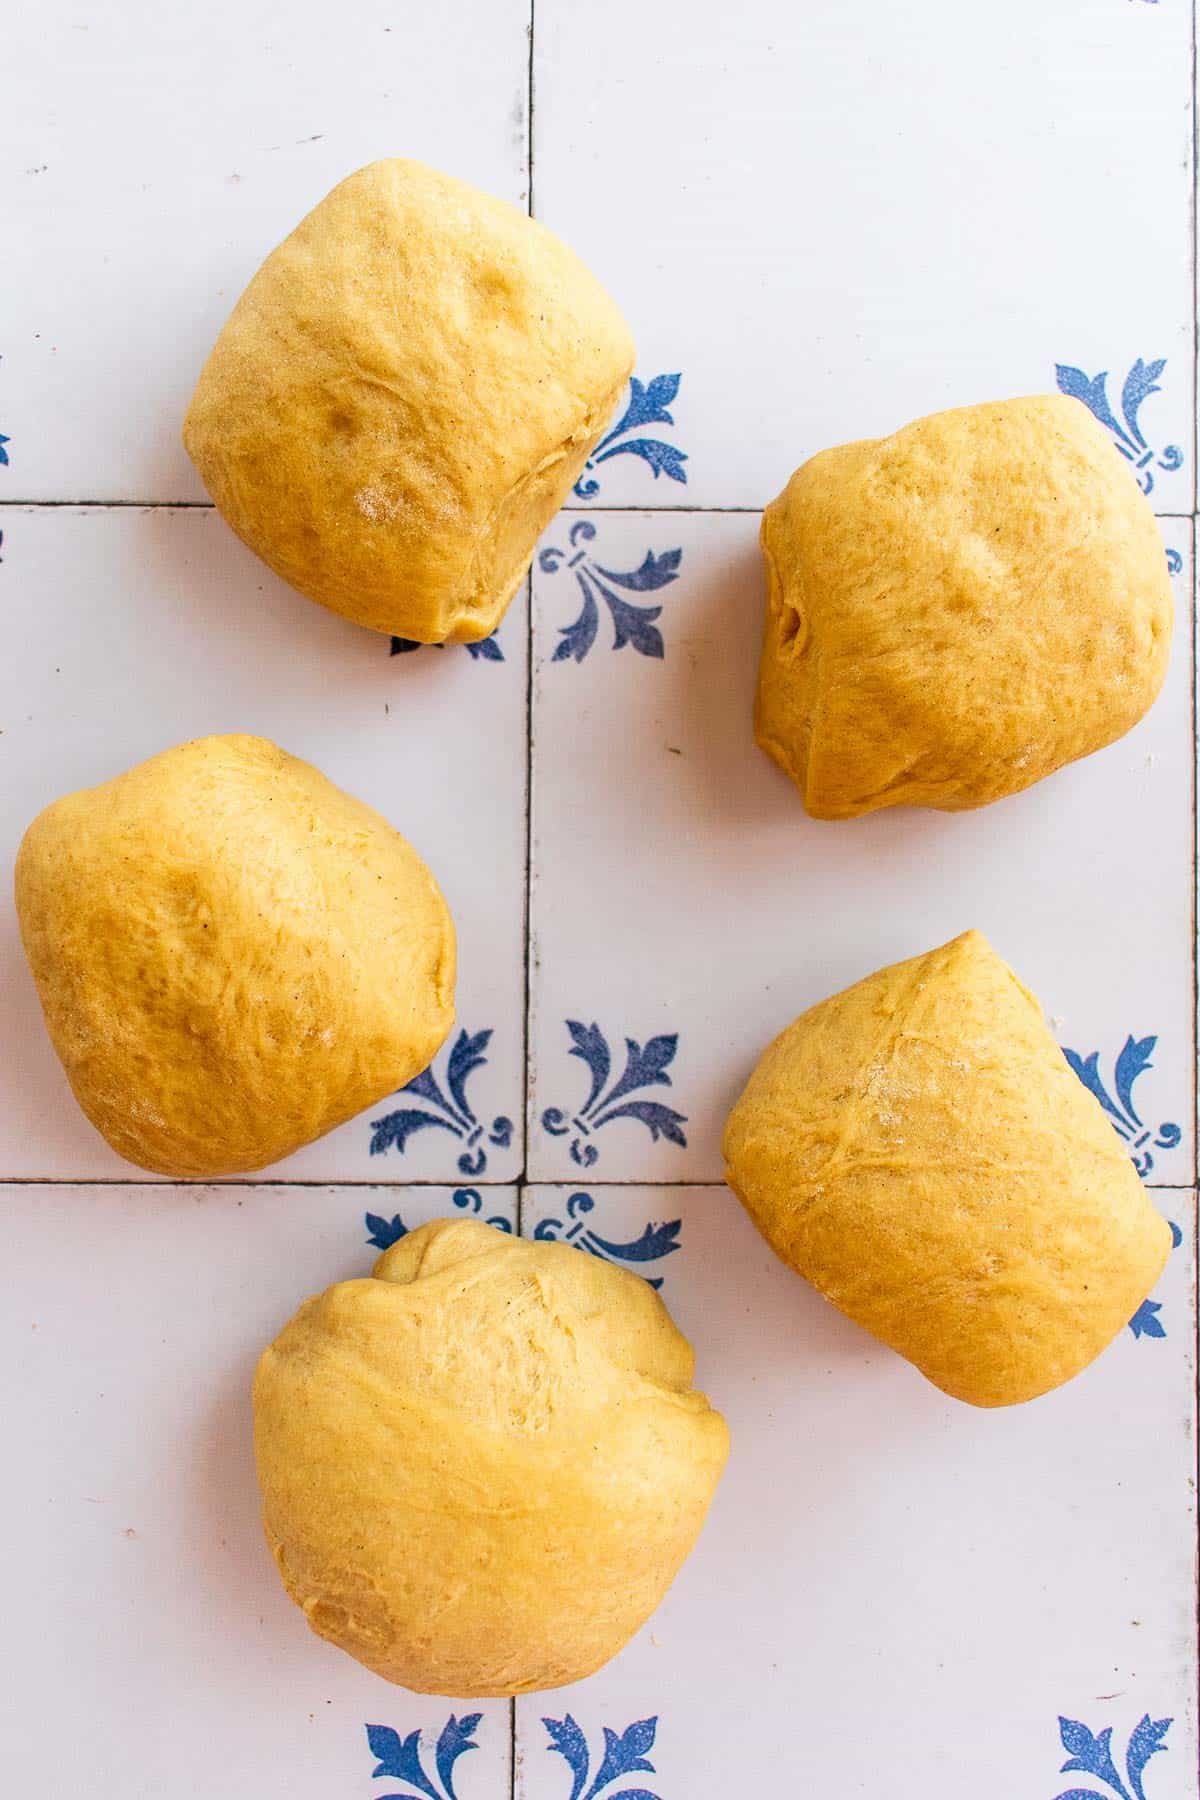
1. Divide the dough into 5 balls.

3. Pick up the far left strand of dough.

5. Pick up the far right log of dough.
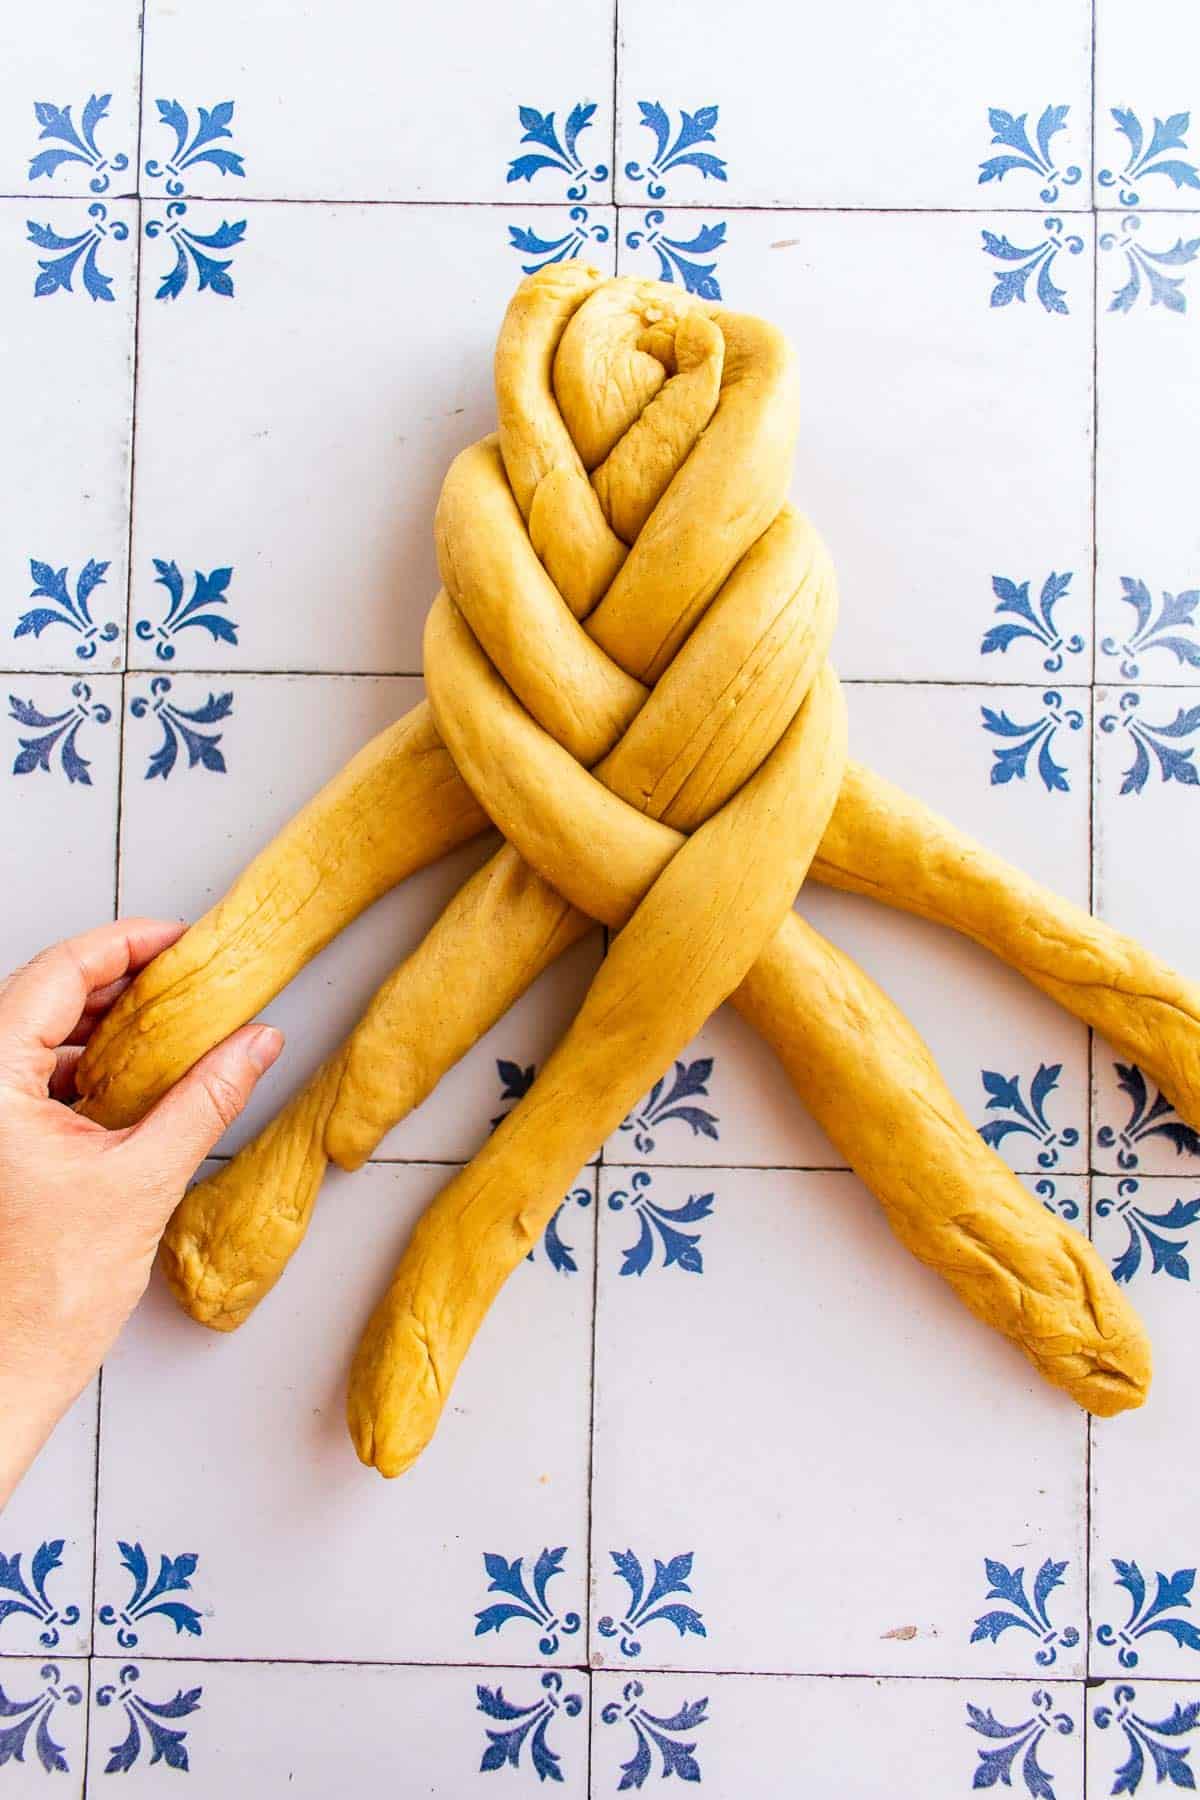
7. Continue repeating this pattern.
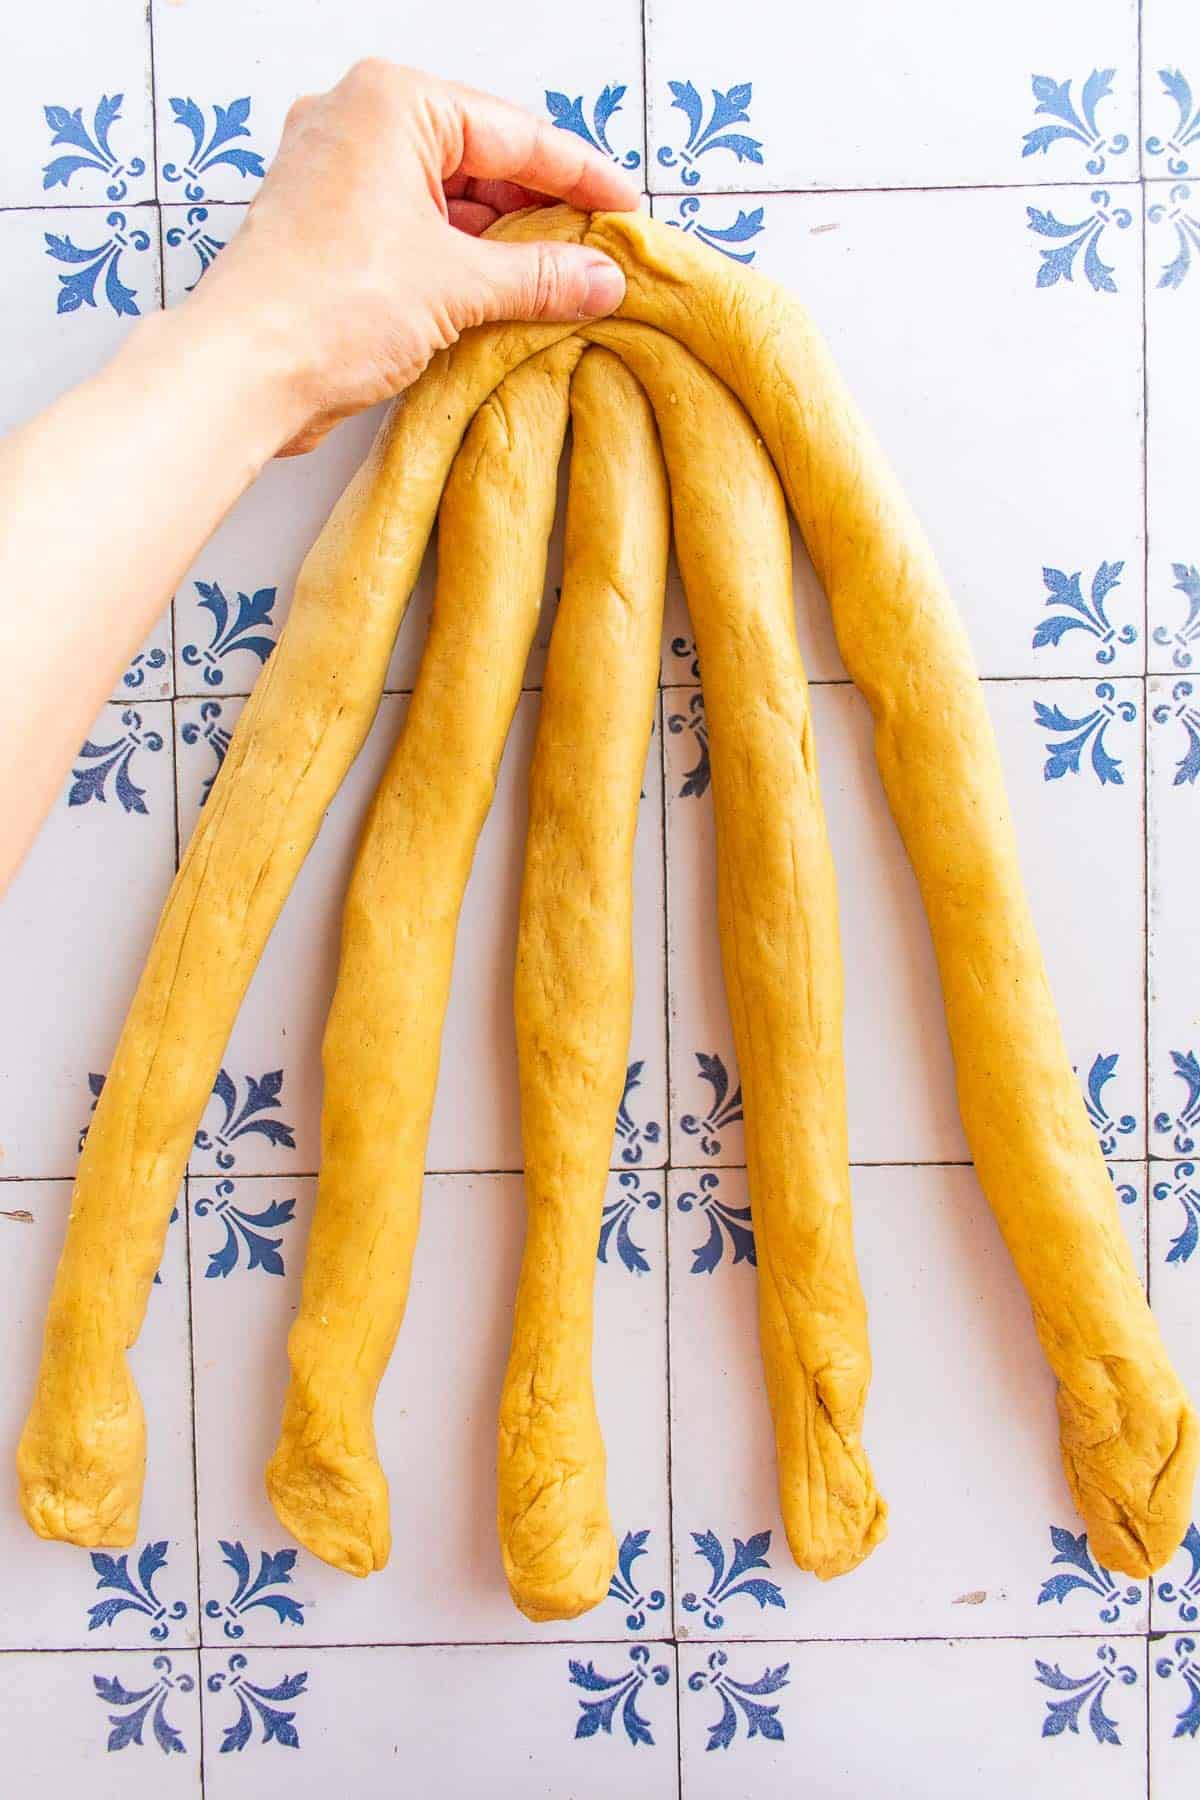
2. Roll into logs & pinch the ends.
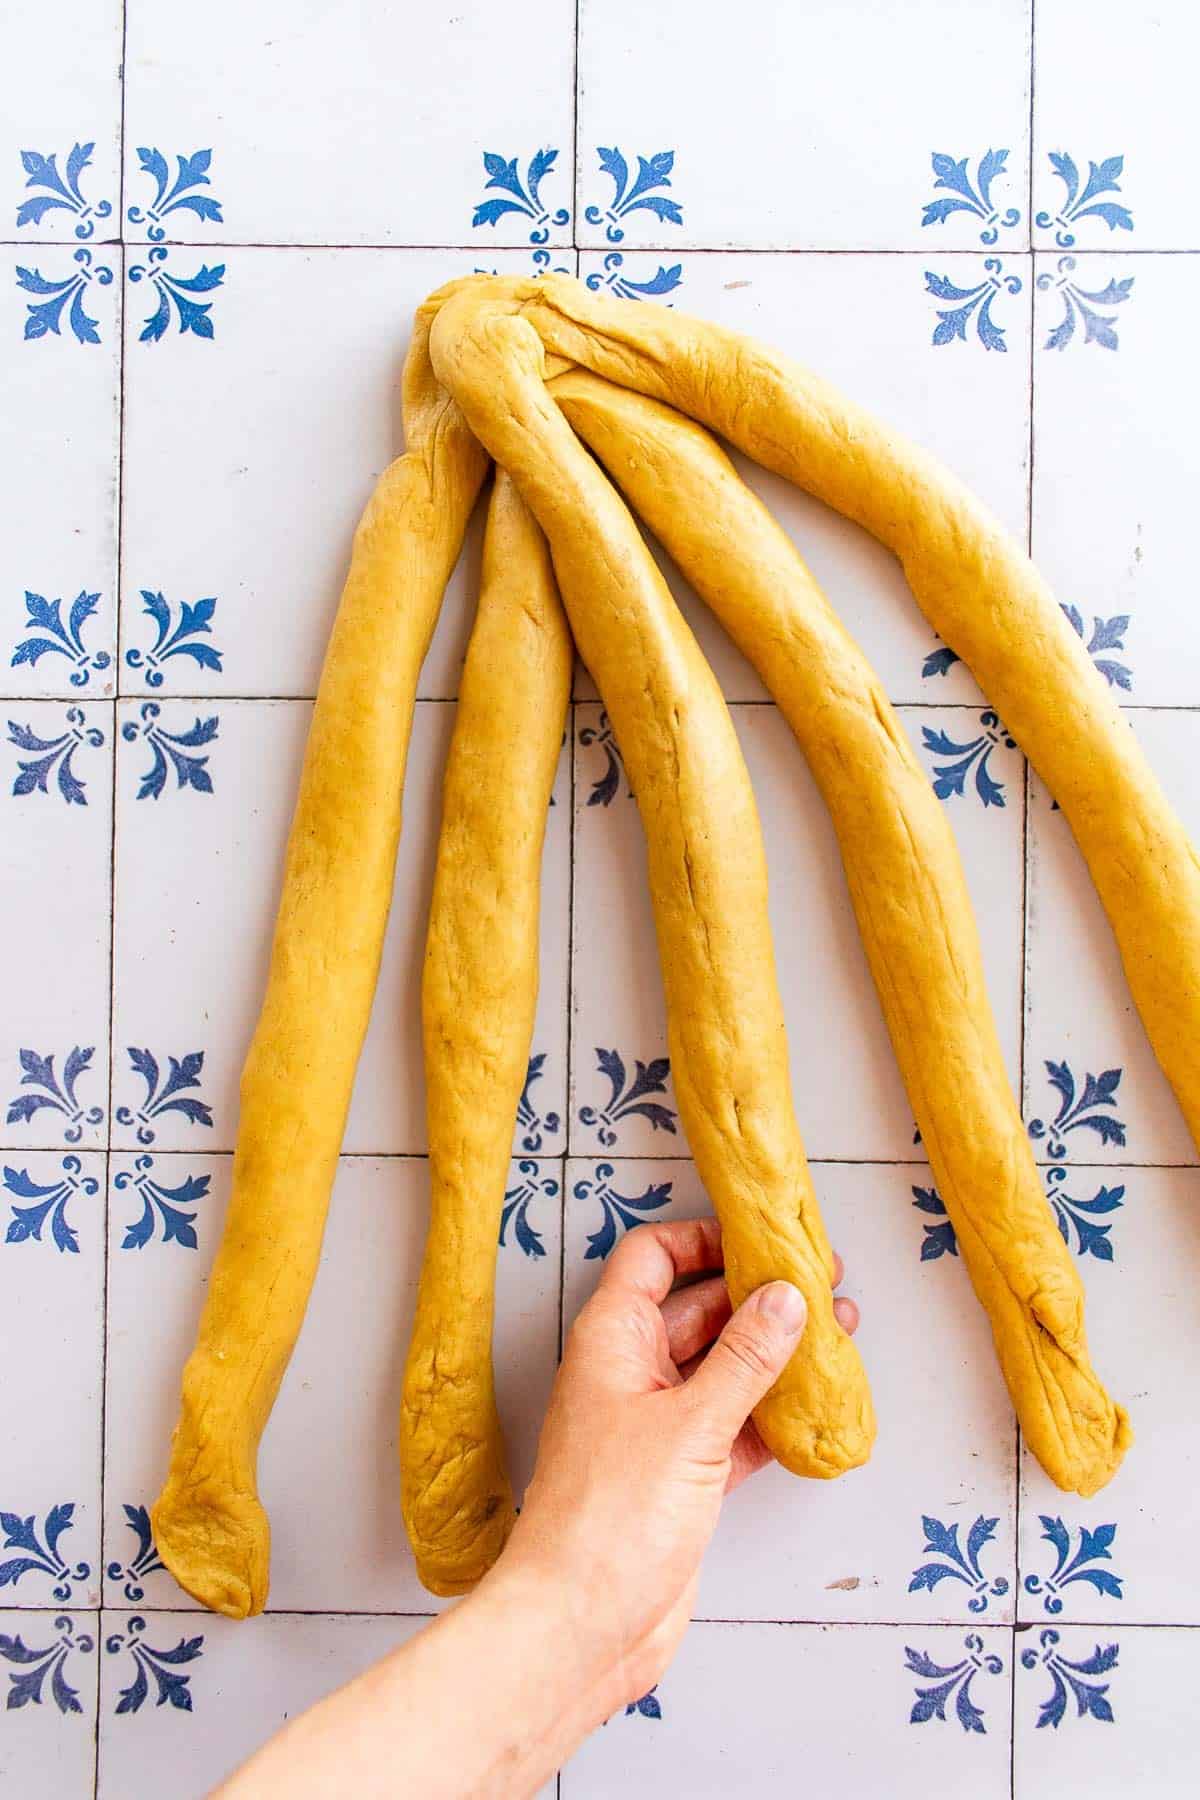
4. Cross it over 2 strands to the right.
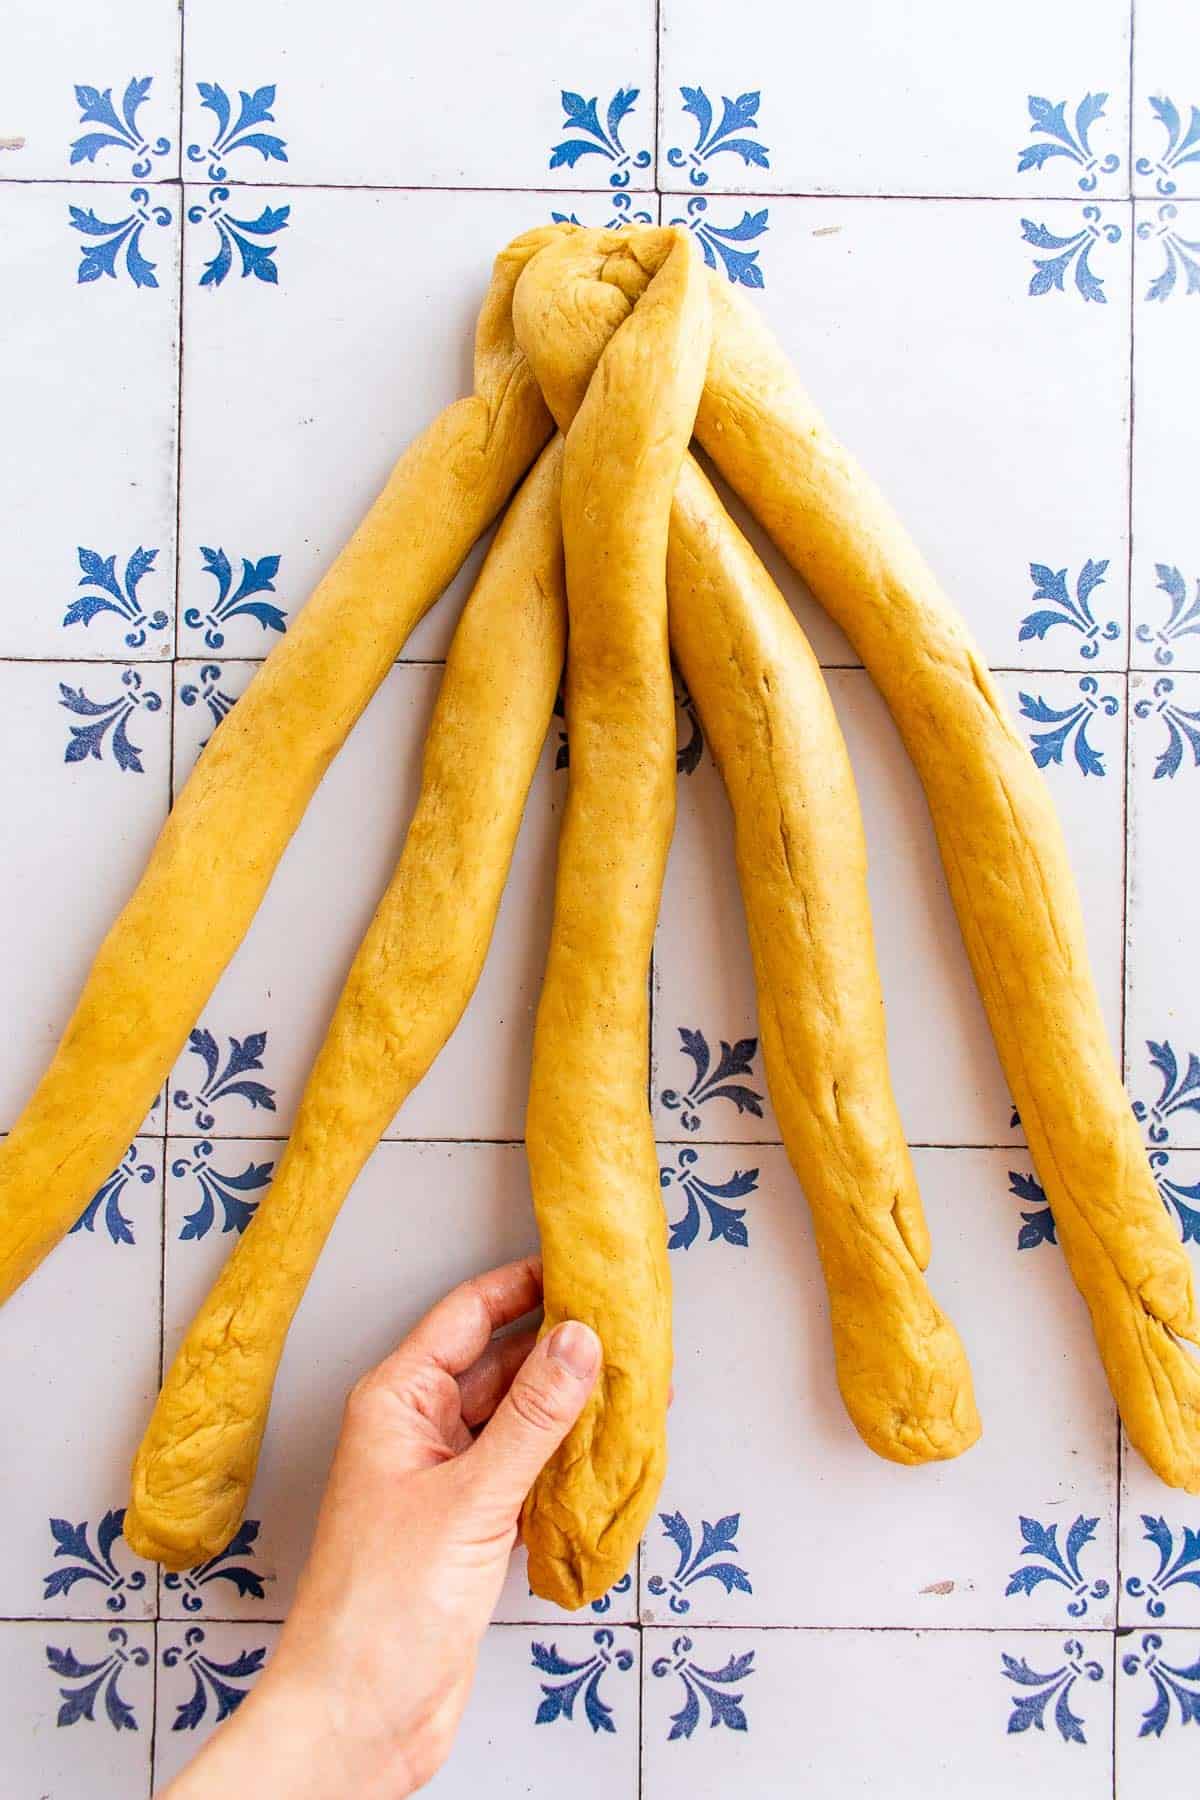
6. Cross it over two strands to the left.
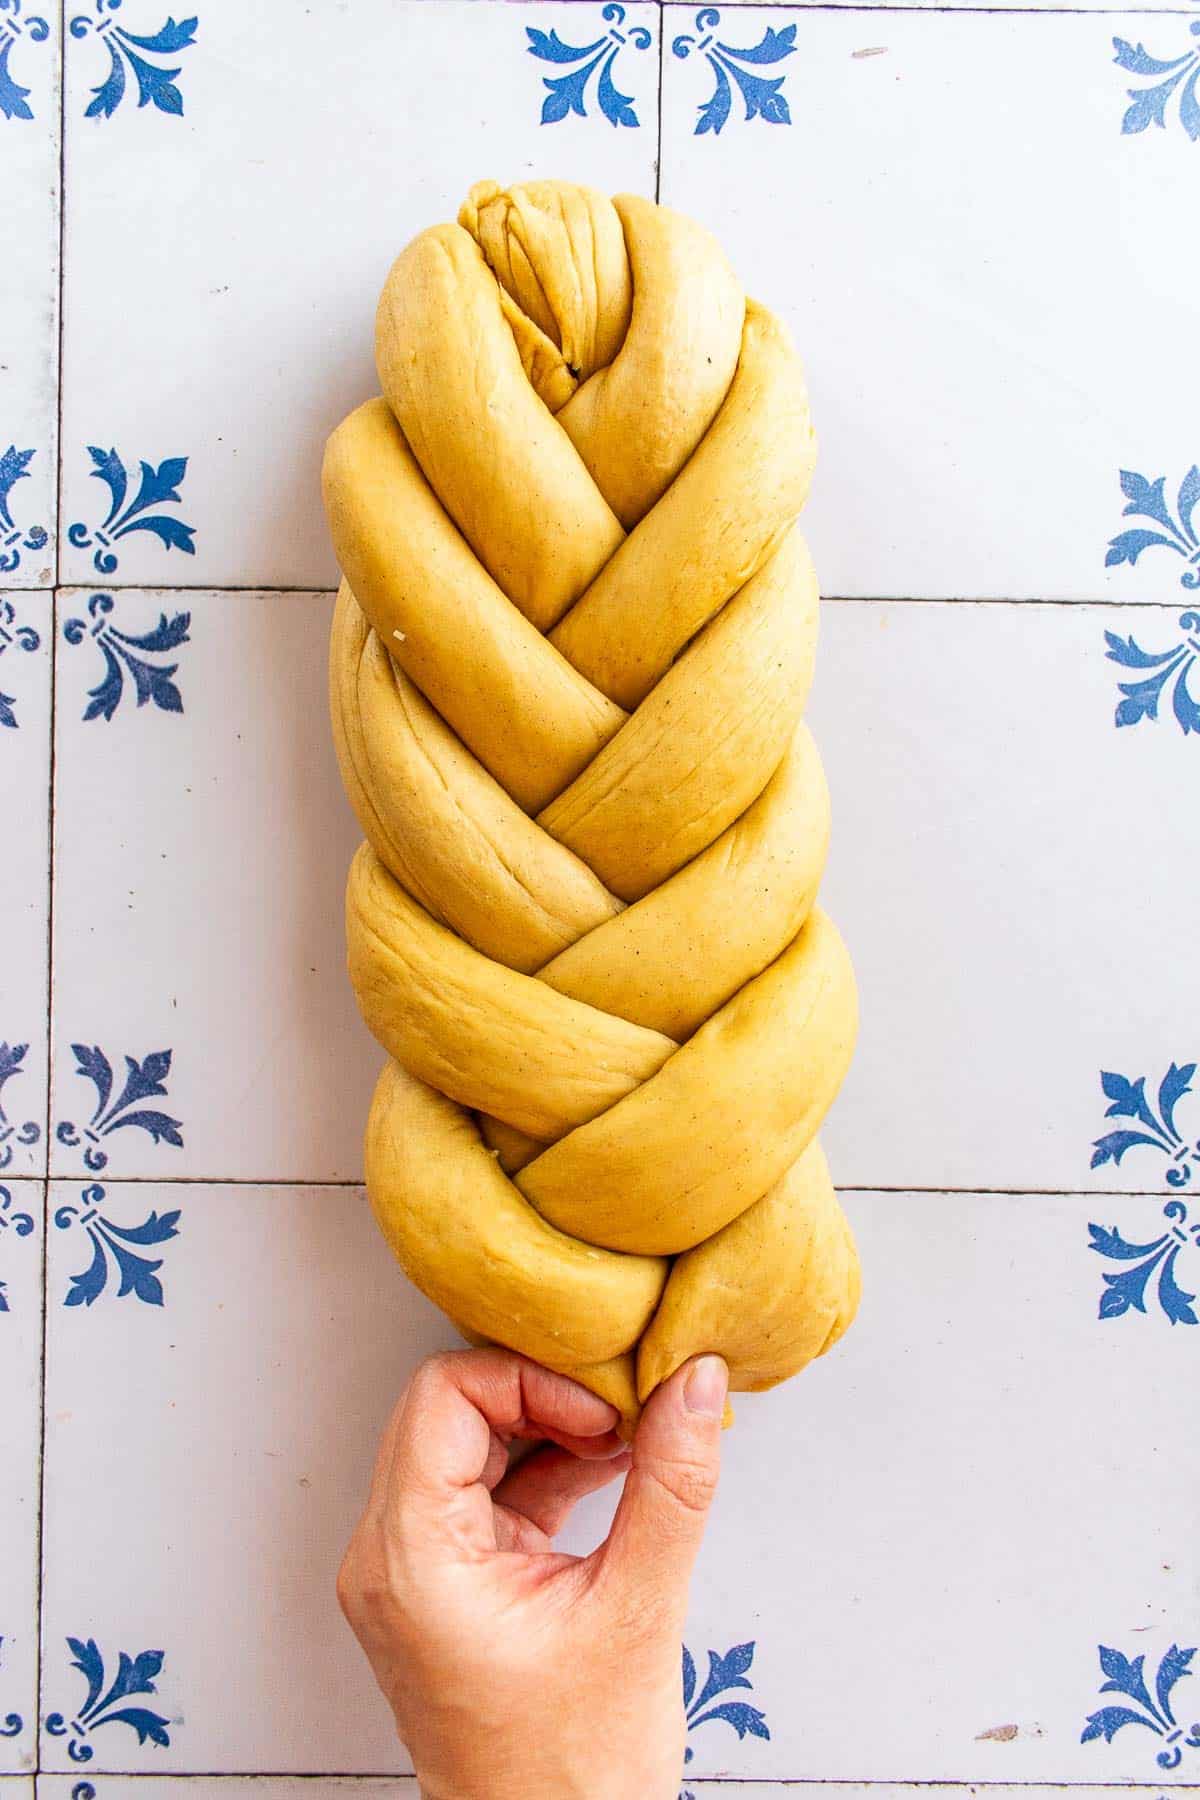
8. Pinch and tuck under the ends.
My Tips for Braided Bread
- Perfect Design: You want your braid to be tight enough that it's not falling apart, but with a little room between each strand so the dough has space to expand as it proofs. I'm continually spreading out the strands as I braid it for proper spacing.
- Prevent Unravelling: To prevent my braid from unravelling, I pinch the two ends tightly together and tuck them underneath.
- Avoid Ripped Dough: Don't try to shortcut the kneading time - we need the full 5 minutes is needed to develop gluten so our strands are stretchy and don't tear as we braid them.
Sweet Yeast Braided Bread
developed & tested by:
Equipment
Ingredients
- 1 cup milk (warmed in the microwave for 1 minute, ideally between 105°F and 115°F)
- 2¼ teaspoons active dry yeast (one packet)
- ½ cup brown sugar
- 2 large eggs, divided
- 1 teaspoon salt (use table salt or fine sea salt)
- 1 teaspoon ground cinnamon
- ½ teaspoon ground nutmeg
- 6 Tablespoons unsalted butter, softened
- 4½ cups all purpose flour, plus extra for kneading
Instructions
- In a small bowl, mix the warm milk, active dry yeast and brown sugar. Set aside for about 10 minutes, until it becomes frothy on top.
- In a large mixing bowl, whisk the flour, salt, cinnamon, and nutmeg.
- Add the yeast mixture, softened butter, one whole egg and one egg yolk. (Save the egg white in a small bowl in the fridge for later.) Mix until it forms a dense dough.
- On a lightly floured surface, knead the dough by hand for about 5 minutes, until it's smooth and elastic. Shape the dough into a ball.
- Place the dough back into the same mixing bowl and cover with a kitchen towel. Let it rest and rise in a warm place (like an empty oven with the light turned on) for 2 hours, until it doubles in size.
- Line a baking sheet with parchment paper or a silicone baking mat. Set aside.
- Once the dough has doubled in size, lightly dust a clean work surface with flour.Divide the dough into three, four, or five even balls, depending on how many strands you'll be creating for your braided loaf. (See the blog post above for step-by-step photos for each type of braid.) Roll each ball with your hands into a log. Press the tops of the strands together, then braid them. Press the bottoms of the strands together.
- Carefully transfer the braided loaf to the prepared baking sheet. Cover with a kitchen towel and allow the loaf to proof for 30 minutes to 1 hour. The dough is done proofing once a shallow indent made by your finger springs back to its original shape after 2 to 3 seconds.
- Preheat the oven to 350°F. In a small bowl, whisk the reserved egg white with one teaspoon of water. Brush over the top and sides of your bread.
- Bake for 30 to 35 minutes, until the bread is golden brown. Transfer to a cooling rack to cool for at least 30 minutes. Enjoy!!
Notes
- Egg Wash: The egg wash at the end is optional to give a beautiful golden sheen on your bread. I've also tested this recipe adding two whole eggs into the dough, and it worked out great too, but your baked loaf will be more pale and matte without that egg wash on top.
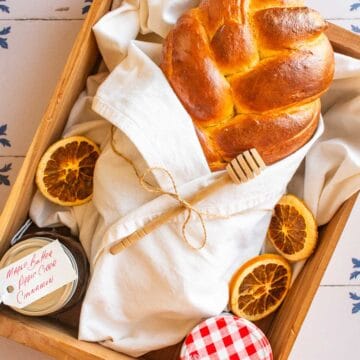
- Storing: Store your cooled loaf in a paper bag, bread box, or wrapped in a kitchen towel at room temperature. I also love doubling this recipe and freezing a loaf for later.


I'm eggcited to hear from you :)