

These rustic bread bowls are made with just three ingredients & baked on a baking sheet with steam in the oven for the perfect crispy crust and chewy interior. They're sturdy enough to ladle with soup, and soft enough to tear off and dunk the sides.

This website uses affiliate links which may earn commission for purchases made at no additional cost to you.
These Homemade Bread Bowls Make Any Soup Feel Special
After my husband and I fell in love with sourdough bread bowls at Disneyland, I knew I wanted to figure out how to create a dry yeast version at home. Tearing into that warm, crusty shell instantly turned our canned soup dinner into a nostalgic experience. And now I love baking a batch while a pot of soup, chowder, or chili simmers away in my slow cooker.
My version of rustic bread bowls is incredibly simple with just 3 ingredients, since I based it off my artisan white bread. They have everything you want in a bread bowl: soft & chewy center, crispy golden crust, rich yeast flavor, and a sturdy shape. I tweaked the ratios of flour and hydration to make sure the interior softens just enough to scrape small bites of bread off the walls into your soup, but not enough to become soggy.
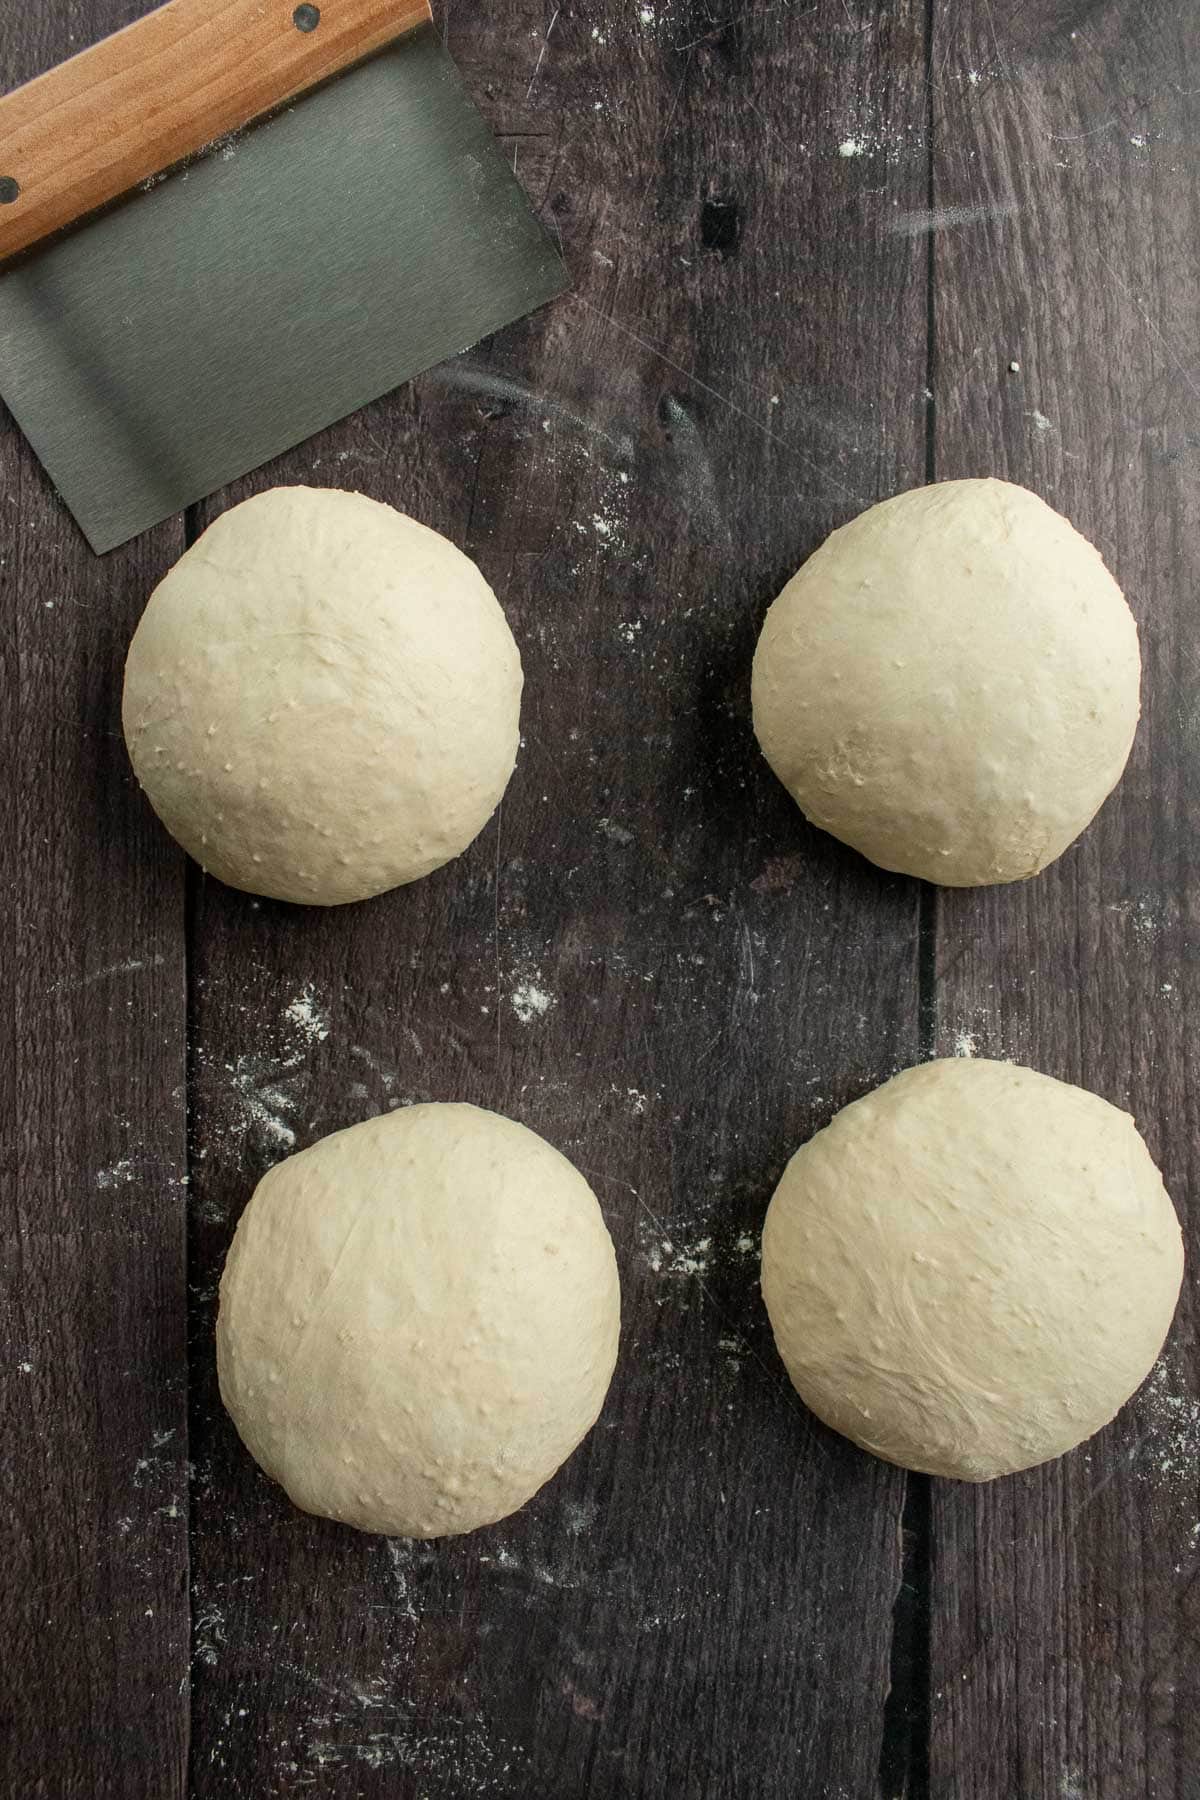
And after testing this recipe with four versus six buns from the dough, I found that dividing the dough into fourths creates the perfect sized bowls. They're definitely big enough to hold a whole serving of soup, but not too big that it's impossible to finish eating.

Let's Gather Our Ingredients
- Flour: I prefer using bread flour for a slightly chewier texture & golden crust, but all purpose flour works great.
- Yeast: Use active dry yeast for this one, since the slower rise develops more flavor.
- Salt: I recommend using non-iodized table salt or fine sea salt, not kosher salt.
Let's Bake Bread Bowls!
For the full step-by-step directions and ingredient quantities, scroll down to the recipe card at the bottom of this post.


Scoring Tip
I love using my retractable bread lame to score my dough. It's really easy to hold at a 45 degree angle and make designs like spirals or leaves.
Tips for Bakery-Style Bread Bowls at Home
- Scoring: When I scored my bread bowls too deeply by accident, they sprung open and lost some of their round bowl shape, so don't cut any deeper than ¼-inch.
- Shaping: It's really important to create tension on the tops and sides by pressing the surface of each dough ball around and tucking it underneath itself. In testing, any bread bowls that didn't have enough tension came out oddly shaped, making them harder to fill with soup.
- Glossy Finish: I prefer my homemade bread bowls to come out of the oven with a rustic matte finish, or you can brush them with melted butter as they cool.


Easy 3-Ingredient Bread Bowls for Soup
Equipment
Ingredients
- 6 cups bread flour
- 4 ½ teaspoons active dry yeast (two packets)
- 1 Tablespoon salt (use fine sea salt or non-iodized table salt)
- 2 cups warm water (between 105°F and 110°F)
Instructions
- In a large mixing bowl, whisk the bread flour, active dry yeast, and salt.
- Add the warm water and mix with a large spoon (or your hands) until it forms a dense dough and there are no visible pockets of dry flour.
- On a floured surface, knead the dough by hand for 5-6 minutes, or in a stand mixer with a dough hook attachment for 3-5 minutes, until it's smooth and elastic. Sprinkle a little more flour on the counter as needed as you knead the dough.
- Return the dough to the same mixing bowl and cover the bowl with a clean kitchen towel. Let it rise in a warm, draft-free spot until it doubles in size, after 1 to 2 hours.
- On a lightly floured surface, evenly divide the dough into four pieces and shape them into balls. Use your hands to gently push the top of the dough down the sides and tuck all the seams underneath to create tension.
- Cut out four large squares of parchment paper. Place the four dough balls seam-side-down on their individual squares of parchment paper, then arrange them evenly spread out on the baking sheet. Cover with a kitchen towel and proof the dough for 30 minutes at room temperature.
- Preheat the oven to 425°F. Fill a heat-proof baking dish or a second metal baking sheet with hot tap water. Place it on the lower rack of your oven to gradually warm up as your oven preheats.
- Once your oven is preheated, score the top of each bread round by slicing two to three ¼-inch deep cuts into the top of the dough at a 45° angle with a bread lame or a sharp knife.
- Bake for 15 minutes, then carefully remove the baking dish or baking sheet with hot water from the oven. Continue baking the bread bowls until the crust is golden and crispy, after another 10-15 minutes.
Notes
- Hollowing: I accidentally got a little carried away when hollowing up a bread bowl once and made a hole in the bottom. I found it's best to tear off little chunks at a time from the sides & bottom until there's enough room to add soup, but the walls are still at least ½ inch thick.
- Make Ahead: When I've had family over for dinner, I've made these bread bowls a day in advance. I didn't reheat them since the soup warms them from the inside, but you could pop them in the oven at 350 for 10 to 15 minutes to warm them up.


I'm eggcited to hear from you :)