

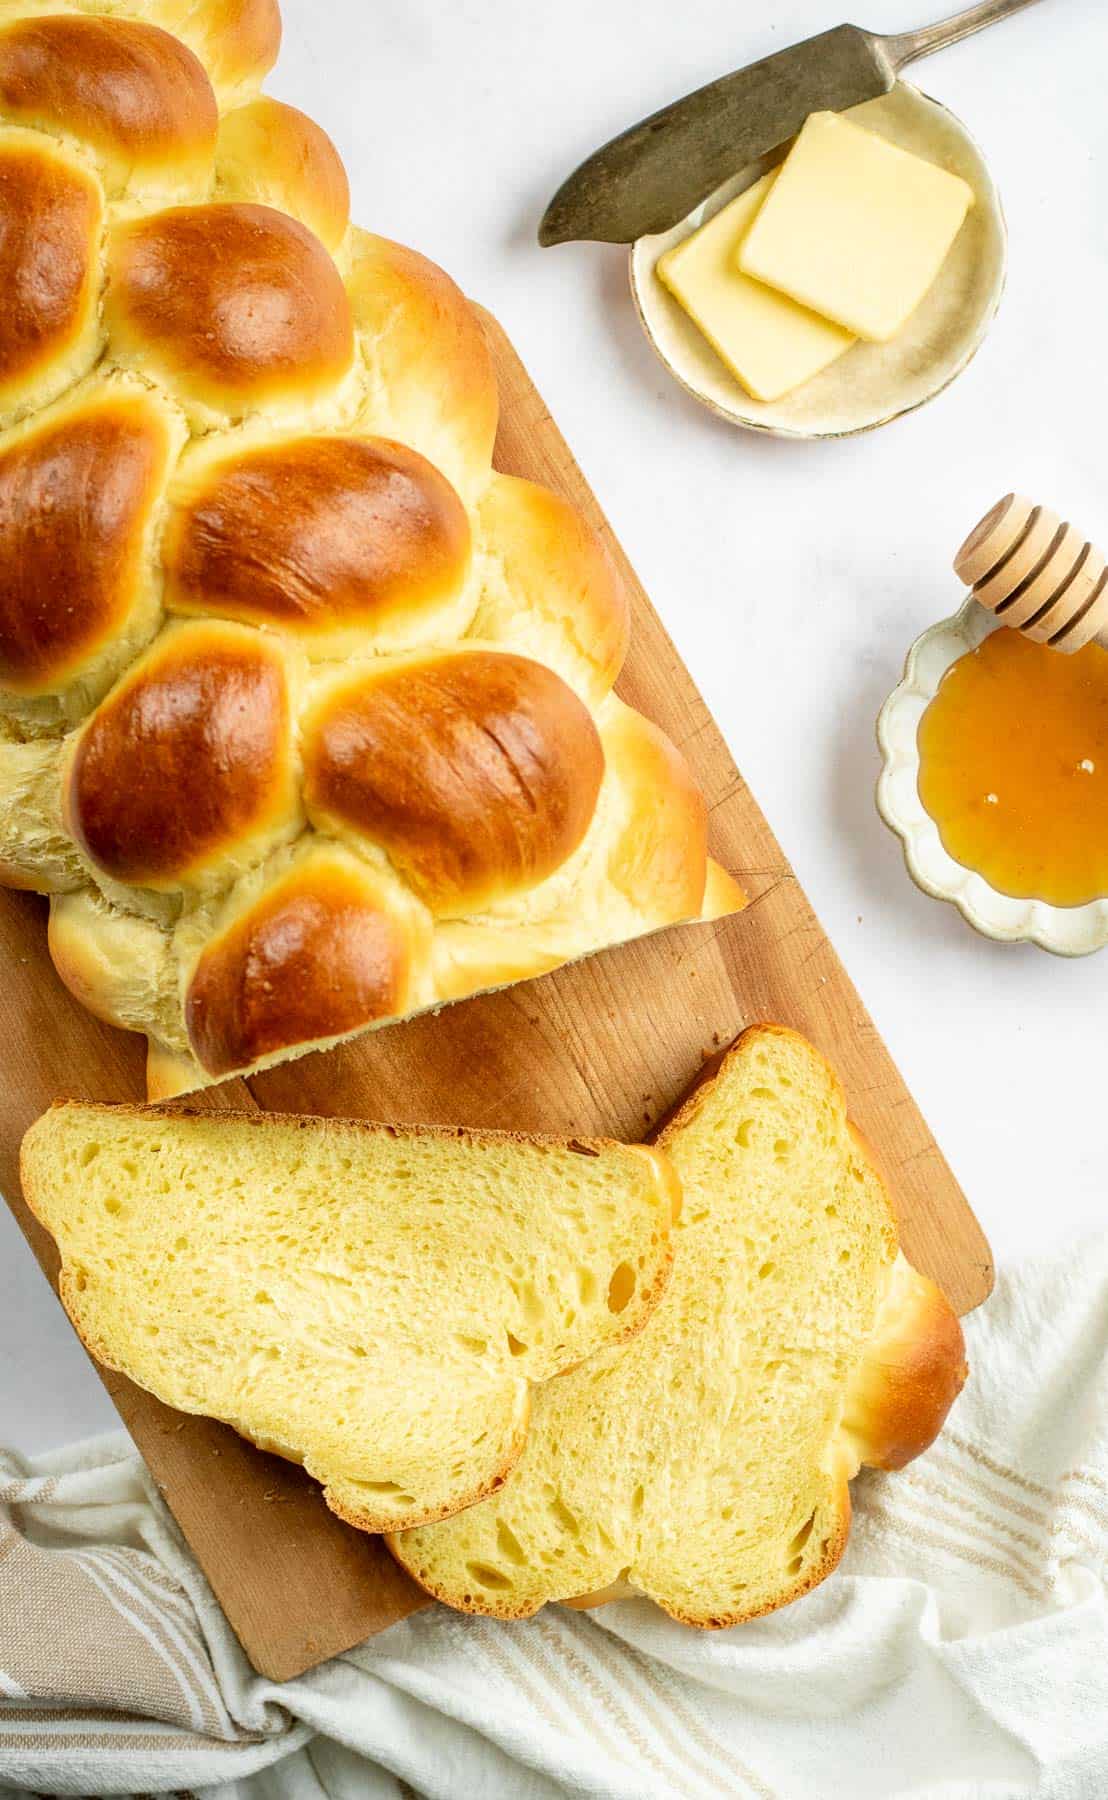
This fluffy six strand challah bread is easier than it looks to braid, and I've included step-by-step photos. The enriched bread dough stays soft for days, made with olive oil and eggs (not milk or butter), and it all comes together in just one bowl.
This Challah Bread Is Basically a Warm Hug
Even though I'm not Jewish, I've been making challah for over five years at least a few times every month. I love how challah manages to be soft and pillowy and rustic all at once. And to keep this loaf respectful of its traditions, I use water instead of milk and olive oil in place of any butter I'd normally add to my enriched bread dough recipes. The end result of these ingredient swaps was actually an even softer crumb, all made easy in one bowl with no butter to soften ahead of time.
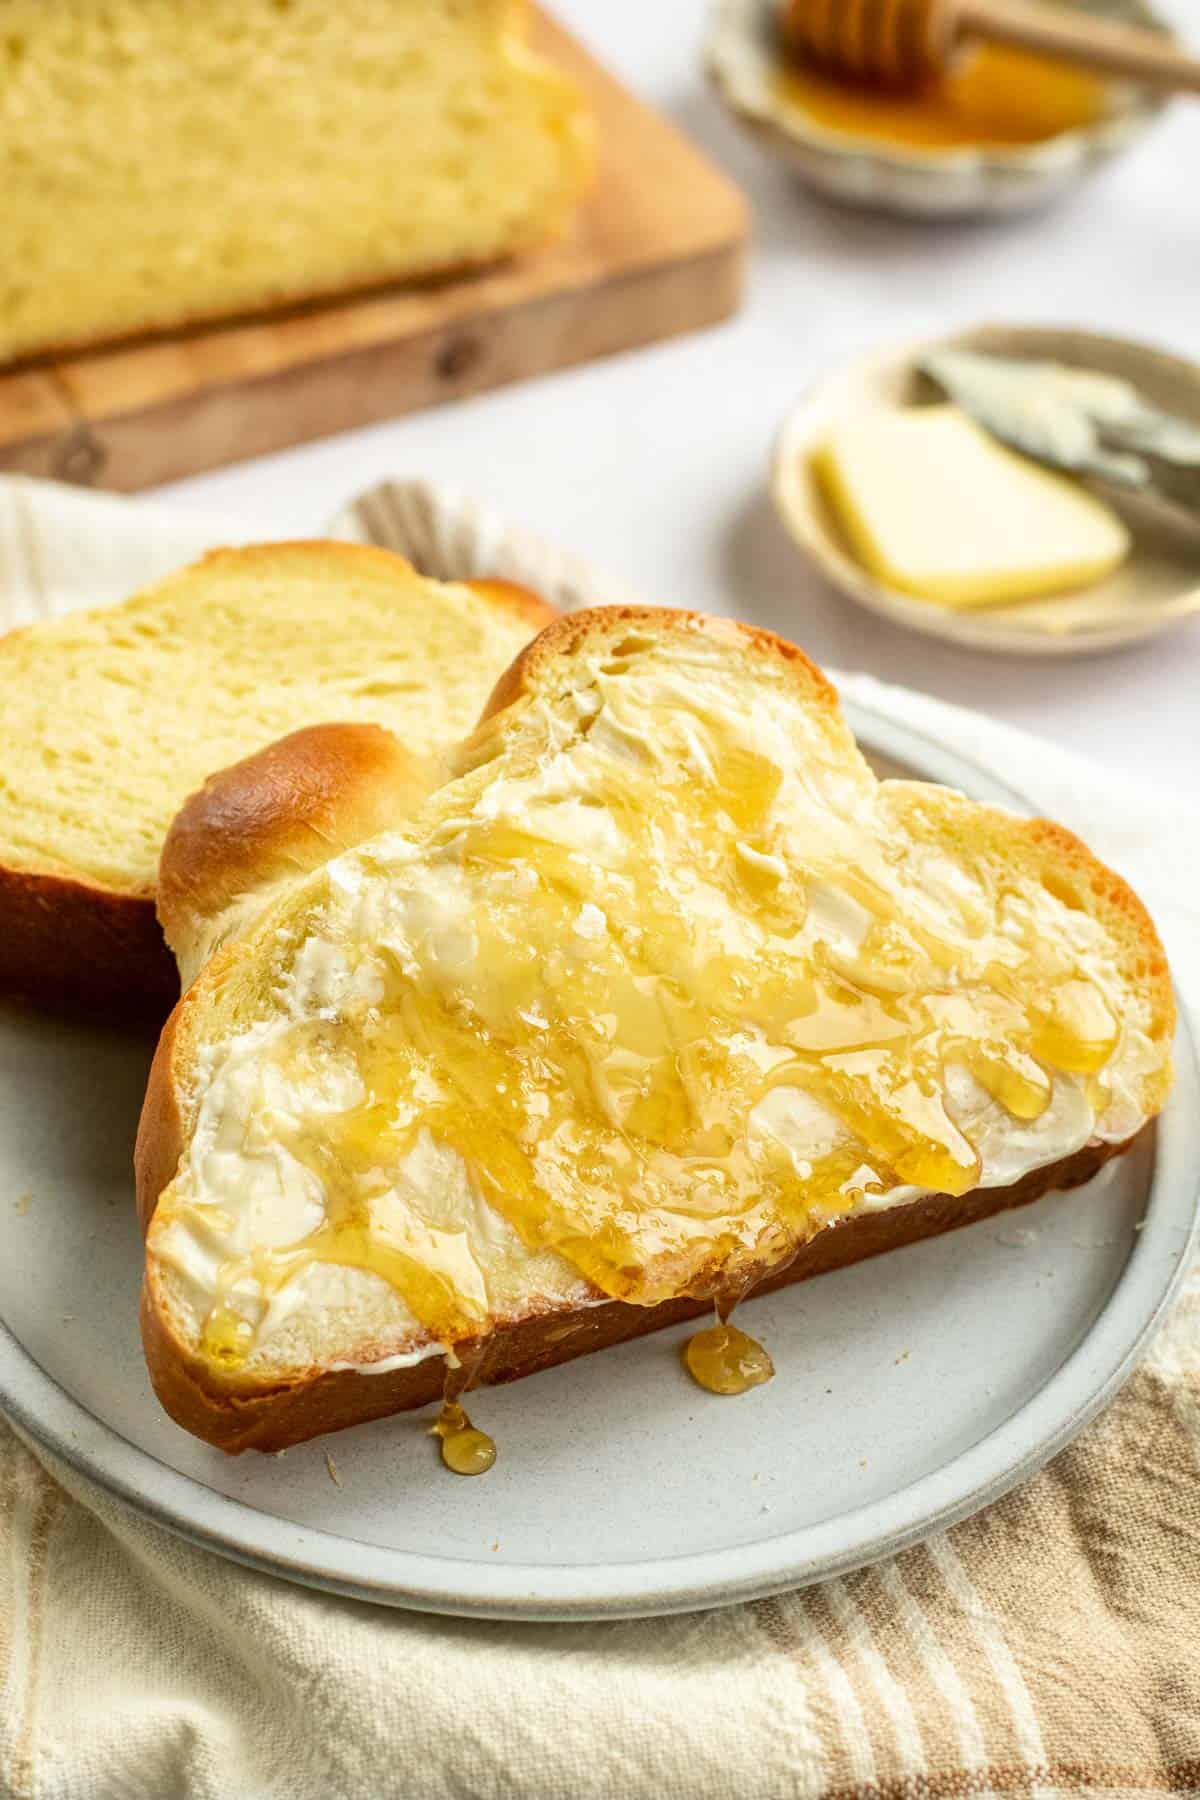
What's kept this one in my family's permanent rotation is how much it can do. Slice it thick and cook it into French toast. Toast it and top it with avocado & fried eggs. Or build it into a sandwich that never turns soggy or crumbles apart. My husband will happily pick this loaf over anything else that comes out of my kitchen, because the crust stays soft throughout the whole week.
Now I know that the braid might look intimidating with six strands laid out on the counter, but it's really just two moves, repeated over and over on each side. Seriously, once I get the pattern going, my hands take over, which is when this becomes a mindful & meditative act.
If six strands feels like too much right now or you want to get creative with more patterns, head over to my sweet yeast braided bread for instructions to make 3, 4, or 5 strand braids.
If You Can Braid Hair, You Can Braid Challah
A few things make the difference between a loaf that looks like it came from a bakery window and one that pulls apart at the seams.
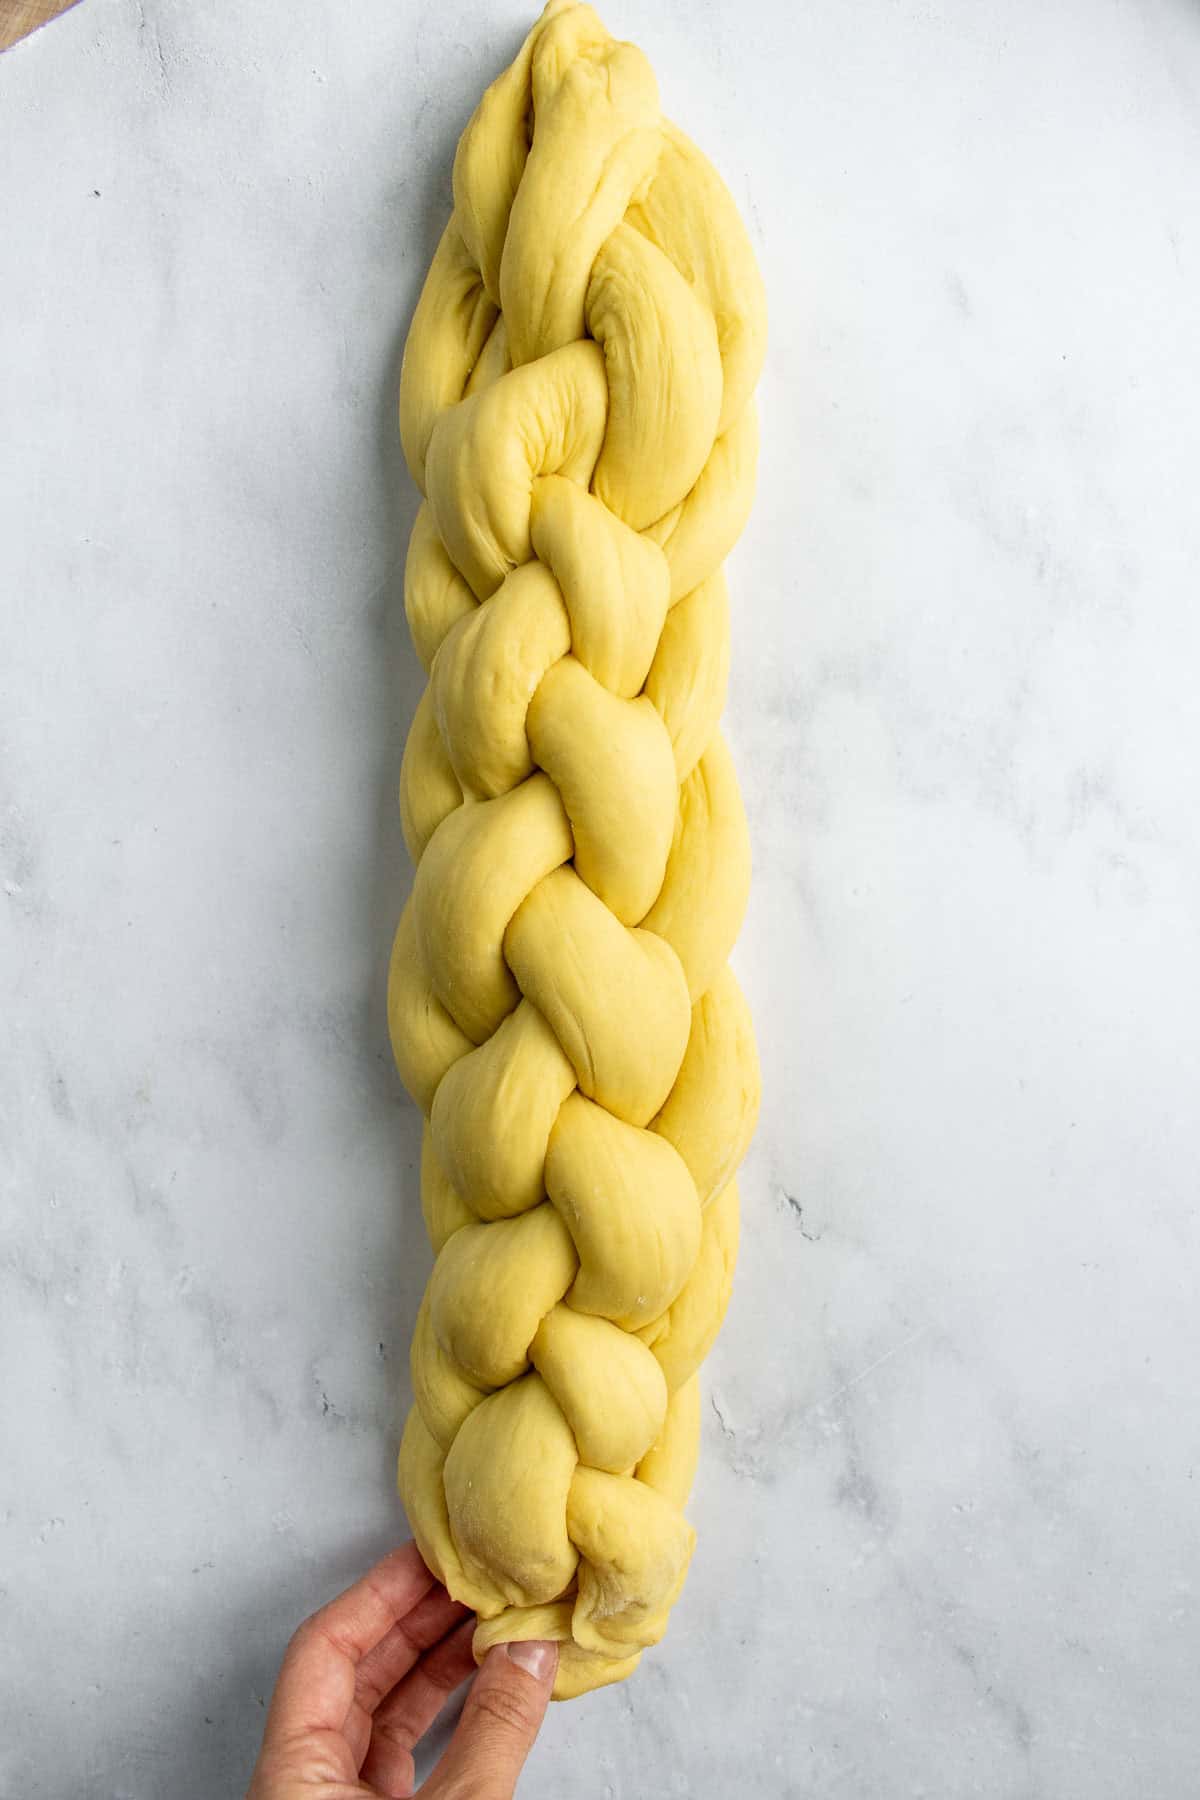
First, braid it snug enough that you don't see big gaps between strands, but leave it loose enough to expand as it proofs and bakes, or it'll tear.
Then tuck both ends underneath the loaf so nothing unravels in the oven.
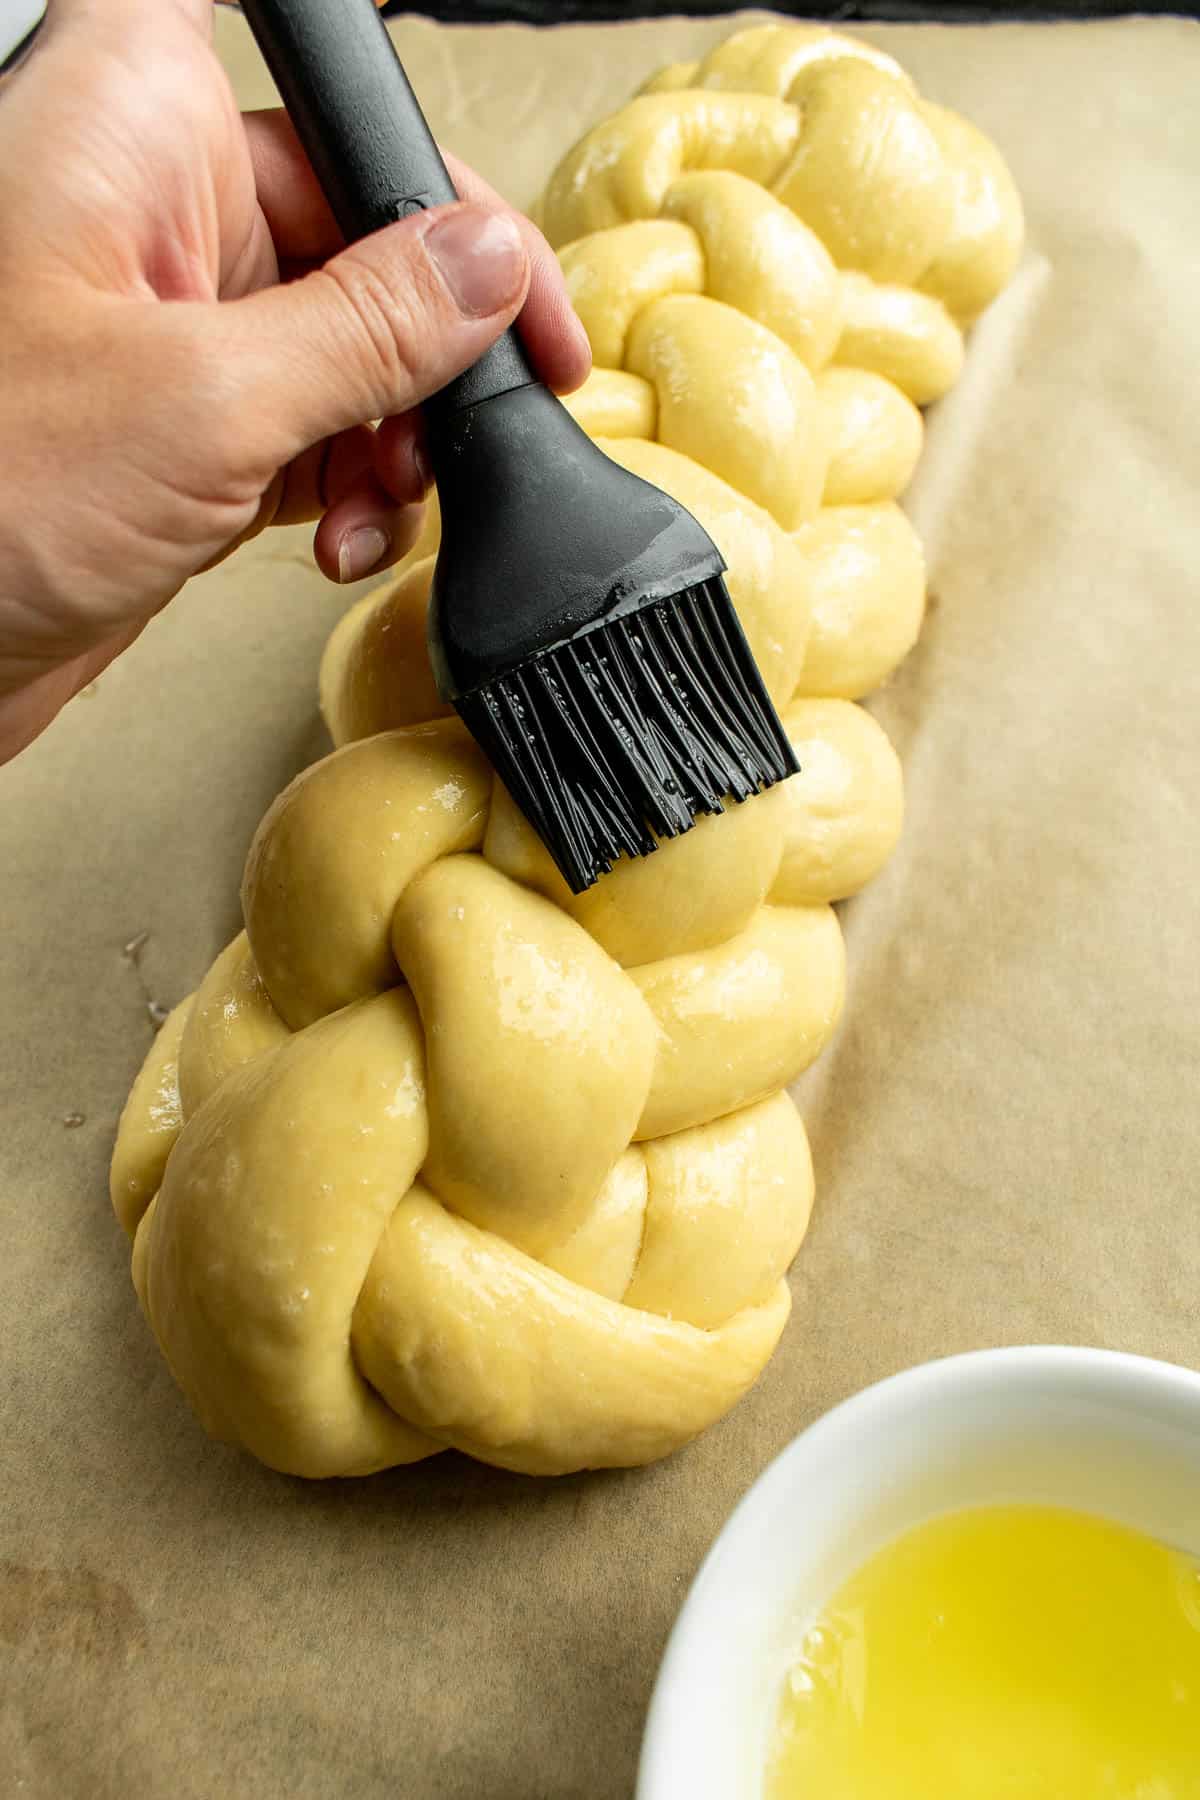
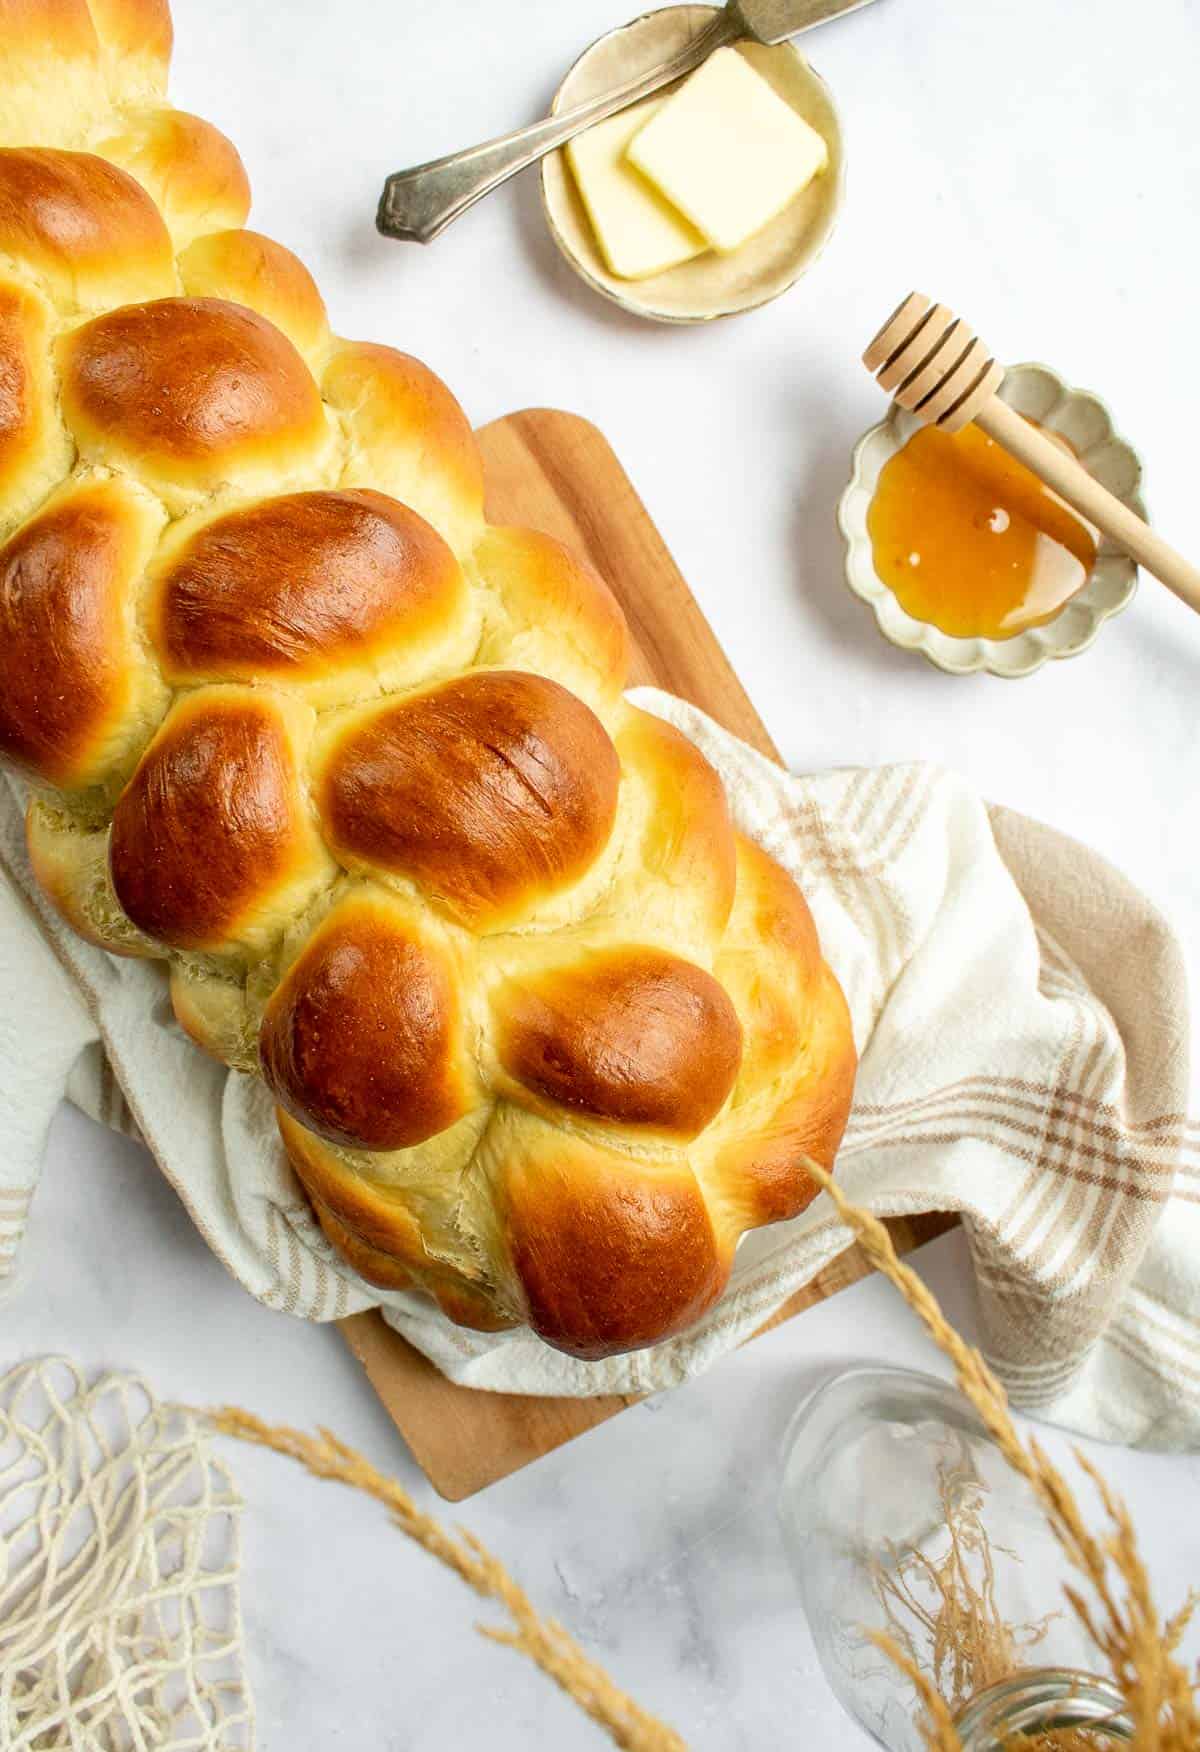
Finally, don't skip the egg wash. It pulls double duty, creating that deep golden shine and acting like glue to hold the whole braid together while it bakes.
Let's Make Challah Bread Together!
For the full step-by-step directions, scroll down to the recipe card.

My Troubleshooting Tips for Braided Challah
- Don't rush the second rise, which can result in dense, heavy challah. Unlike the first rise, your braided loaf won't double in size again, so instead of eyeballing volume, I recommend using the poke test. Press a shallow indentation into the dough. If it slowly springs back over 2 to 3 seconds and only fills halfway, it's ready for the oven. If it springs back immediately, give it more time.
- Expect tacky dough and don't over-flour it. I created this dough with a high hydration to keep it soft and moist once baked, so I usually knead mine in a stand mixer, so I'm not tempted to add extra flour just to make it easier to handle. If you're kneading by hand and the dough keeps sticking to your fingers, wet your hands with cold water instead of reaching for more flour. I know it sounds backwards, but wet hands actually release from dough more easily than dry, floured ones.
- Let it cool before slicing. I know it's tempting to cut into a warm, steamy loaf, but the center is still setting during that first hour. If you slice too soon, you'll end up with a gummy middle, even if it's fully baked.
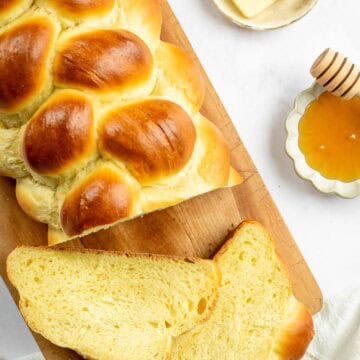
6 Strand Braided Challah Bread
developed & tested by:

Equipment
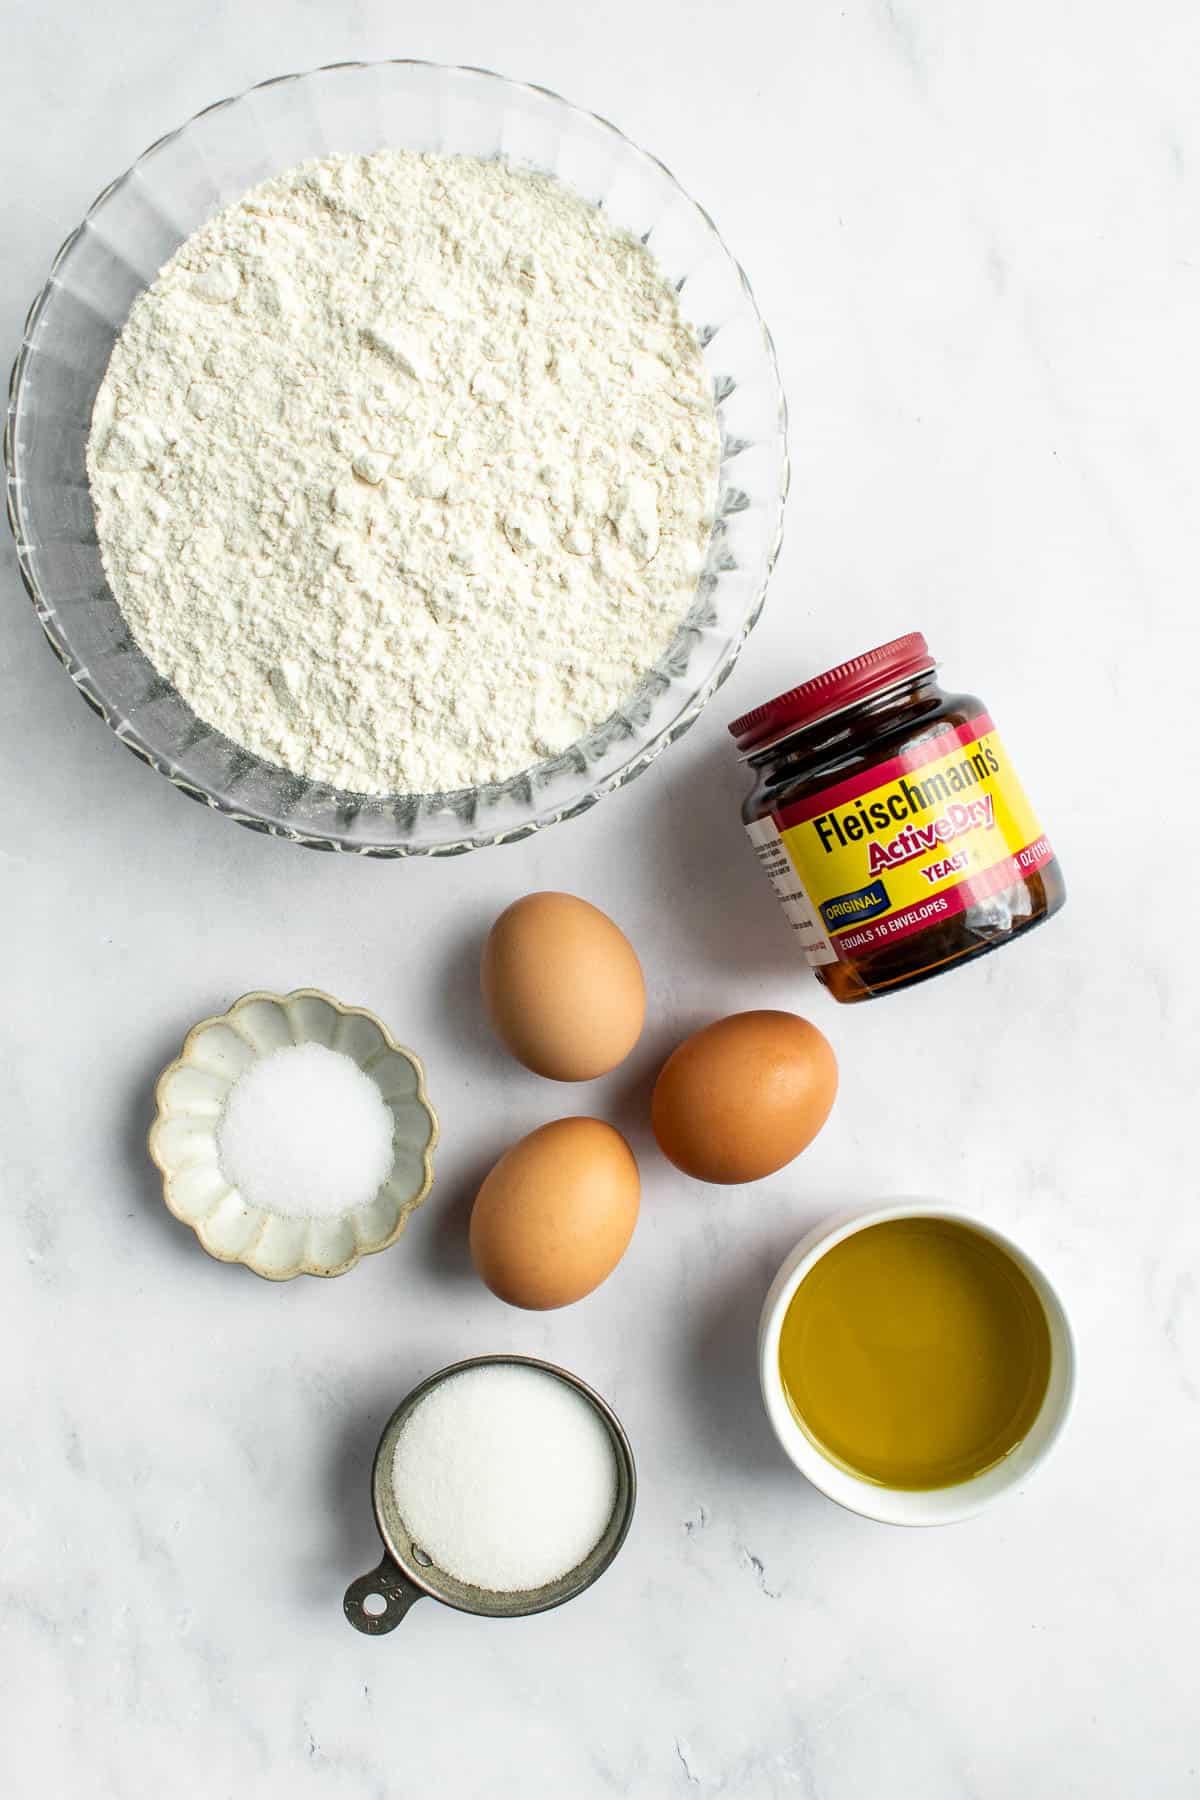
Ingredients
- 1 cup water, warmed in the microwave for 1 minute, ideally between 105-115°F (41-46°C)
- 2¼ teaspoons active dry yeast (one packet)
- ¼ cup granulated sugar
- 3 Tablespoons olive oil
- 3 large eggs, divided
- 5 cups all purpose flour, plus extra for kneading
- 1½ teaspoons salt (use table salt or fine sea salt)
Instructions
Mix the Dough & Let it Rise
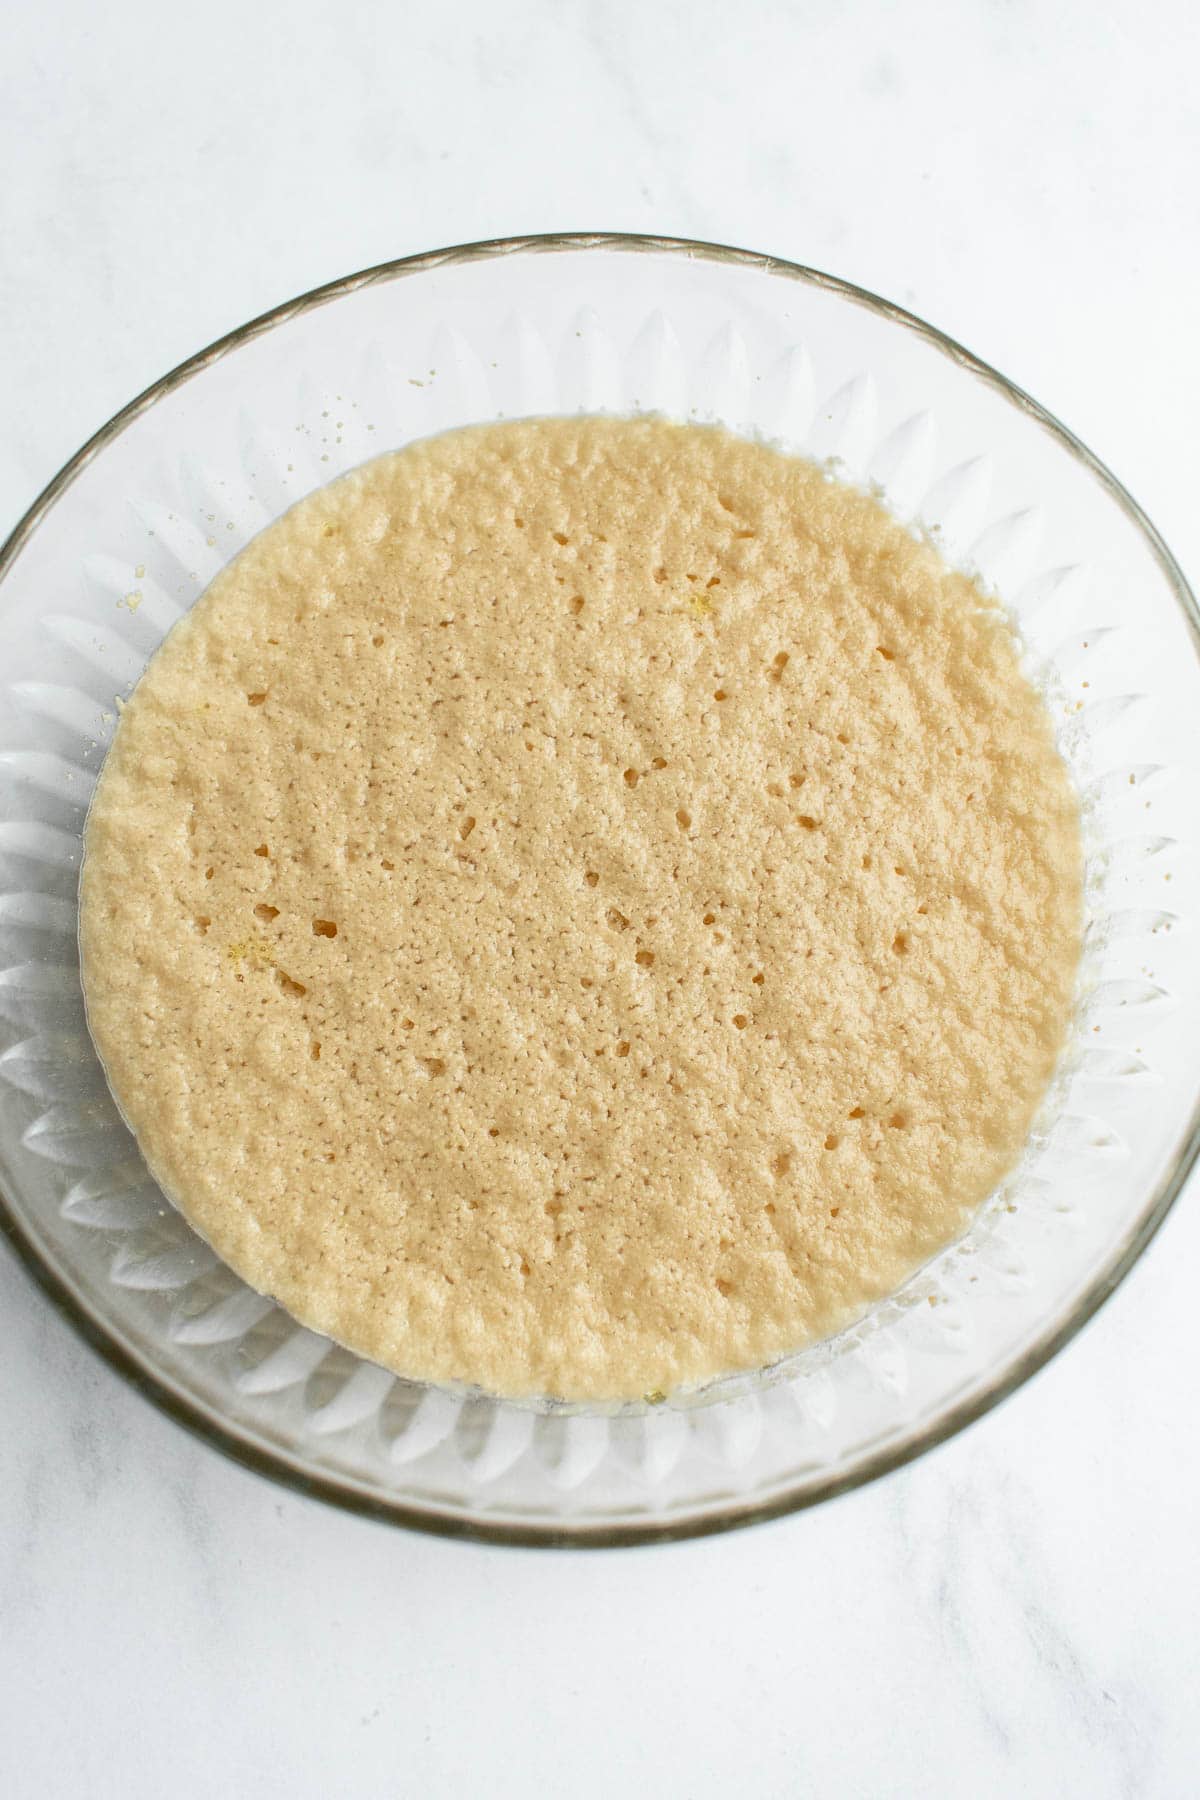
- In a large mixing bowl, mix the warm water, active dry yeast and sugar. Set aside for 10-15 minutes, until it becomes frothy on top.
- Add the olive oil, two eggs, and one egg yolk to the yeast mixture, and whisk to combine. Save the egg white from the third egg in a small bowl & set aside in the fridge to use in the egg wash just before the bread is baked.
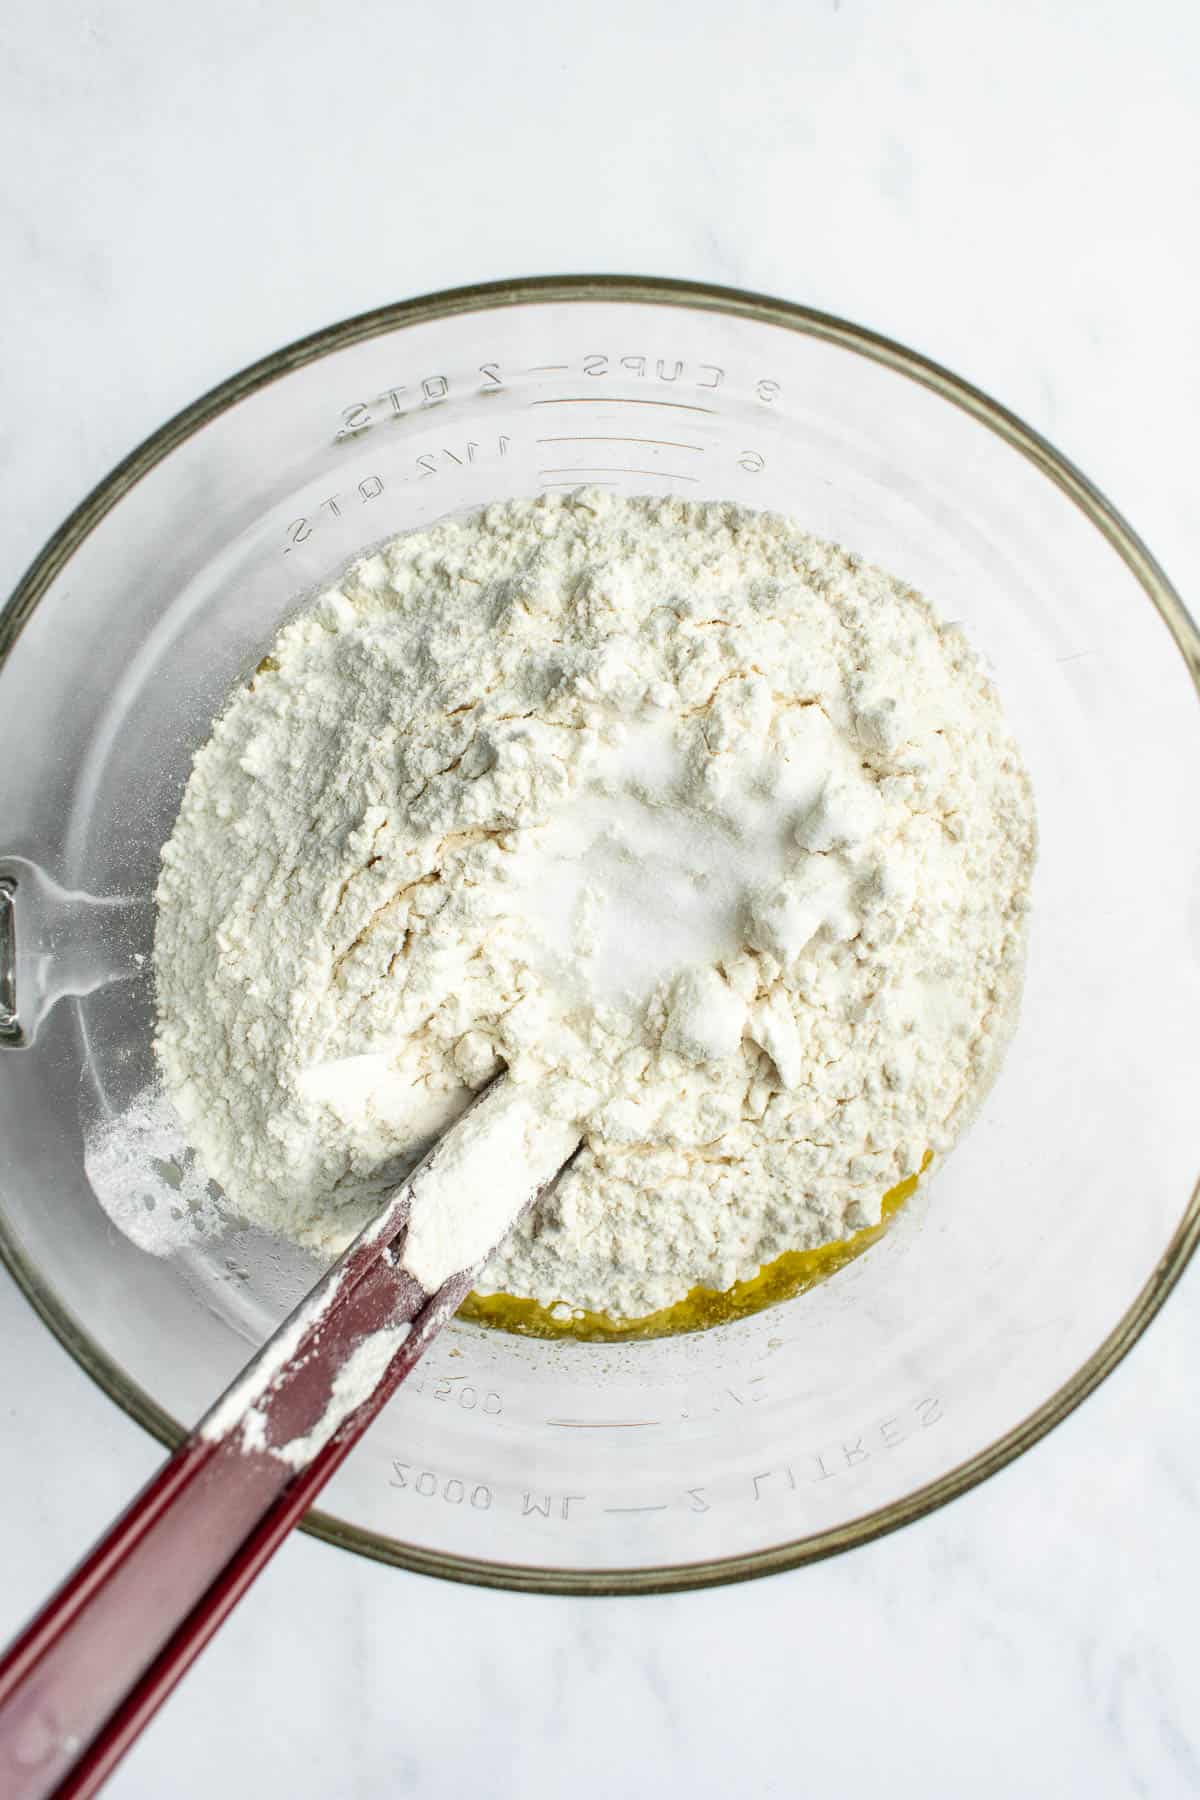
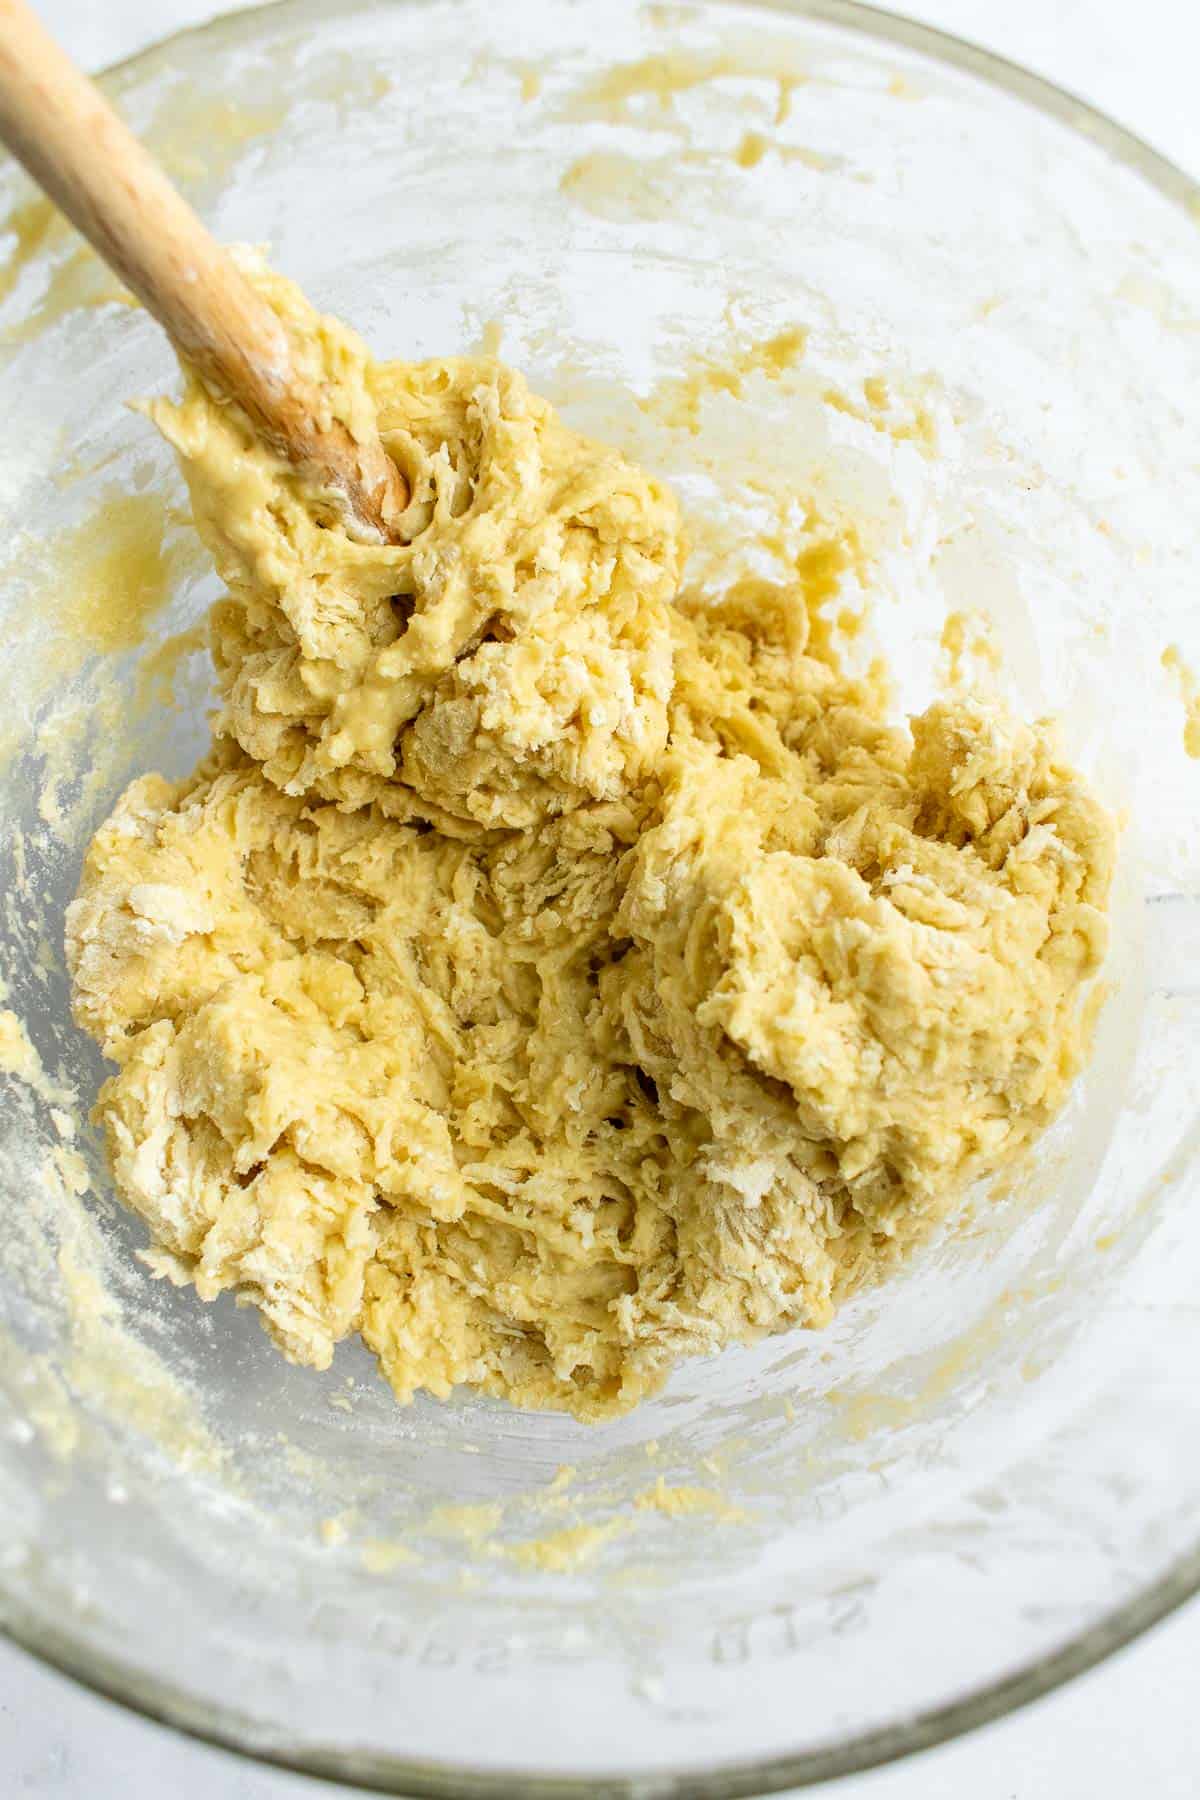
- Add the flour and salt to the wet ingredients, then mix with a large spoon until it forms a shaggy dough.
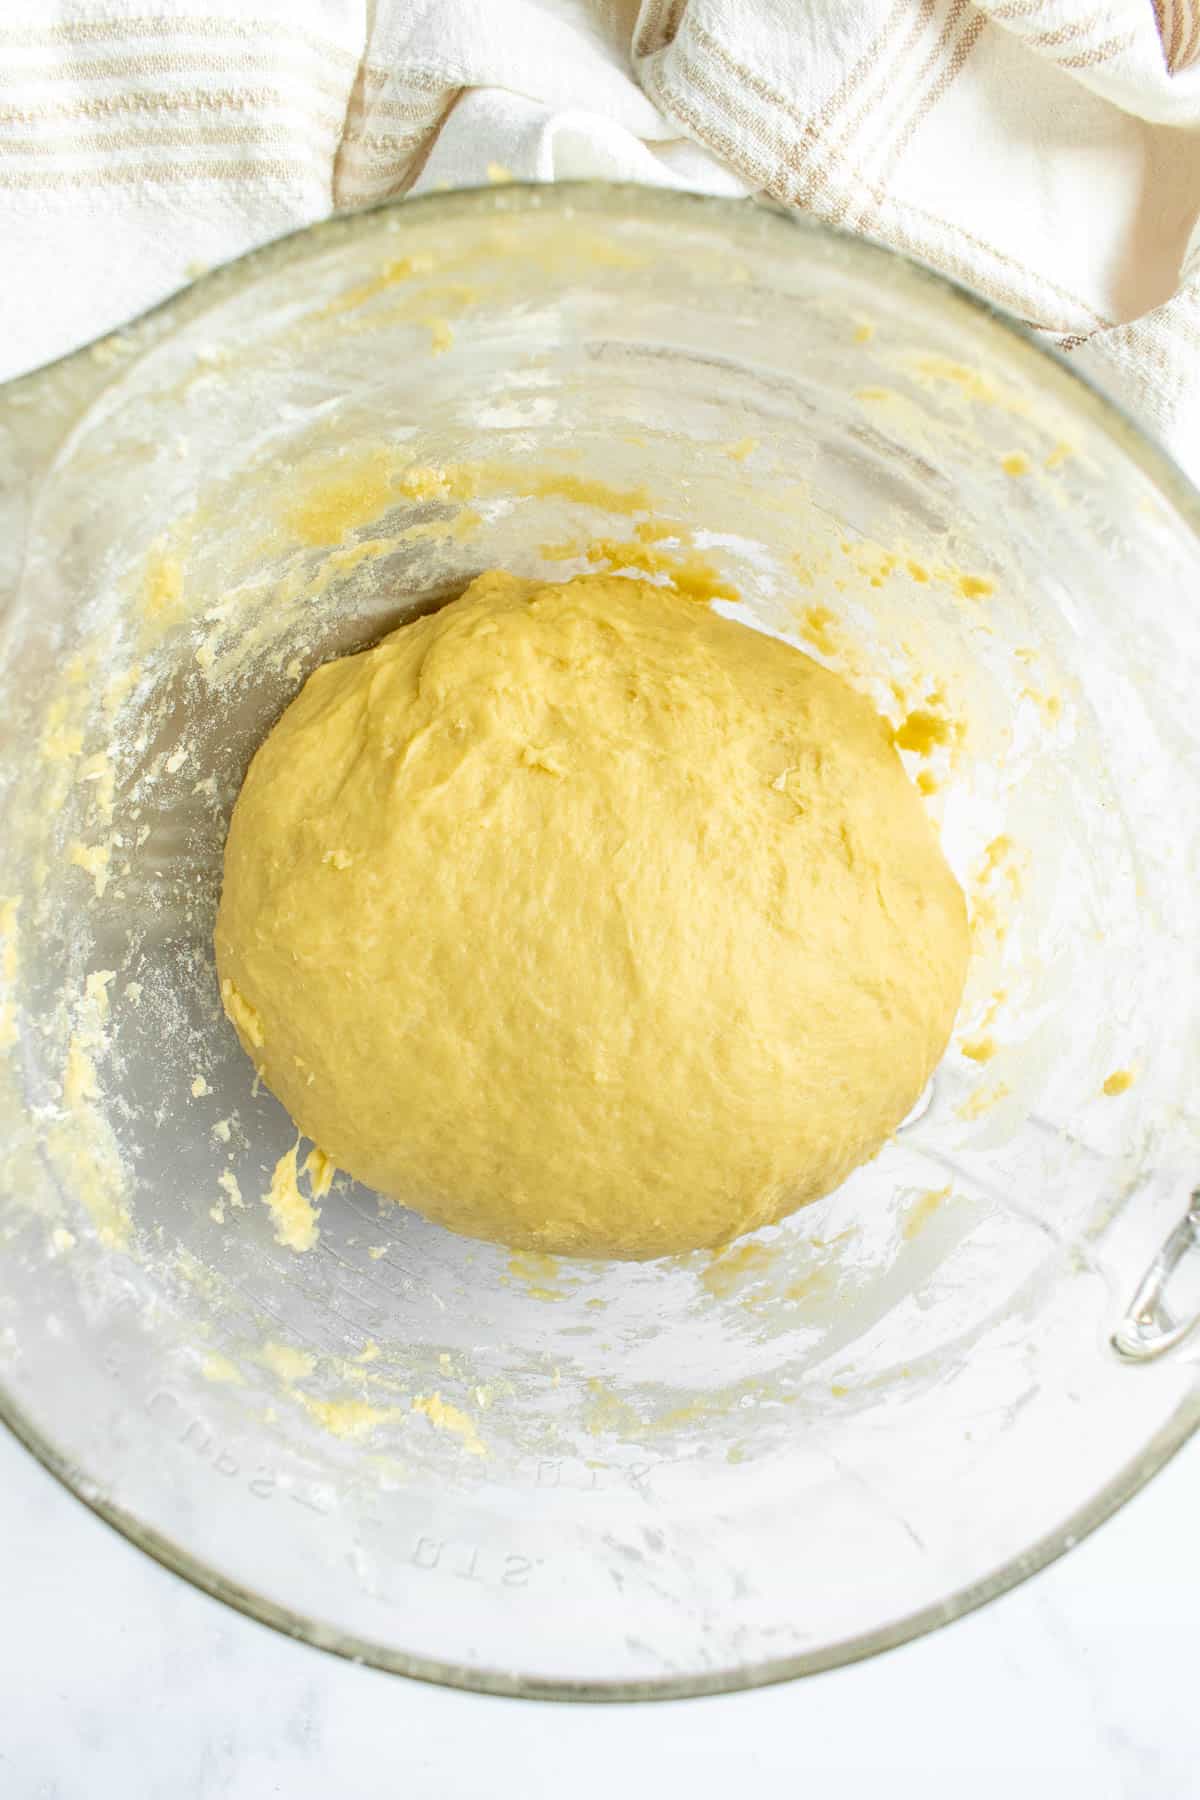
- On a lightly floured surface, knead the dough by hand for about 5-6 minutes, until it's smooth and elastic. Shape the dough into a ball.
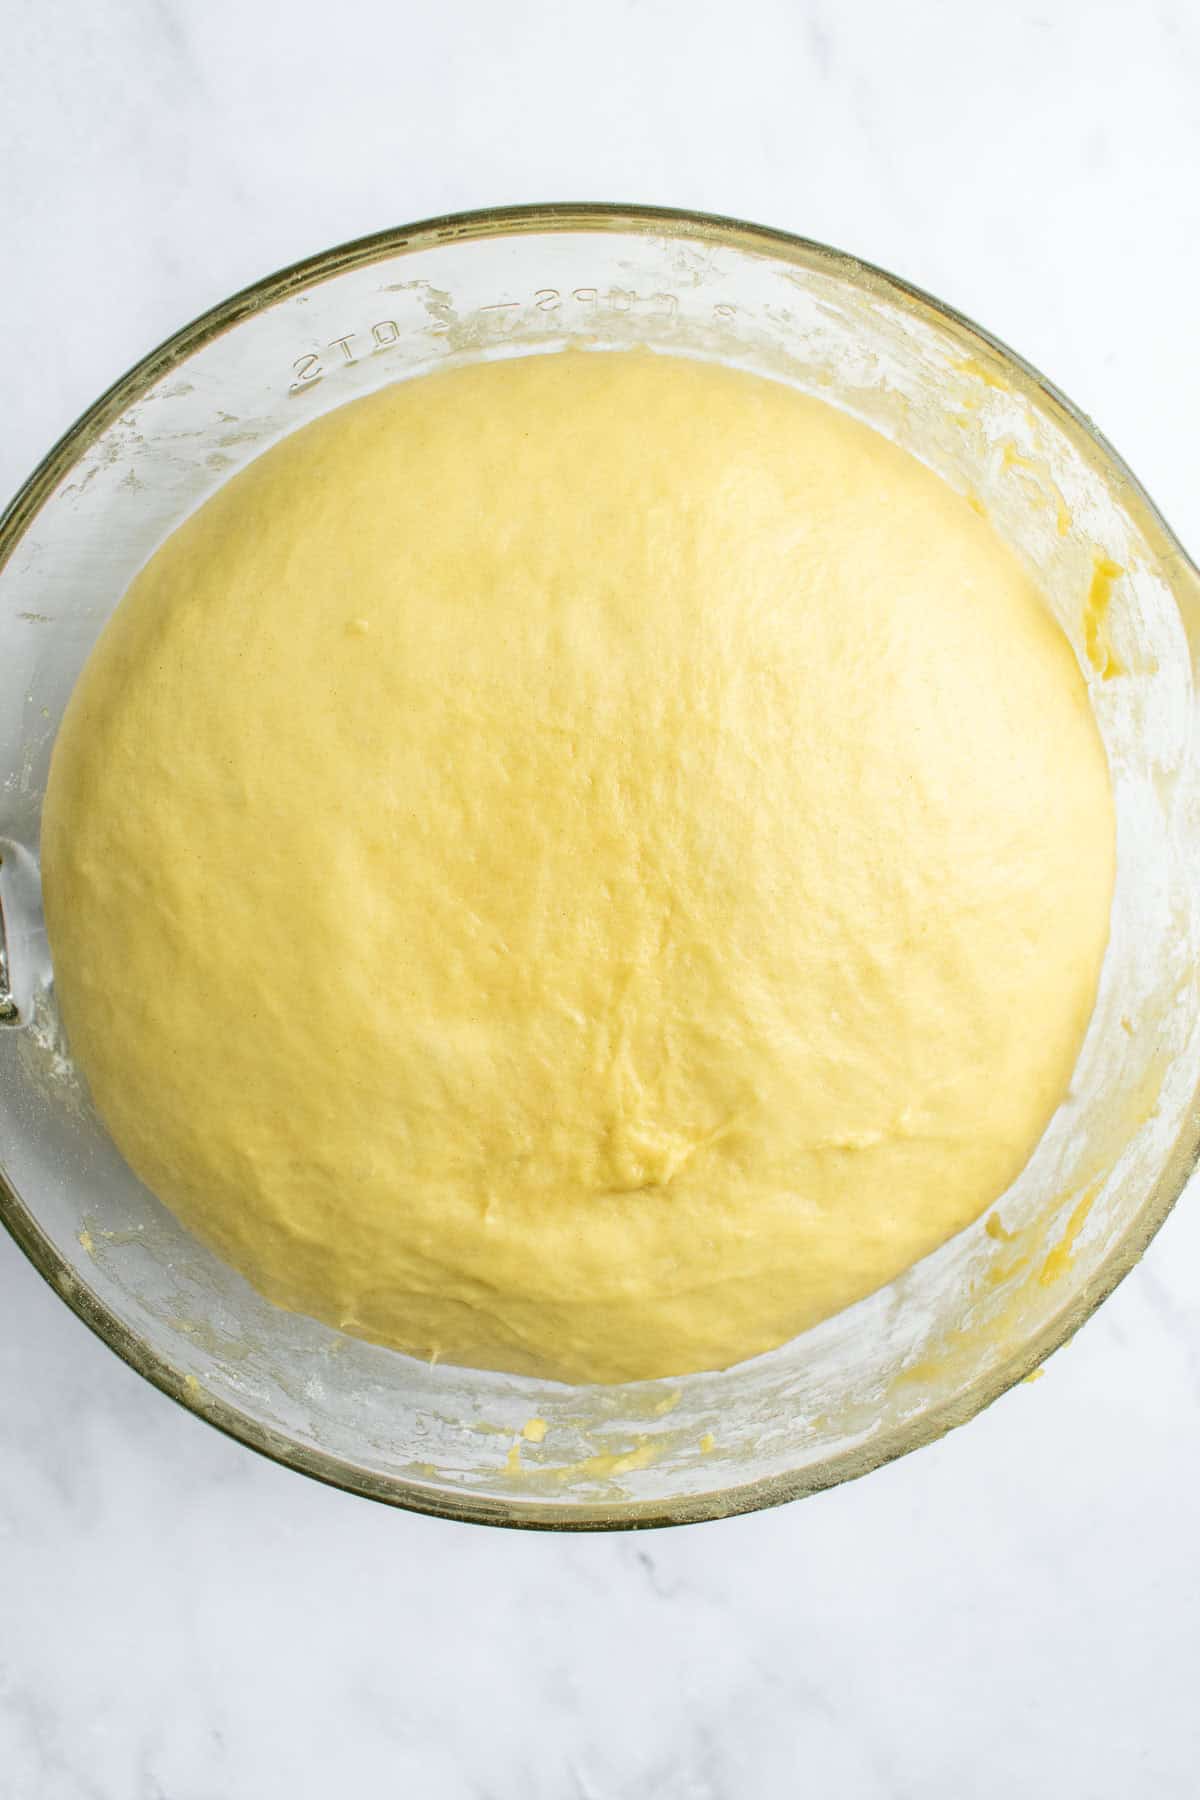
- Place the dough back into the same mixing bowl and cover with a damp kitchen towel or dinner plate. Let it rest and rise for about 2 hours, or until it doubles in size.
- Line a baking sheet with parchment paper. Set aside.
Braid the Dough
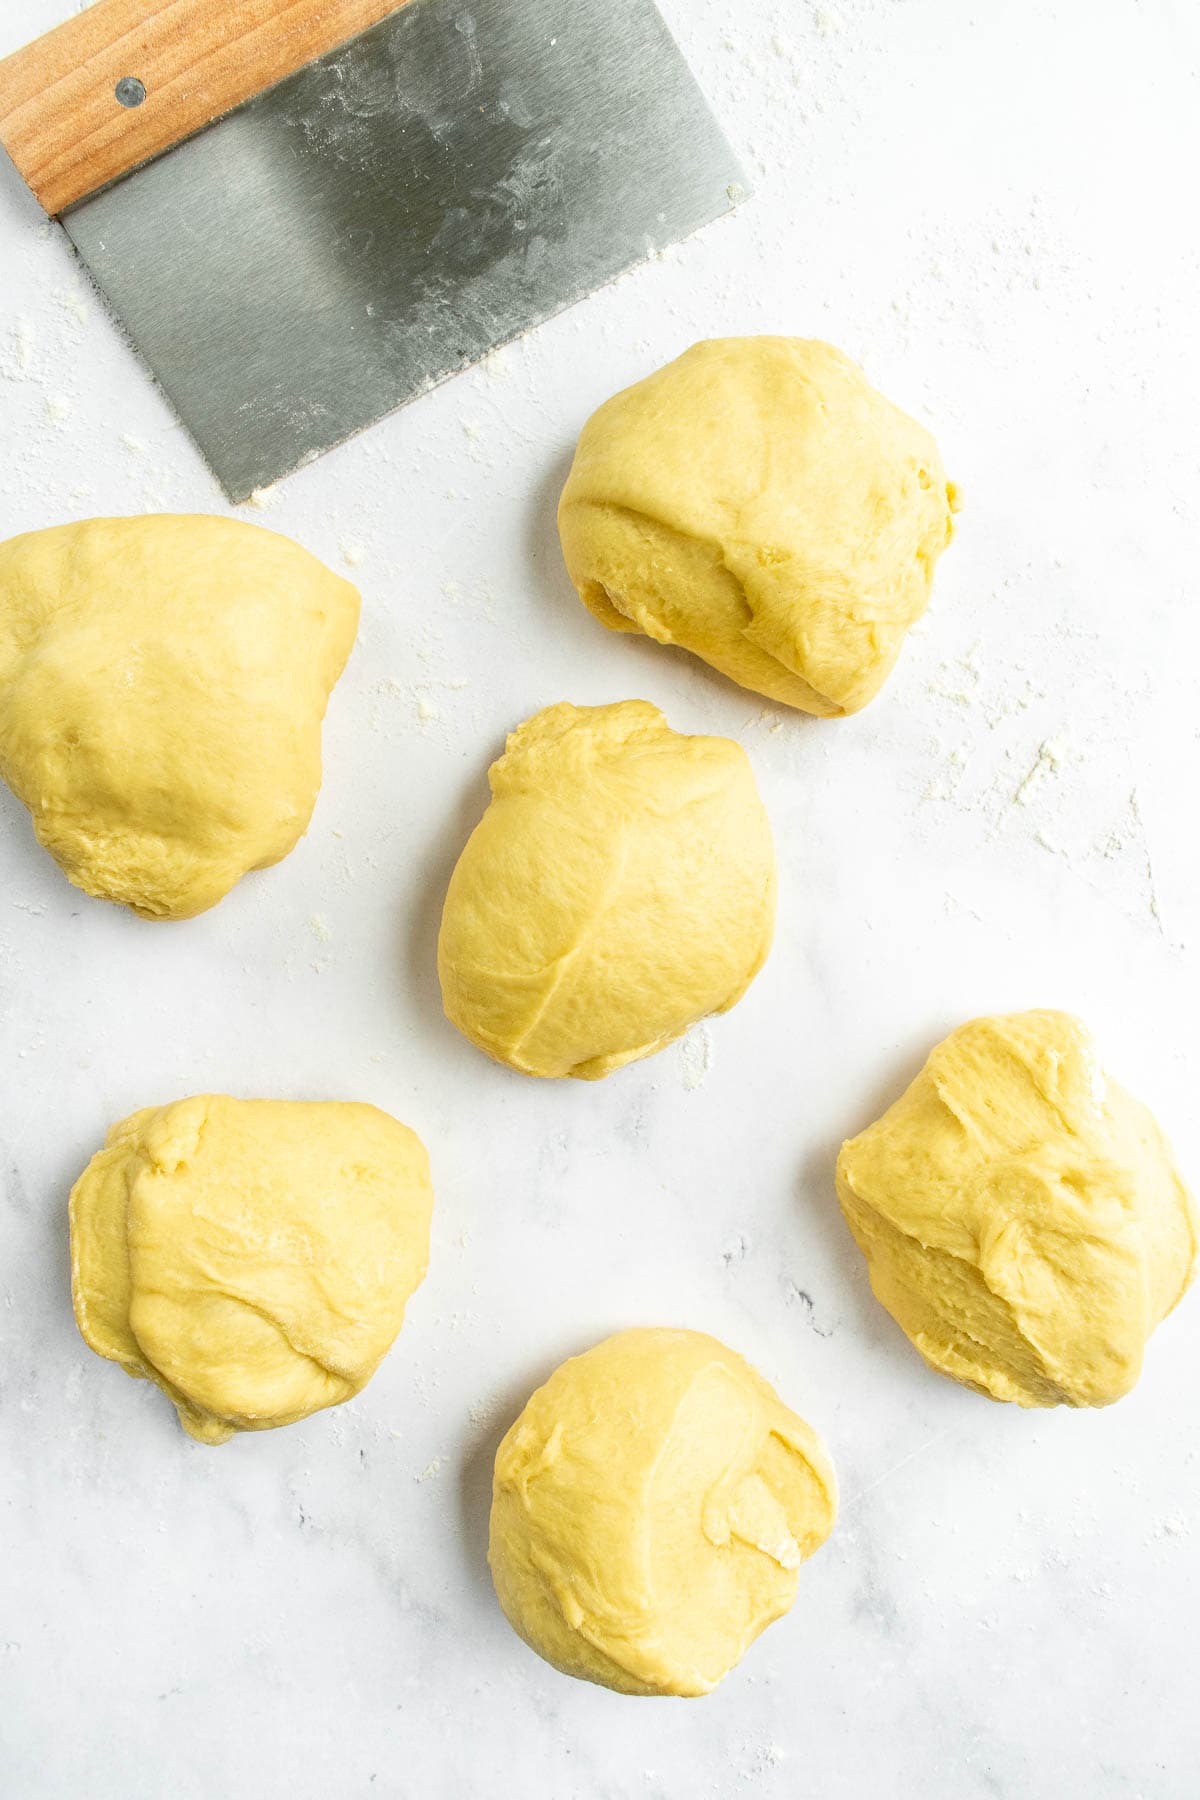
- Once the dough has doubled in size, lightly dust a clean work surface with flour. Divide the dough into six even balls, and keep them covered with a damp kitchen towel so they don't dry out.
- Roll each ball, one at a time, into a 14-inch log, with even pressure in both hands. (You can make your strands 12-inches for a taller, shorter loaf, or 16-inches for a shorter, longer loaf. Just make sure all six strands are the same length.)
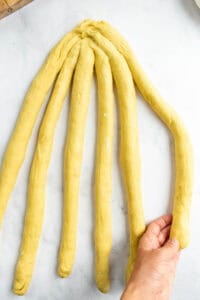
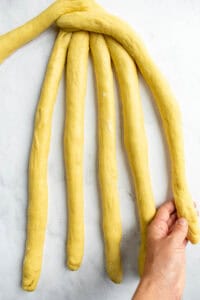
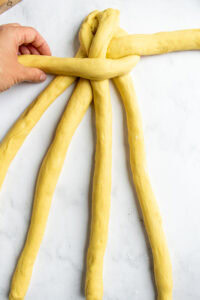
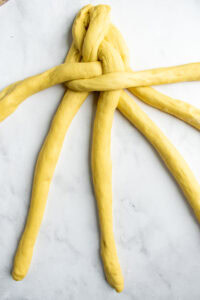
- Start the Braid: Press the tops of the strands together so they don't unravel. First pick up the far-right strand.

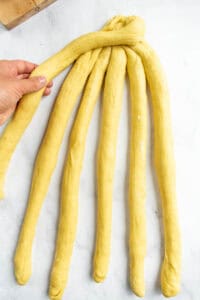
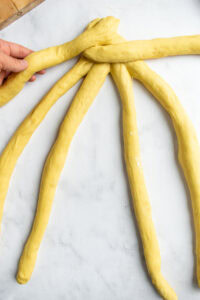
- Cross the far-right strand over all five strands to the far left.
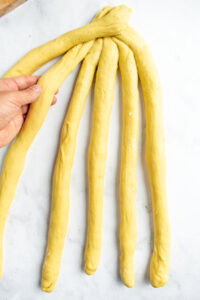
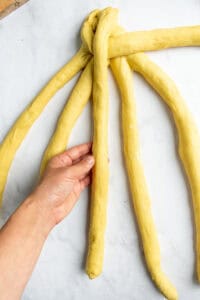
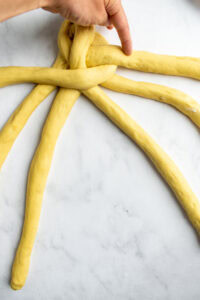
- Then pick up the strand immediately to the right of it (what was originally the far-left strand)
- And cross that strand all the way over four strands to the far right.
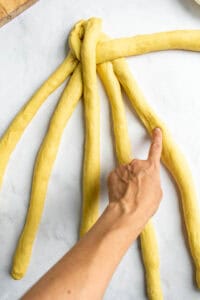
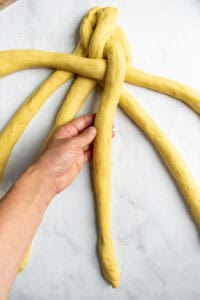
- Continue the Braid: Pick up the far-left strand.
- And cross it over two strands to the right, to the center.
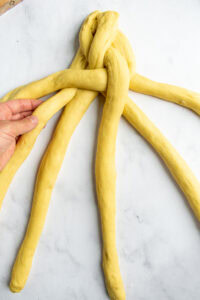
- Pick up the strand two-to-the-right (the strand just to the left of the far-right strand).
- And cross it all the way over four strands to the far left.
- Pick up the far-right strand.
- And cross it over two strands to the left, to the middle.
- Pick up the strand two-to-the-left (the strand just to the right of the far-left strand).
- And cross it all the way over four strands to the far right.
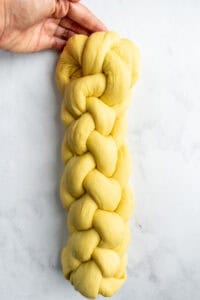
- Repeat the braiding pattern from the beginning until you reach the end of the dough strands.
- Finish the Braid: Pinch all six strands together at the bottom. Then gently tuck the top and bottom under the dough, again to help prevent it from unraveling as it bakes.
- Carefully transfer the braided loaf to the prepared baking sheet. Cover with a kitchen towel and allow the loaf to proof for 30 minutes to 1 hour, until a shallow indent made by your finger slowly fills halfway back to its original shape after 2 to 3 seconds.
- Preheat the oven to 350°F.
- In a small bowl, whisk the reserved egg white with one teaspoon of water. Brush over the top and sides of your bread.
- Bake for 30 to 35 minutes, until the bread is golden brown. Transfer to a cooling rack to cool for at least 1 hour before slicing.
Notes
- Give your dough a warm, draft-free spot to rise. Enriched doughs like this one, loaded with eggs and olive oil, take longer to rise than a lean bread dough. I proof mine in the oven with just the light on, which keeps the yeast happy and active in its ideal temperature between 75-78°F (or 24-25°C).
- Aim for six even strands. A lopsided loaf usually comes down to uneven dough portions. You can weigh each piece for precision, but I typically eyeball it and it turns out just fine. And use even pressure in your hands when rolling each dough ball into a long strand.
Nutrition
This website uses affiliate links which may earn commission for purchases made at no additional cost to you.

I'm eggcited to hear from you :)