

My Dutch oven Thanksgiving turkey bread is made with dry instant yeast (no sourdough needed) and leans savory with cumin, garlic, and thyme in the dough. It's a fun edible centerpiece that feeds a crowd at the holidays and can easily be made ahead of time.
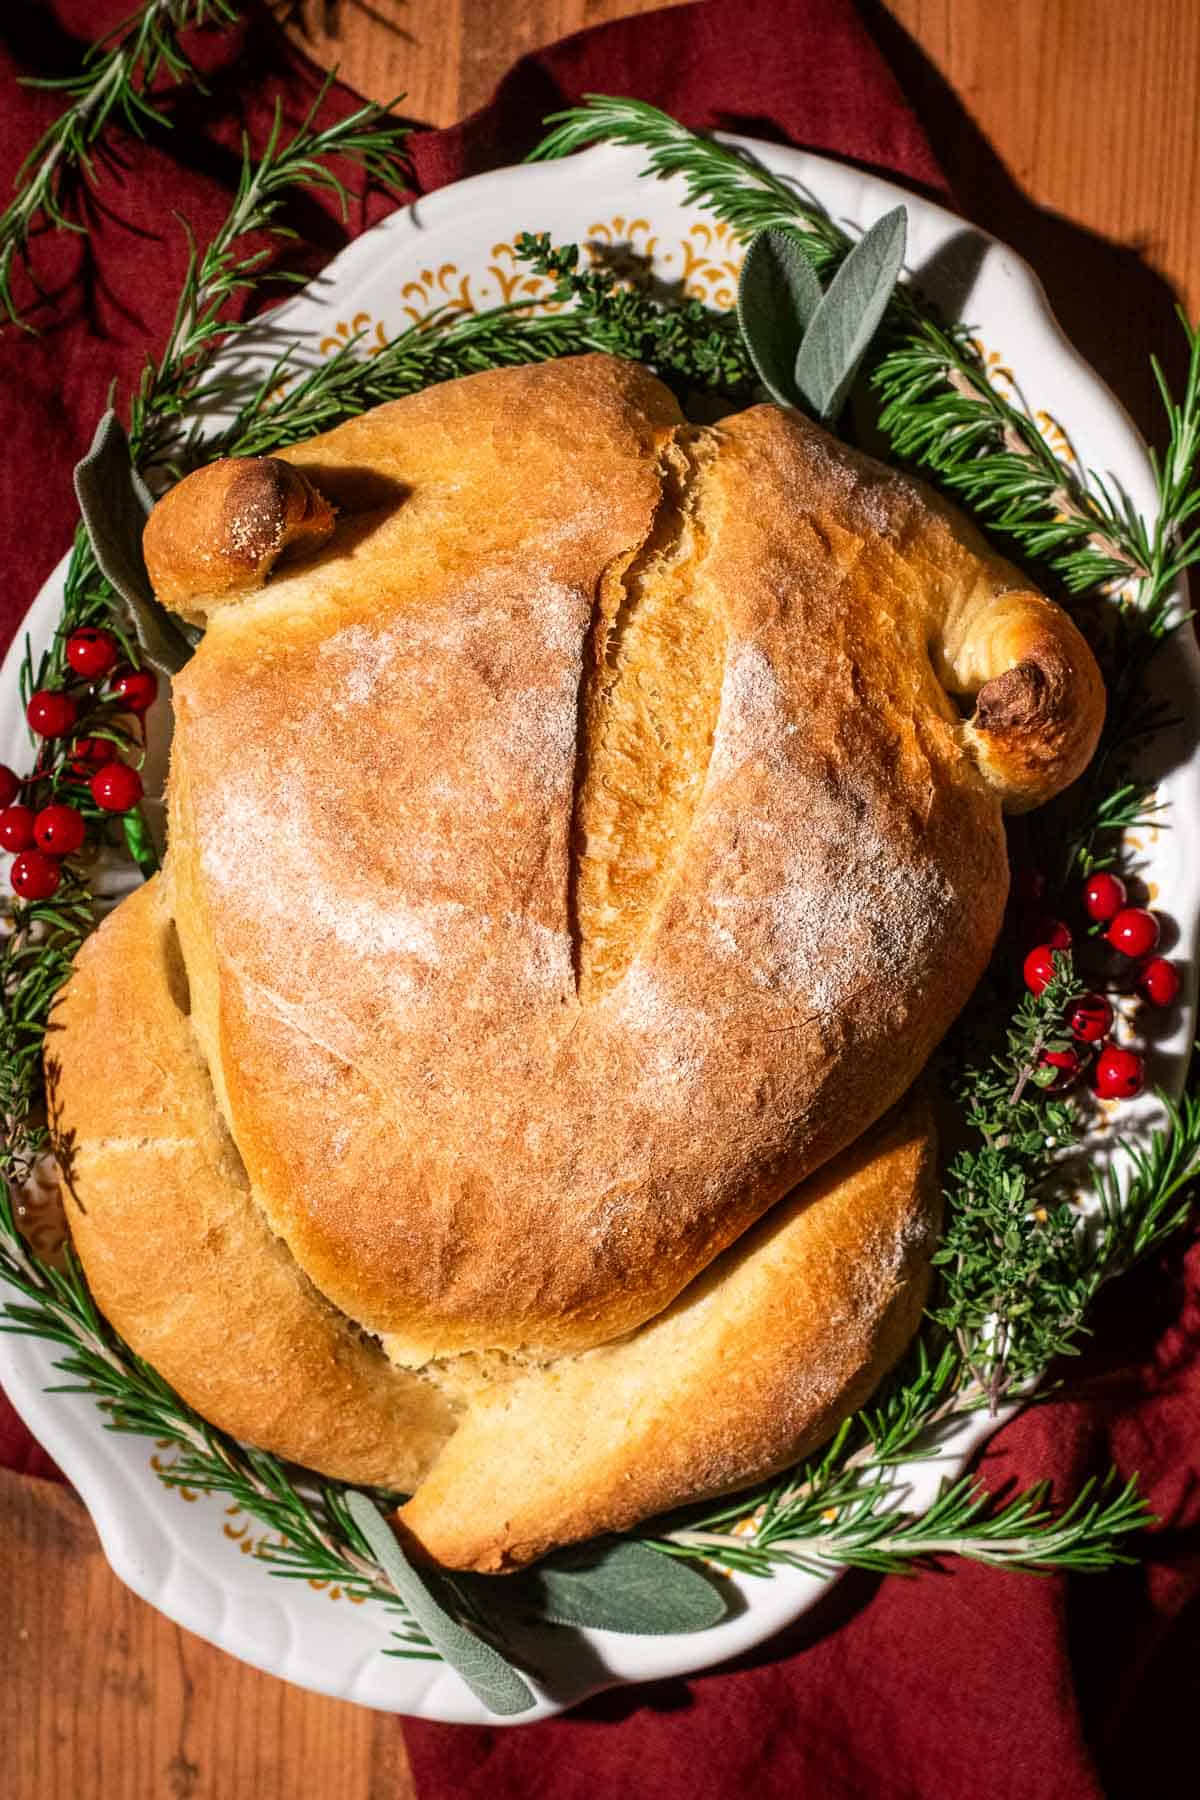
Thanksgiving Turkey Bread as an Edible Centerpiece
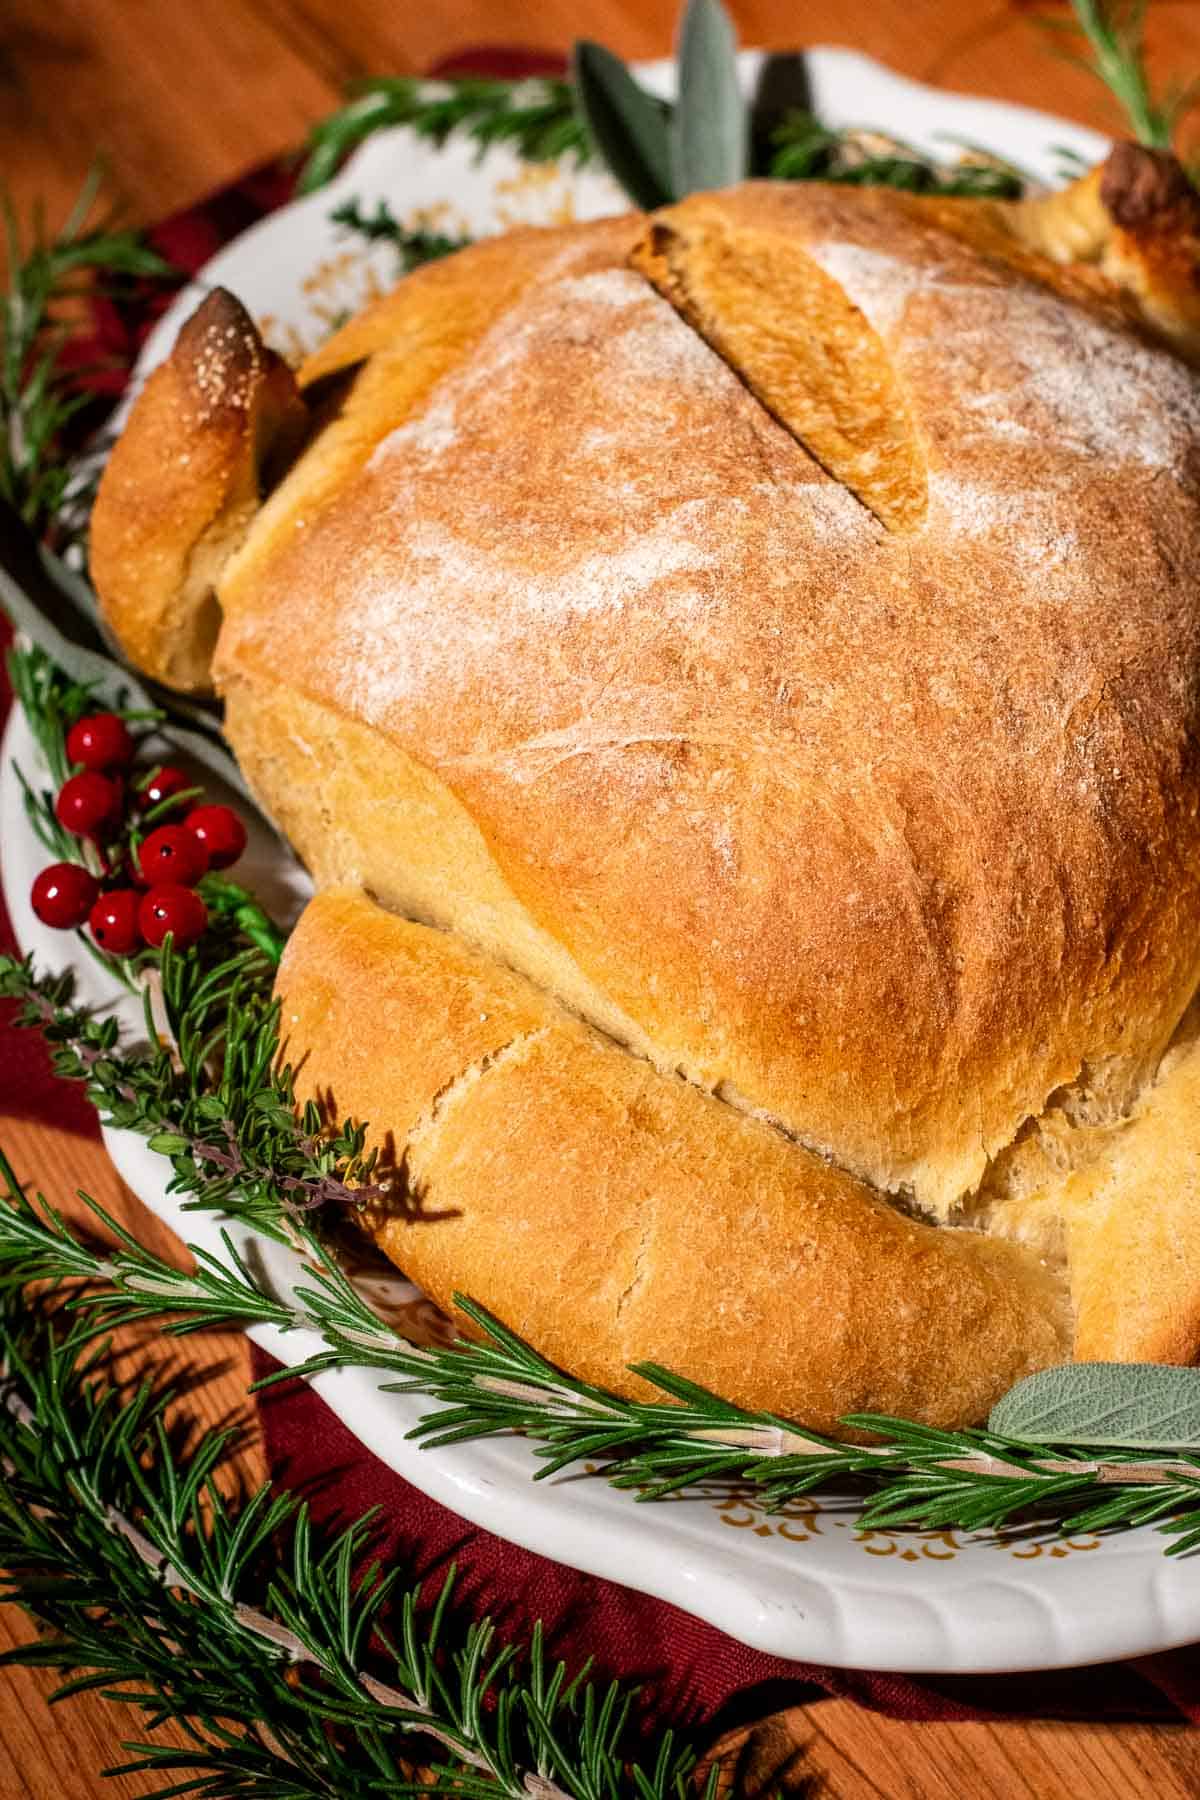
Here's my holiday hot take: Thanksgiving tables don't need another basket of bread rolls. Which is exactly why I made this fun holiday turkey bread! It's a fun centerpiece that doubles as a side dish for a crowd at Thanksgiving or Christmas. Garlic powder, cumin, and thyme lean it savory, though you can leave them out if you prefer. And for that roasted-turkey shine, you can brush it with melted butter right before serving.
My first loaf in testing was made with all-purpose flour at 72% hydration, and it was really sticky and it lost its definition in the oven. Dropping the hydration to 67% and swapping in bread flour makes the dough feel a little stiffer (especially in the early stages of mixing & kneading), but it's much easier to shape and holds its form better as it bakes.
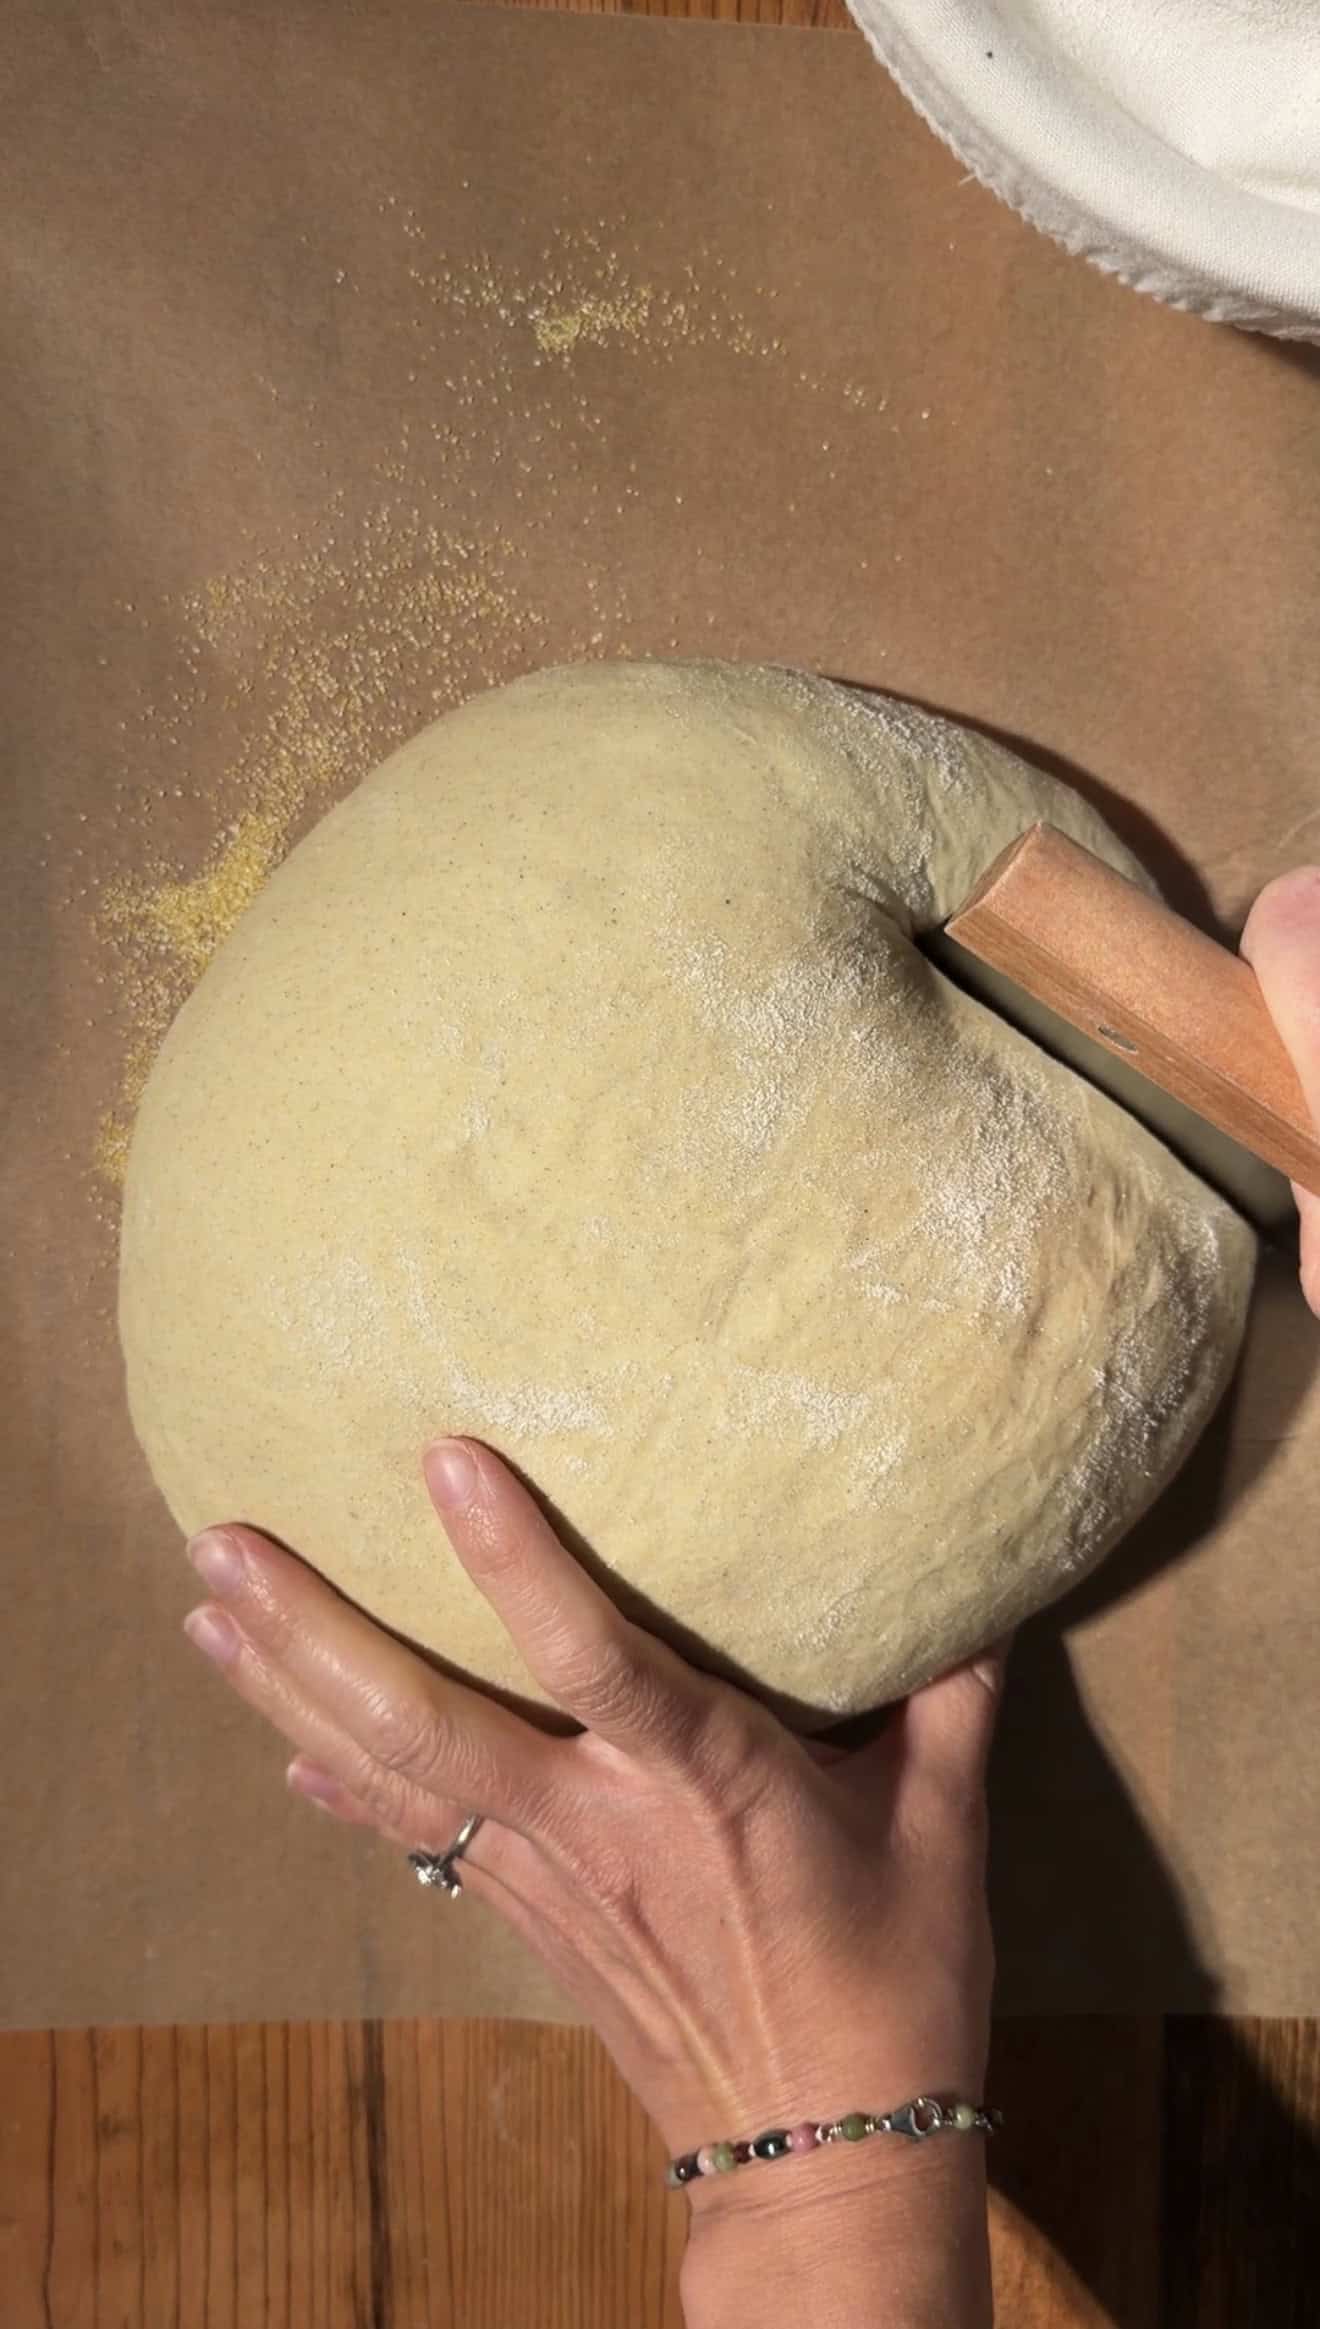
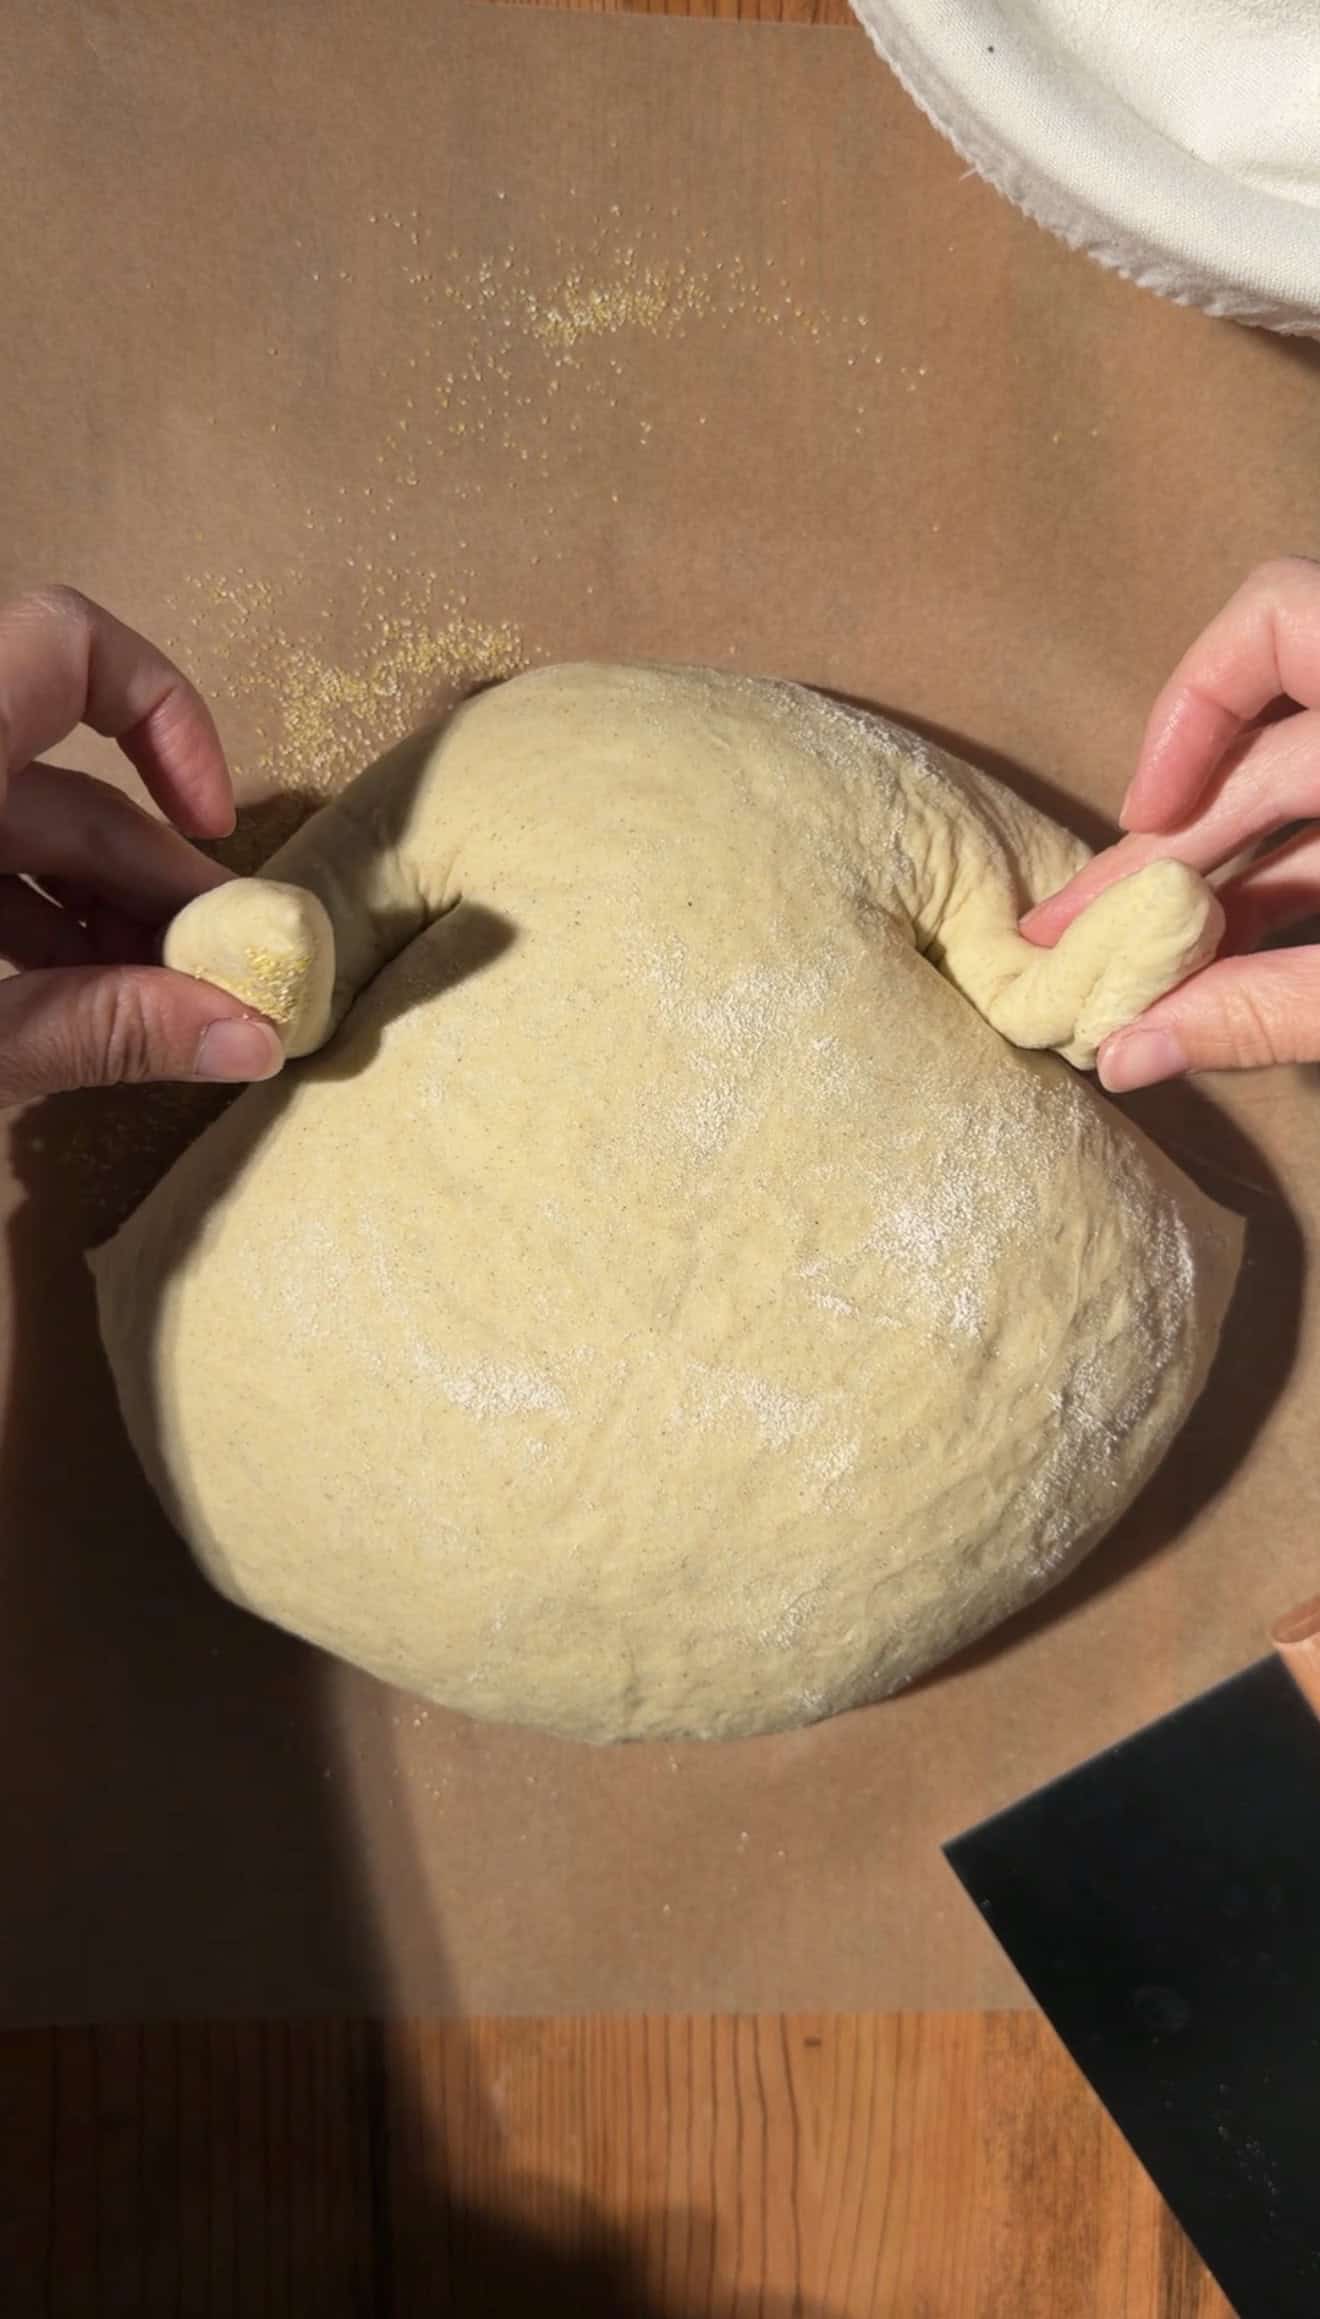
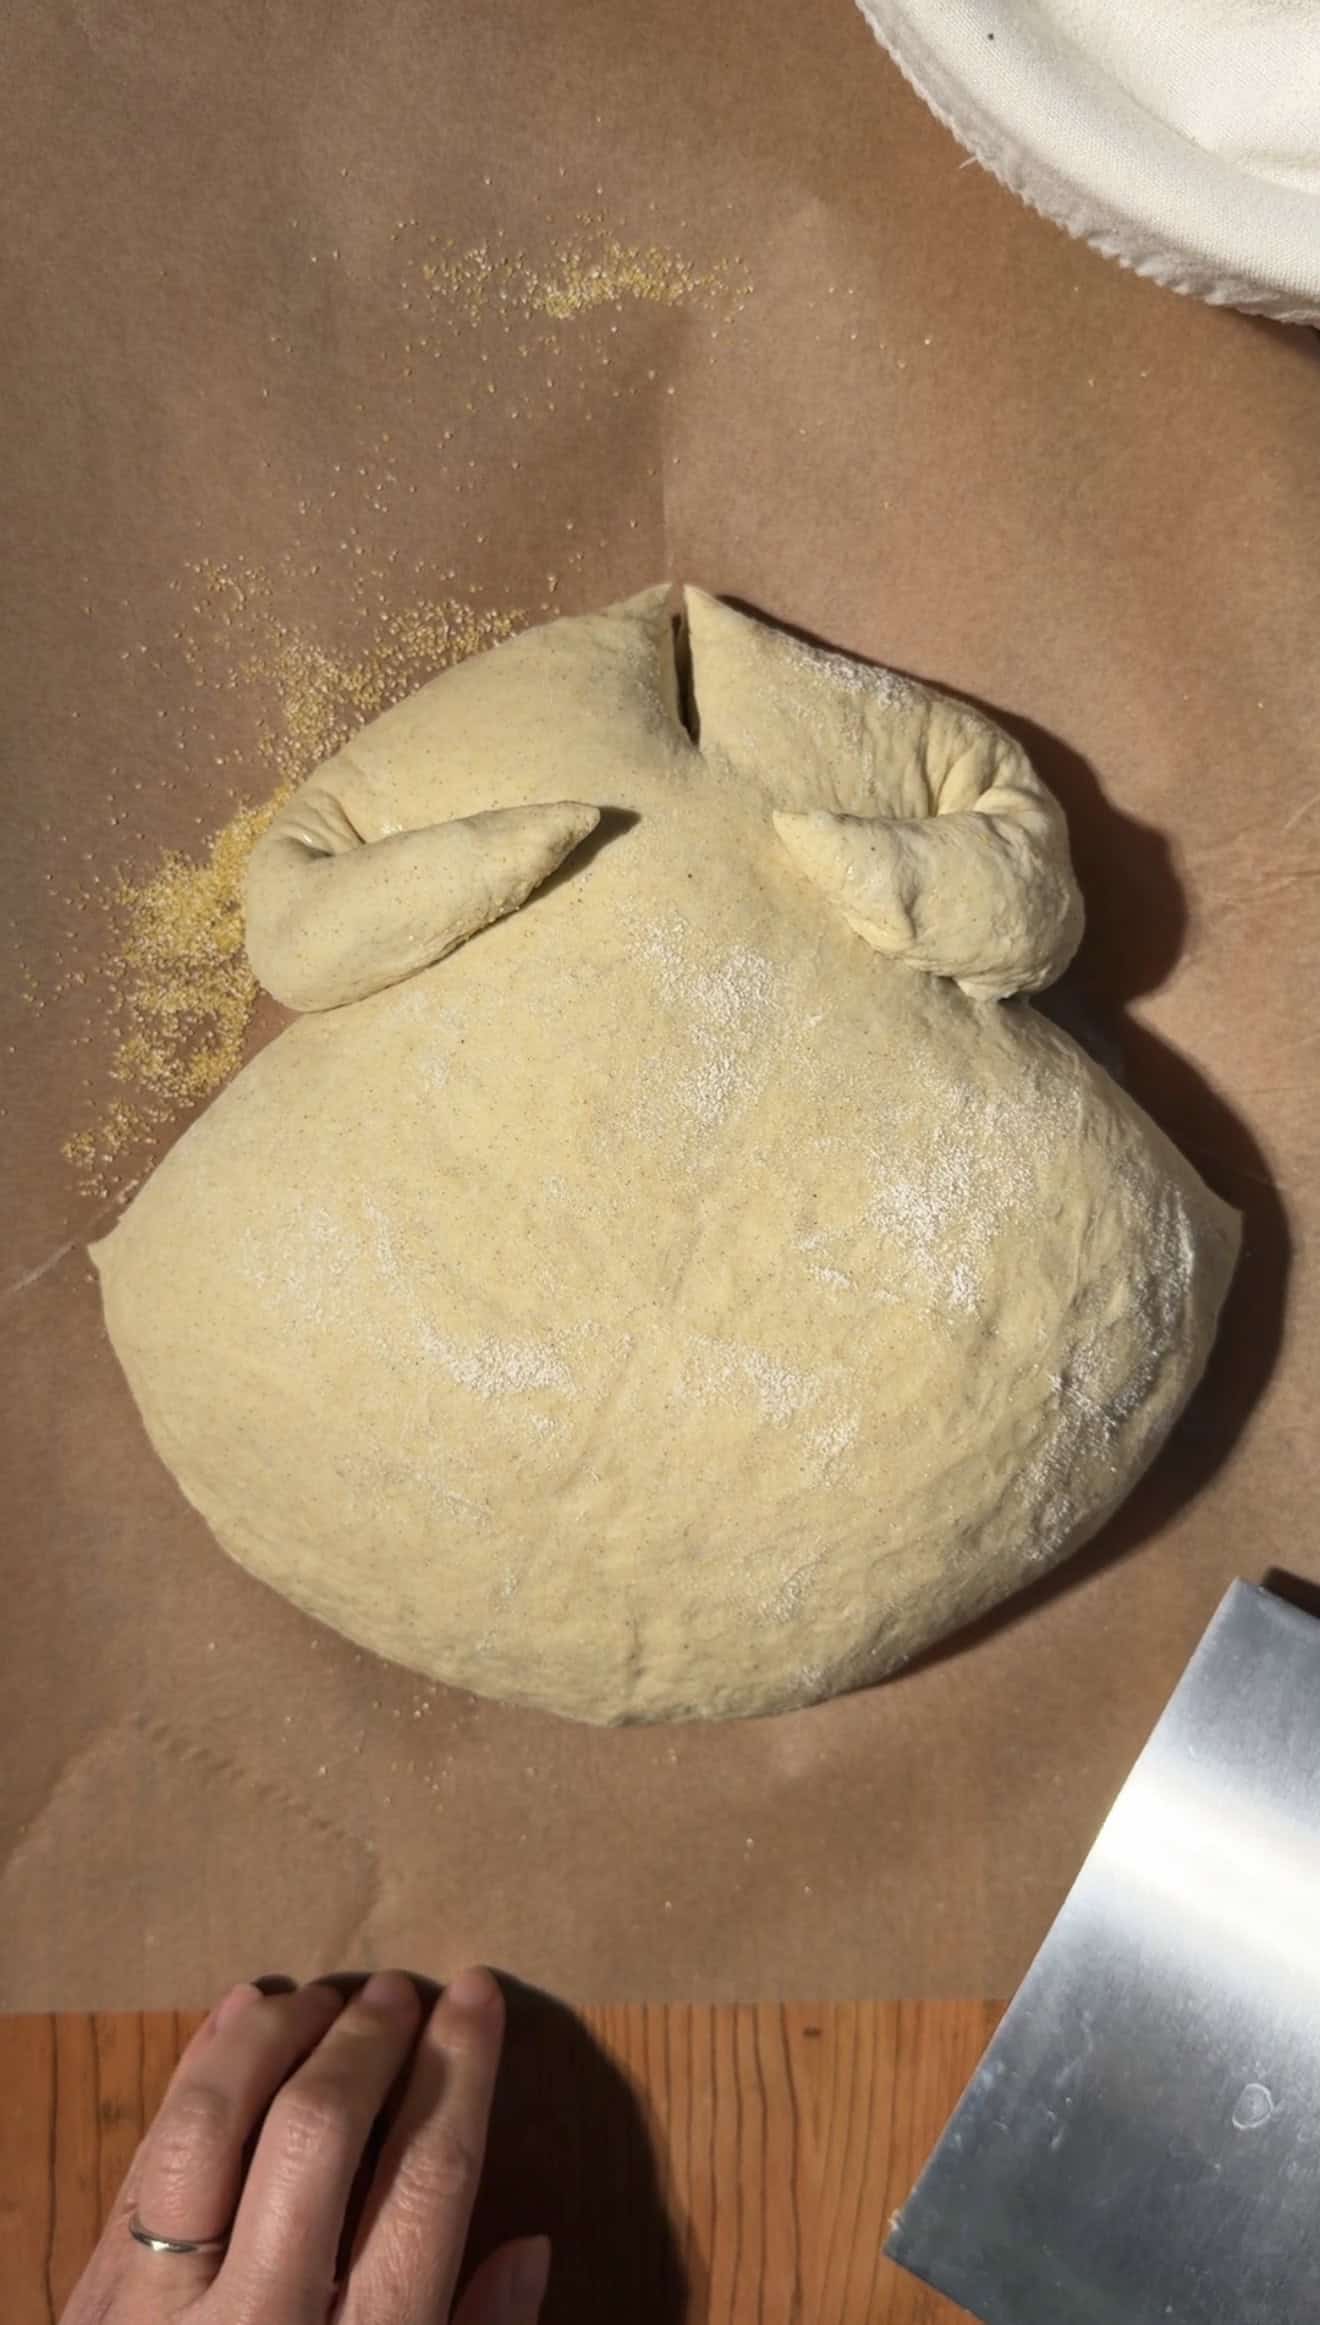
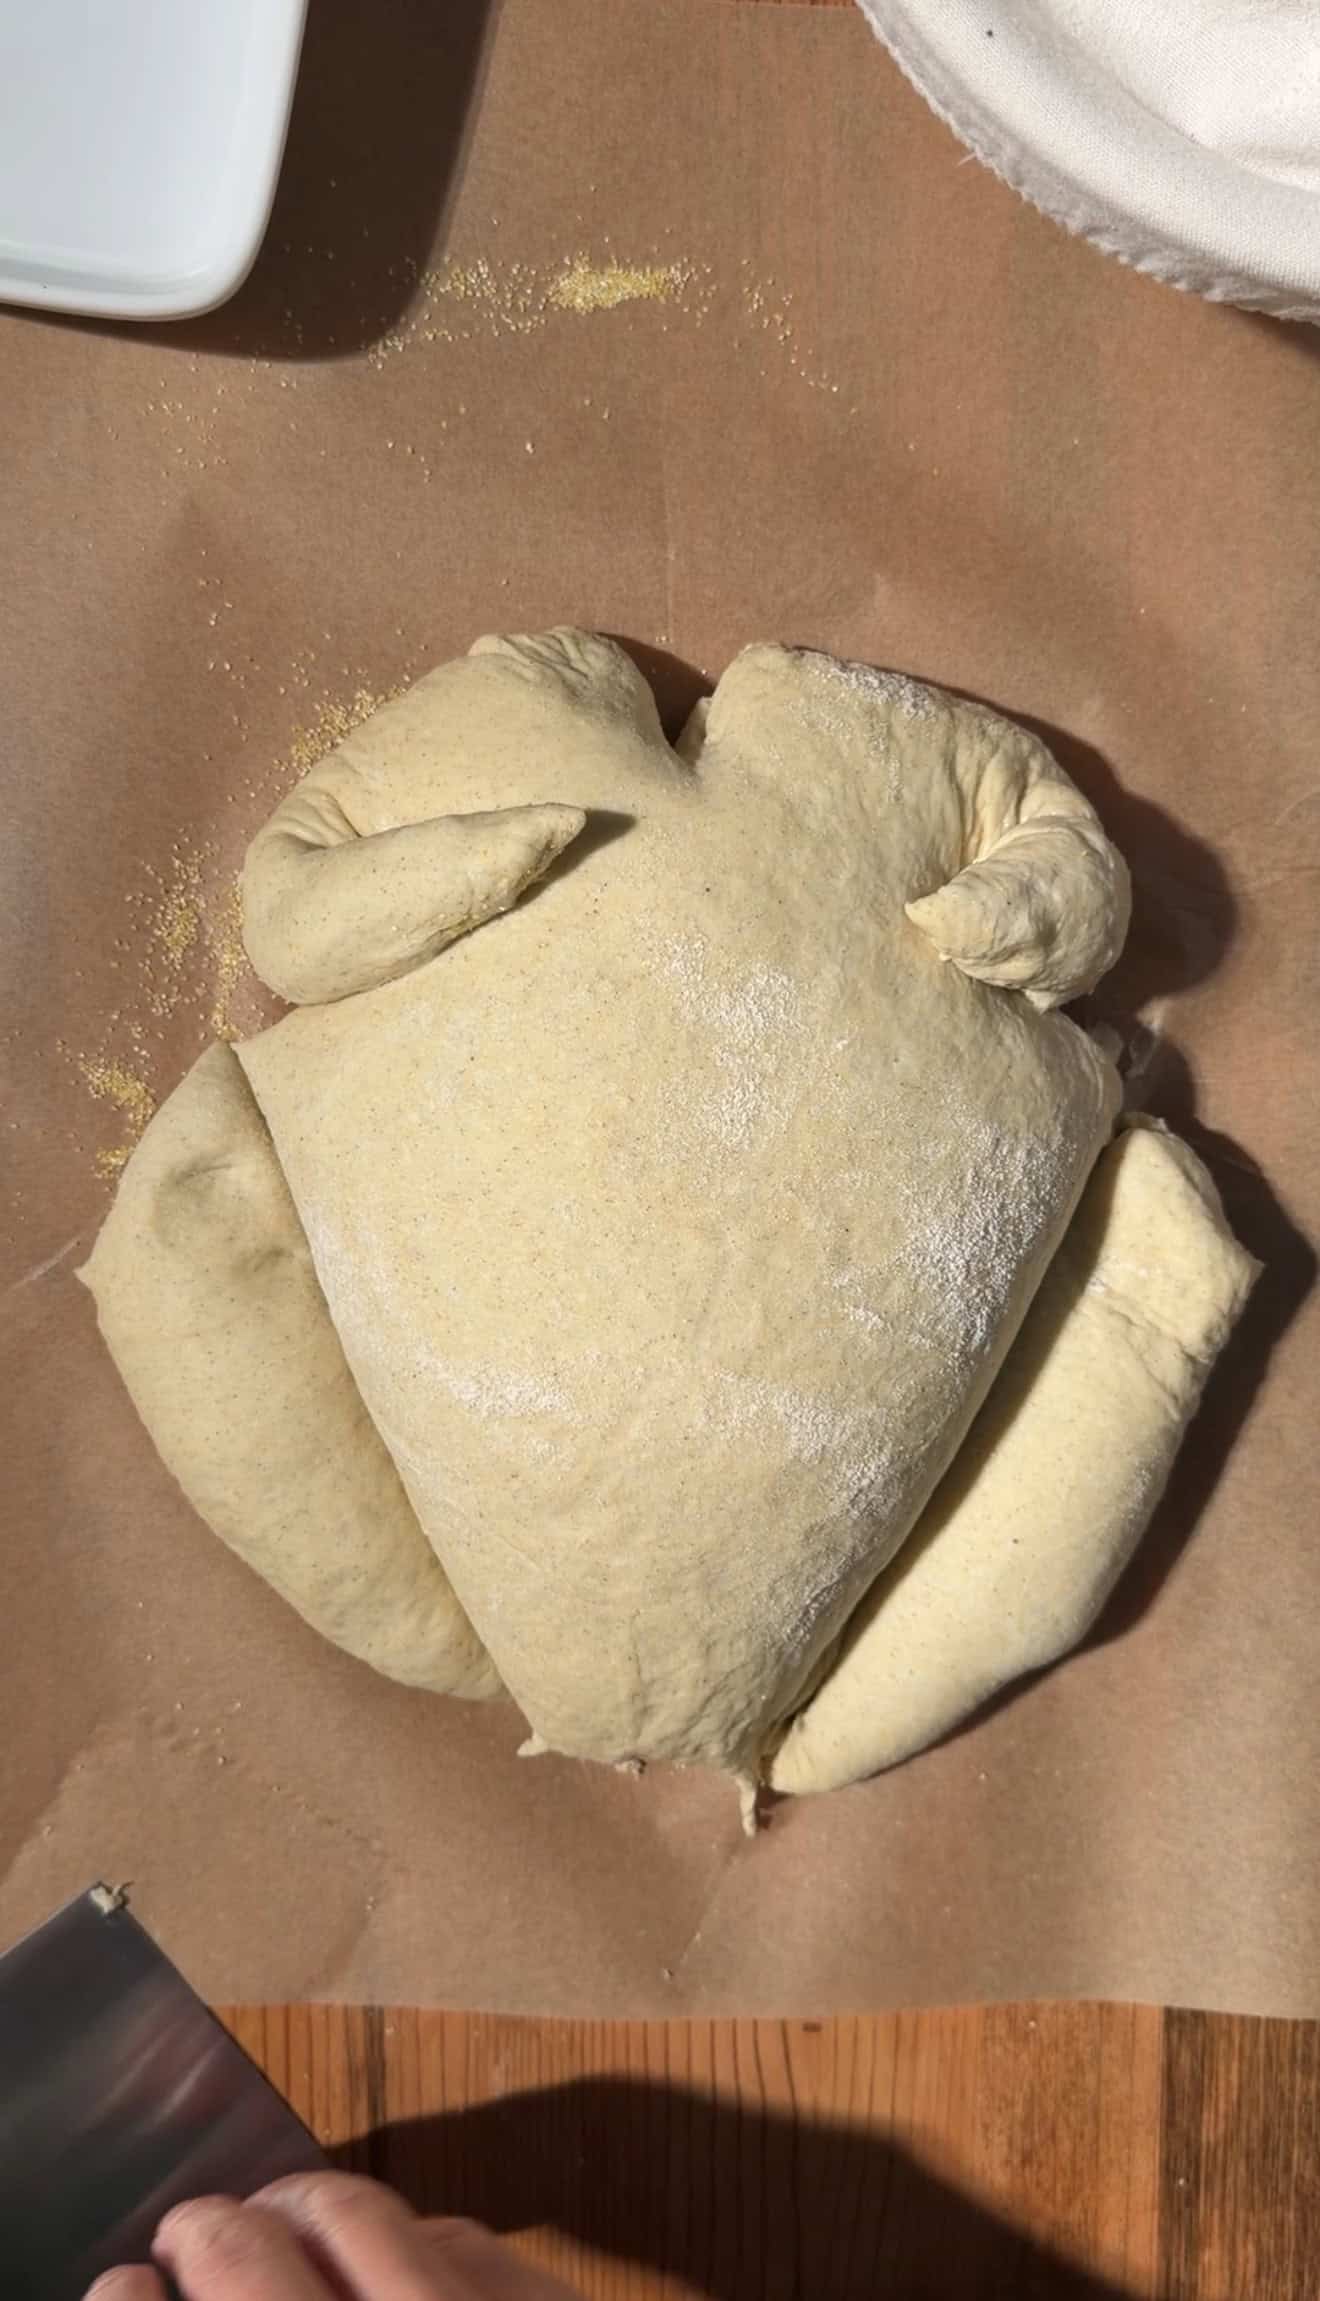
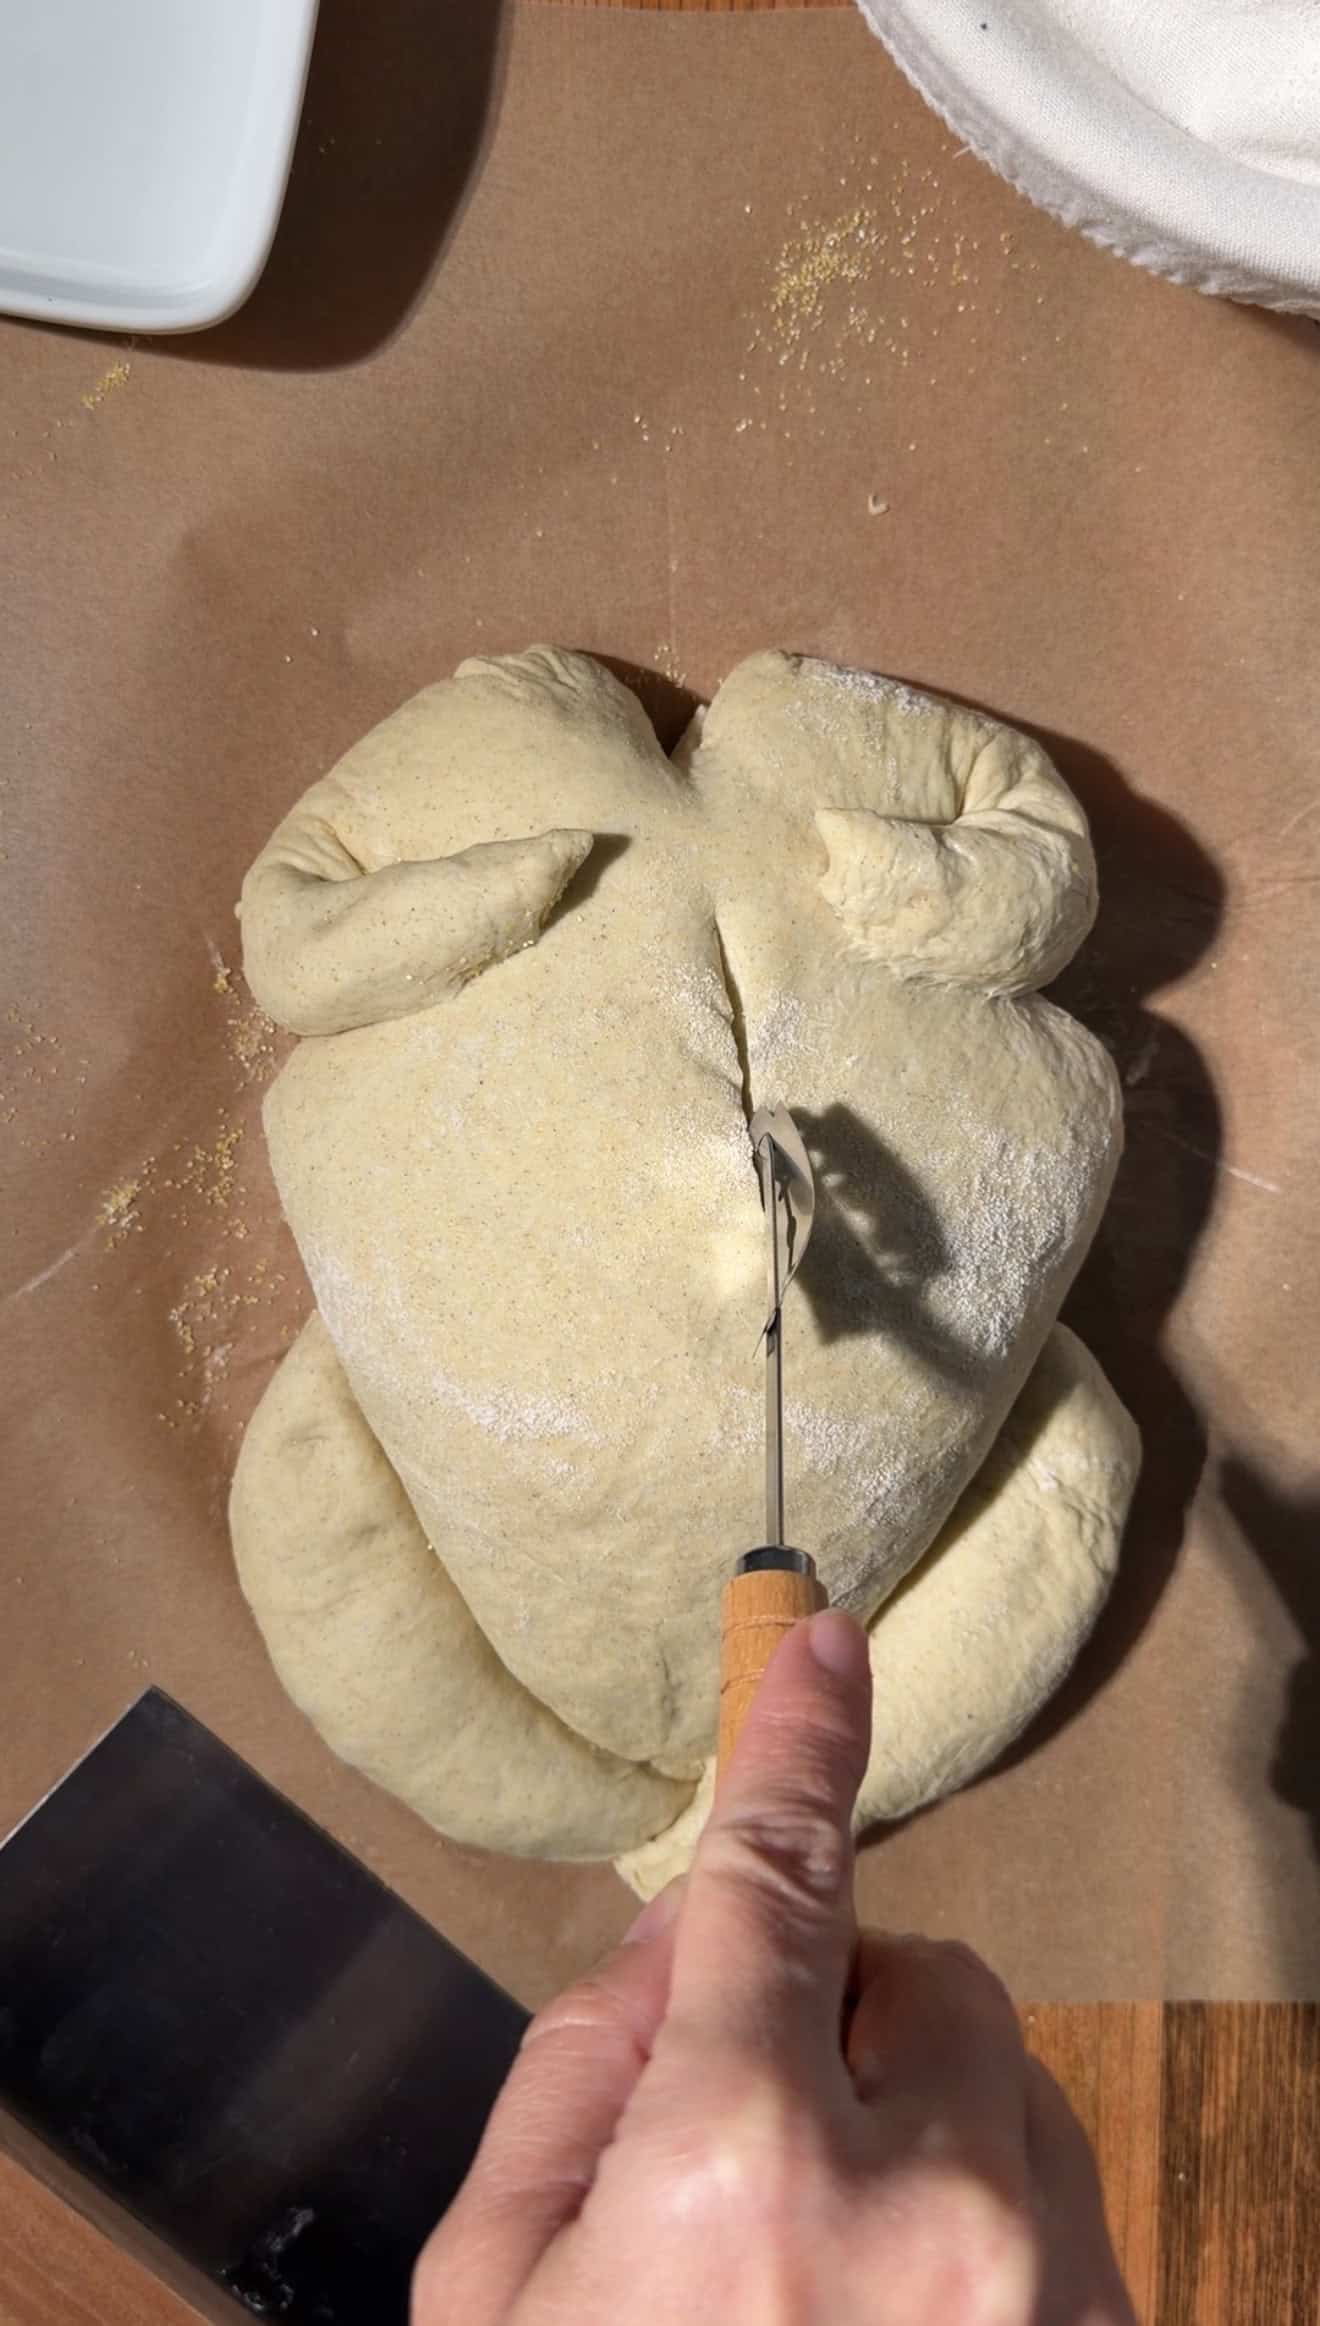
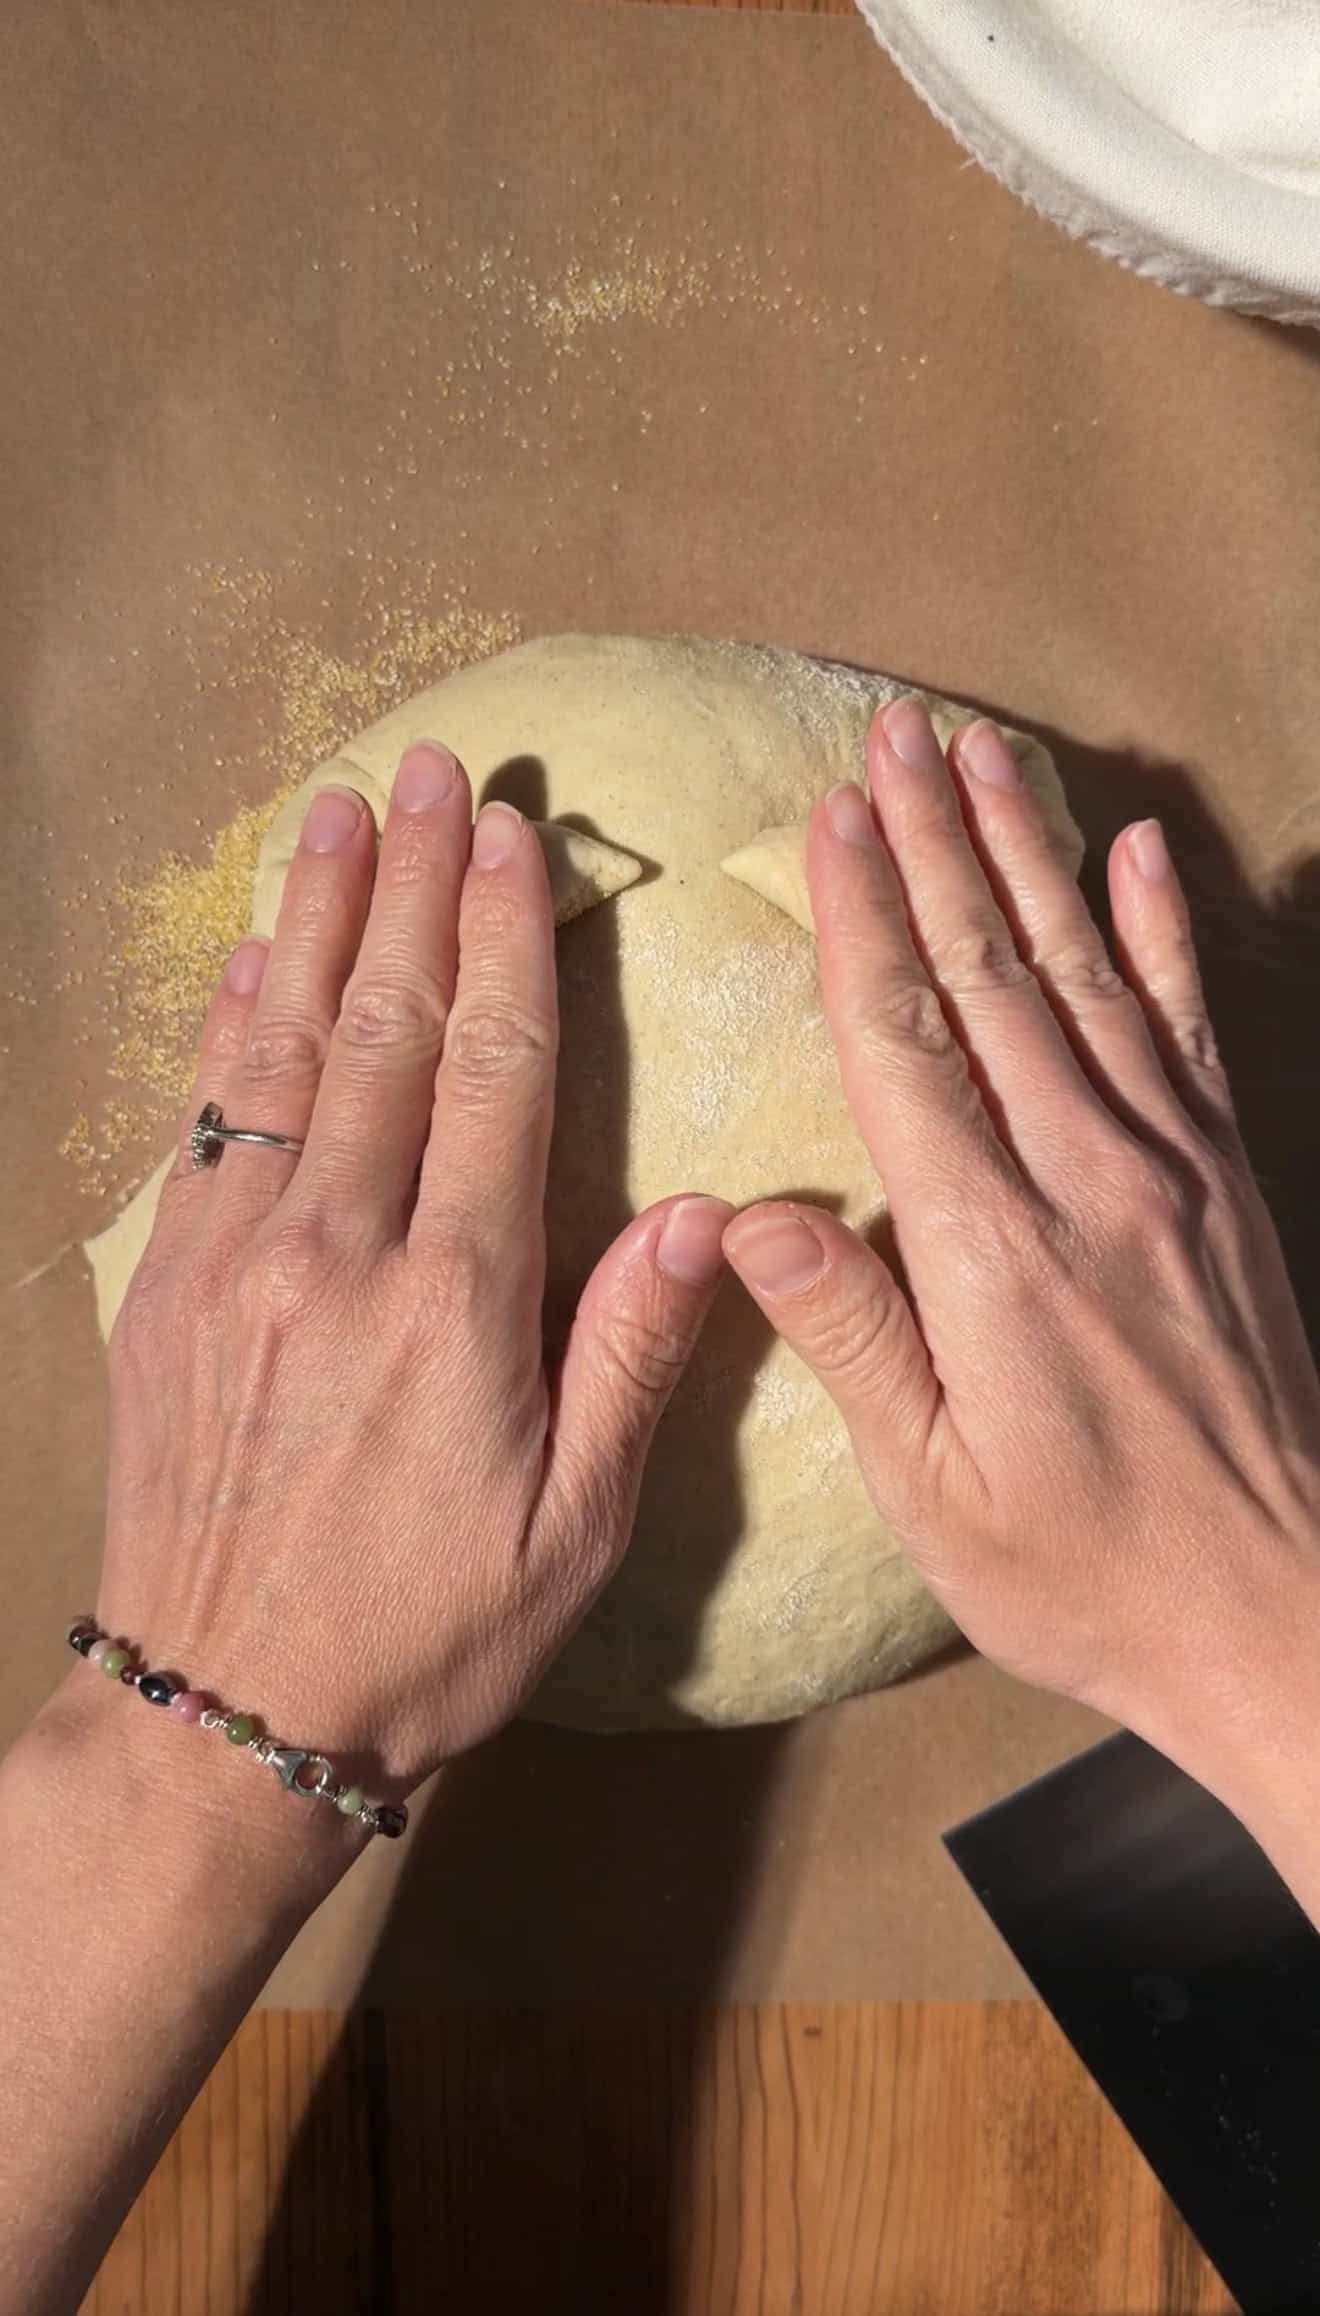
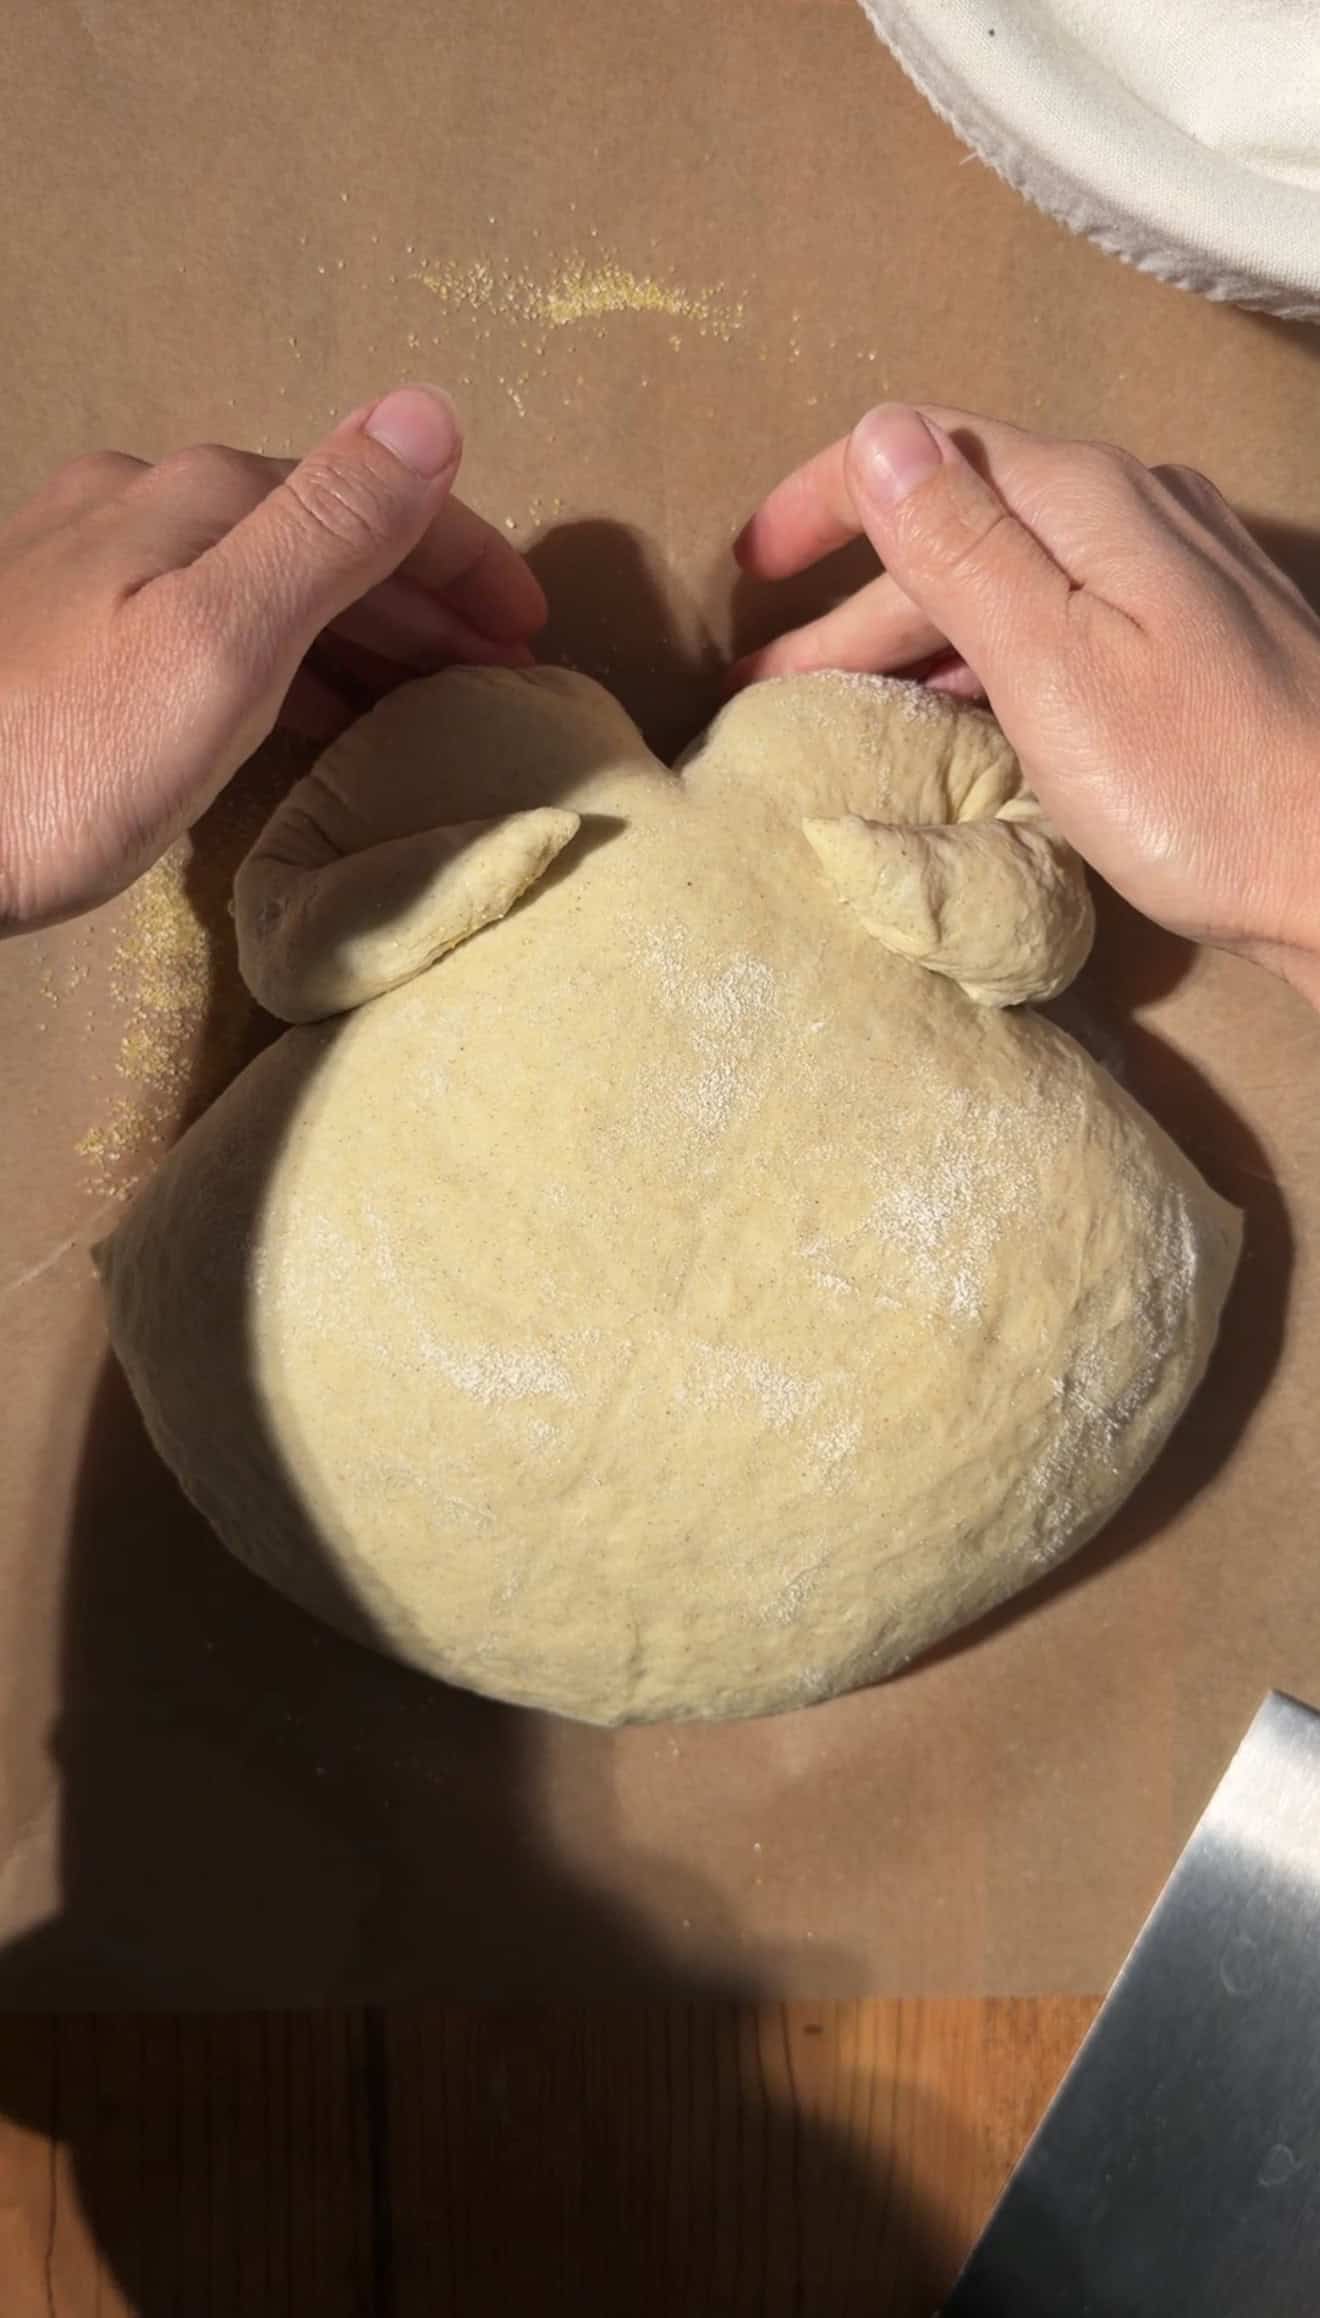
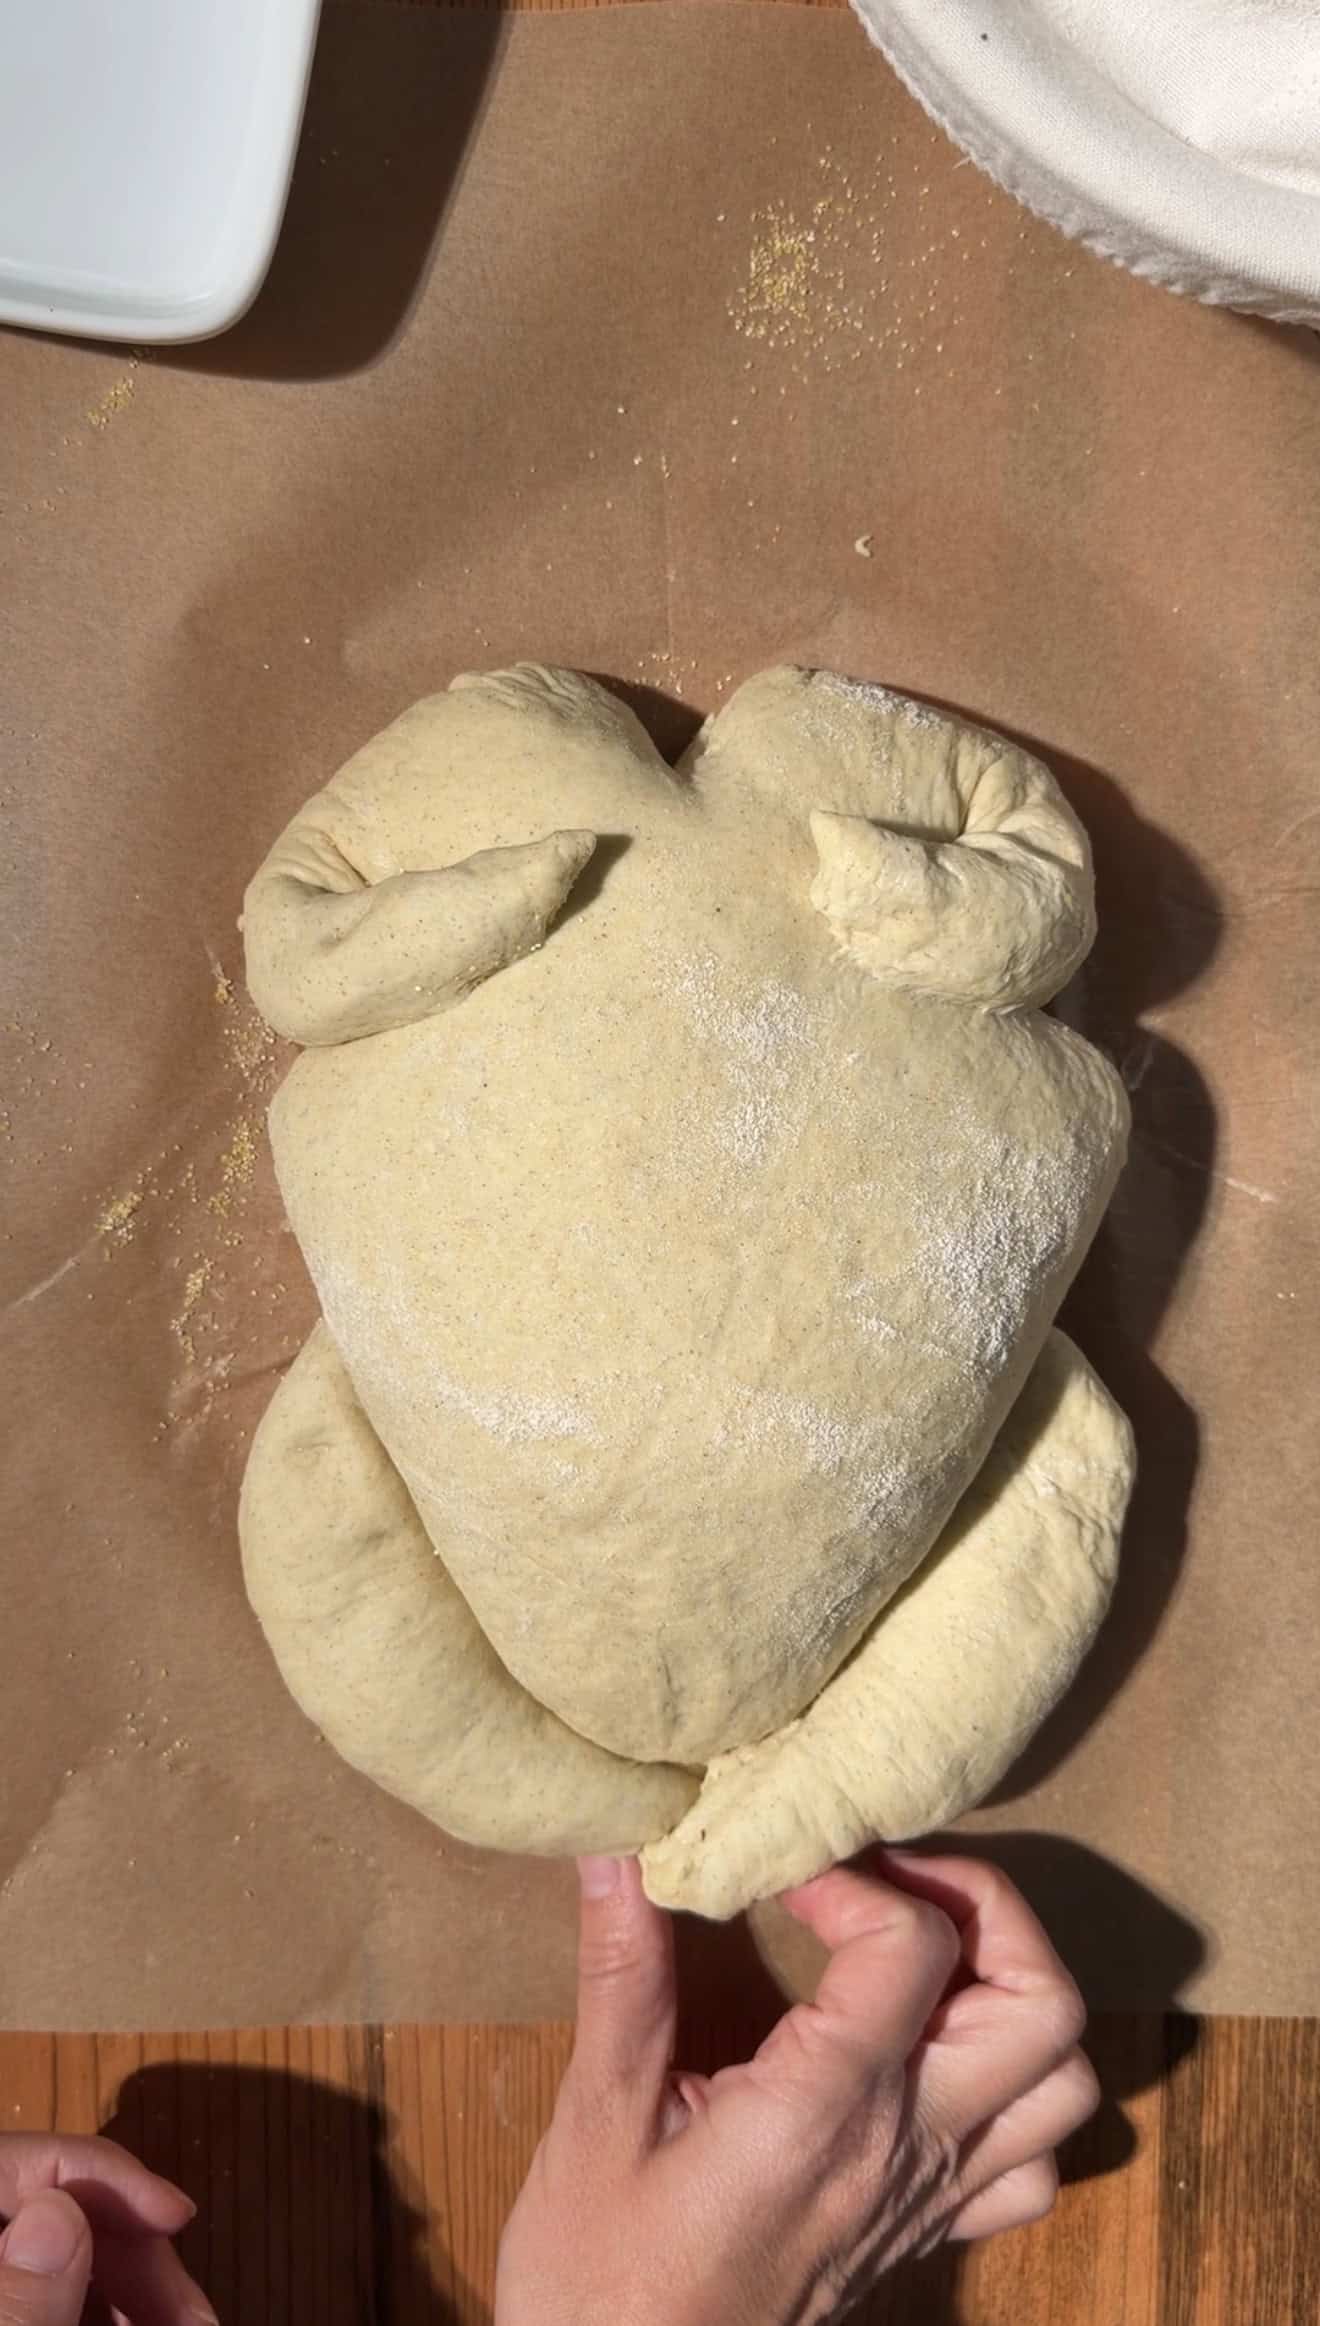
Shaping a loaf into a bird takes a few tricks, and I've picked them up after making this four years in a row. First, keep the wings from touching on top, or you end up with something that looks like an animal, just not a turkey. Let them stand up on the body with at least one inch between them. If the wings start to spring back, dab them with a little water and gently press them into place. The same water trick works on the legs, or you can tie them together with baking string. Finally, a ¼-inch-deep score down the center controls the expansion so the loaf doesn't blow out somewhere else.
Slices of this turkey-shaped bread taste great dunked in gravy, filled with Thanksgiving leftovers, or slathered with my homemade garlic butter. And if you love artisan bread with decorative shaping, try my bunny bread for Easter!
Let's Shape Turkey Bread!
For the full step-by-step directions, scroll down to the recipe card.
Make-Ahead Holiday Side
The holidays are already busy enough, so this rustic loaf is built to be made ahead. Mix the dough, let it rise in the fridge for 8-12 hours, then proof, shape, and bake it the next morning. It's best served fully cooled, so it's ready to be carved (ahem, I mean sliced) by dinnertime.
My Tips for Baking Turkey-Shaped Bread
- Don't worry if the dough looks dry and shaggy when you first mix in the water, since bread flour just takes a little longer to hydrate.
- Cut the wings and drumsticks after proofing, not before, or the turkey loses its definition by the time it goes into the oven.
- Cold dough cuts cleanly because it won't stick to your knife, bench scraper, or hands. I proof the dough at room temperature, then pop it in the fridge while the oven preheats, so it's cool by the time I score it.
- I never needed foil in my tests, but if your wing tips darken before the bread is done, tent them loosely with small pieces of foil.
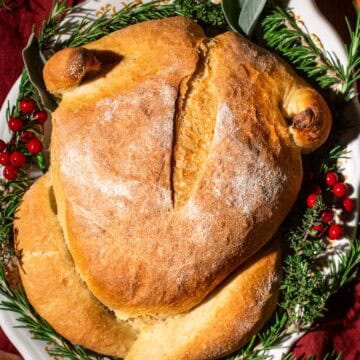
Easy Turkey Shaped Bread
developed & tested by:

Equipment
Ingredients
- 4½ cups bread flour
- 2¼ teaspoons instant yeast (one packet)
- 1½ teaspoons salt
- 2 teaspoons garlic powder
- 1 teaspoon ground cumin
- 1 teaspoon ground thyme
- 1½ cups warm water (between 105-115°F or 41-46°C)
Instructions
Mix, Knead, and Rise
- In a mixing bowl, whisk the bread flour, instant yeast, salt, garlic powder, cumin, and thyme.
- Add the warm water to the dry ingredients and mix everything with a large spoon until it forms a shaggy, dry dough.
- On a clean counter, knead the dough for 5-7 minutes by hand (or 4-5 minutes in a stand mixer with a hook attachment), until the dough is smooth and elastic.
- Shape the dough into a ball and place it back in the mixing bowl. Cover with a dinner plate or plastic wrap, and set in a warm draft-free place to rise and double in size, after about 1.5 hours. (I like letting my dough rise in the oven, turned off, with the oven light on.)
Proof the Dough
- On a clean surface, shape the dough into a round shape. Create tension on the surface of the dough by using your hands to gently pull the bottom of the bread along the counter towards you. Tuck all the seams underneath.
- Place the dough seam-side-up either in a round proofing basket or in a wide, shallow bowl lined with a kitchen towel dusted with a little flour. Cover the dough with a dinner plate or plastic wrap and allow it to proof at room temperature for about 30 minutes, or in the fridge for 2-4 hours, until an indentation made with your finger springs back to its original shape after 2-3 seconds.
- Preheat your oven to 450°F (235°C). Place a Dutch oven with the lid in the oven to become hot as the oven preheats.
Shape the Dough into a Turkey
- Once the dough is proofed, sprinkle a little flour or cornmeal on a large piece of parchment paper or a silicone bread sling, and place the dough seam-side-down.
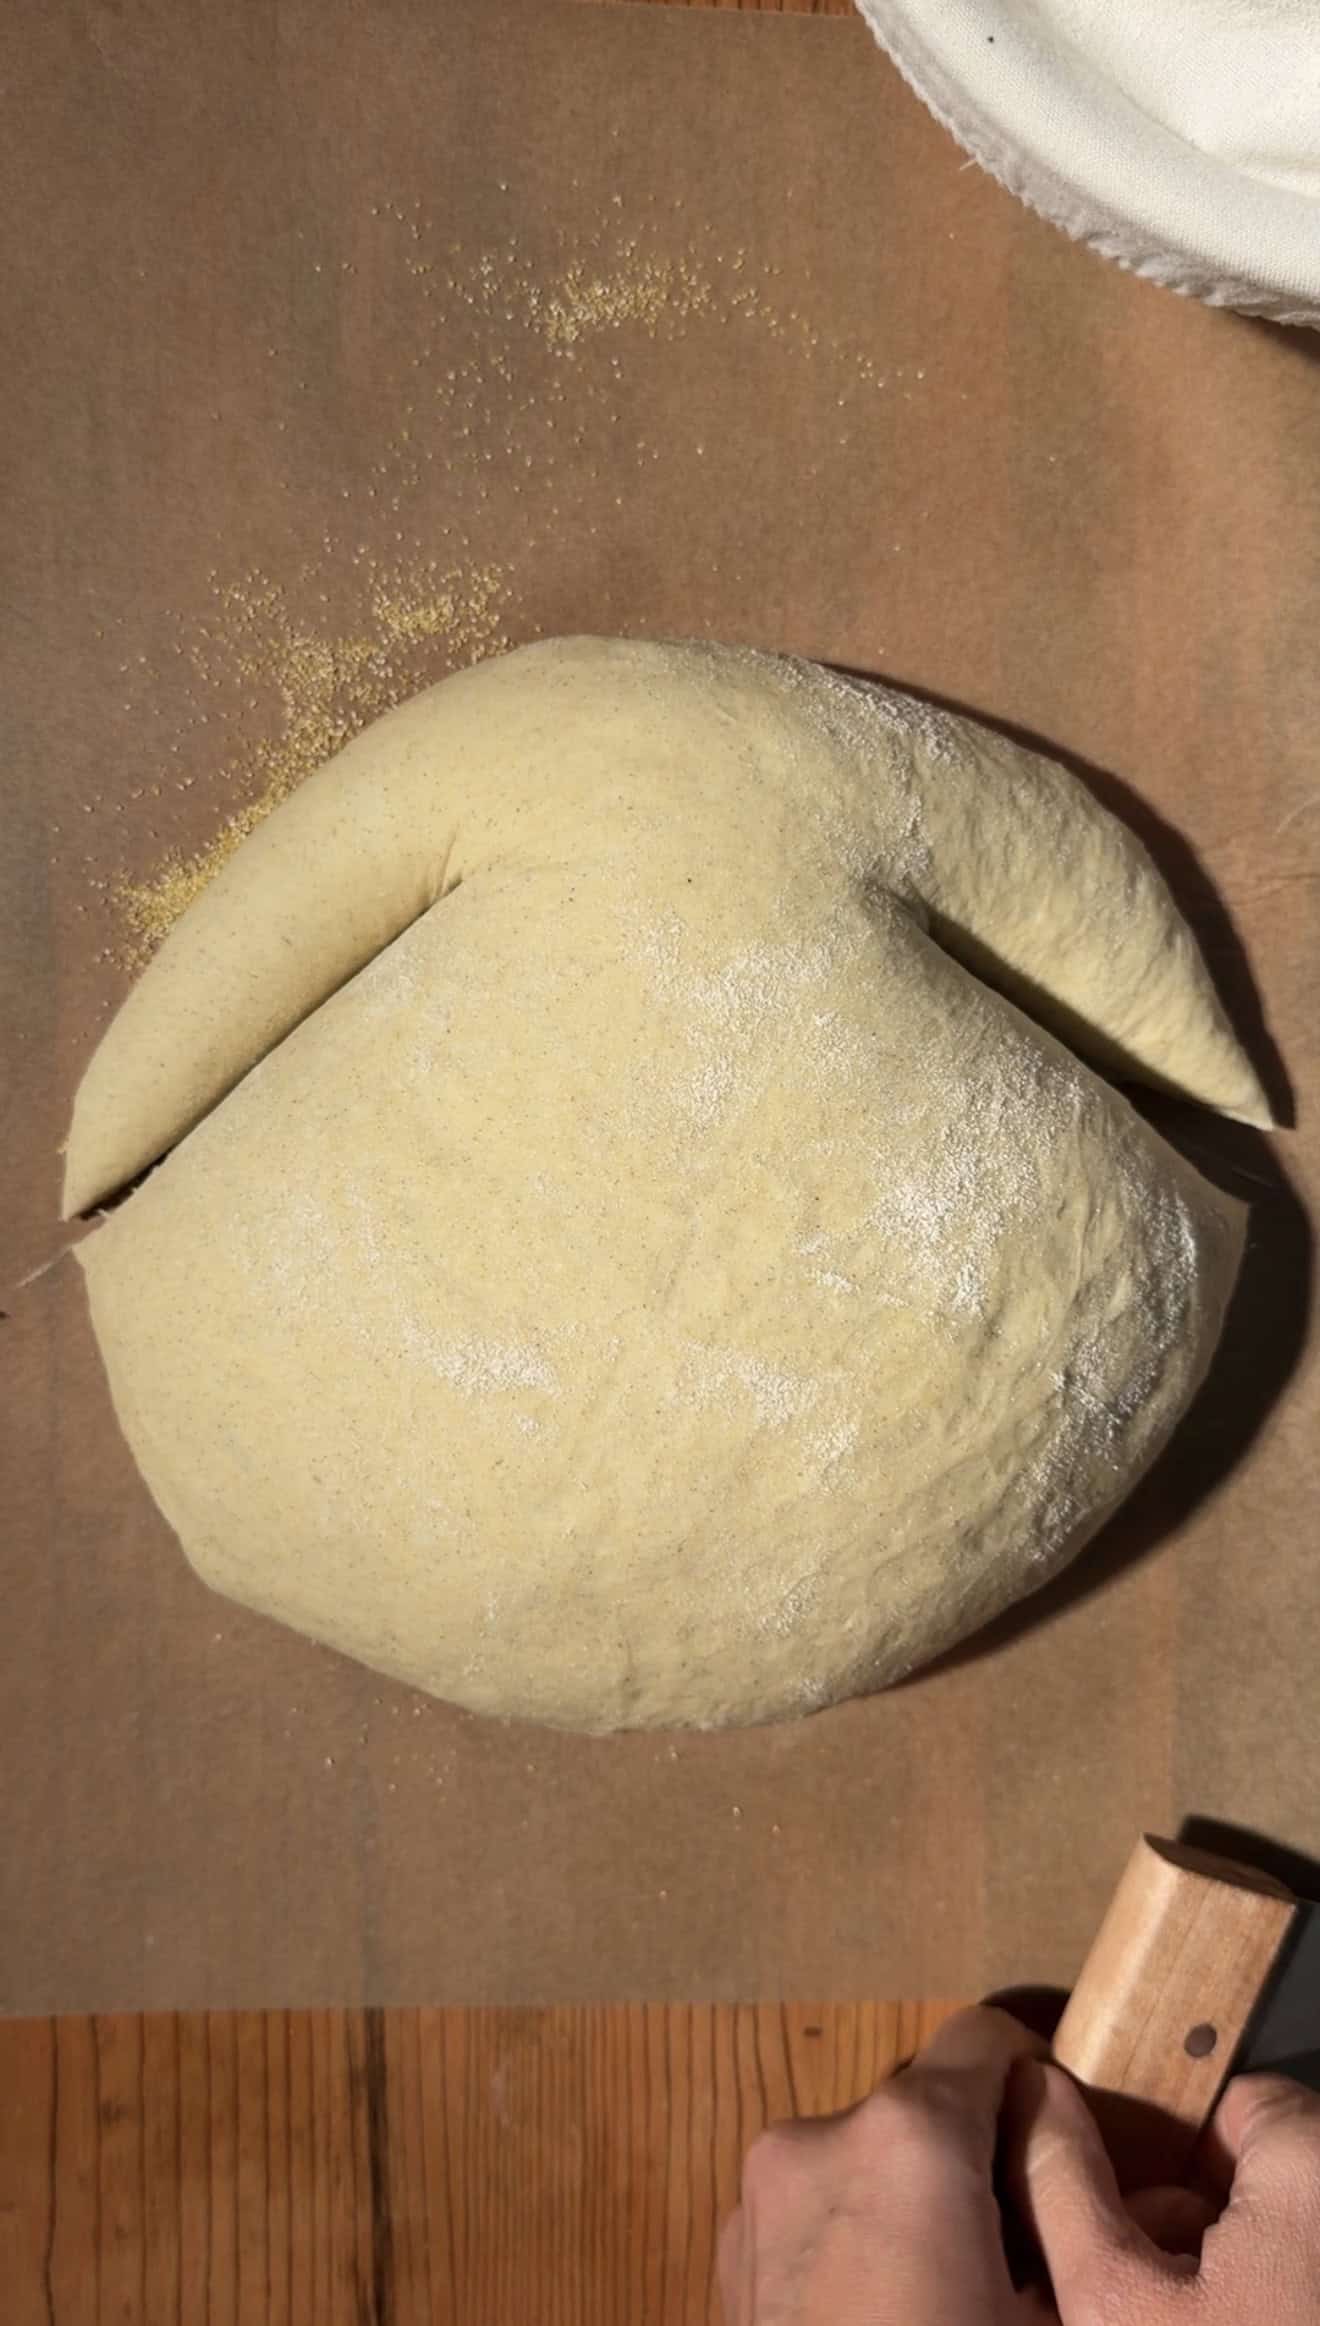
- Wings: Starting just below the top center, make a 45-degree diagonal cut outward, ending just above halfway down the side. Repeat on the other side. (Don't cut these pieces all the way off.) Bend each flap toward the center and lay it over the middle, leaving about 1 inch between the tips of the wings. If they won't stick, dab the dough with water.
- Legs: Near the bottom on each side, make a complete cut starting about 2 inches in from the edge (below the wing) and ending just to the right and left of the bottom center. Slide each leg piece down about 1 inch. Pull the bottom edges together and pinch to join. If they won't stick, tie loosely with baking twine.
- Top: Cut a 1-inch slit at the top center. Gently curve the edges to look like the tops of the turkey breasts.
Bake the Bread
- Remove the hot Dutch oven from your oven and remove the lid. Pick up the bread by holding the parchment paper or bread sling, and carefully place it in the hot Dutch oven.
- Cover with the lid and place it in the oven. Bake covered for 30 minutes, then remove the lid, and bake for an additional 10-15 minutes uncovered, until the crust is crispy and the bread has an internal temperature of at least 205°F. Allow the loaf to cool on a cooling rack for at least 1 hour before slicing.
Notes
- Make-Ahead: Mix and knead the dough then place it in the mixing bowl and cover tightly with plastic wrap. Let it rise in the fridge overnight for 8-12 hours, then proceed with shaping and proofing it.
- Scoring: Cut in single confident strokes. Sawing back and forth drags the dough and collapses the structure so it bakes up flat.
- Shaping: Keep the wings and legs snug against the body. It looks more like a turkey, keeps the thin pieces from burning, and makes slicing much easier.
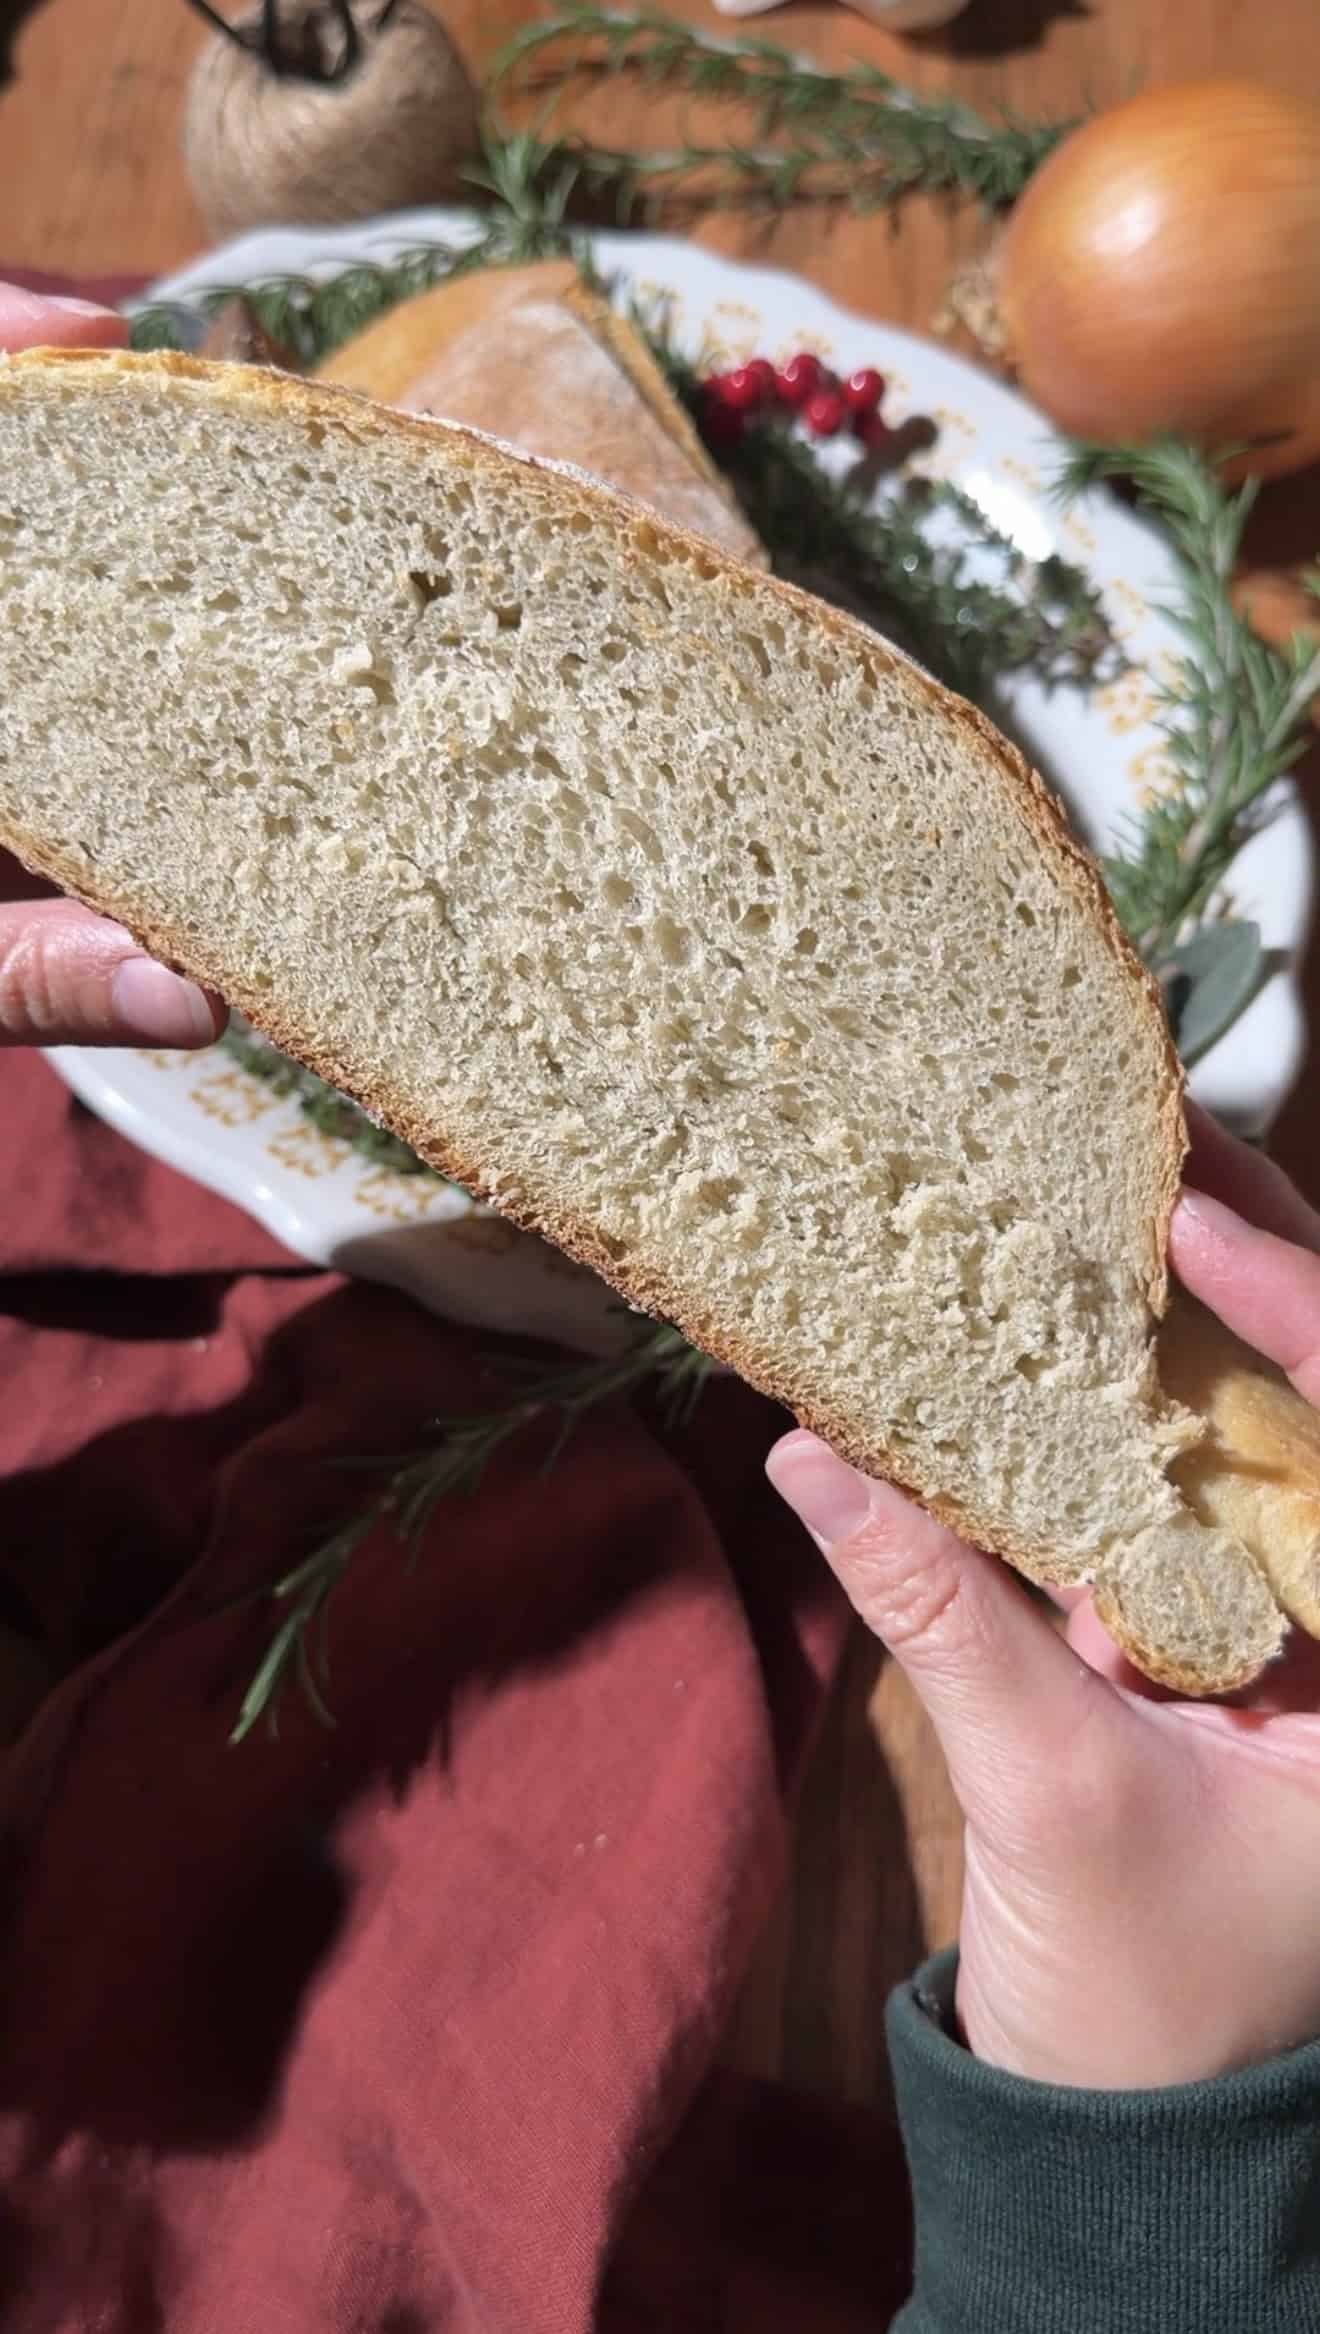
- Cooling: Let it cool for at least 1 hour before slicing, or the crumb turns gummy.
Nutrition
This website uses affiliate links which may earn commission for purchases made at no additional cost to you.


I'm eggcited to hear from you :)