
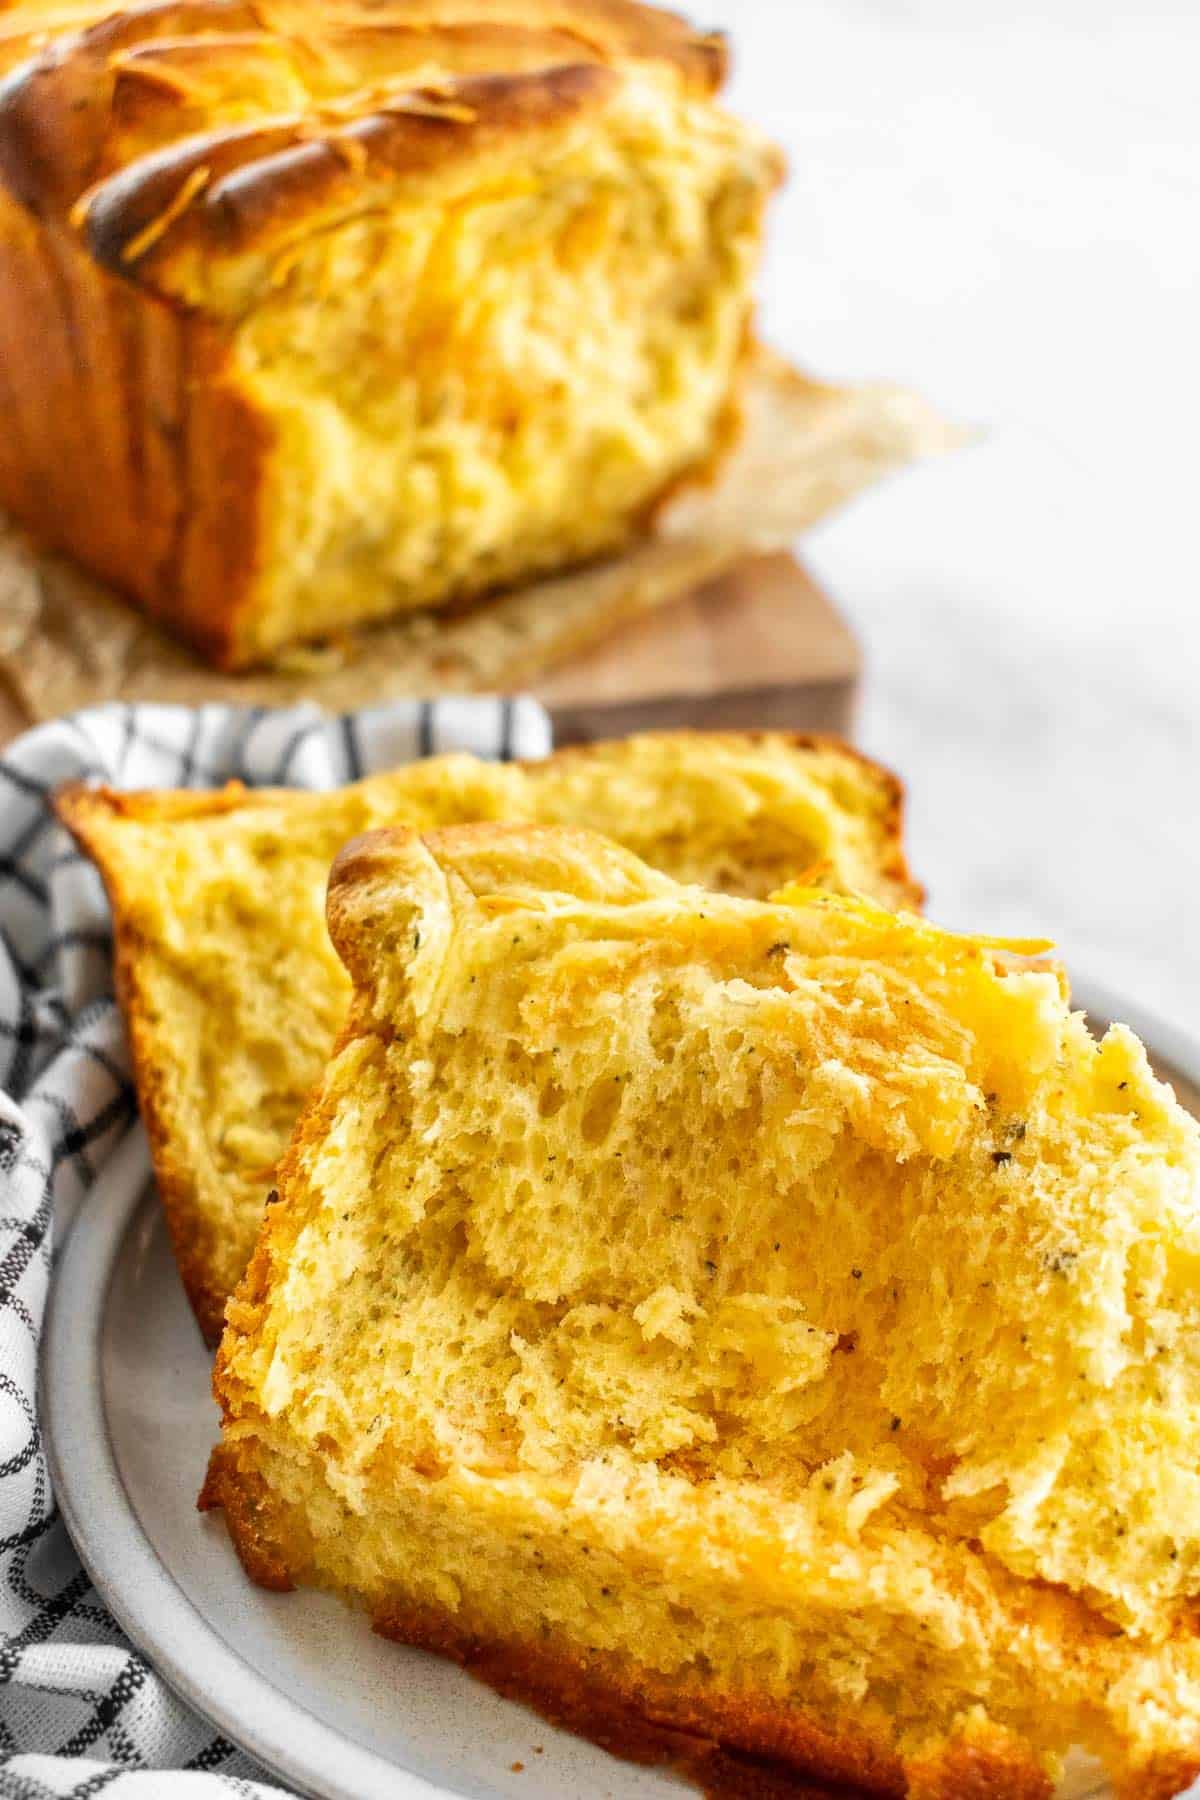
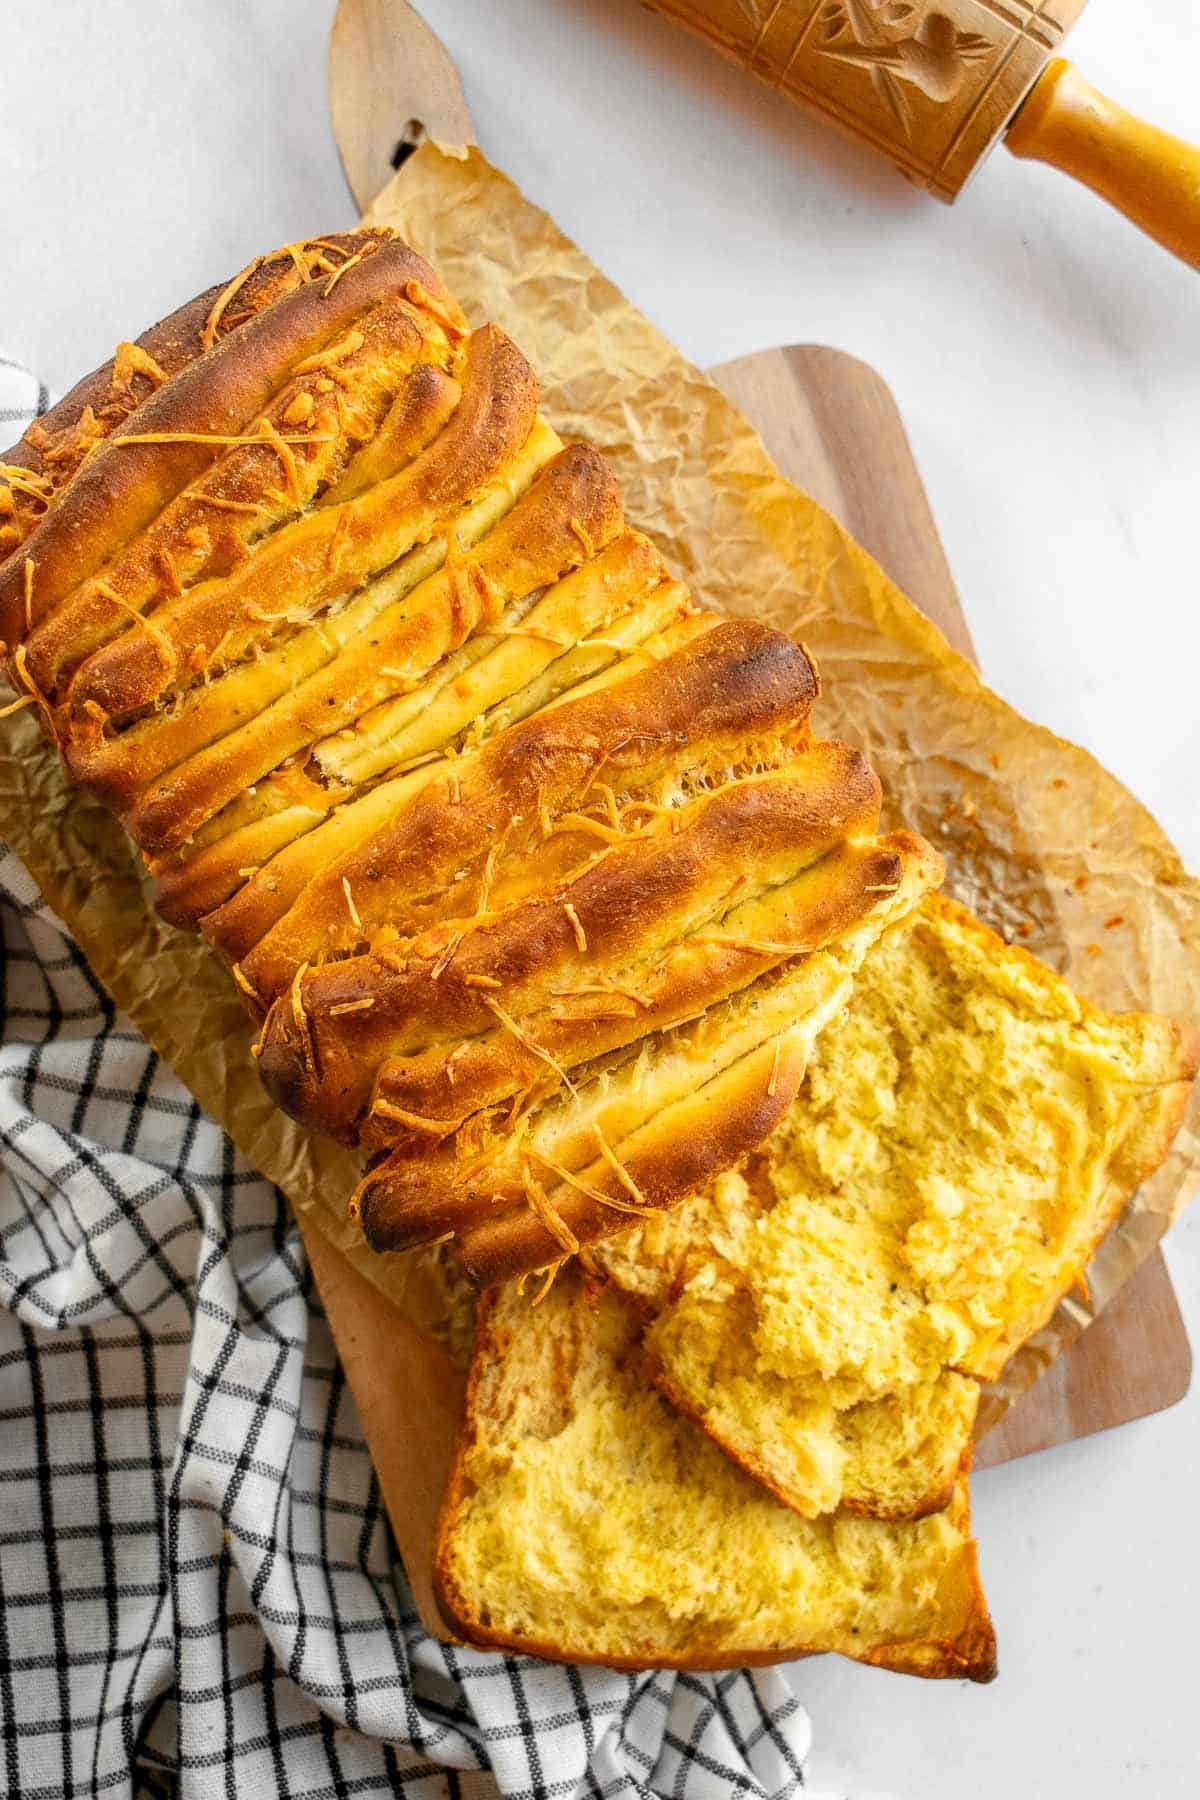
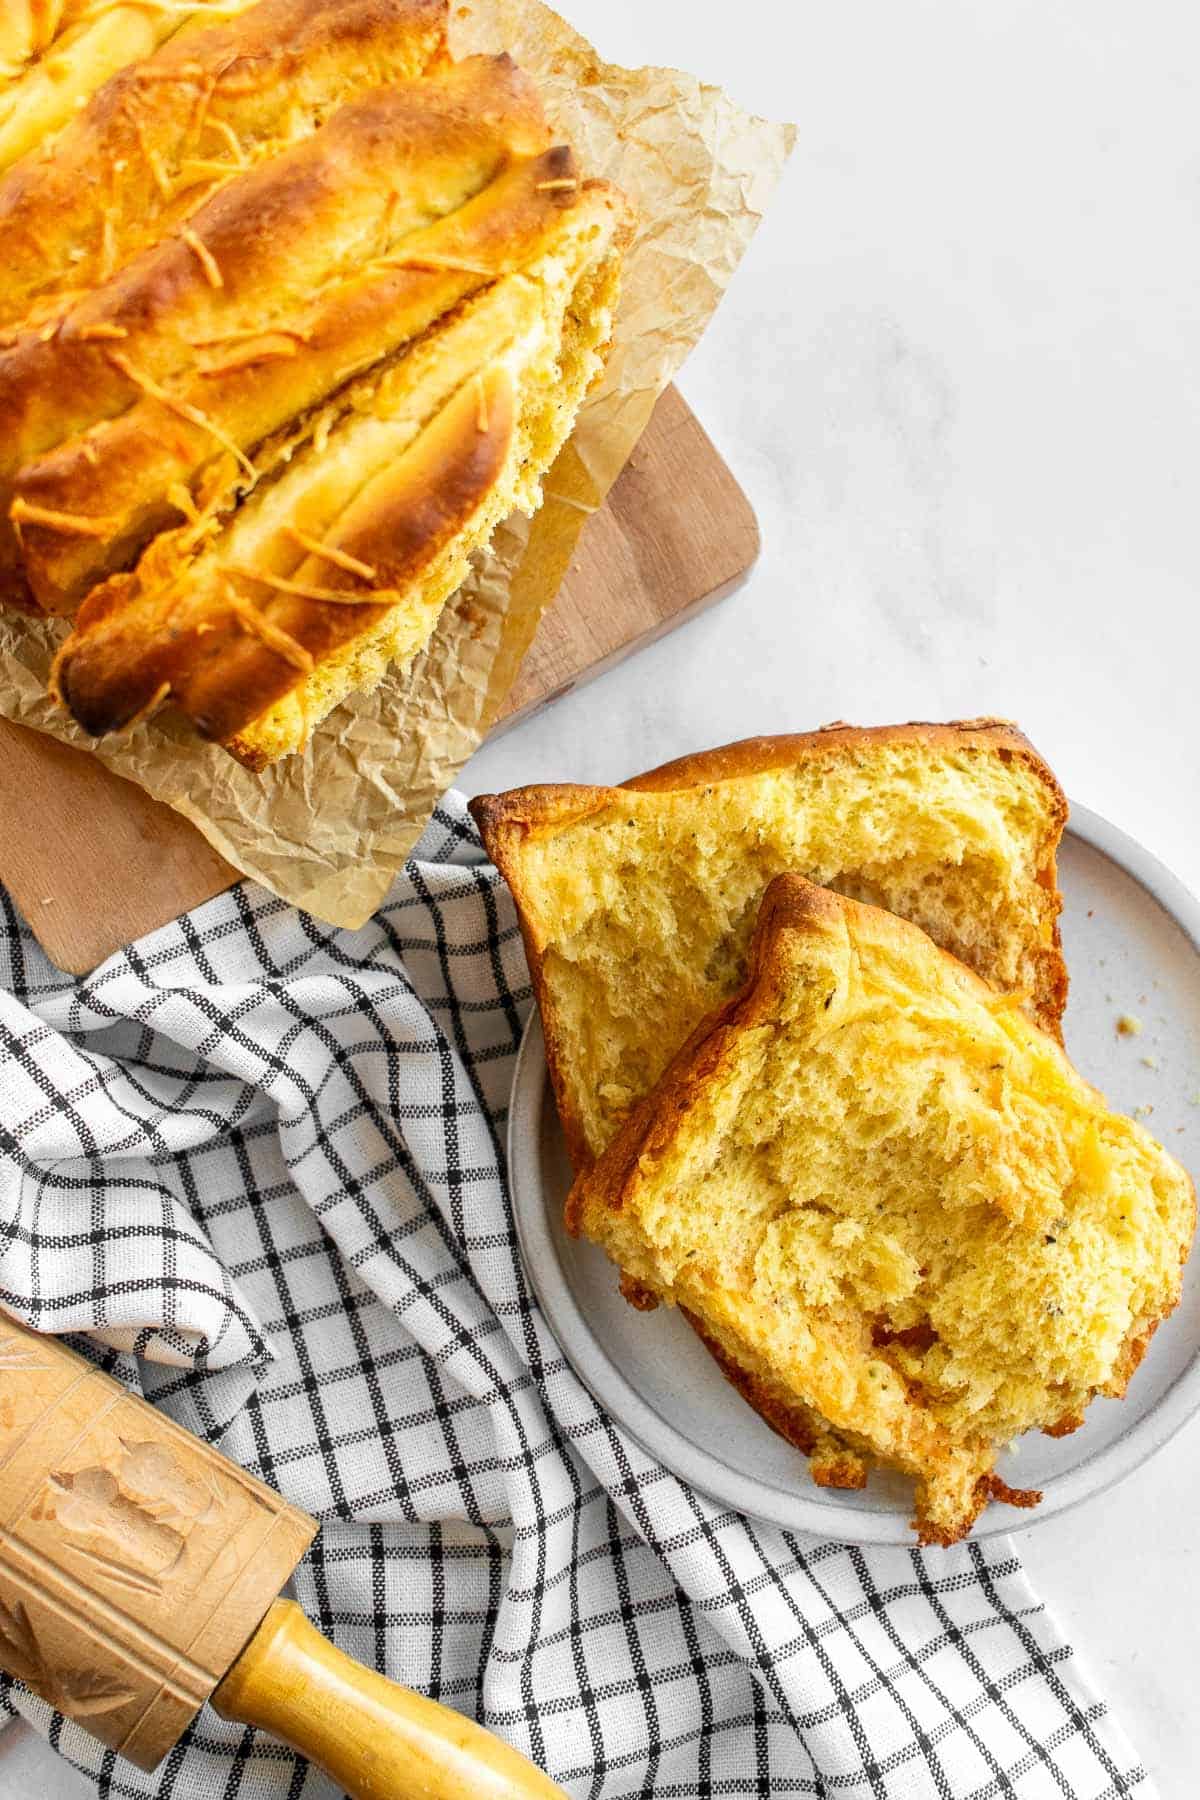
This homemade cheesy pull apart bread is baked with shredded Parmesan and cheddar between each buttery, fluffy slice. And nutritional yeast, garlic powder, and dried herbs add tons of flavor to each savory bite.
This website uses affiliate links which may earn commission for purchases made at no additional cost to you.
This is My Favorite Cheese Stuffed Bread!
This cheesy pull apart bread is what I turn to when I want a loaf that feels indulgent but isn't difficult. I love serving it alongside soup for a simple weeknight dinner, but it works just as well as a fun holiday appetizer, like my easy pizza pull-apart bread.
First, I start with my favorite enriched bread dough, which is soooo fluffy & buttery. Then I add garlic powder and Italian seasoning for plenty of herby, savory flavor, similar to my rustic Parmesan & rosemary bread. And my secret ingredient of nutritional yeast makes the bread itself taste irresistibly cheesy. Finally, garlic butter gets slathered on the rolled-out dough before sprinkling two types of cheese on top - I love using Parmesan for a tangy flavor + cheddar which melts really well as it bakes. I've also tested this recipe with Gruyère + mozzarella and it turned out great, so feel free to switch up the cheese based on your preference!
Welcome to My Kitchen - Let's Bake Bread!
For the full step-by-step directions and ingredient quantities, scroll down to the recipe card at the bottom of this post.
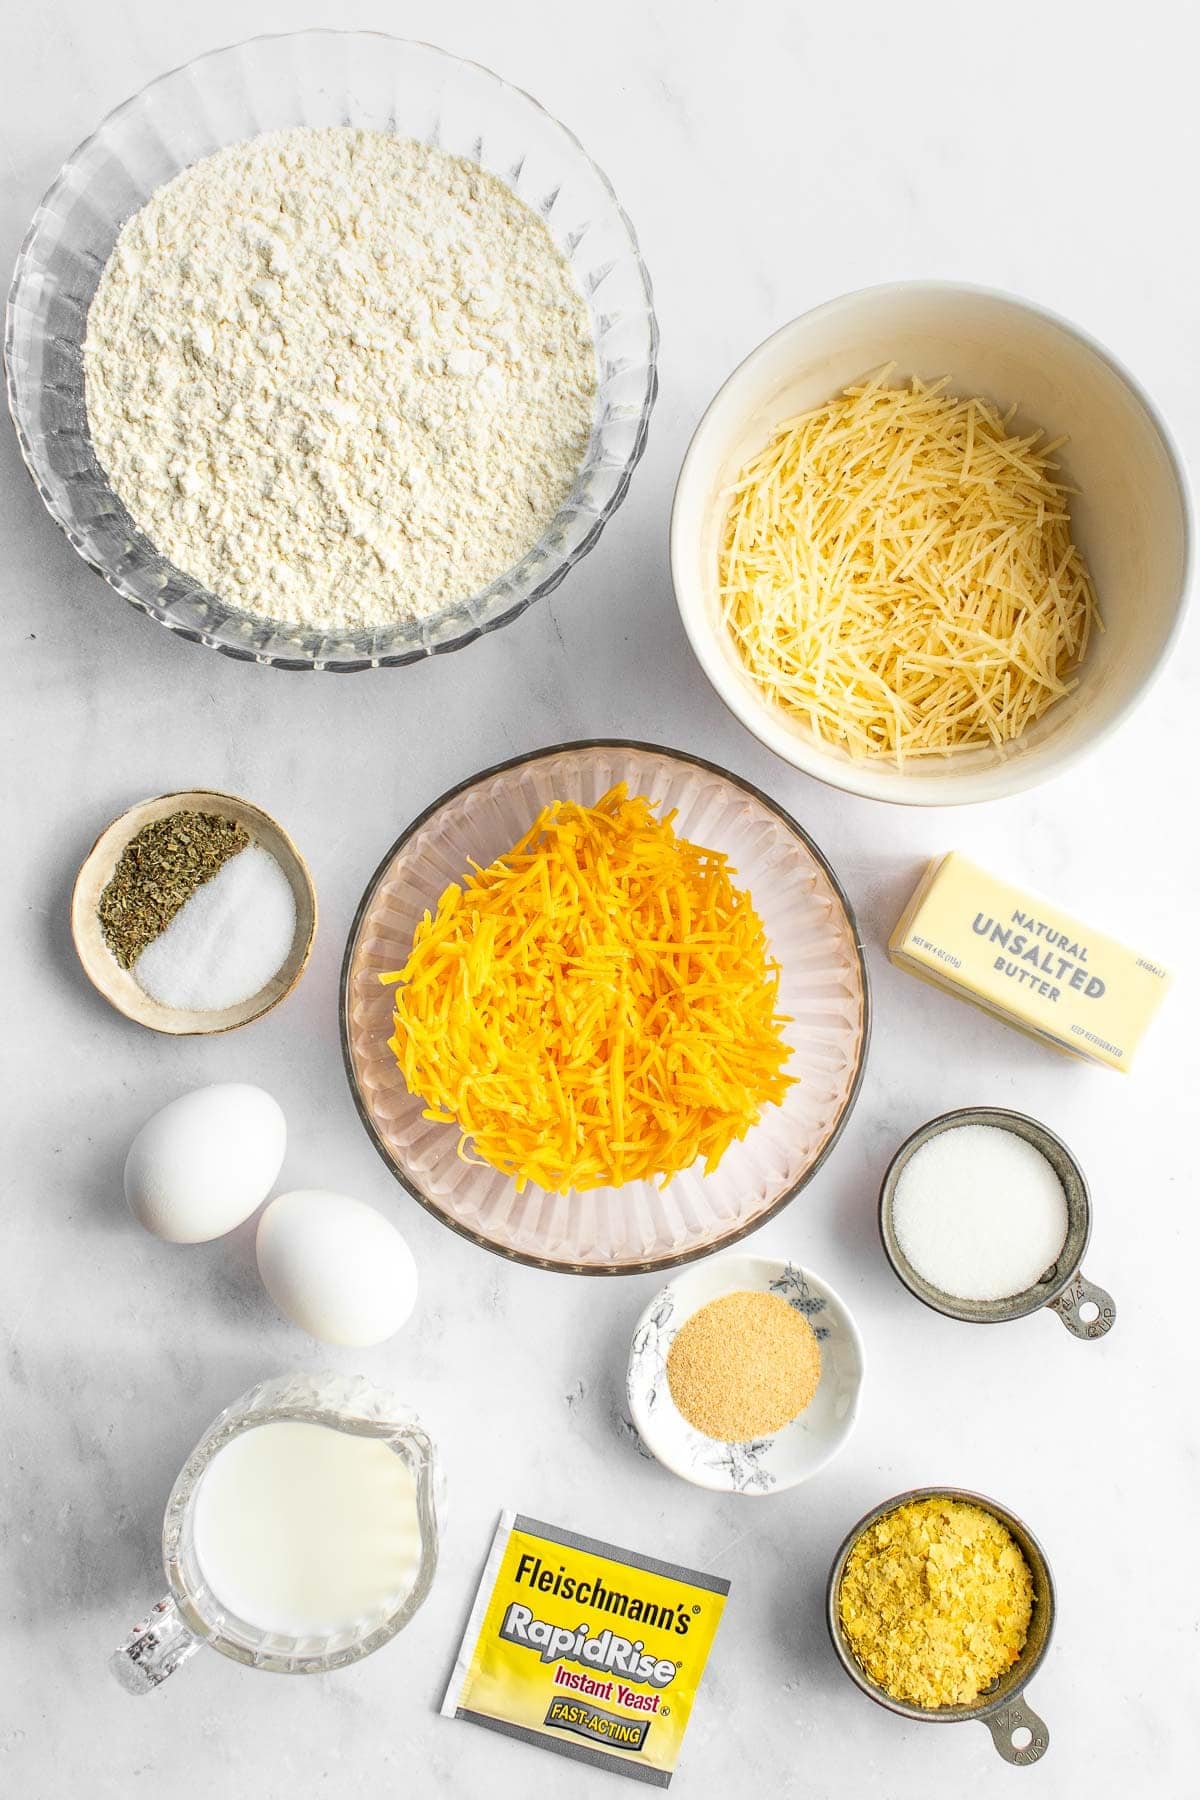
1. Gather all the ingredients you'll need.
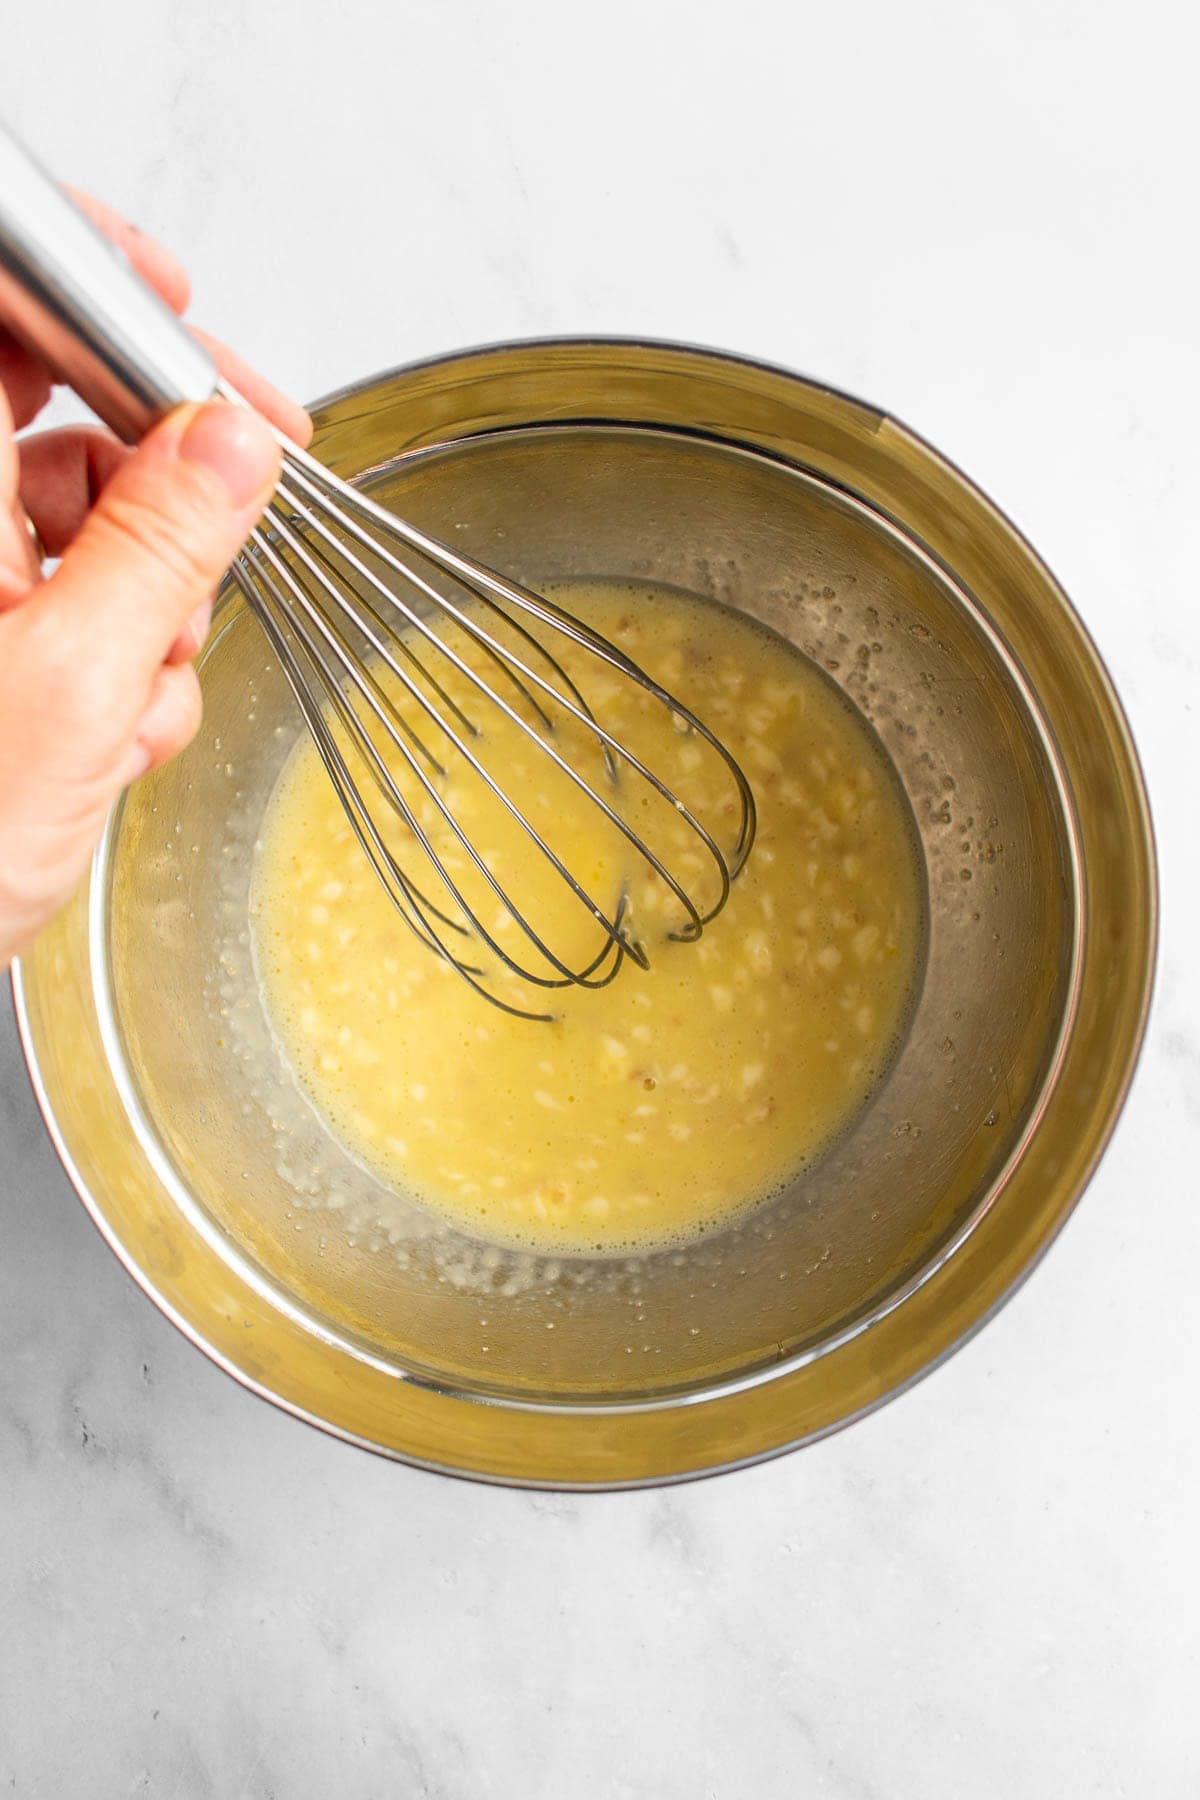
2. Whisk milk, butter, eggs, sugar & yeast.
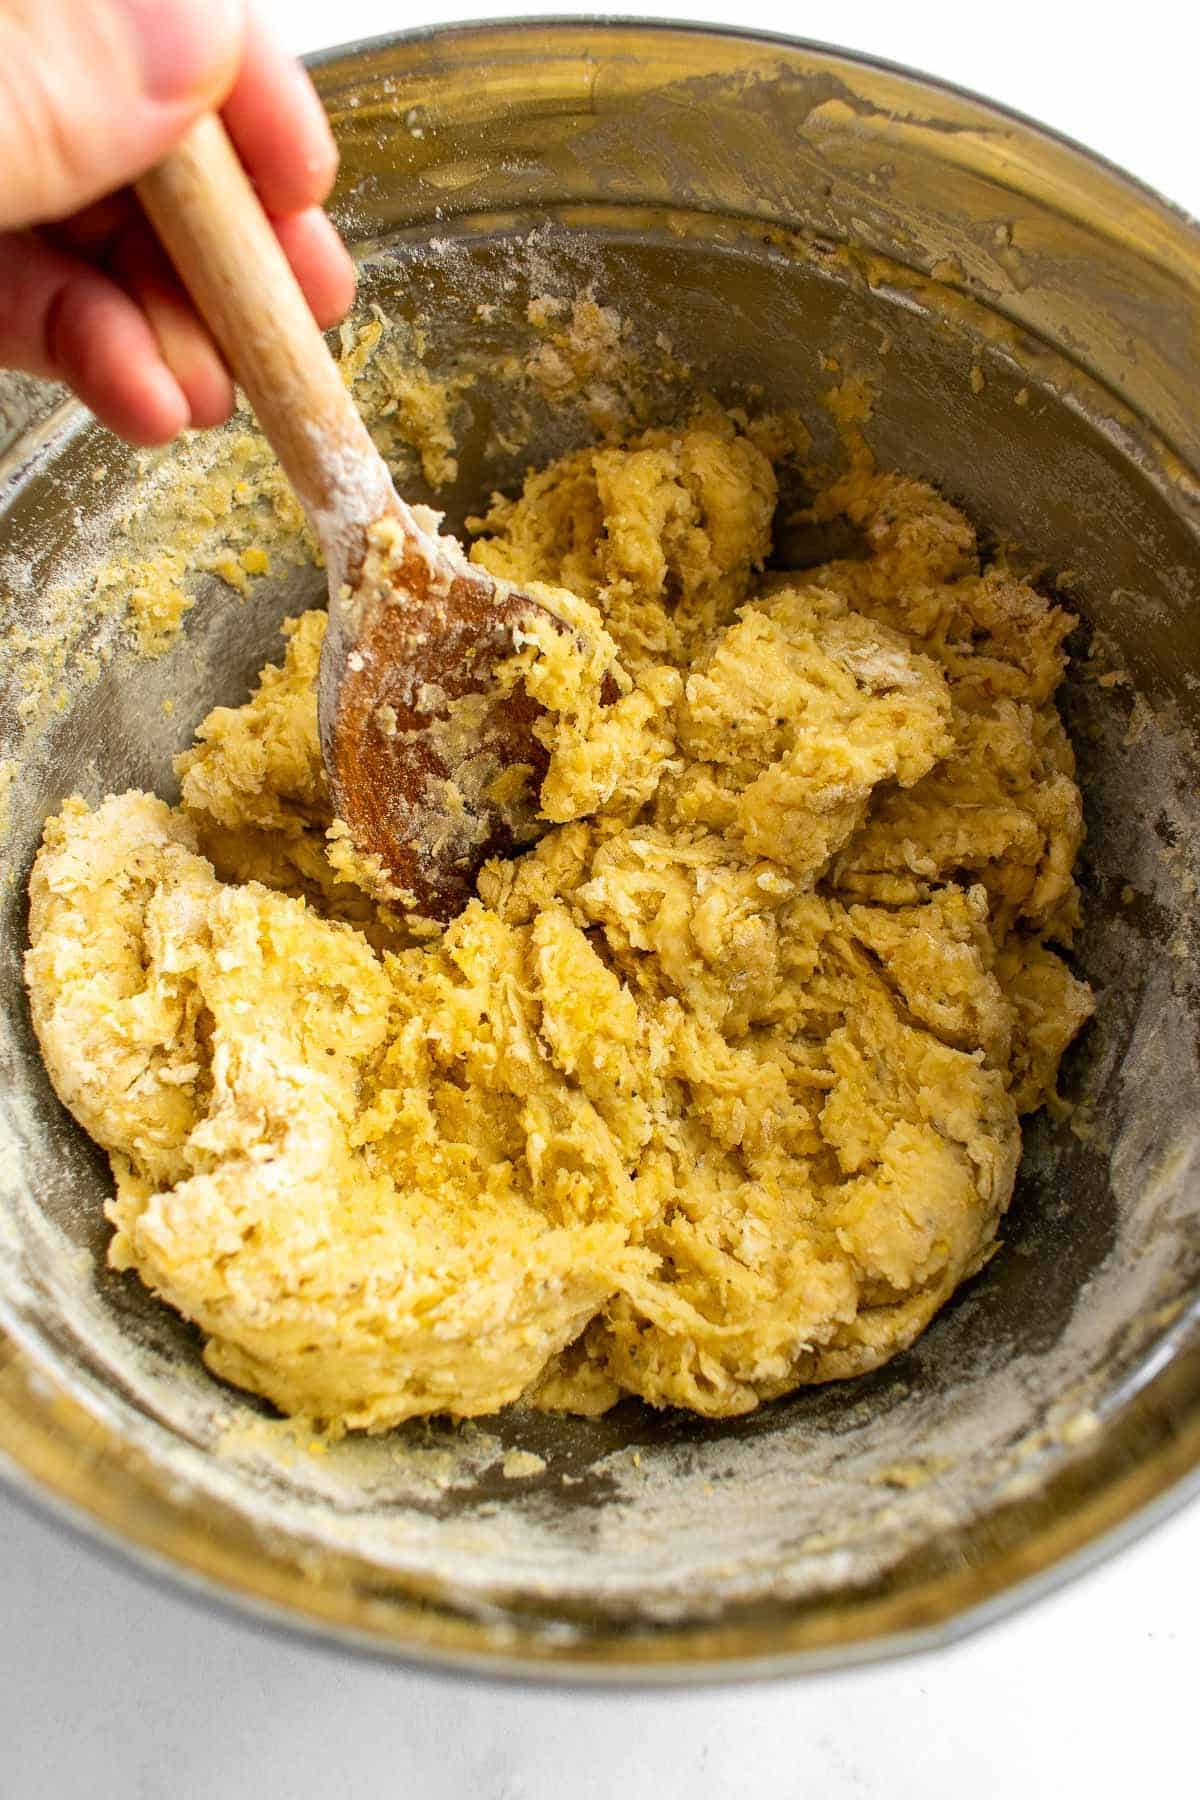
3. Mix in flour, nutritional yeast, dried herbs, and salt.
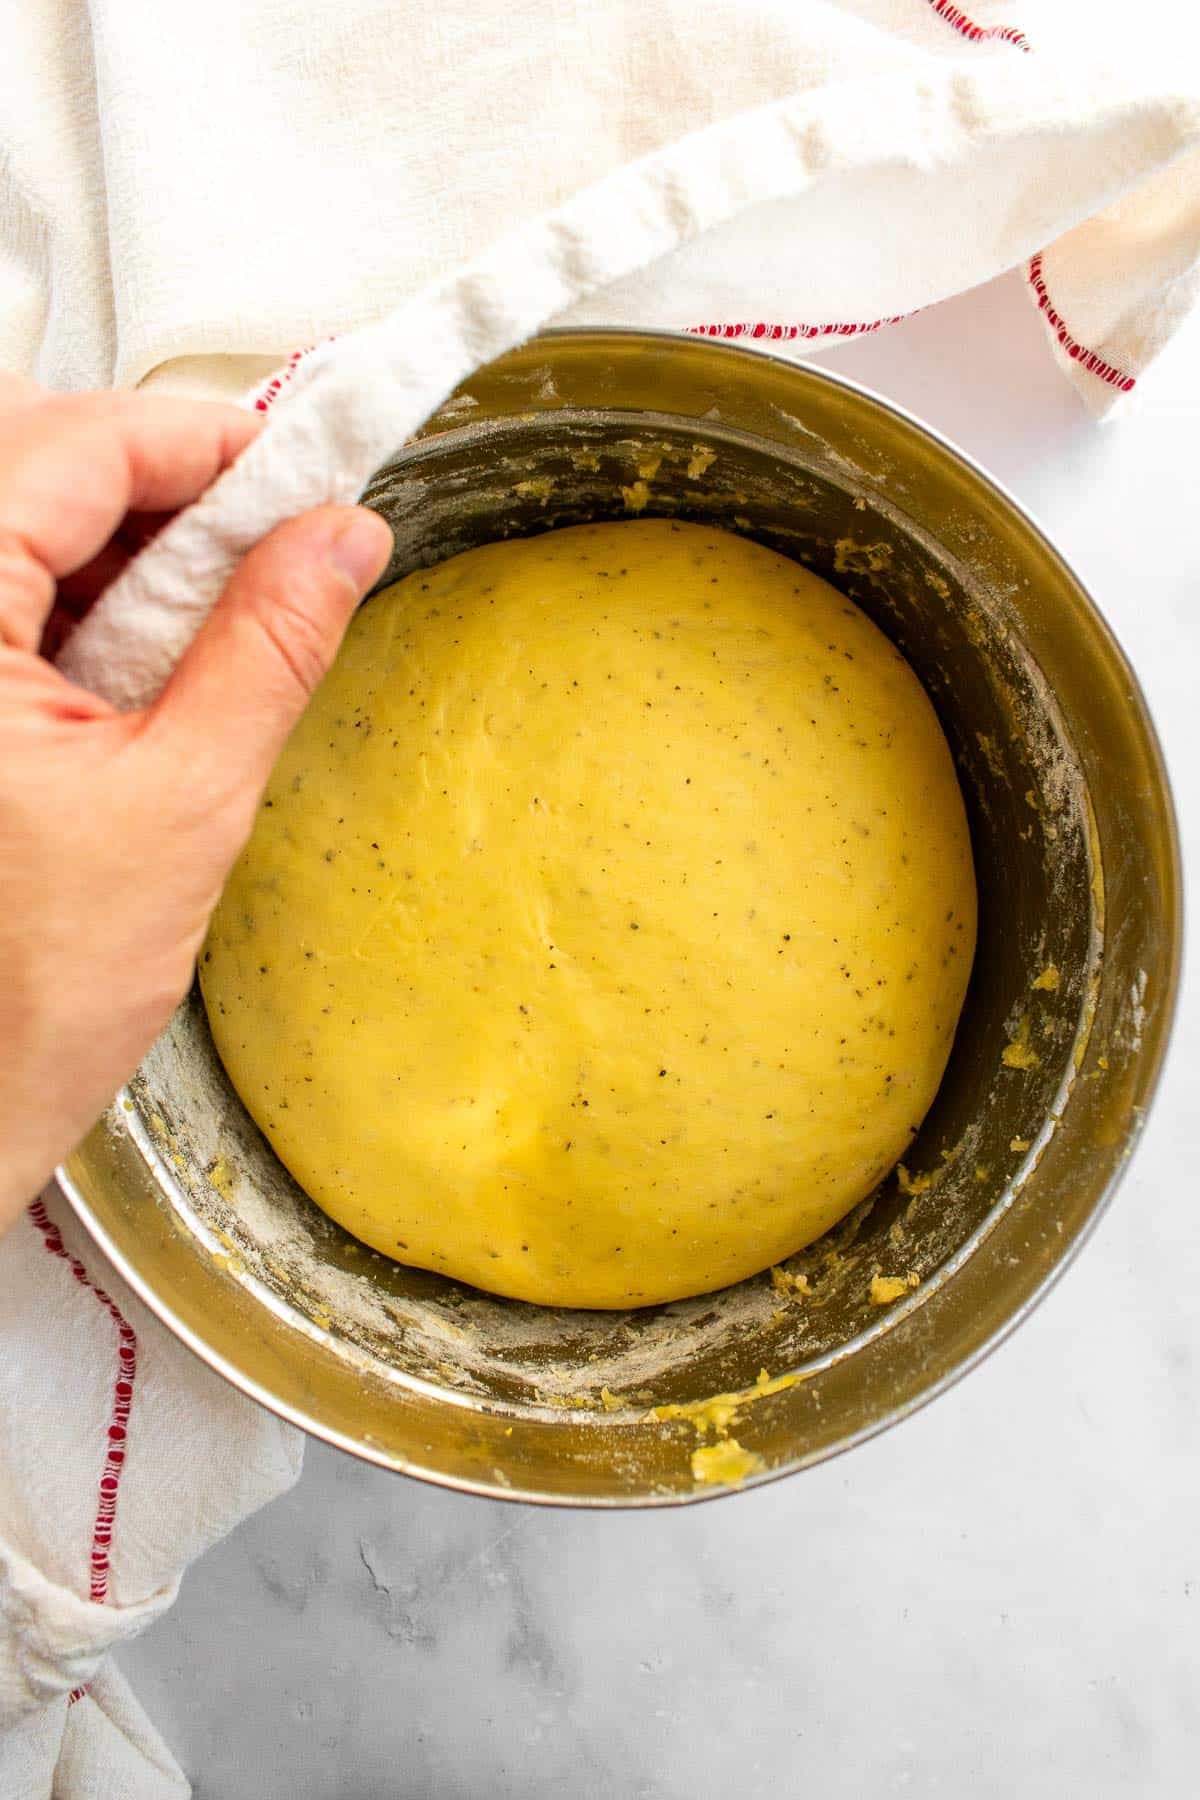
5. Let the dough rise.
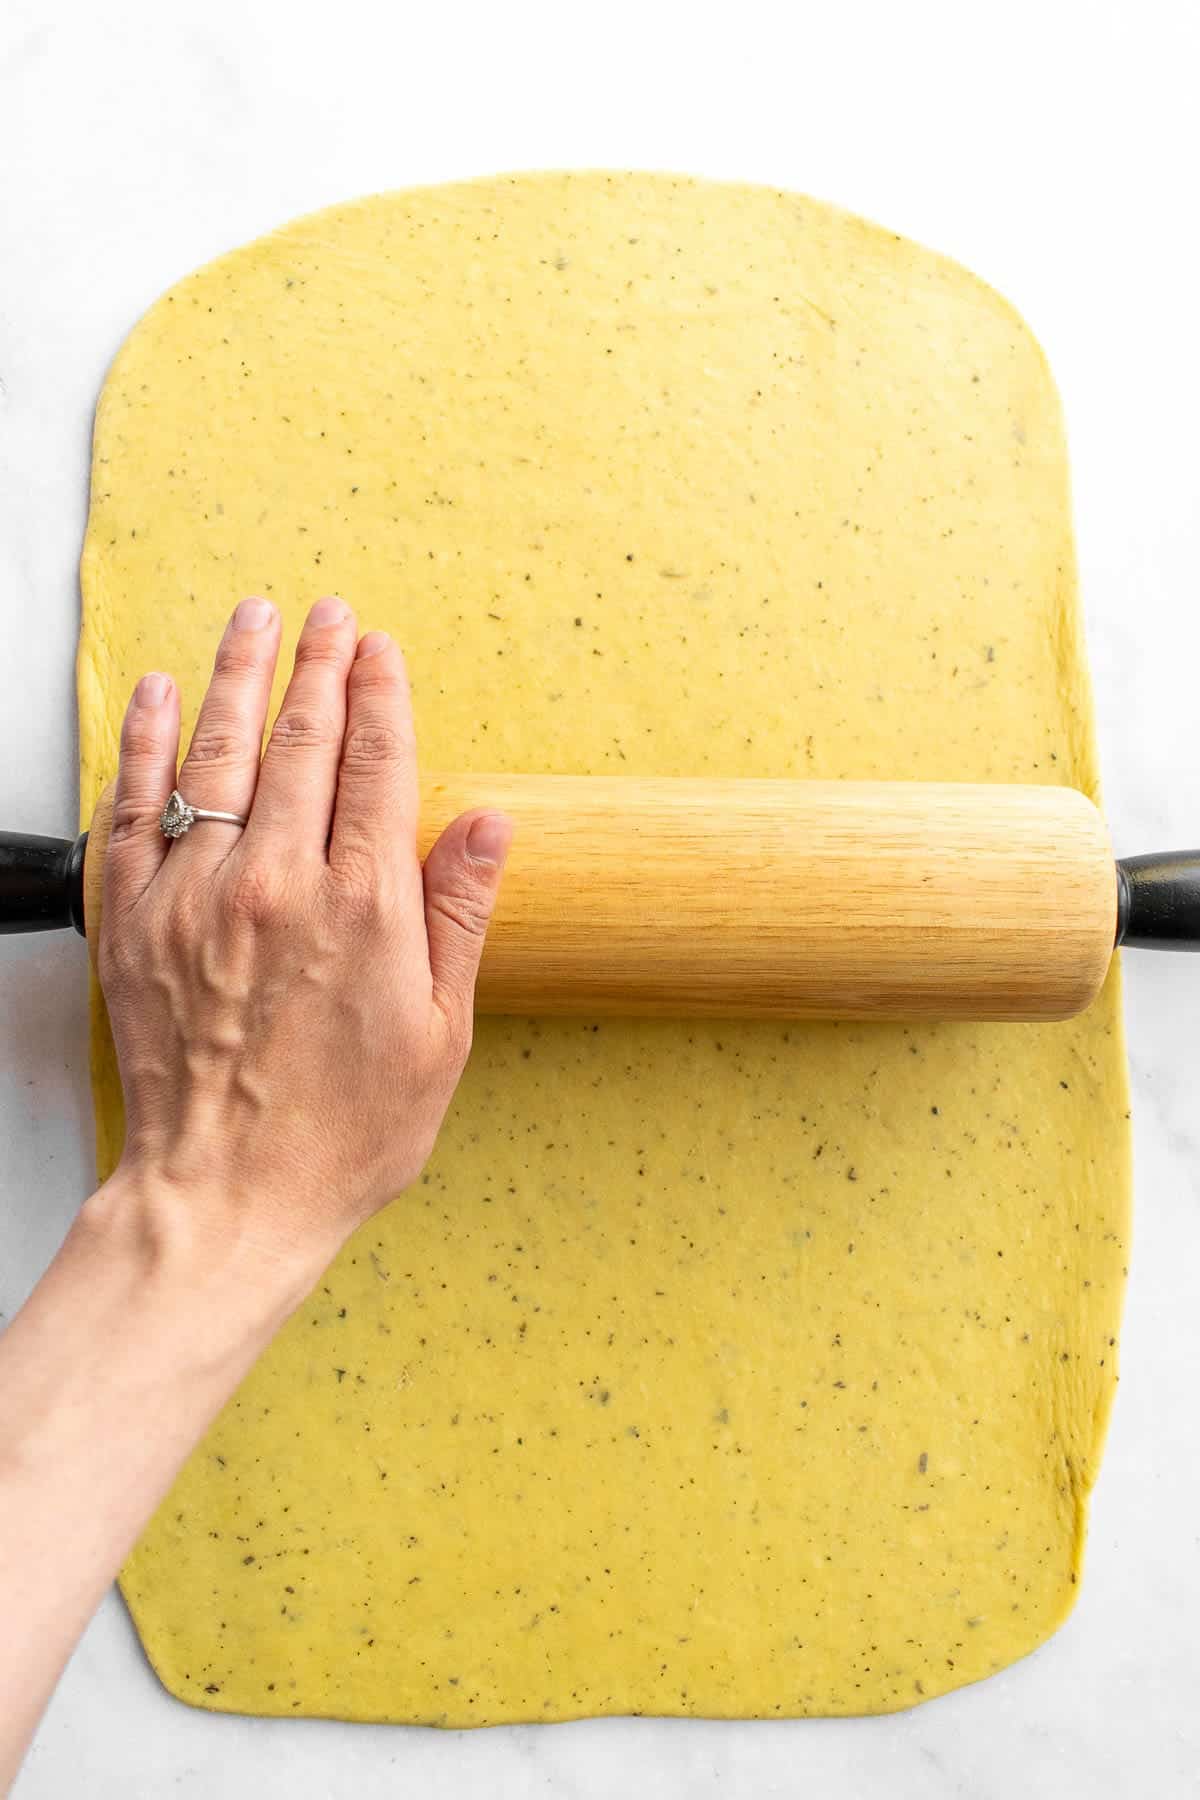
7. Roll out the dough.
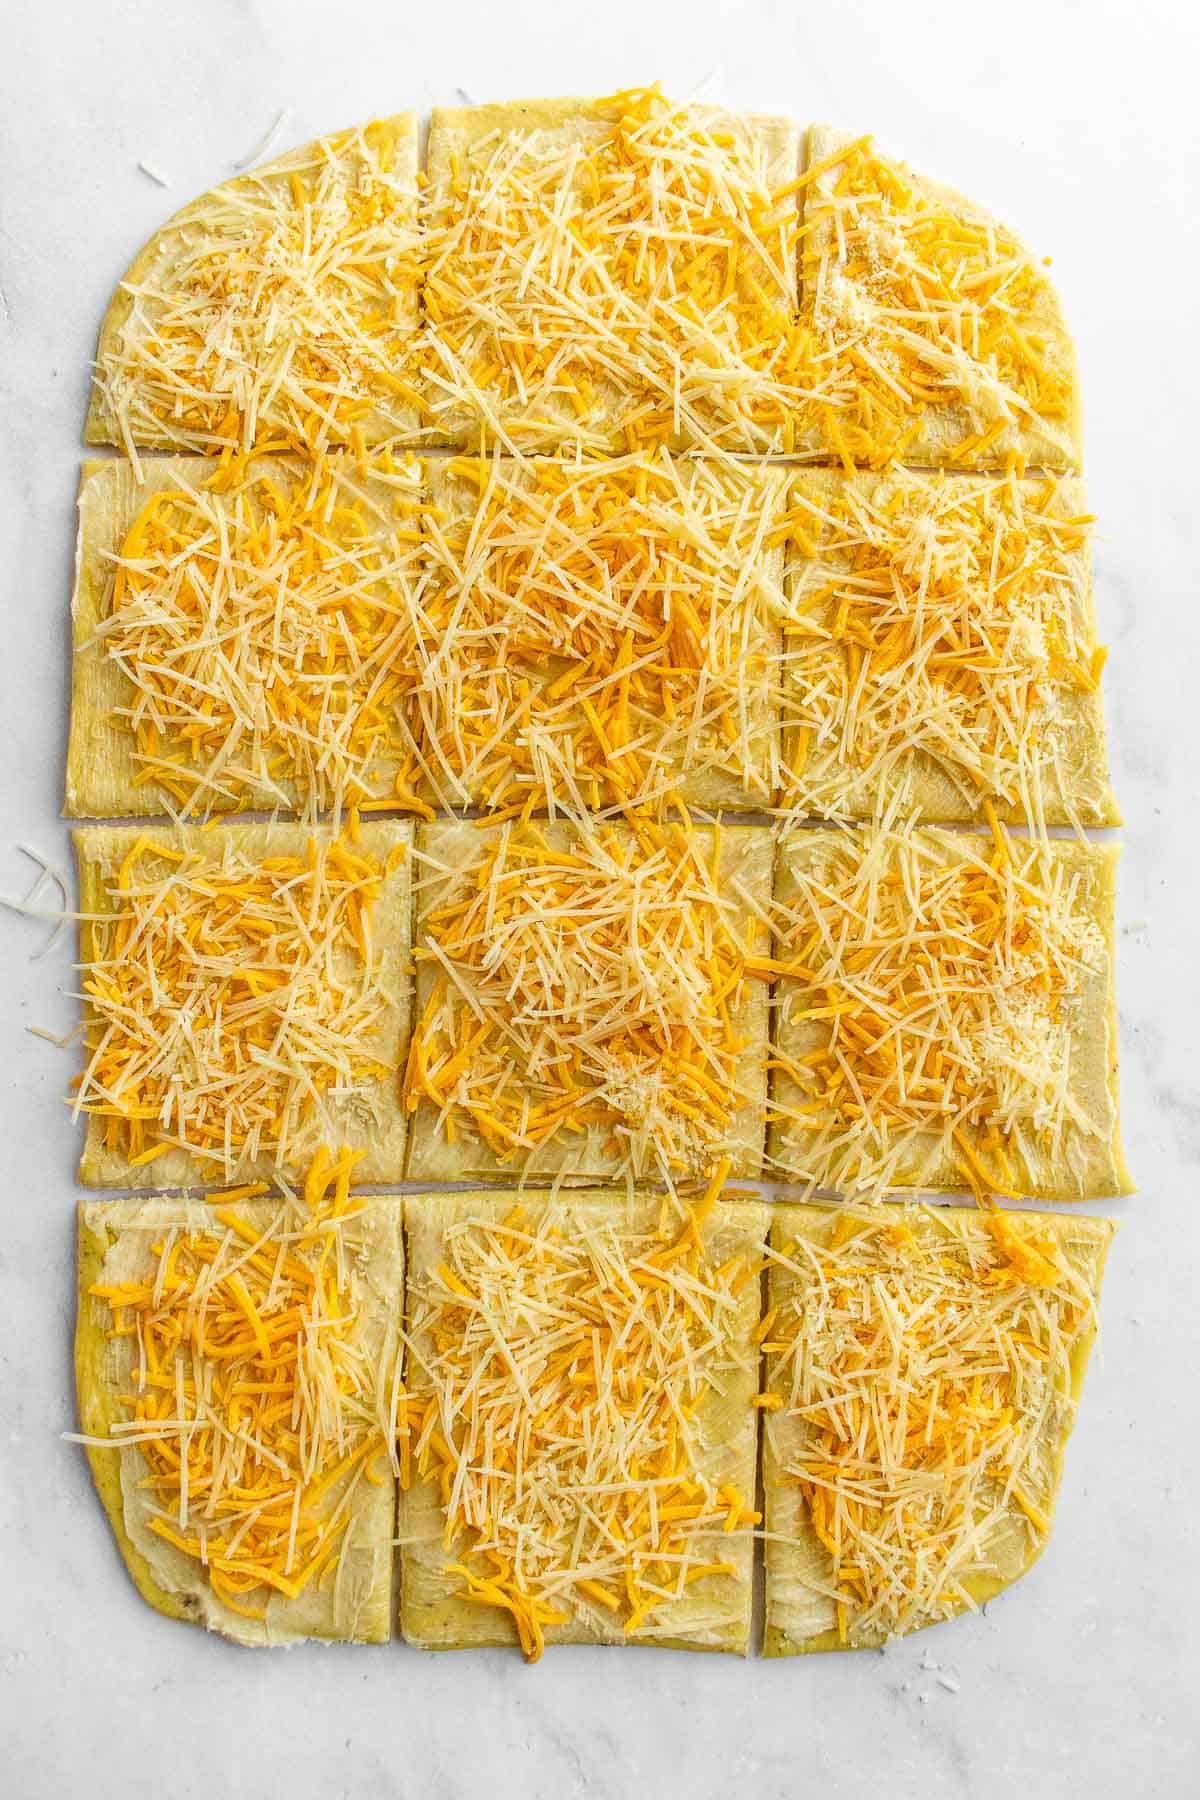
9. Slice into 12 squares and top with shredded cheese.

11. Proof the loaf.

4. Knead the dough until it's smooth & elastic.
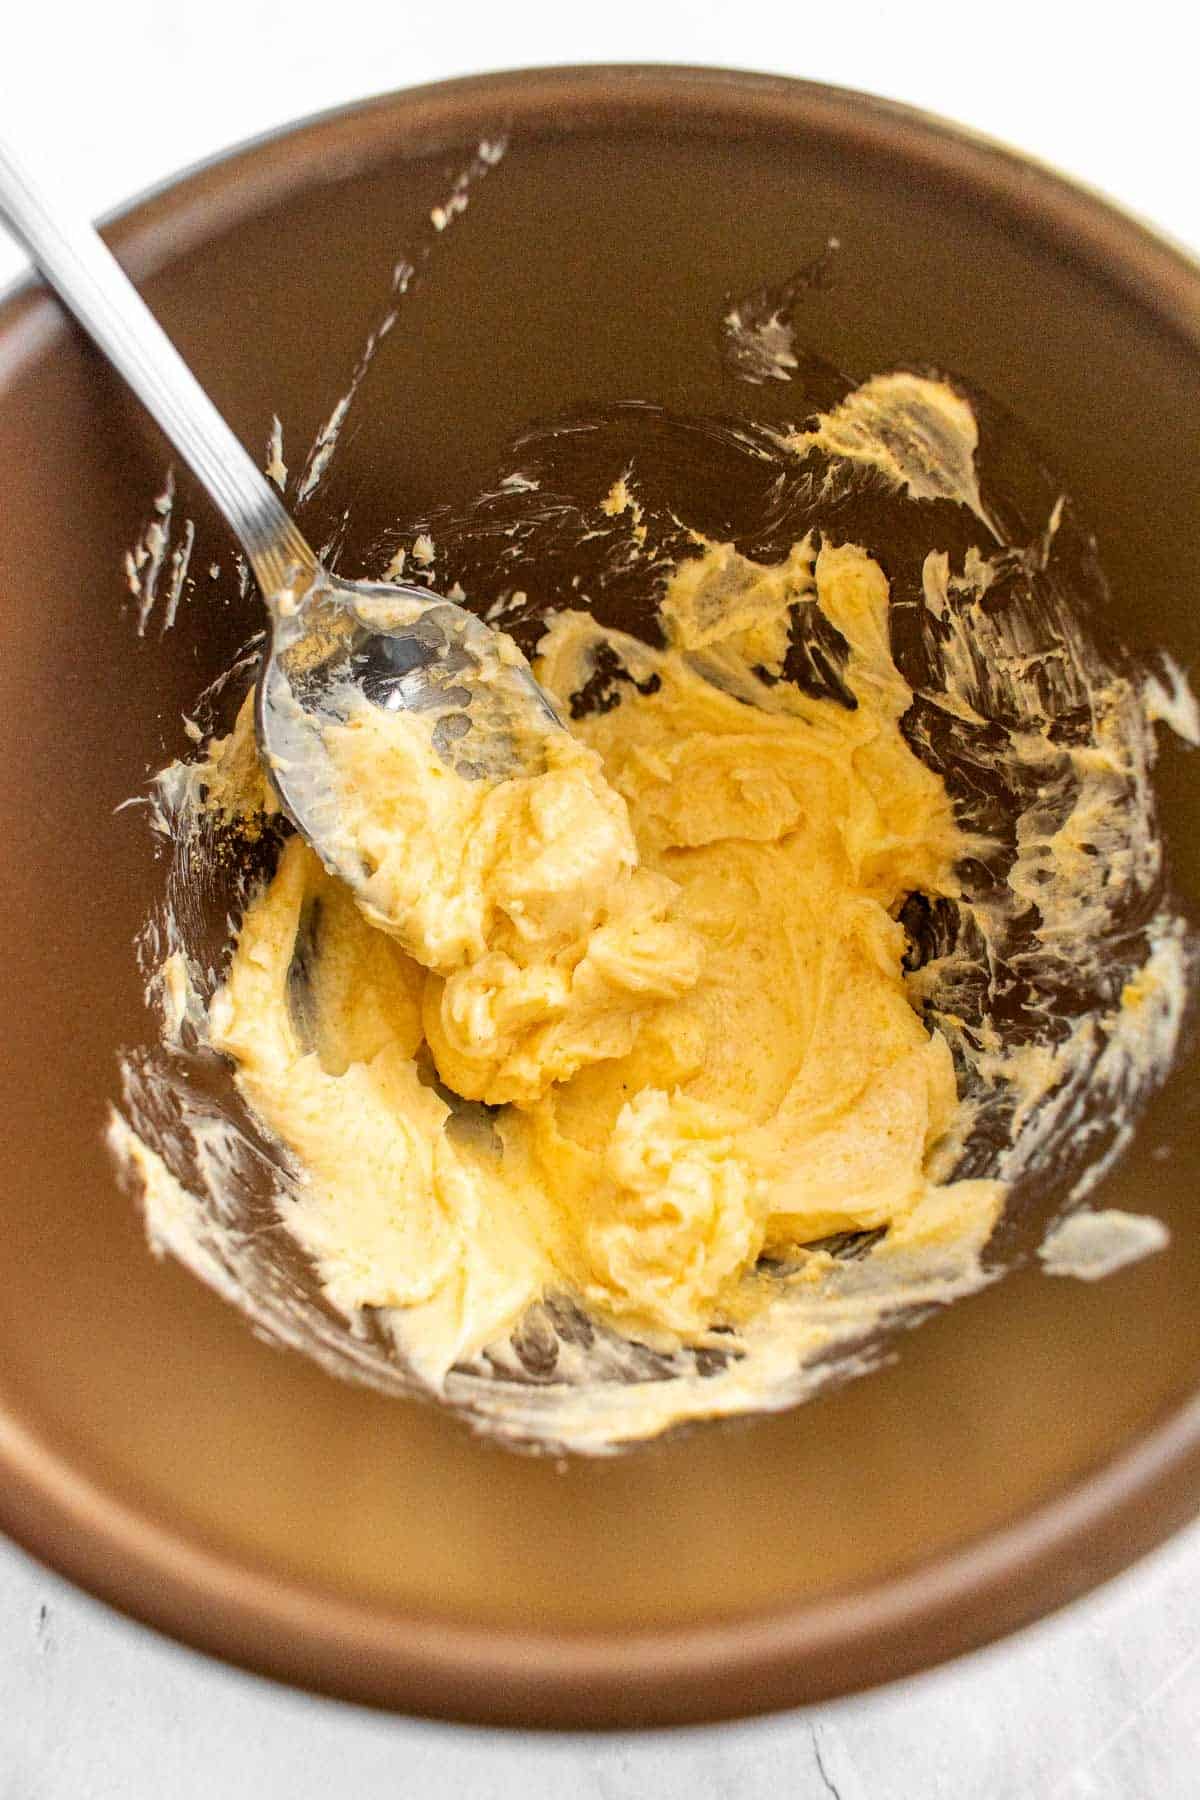
6. Mix the garlic butter.
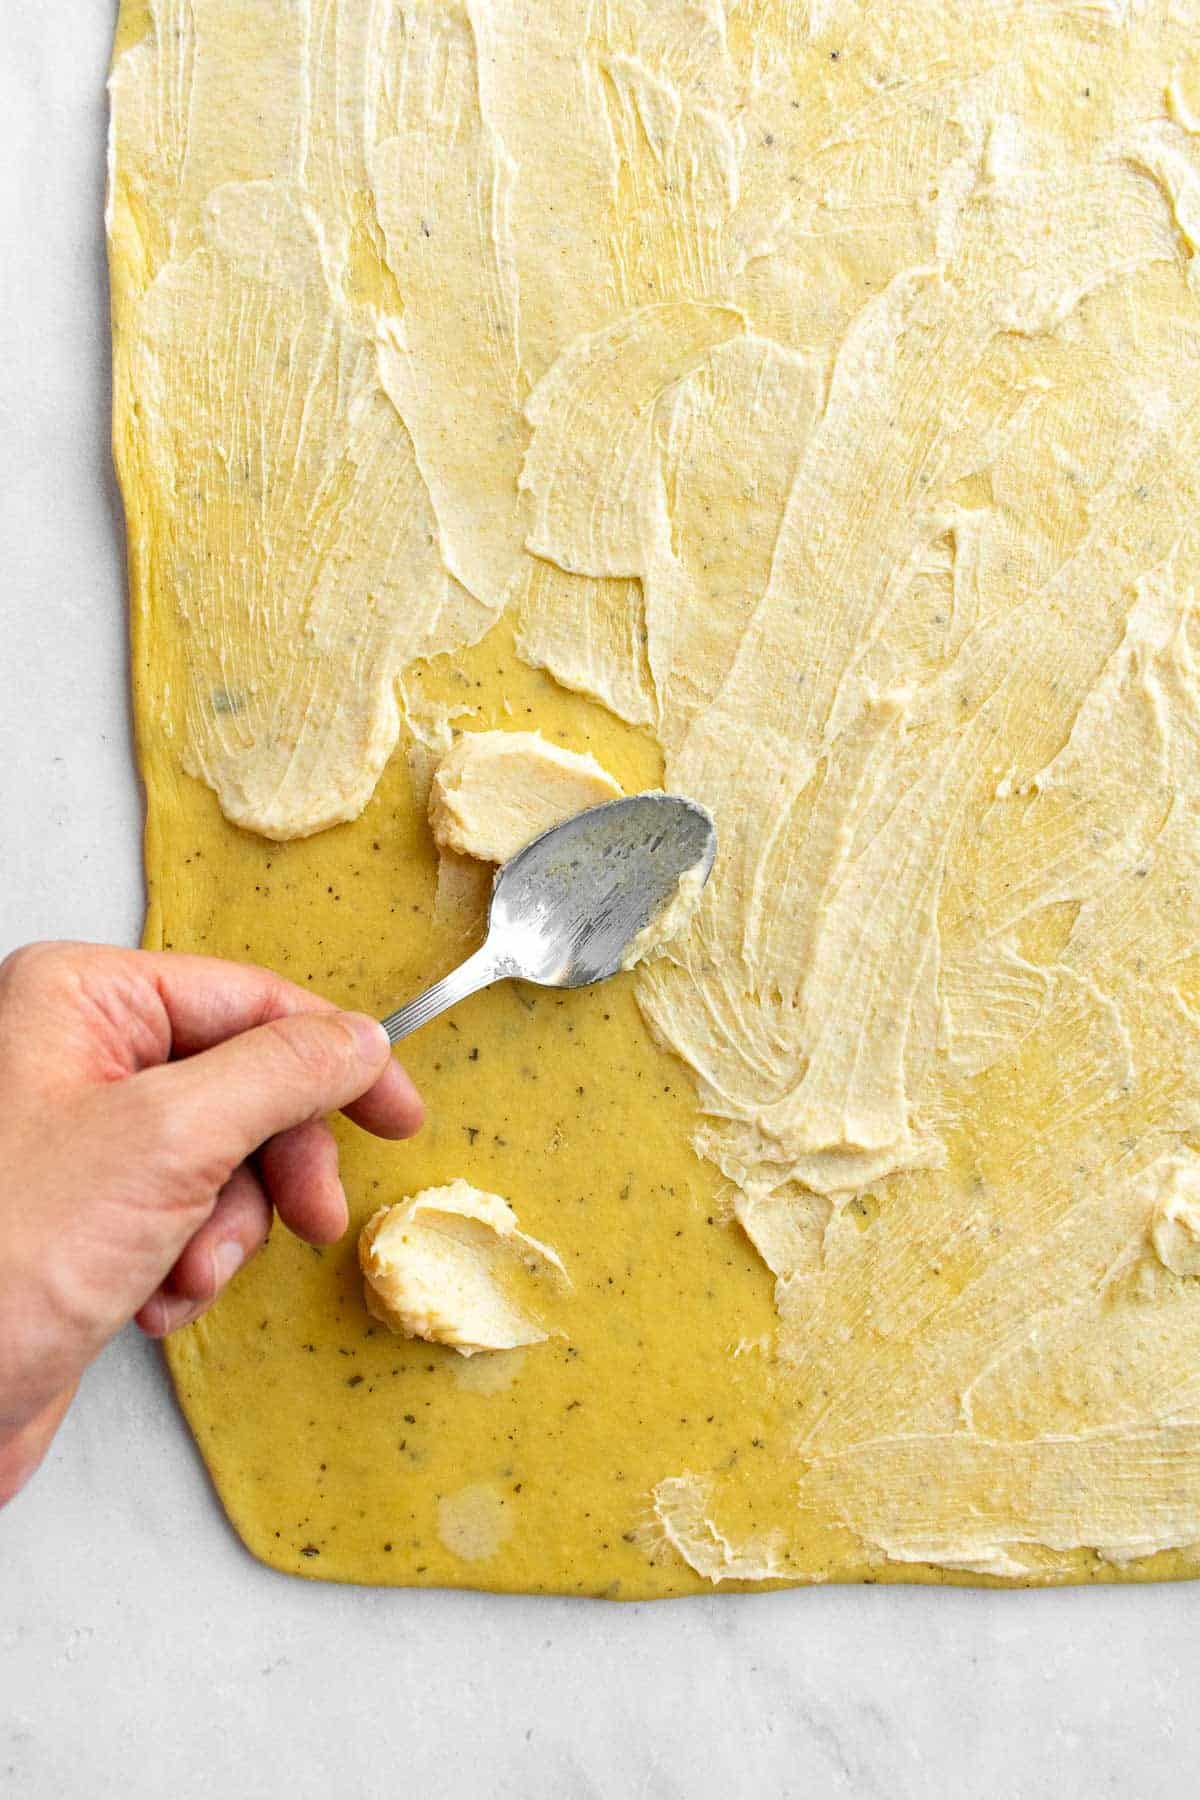
8. Cover with garlic butter.
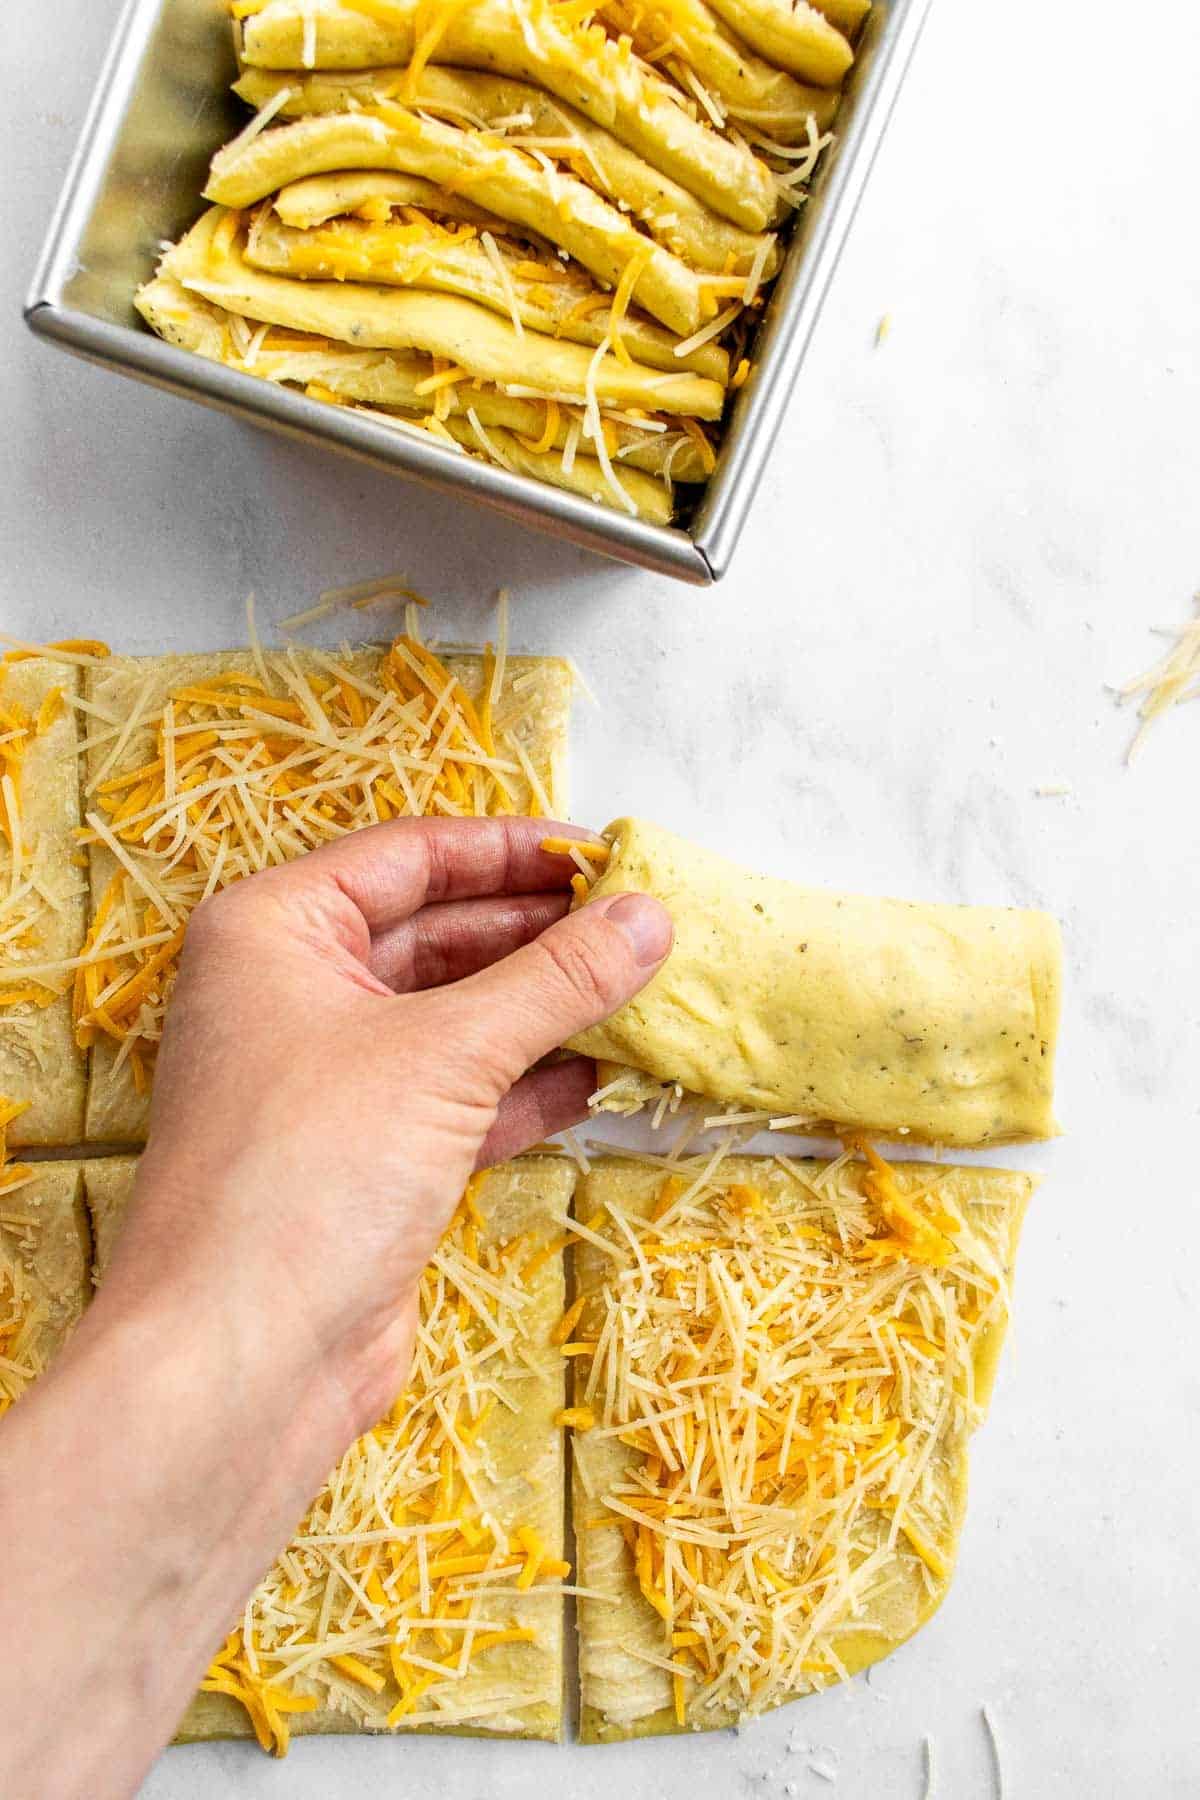
10. Fold each square in half & arrange in a loaf pan.
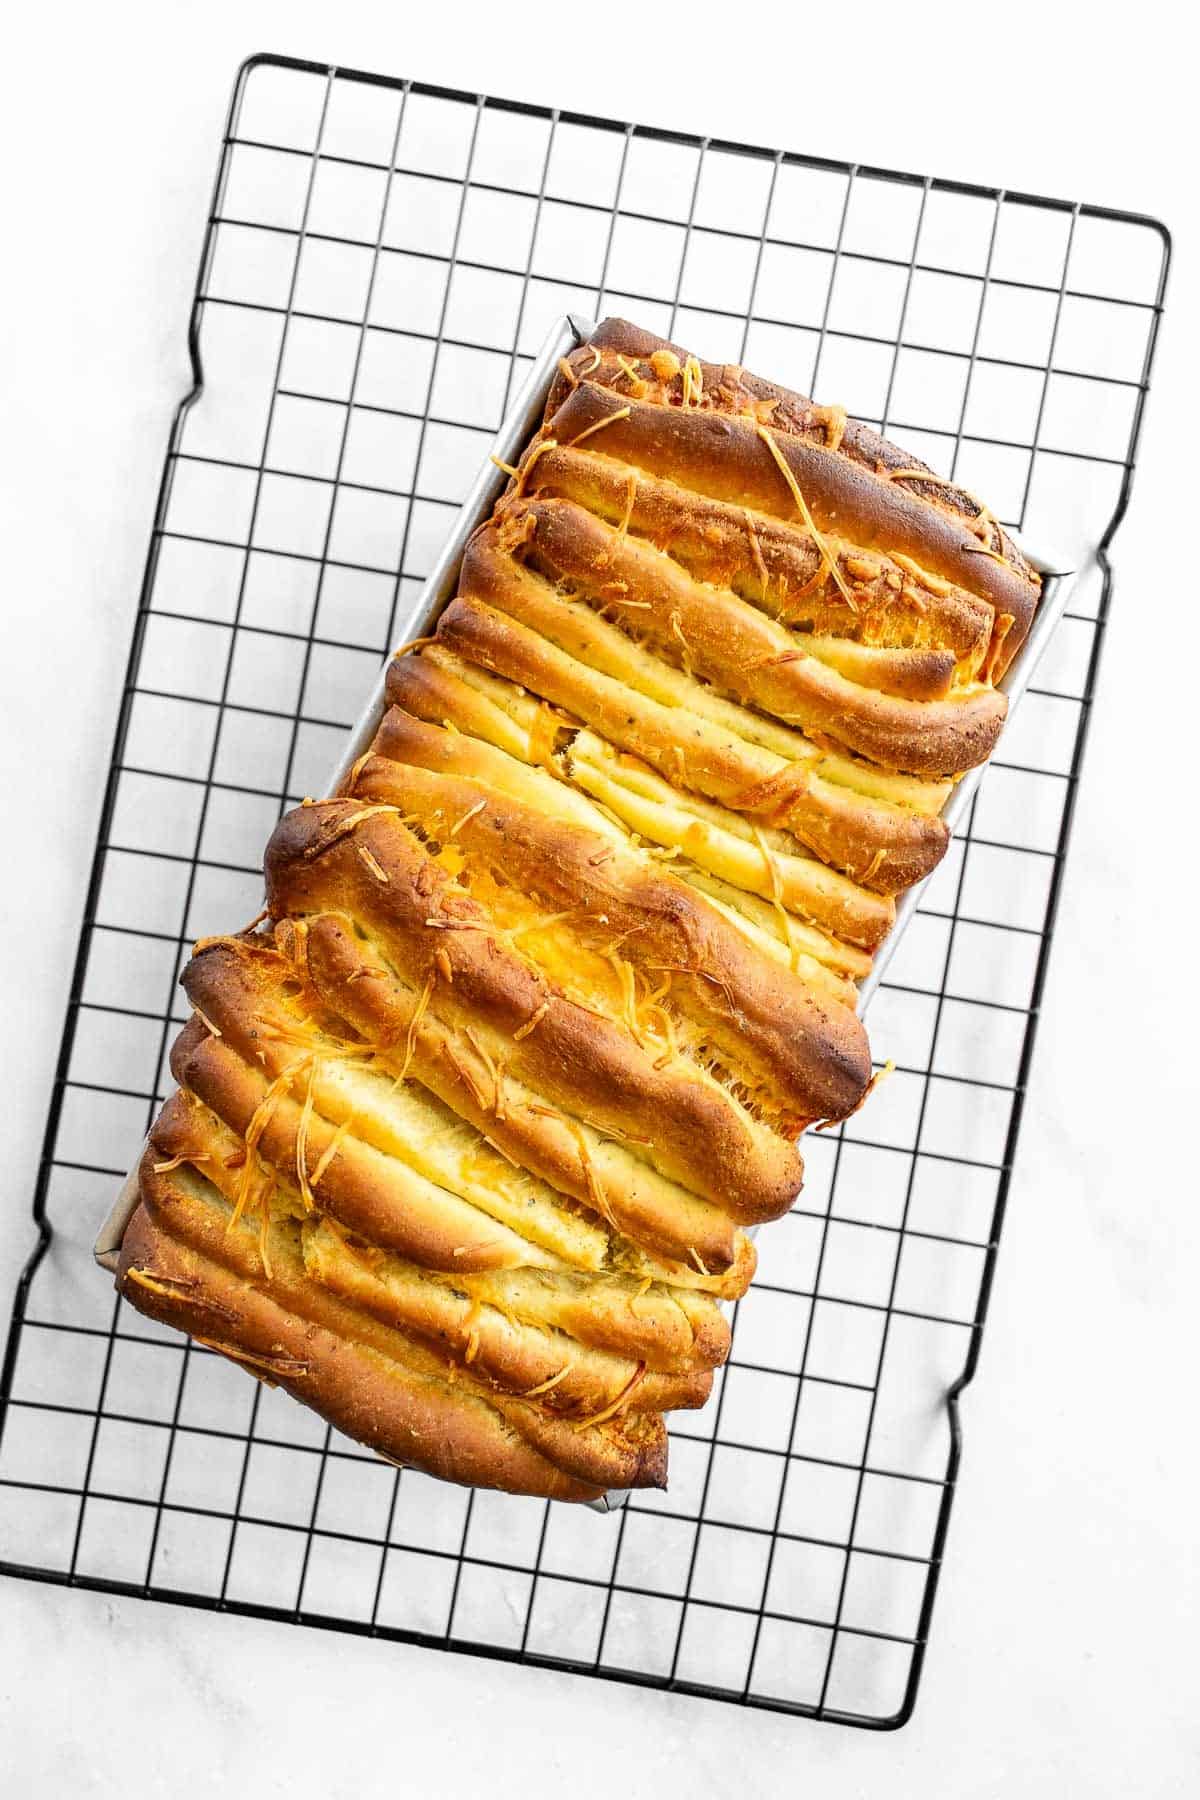
12. Bake and enjoy!

Bread Baking Tip
To prevent the center from being doughy or soggy, I recommend using a kitchen thermometer to make sure your bread is at least 190°F before pulling it out of the oven. I find that the moisture released from the cheese adds more bake time than you might think.
Flavor Tips for this Tear-and-Share Bread
- Herbs: I love using dried Italian seasoning in the dough, which is packed with flavor from several different dried herbs. I've also tested this recipe with dried rosemary and dried basil, so if that's what you have on hand, those are also delicious options!
- Garlic: I like using garlic powder in the filling so I don't have to pull out my cutting board, but you could swap in fresh minced or grated garlic, like in my homemade garlic butter.
- Nutritional Yeast: I usually buy nutritional yeast in the bulk section at my local grocery store, or you can find it in the health foods aisle. But don't worry if you can't get some - this loaf is still plenty cheesy without it!

Cheesy Pull Apart Bread from Scratch
Equipment
Ingredients
BREAD
- ⅔ cup milk
- 2 Tablespoons granulated sugar
- 2¼ teaspoons instant yeast (one packet)
- 2 large eggs, at room temperature
- 4 Tablespoons unsalted butter, softened to room temperature
- 3 cups all purpose flour
- ¼ cup nutritional yeast
- 1 teaspoon Italian herb seasoning
- 1½ teaspoons salt (use either table salt or fine sea salt)
FILLING
- 4 Tablespoons unsalted butter, softened to room temperature
- 1 teaspoon garlic powder
- ¼ teaspoon salt
- 1 cup shredded Parmesan cheese
- 1 cup shredded cheddar cheese
Instructions
- Warm the milk: In a microwave-safe bowl, warm the milk in the microwave for about 1 minute, until it's between 98°F to 105°F.
- Mix the Wet Ingredients: In a large mixing bowl, whisk the warm milk with the sugar, instant yeast, eggs, and softened butter.
- Add the Dry Ingredients: Add the flour, nutritional yeast, Italian seasoning, and salt. Mix with a large wooden spoon until it forms a soft dough.
- Knead the Dough: On a clean work surface, knead the dough by hand for about 5 minutes, until the dough is smooth and elastic. (Or knead the dough in a stand mixer with a hook attachment for about 3 minutes.)
- Let the Dough Rise: Place the dough ball back in the mixing bowl and cover it with a clean kitchen towel. Let the dough rise in a warm spot until it has doubled in size, after about 1 hour.
- Make the Filling: In a small bowl, mix the softened butter, garlic powder, and salt until it forms a thick paste. Set aside.
- Fill and Cut the Dough: Grease a 9-inch by 5-inch loaf pan and set aside. On a clean work surface, roll out the dough until it's about 12 inches by 16 inches. Spread the garlic butter over the dough in an even layer, all the way to the edges. Cut the dough into 12 even squares (4 inches by 4 inches) (3 squares by 4 squares). Sprinkle the shredded Parmesan and cheddar evenly on top of each square.
- Shape the Dough: Fold each square of dough in half and place it in the prepared loaf pan so the folded side is facing down in the pan, and the open side showing the filling is facing up. To get all the dough pieces to fit, gently press the ones in the loaf pan towards the edge to make room for the rest.
- Proof the Dough: Cover the loaf pan with a kitchen towel. Set aside to proof for 1 hour, until the loaf has puffed up. The dough is done proofing when an indent made by your finger springs back to its original shape after 2-3 seconds.
- Bake the Bread: Preheat the oven to 350°F. Bake for 40 to 50 minutes, until the loaf is golden brown and reaches an internal temperature of 190°F-200°F. I usually add a large piece of aluminum foil folded in half over my bread after 20 minutes, to prevent the top from getting too dark. Allow the loaf to cool for 10 minutes, then remove it from the loaf pan to tear & share!Optional: Brush the top with a little melted butter and sprinkled with fresh chopped herbs or extra shredded cheese.
Notes
- Equipment: I recommend greasing a metal loaf pan for this bread. When I tested the recipe by lining the pan with parchment paper, it didn't get quite as golden brown and crispy on the bottom and sides.
- Storing: You can store your cooled loaf at room temperature for a couple days or wrapped in aluminum foil in the fridge for up to a week. I like to reheat slices in the toaster to get the edges crispy again and the cheese soft.
- Tearing vs Slicing: I find it a lot easier to pull apart the slices and get those gooey cheese pull moments while the bread is still warm. Once it cools, I usually slice it with a serrated knife for more even pieces.


I'm eggcited to hear from you :)