

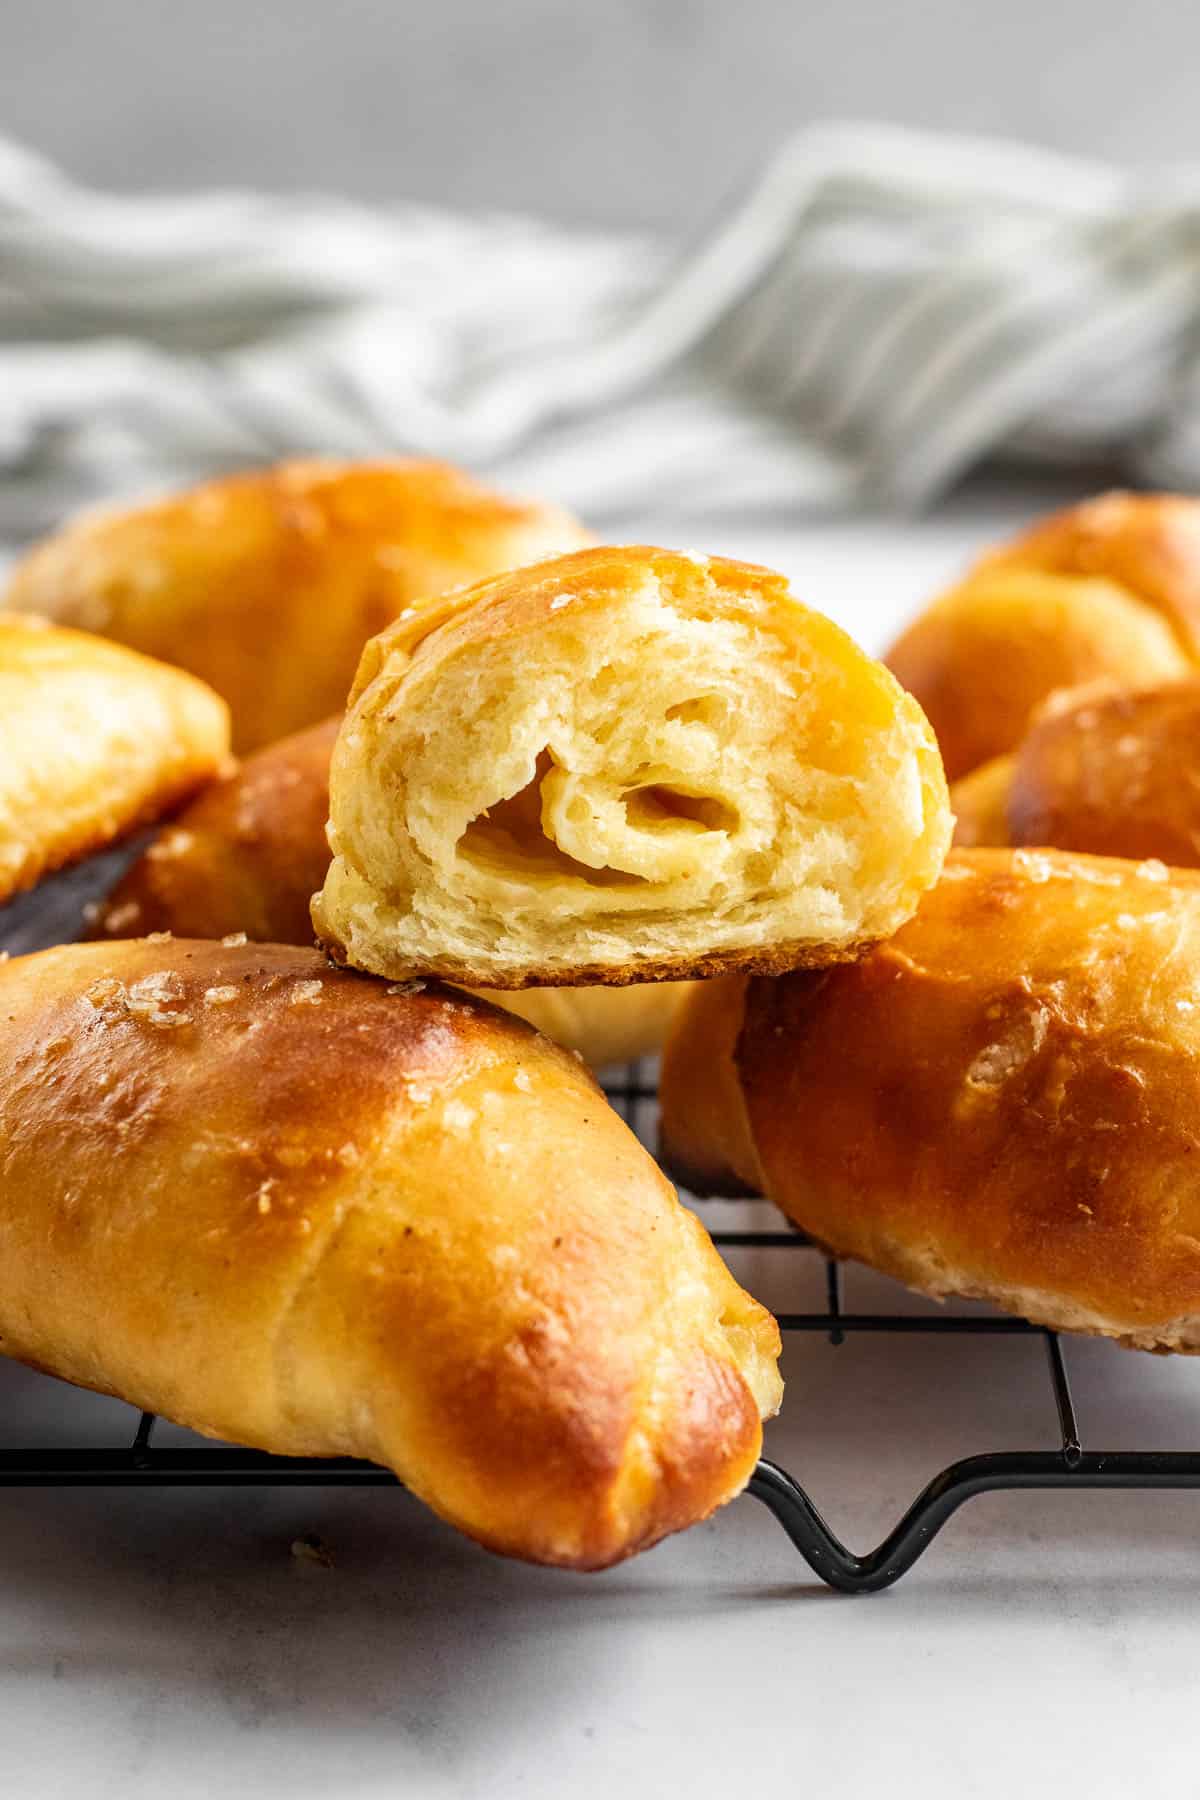
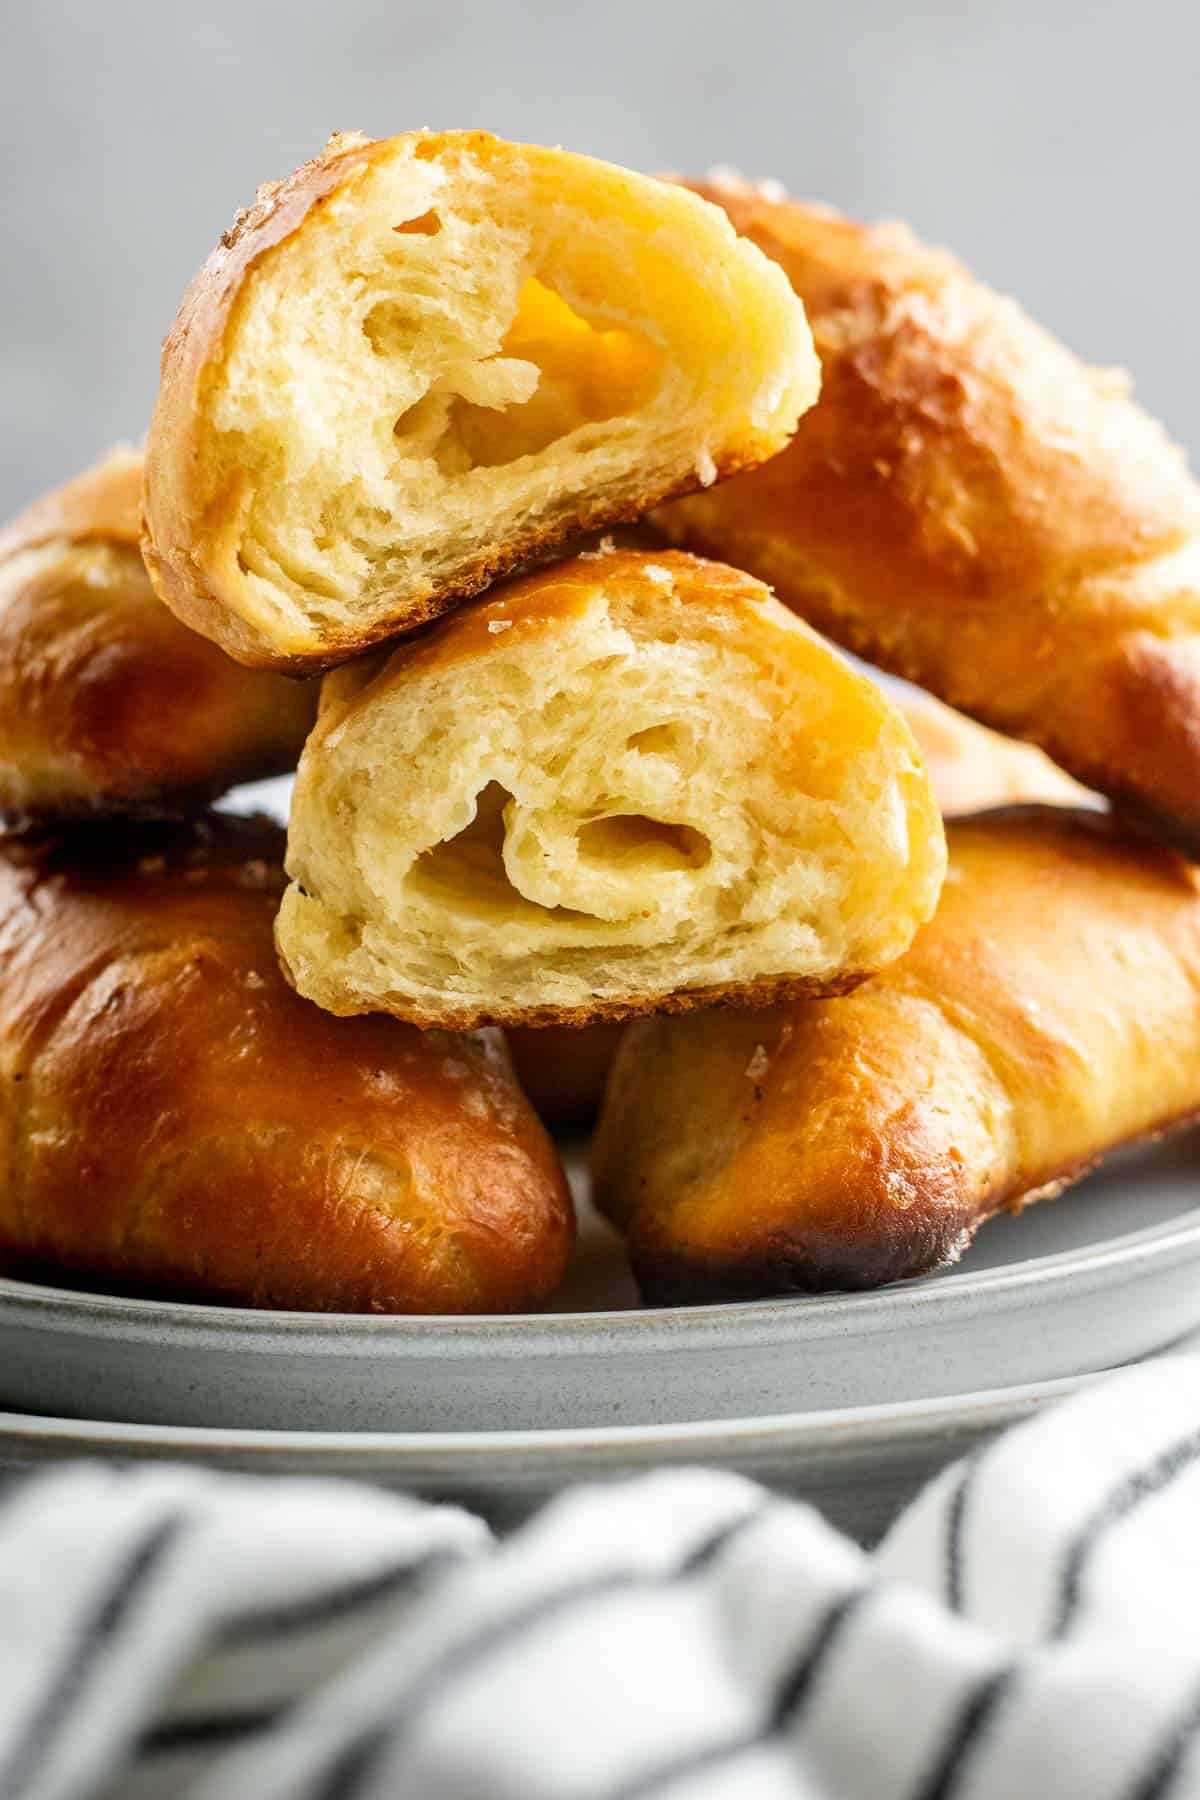
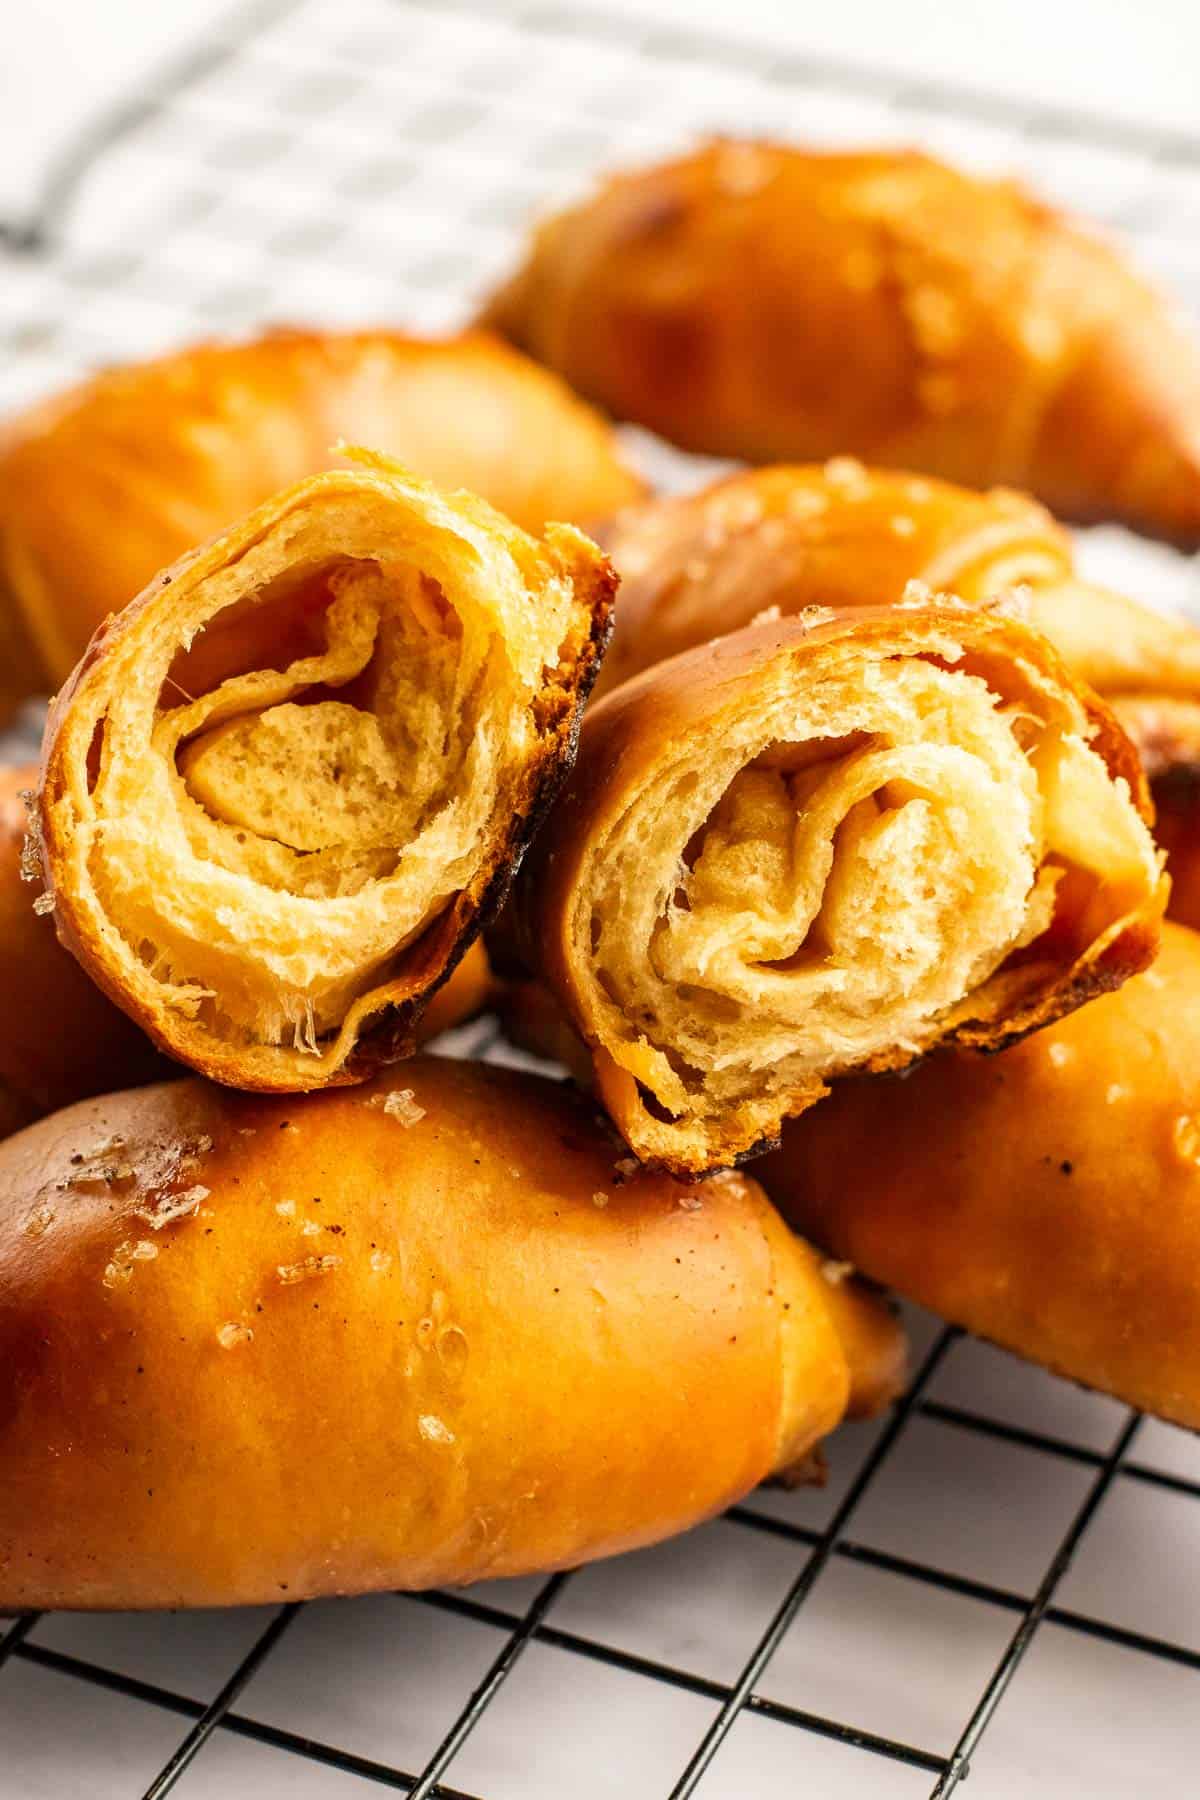
These fluffy salt bread buns are filled with salted butter and topped with flaky salt, perfect for breakfast or snacking! A simple Tangzhong and a bit of milk powder make the dough tender and flavorful, while a generous brush of water helps the crust stay soft as the buns bake up light & flaky.
My Take on Viral Salt Bread with Just 7 Ingredients!
Back in 2024, I visited South Korea and completely fell in love with the street food scene! So I developed this recipe for buttery salt bread that recreates those flavors at home. Inspired by Japanese shio pan and Korean salt bread, I use a Tangzhong (which is a thick, cooked mixture of just flour + water) to make the dough suuuper soft and moist.
After testing this recipe a few different ways, I like it with 70% hydration, to create really airy, fluffy bread that still feels manageable to work with. I'll tell you upfront though, it needs to be sticky to get the right texture, which is why I prefer mixing & kneading this one in my stand mixer. You can knead it by hand with the "claw kneading method" and rinse your hands in cold water periodically.
For more flavor, milk powder adds a subtle richness without increasing the dough's hydration. However, it does inhibit yeast so we'll only use 25 grams. I also tested toasted milk powder, but that honestly added more work with barely any flavor difference. And while some recipes call for a mix of bread flour and cake flour, I prefer the chewier texture created with just bread flour.
Welcome to My Kitchen! Let's Bake Salt Bread!
For the full step-by-step directions, scroll down to the recipe card.
Carissa's Testing Notes
My first batch barely doubled in size after 4 hours of rising, because there was way too much salt & milk powder. They were dense and small, great for dunking in soup but not what I was going for here.
I also tested a cold proof of the dough to enhance the flavor and split up the work over two days. But they ended up looking like little ham rolls! Great flavor but tight, heavy texture again.
Recipe Tips
- Measurements: I normally include both empirical and metric measurements in my recipes, but this dough is a little more sensitive to ingredient ratios. So pull out your kitchen scale! I got mine from my local grocery store for about $15.
- Brown Butter Topping: It's totally normal for some of the butter to leak out of the buns as they bake. This butter turns into delicious brown butter, which we'll brush onto the buns for extra flavor and a glossy shine!


Easy Salt Bread (Shio Pan)
developed & tested by:
Equipment
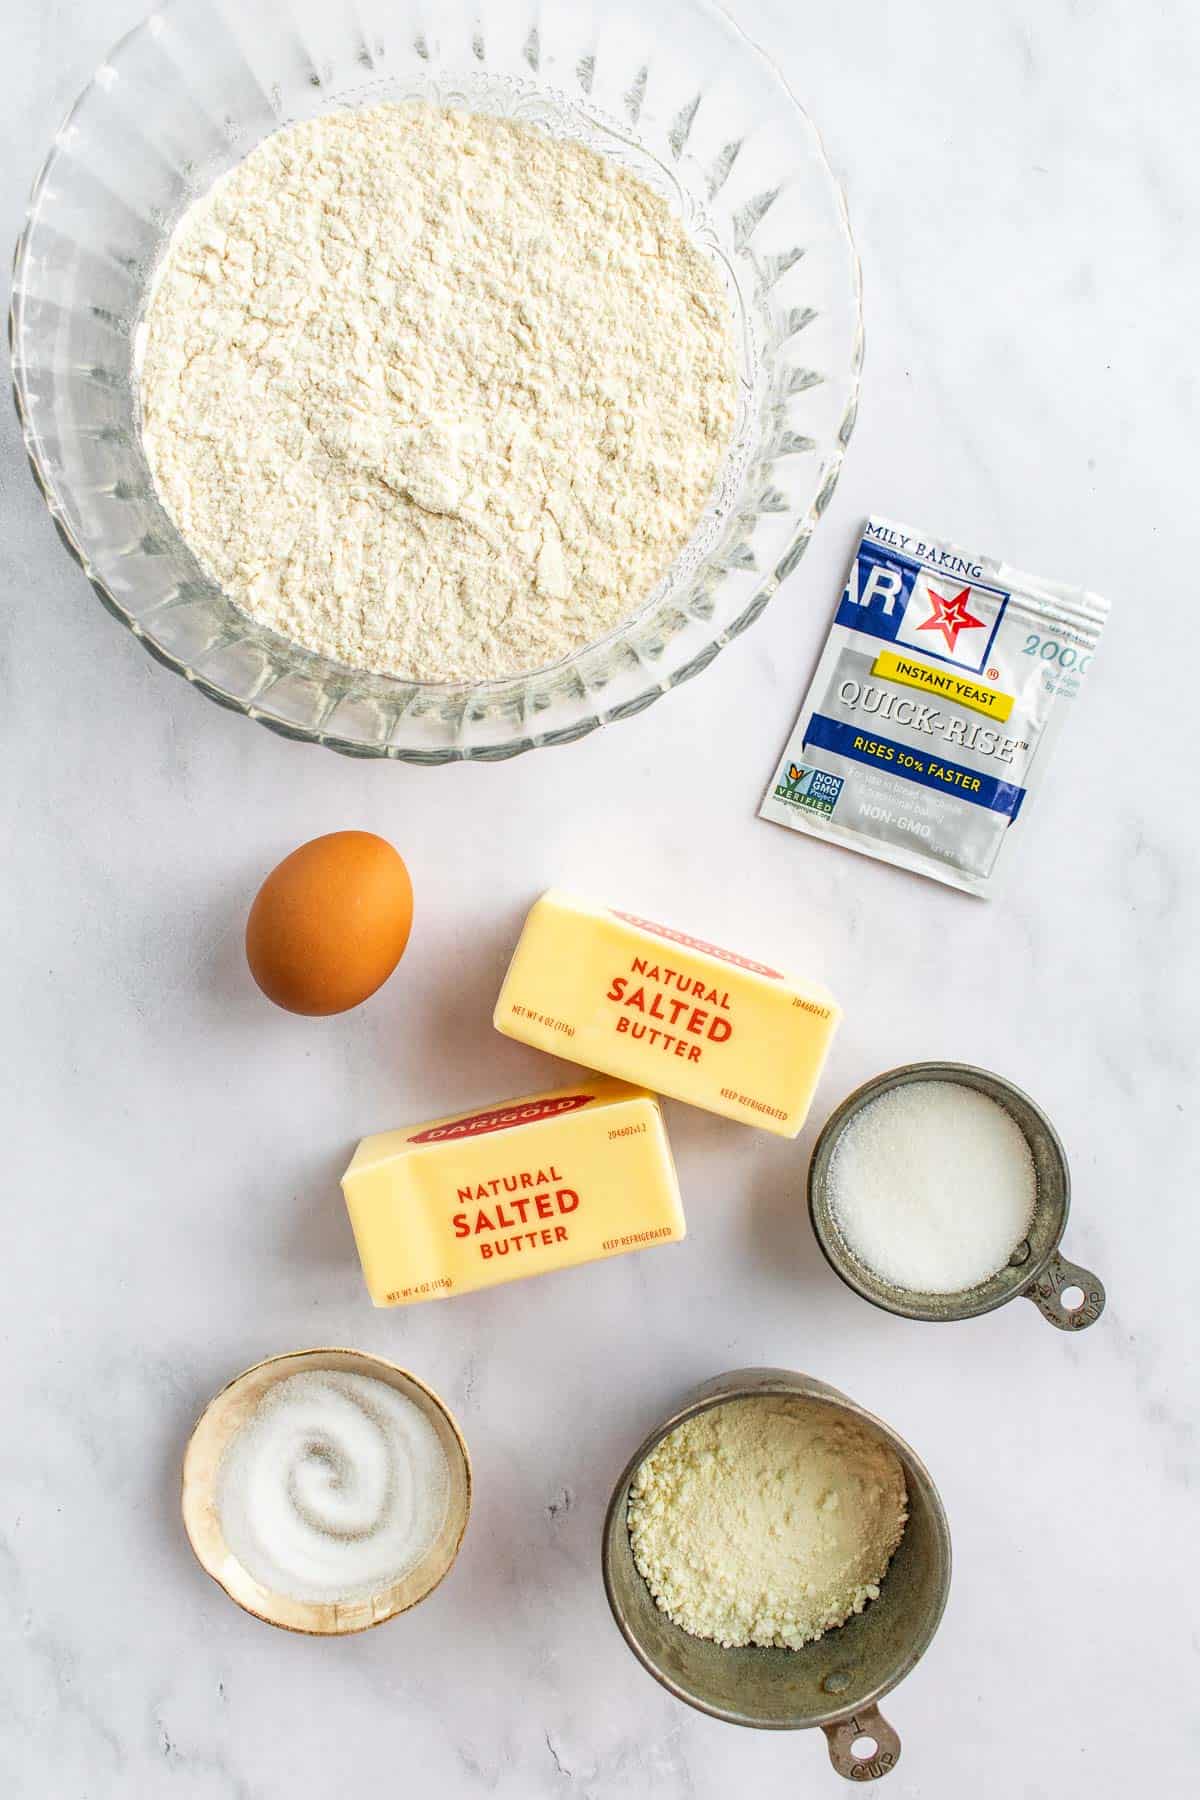
Ingredients
Tangzhong
- 20 grams bread flour
- 100 grams water
Dough
- 80 grams Tangzhong
- 75 grams warm water (between 80-90°F or 27-32°C)
- 230 grams bread flour
- 25 grams milk powder
- 25 grams granulated sugar
- 7 grams instant yeast (one packet)
- 5 grams salt (use table salt or fine sea salt)
- 1 egg, at room temperature
- 28 grams salted butter, softened to room temperature (2 tablespoons)
Filling
- 113 grams salted butter, cold (1 stick)
Topping
- flaky salt
Instructions
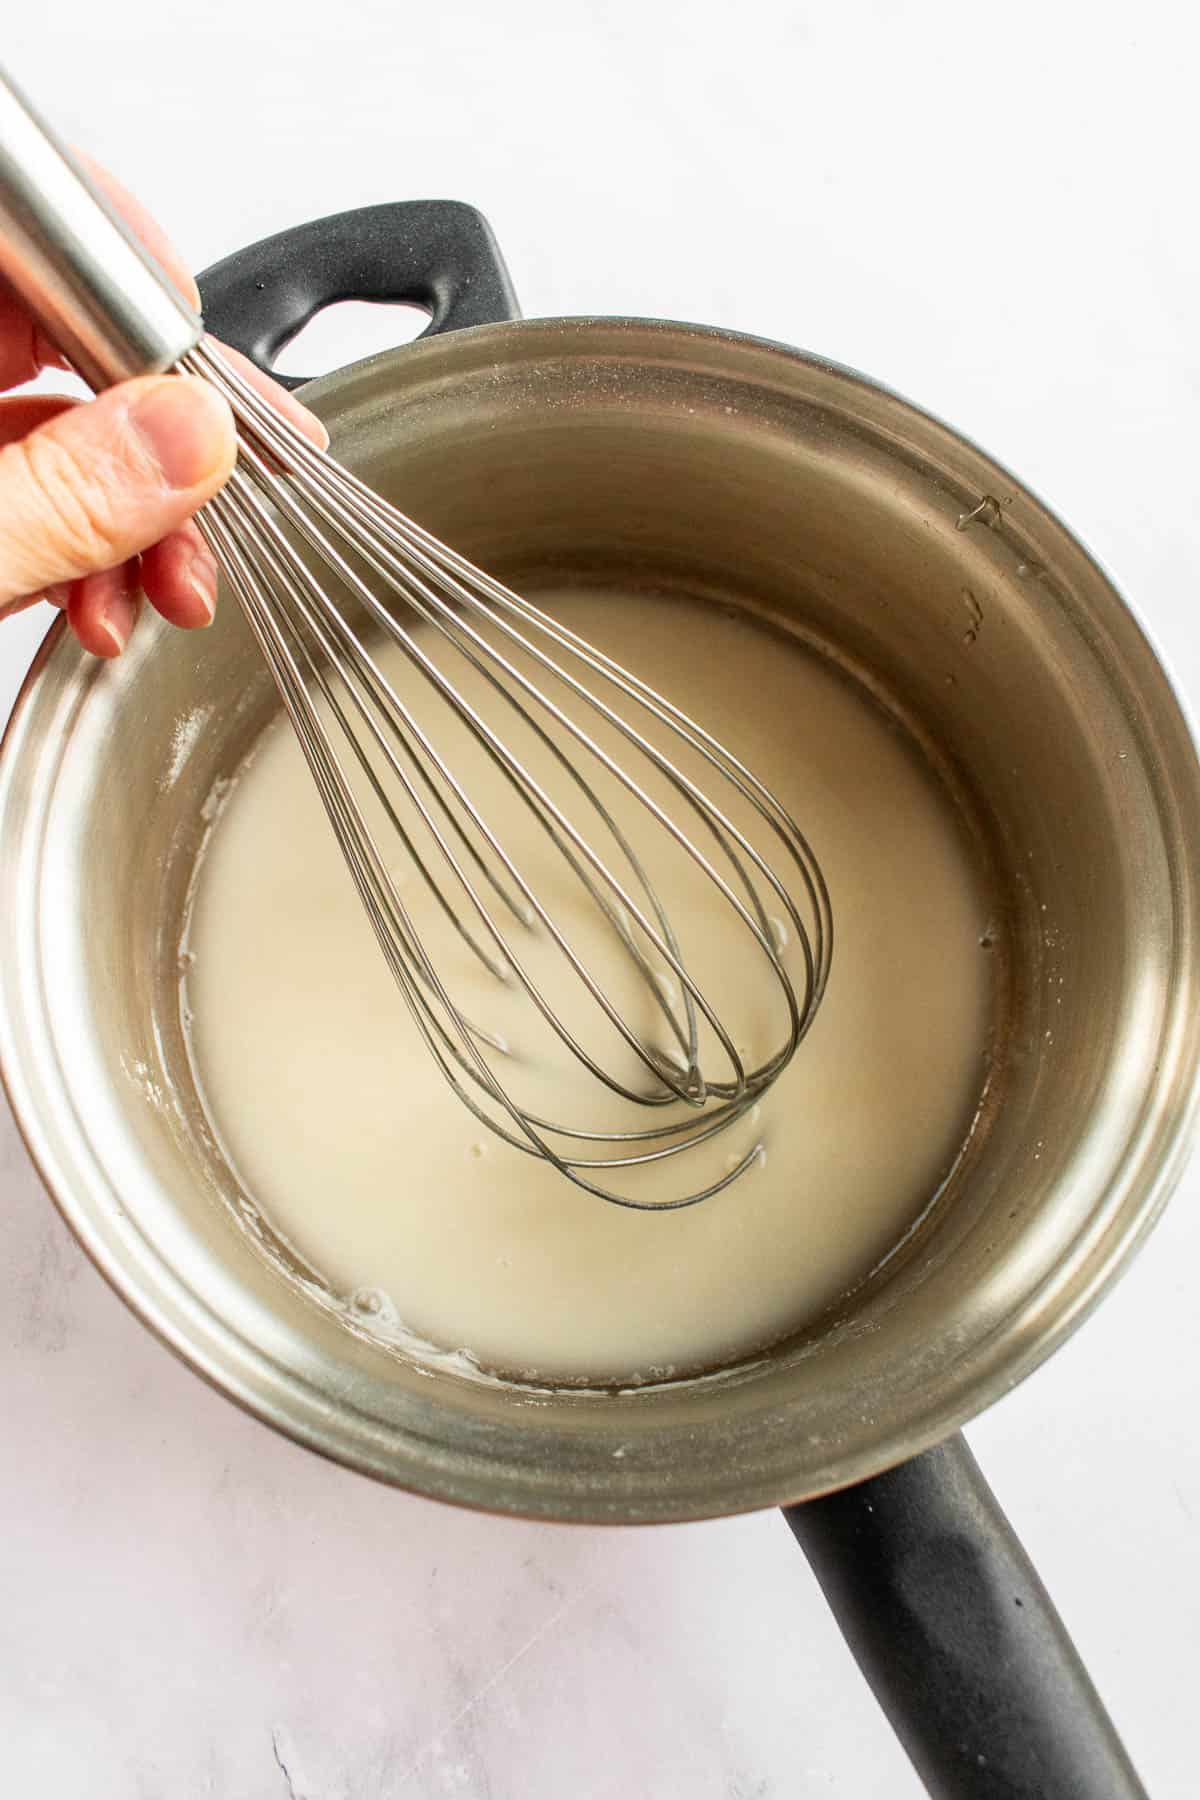
Make the Tangzhong
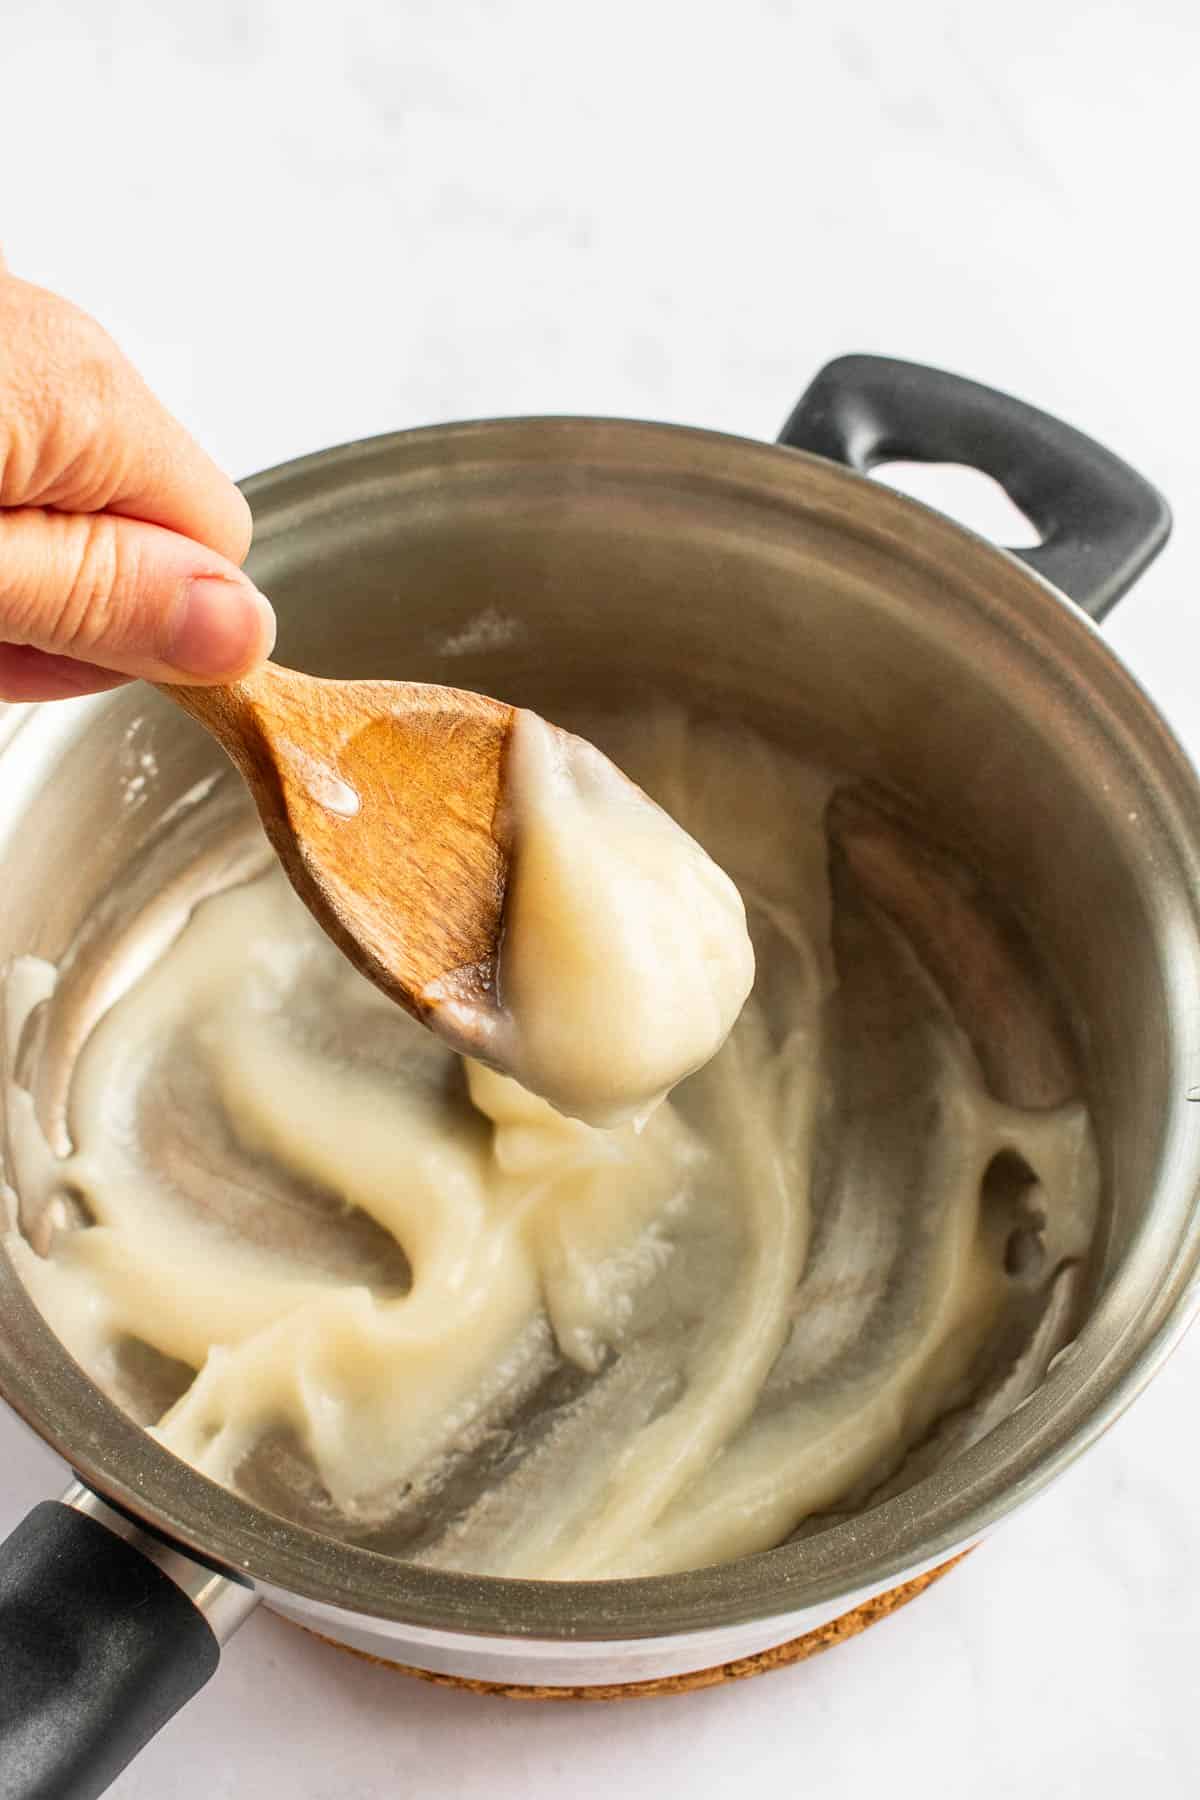
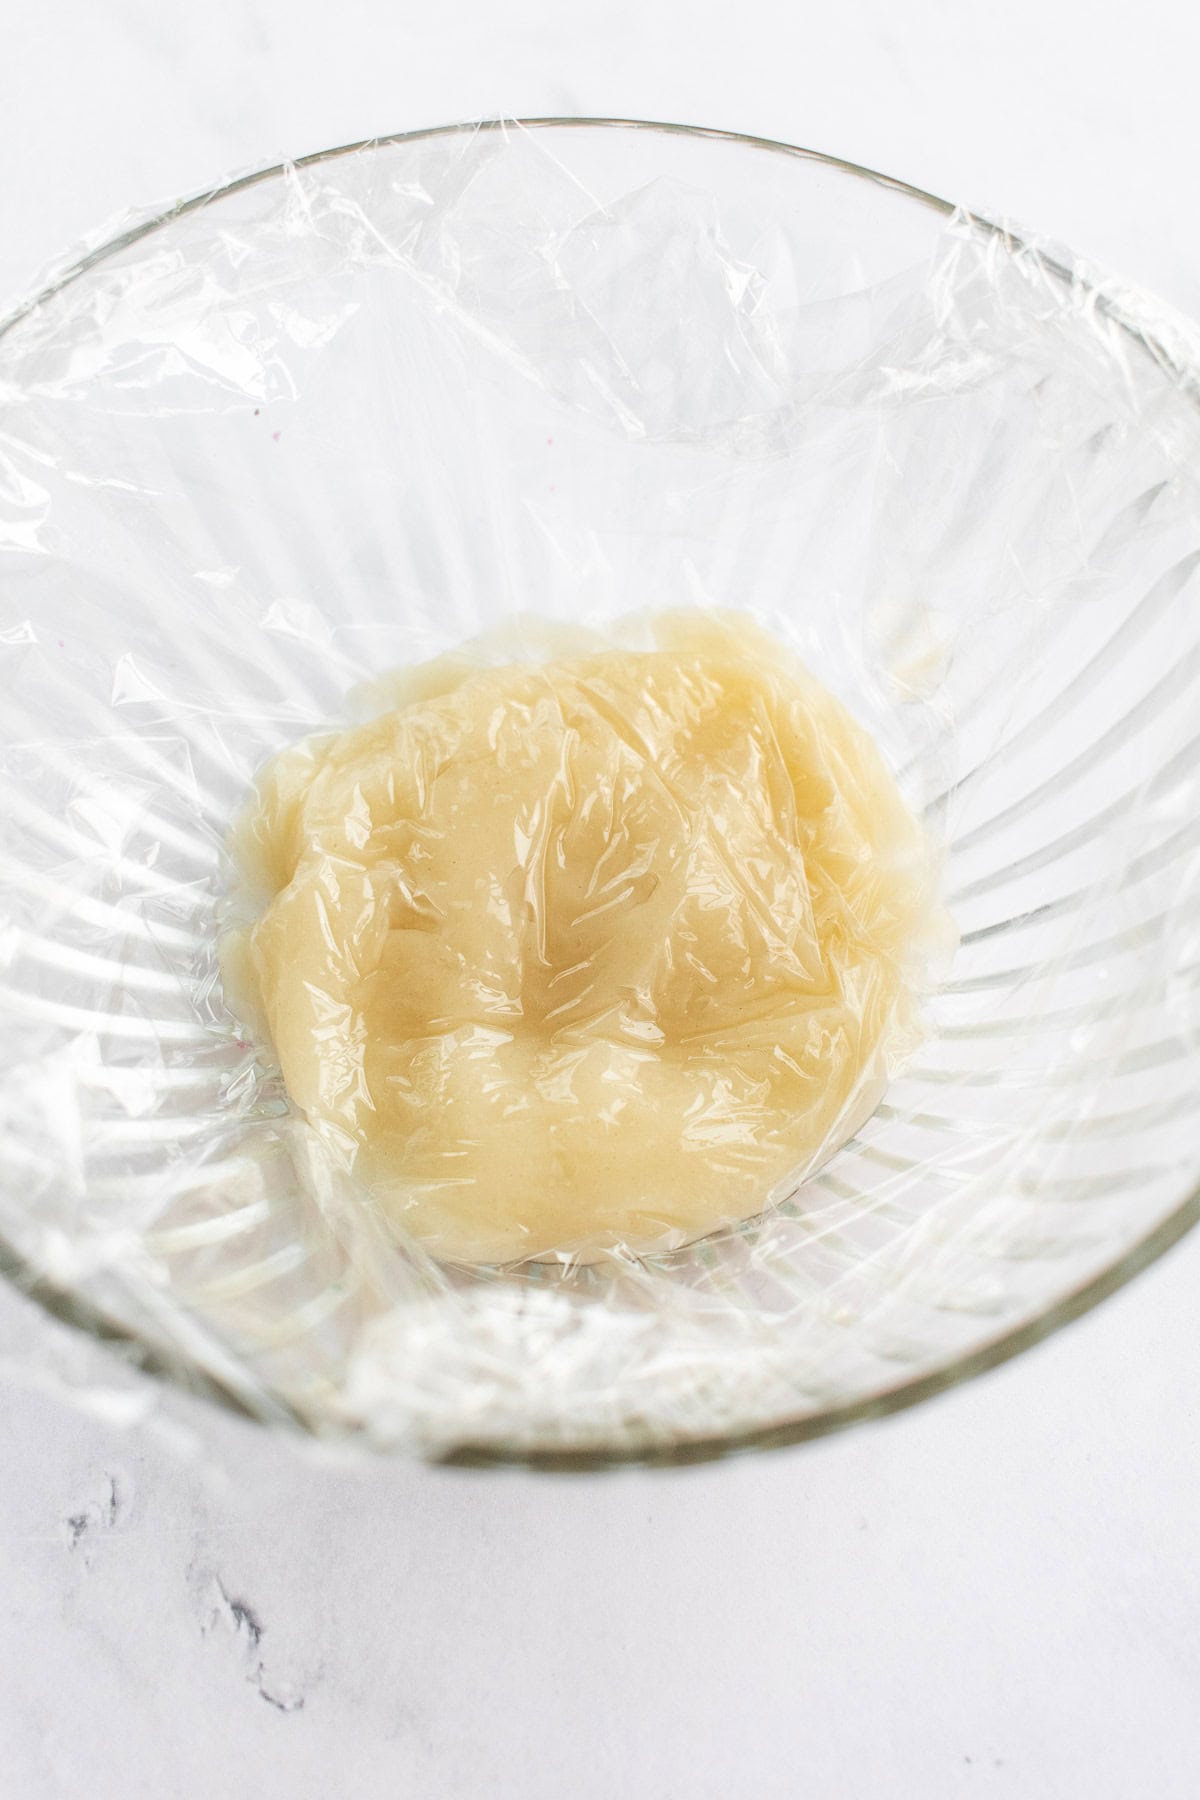
- In a small saucepan, mix the bread flour and water until the flour is dissolved. Turn on the heat to low and cook, stirring constantly with a wooden spoon, until it thickens to yogurt or pudding consistency, after 5-10 minutes.
- Transfer the mixture to a bowl and cover it with plastic wrap so it's touching the top of the mixture to prevent a skin from forming. Set aside to cool to room temperature.
Make the Dough
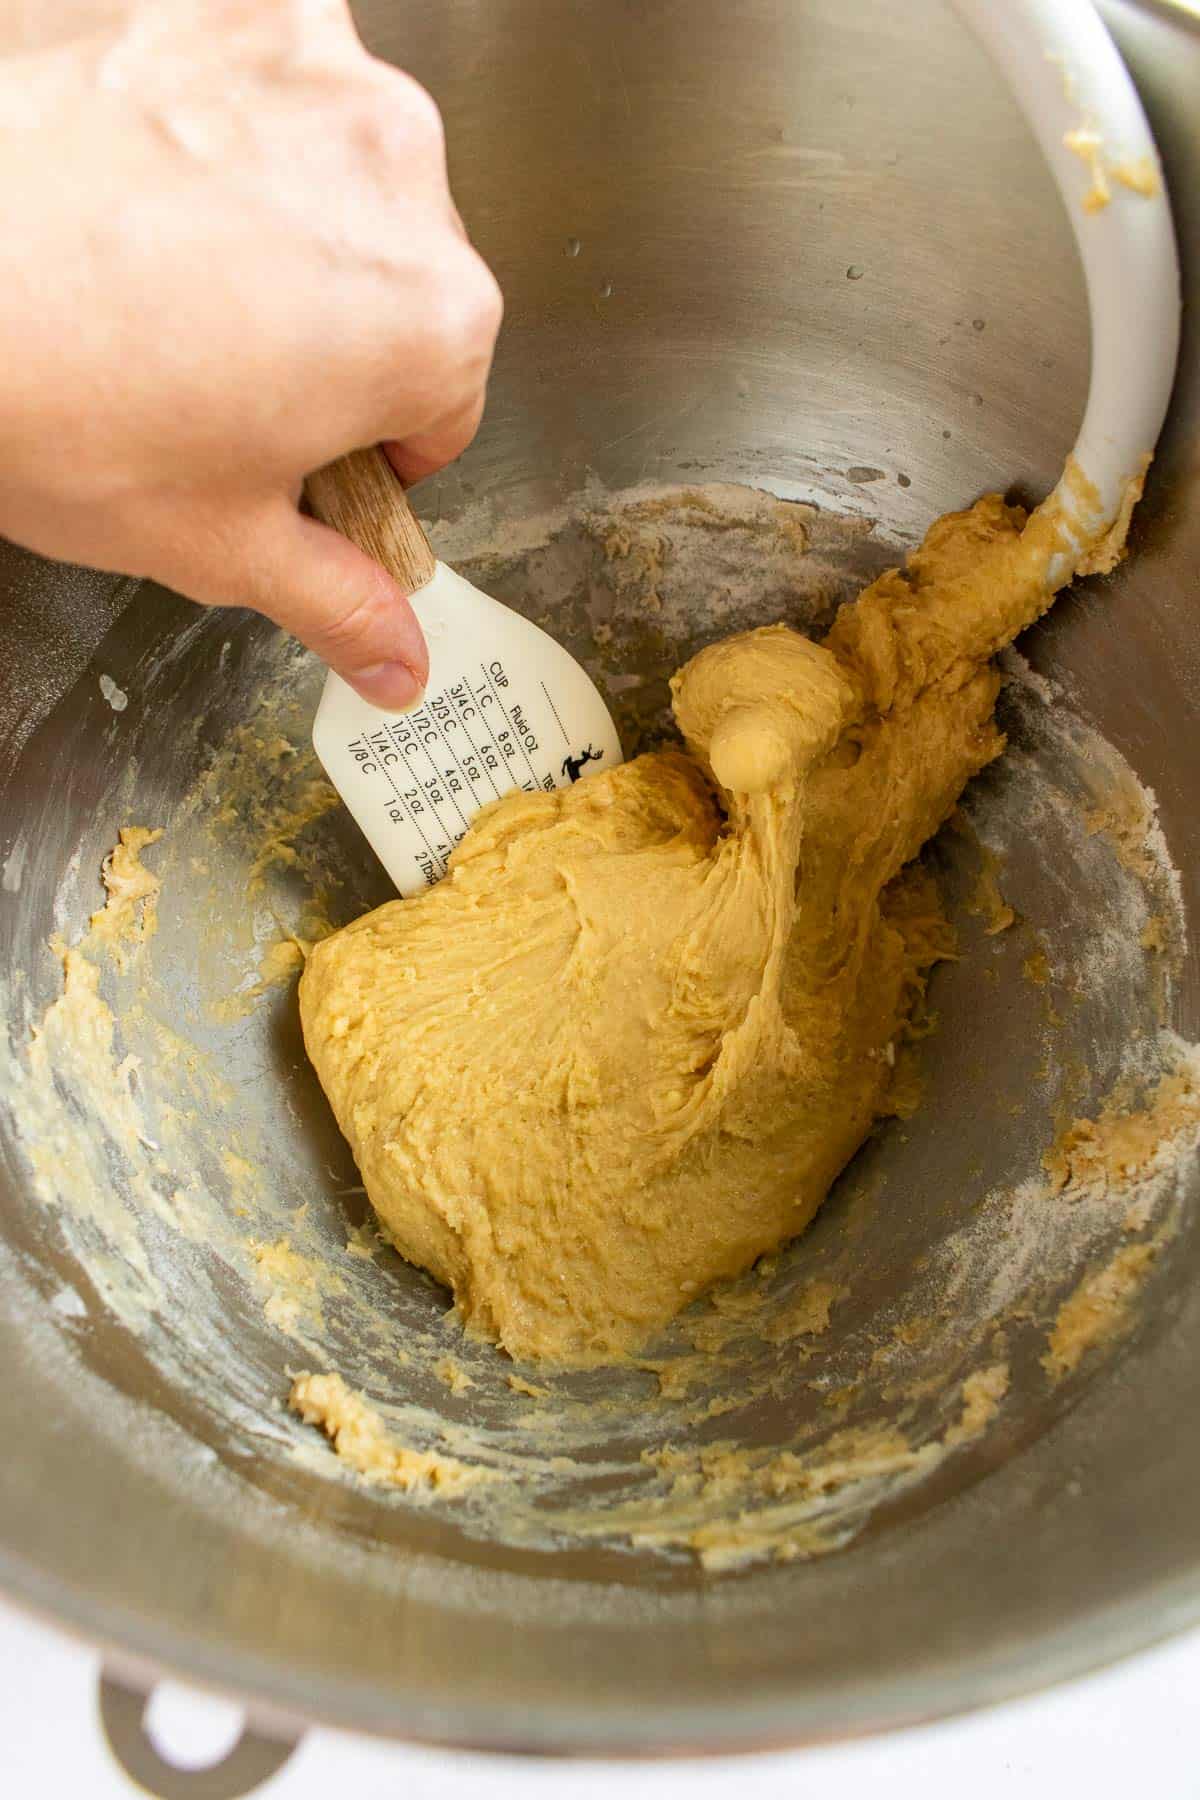
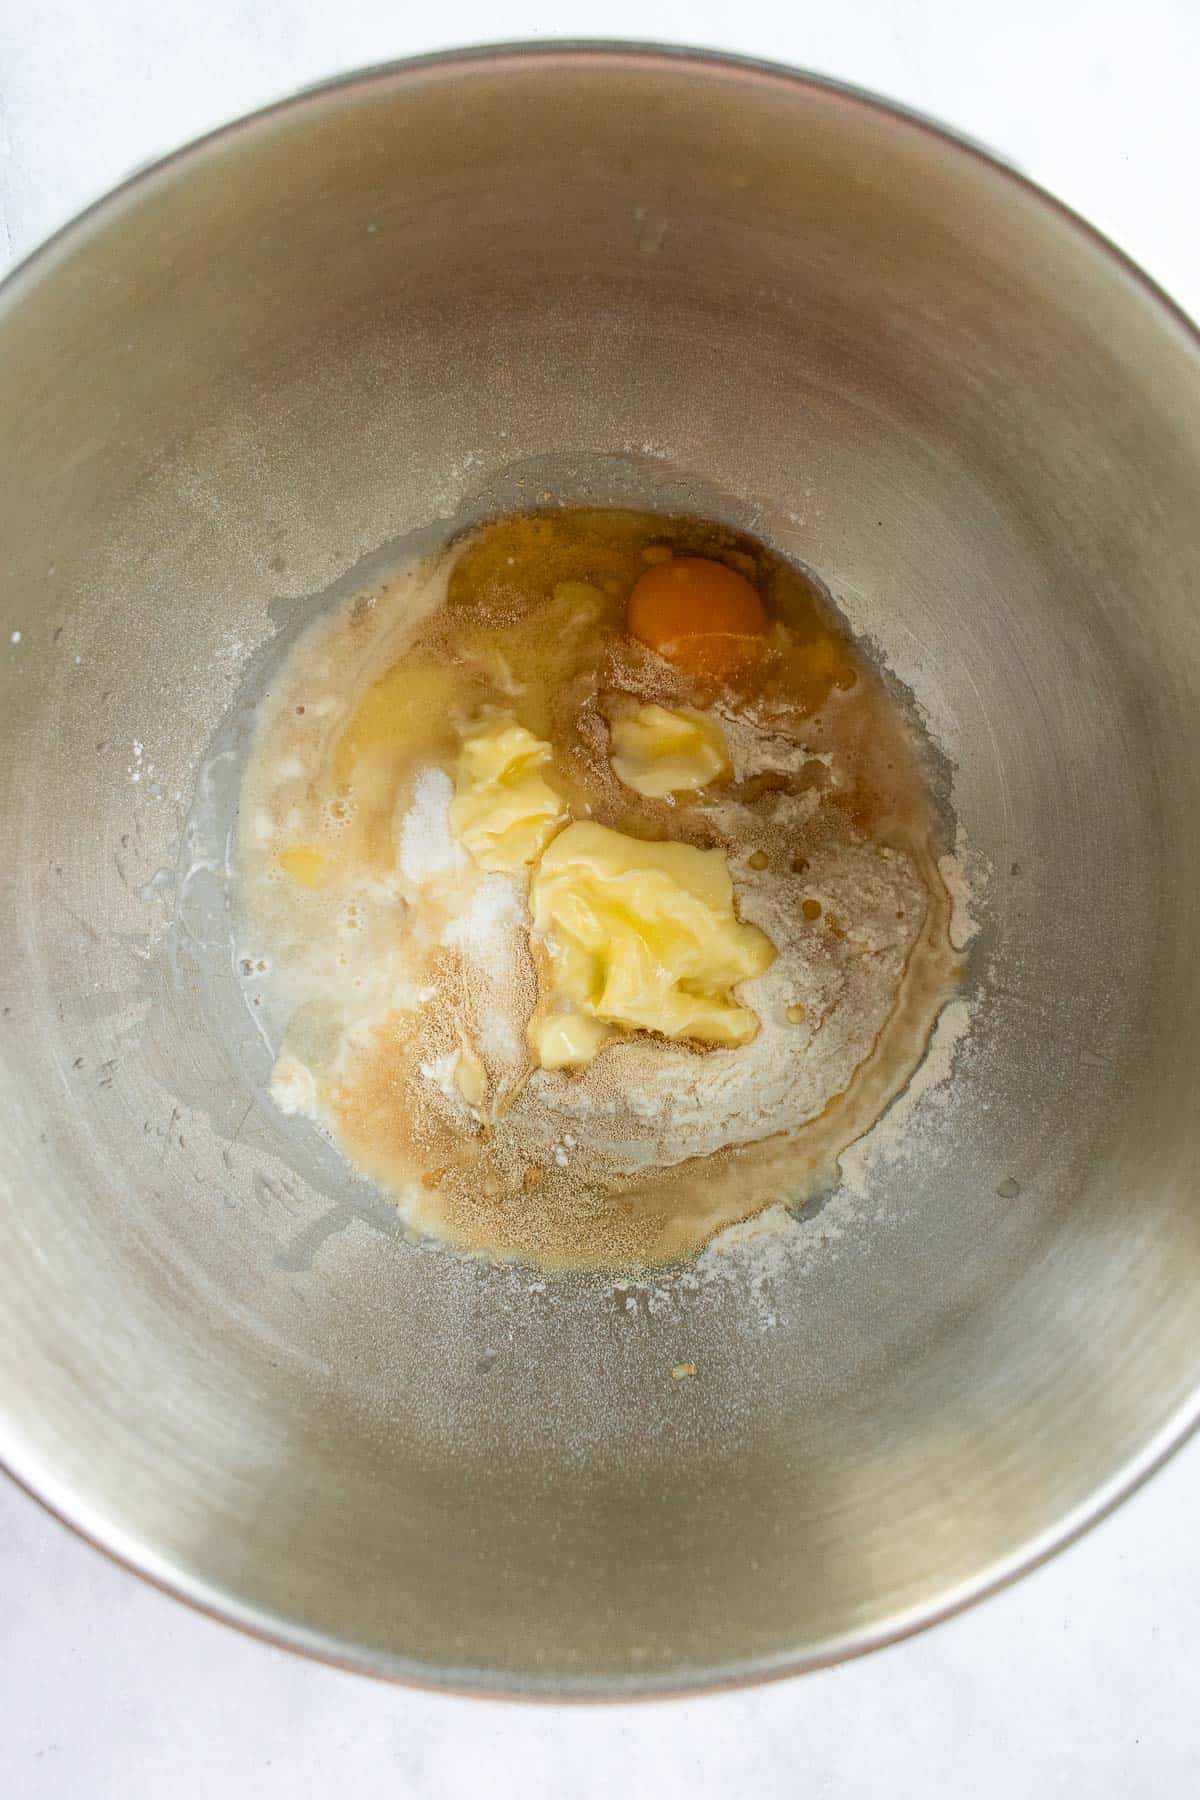
- In the bowl of a stand mixer, add 80 grams of your cooled Tangzhong along with the warm water, bread flour, milk powder, sugar, instant yeast, salt, egg, softened butter. Mix the dough on low speed with a dough hook attachment until it starts to form a sticky dough, after 5 minutes. (It'll look dry at first, but it'll become more sticky as the flour hydrates as it's kneaded.)
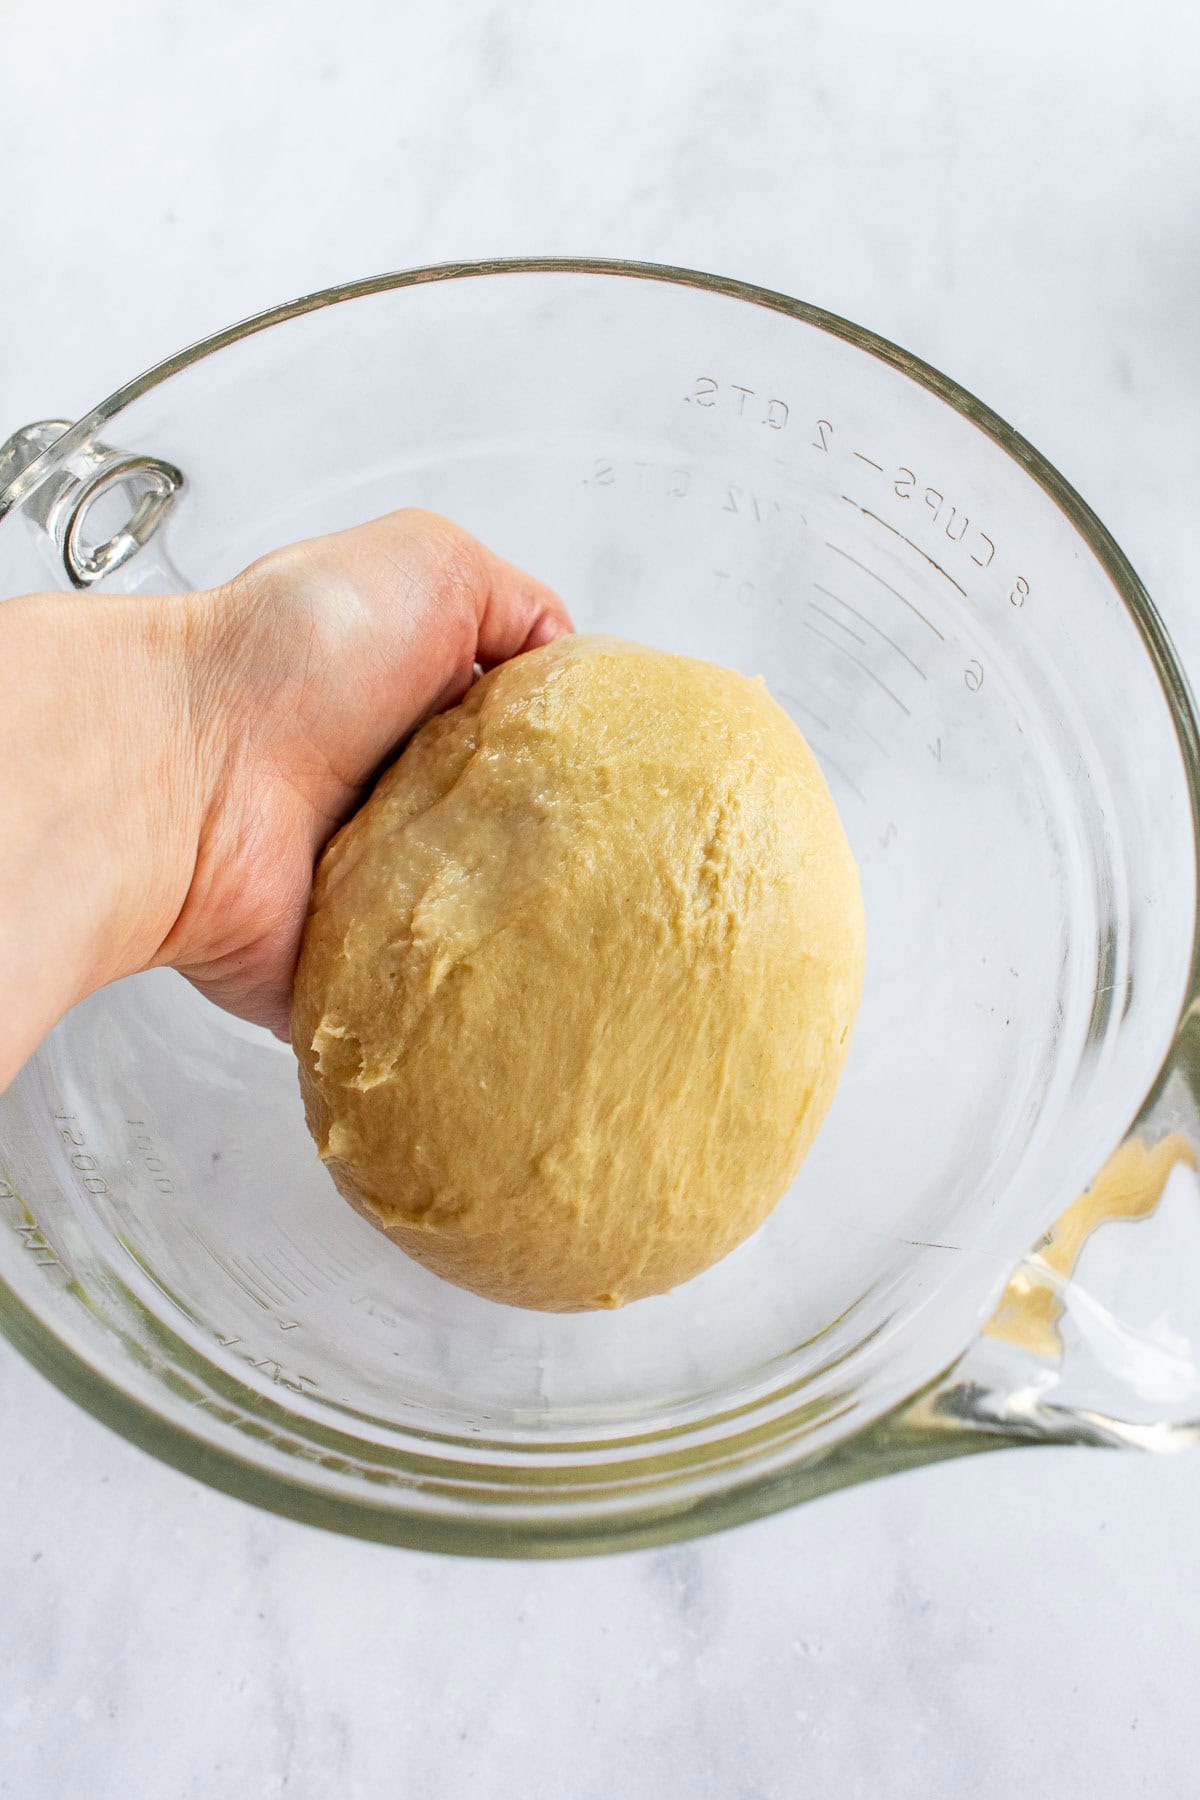
- Scrape the sides and bottom of the bowl. Turn the mixer back on low so it can knead the dough for another 10-20 minutes, until it's really stretchy and elastic. (It'll still be tacky, but if you tear off a bit of the dough, it should stretch between your fingers to show light through it without tearing, passing the classic "windowpane test".)
- Shape the dough into a ball (I wet my hands with cold for this step, to prevent it from sticking too much) and place it back in your mixing bowl. Cover with plastic wrap or a dinner plate (to retain moisture) and let it rise in a warm, draft-free spot (I place mine in the oven, turned off, with the oven light on) until it grows about 2½ times in size, after 2-4 hours.
Prepare the Butter Filling
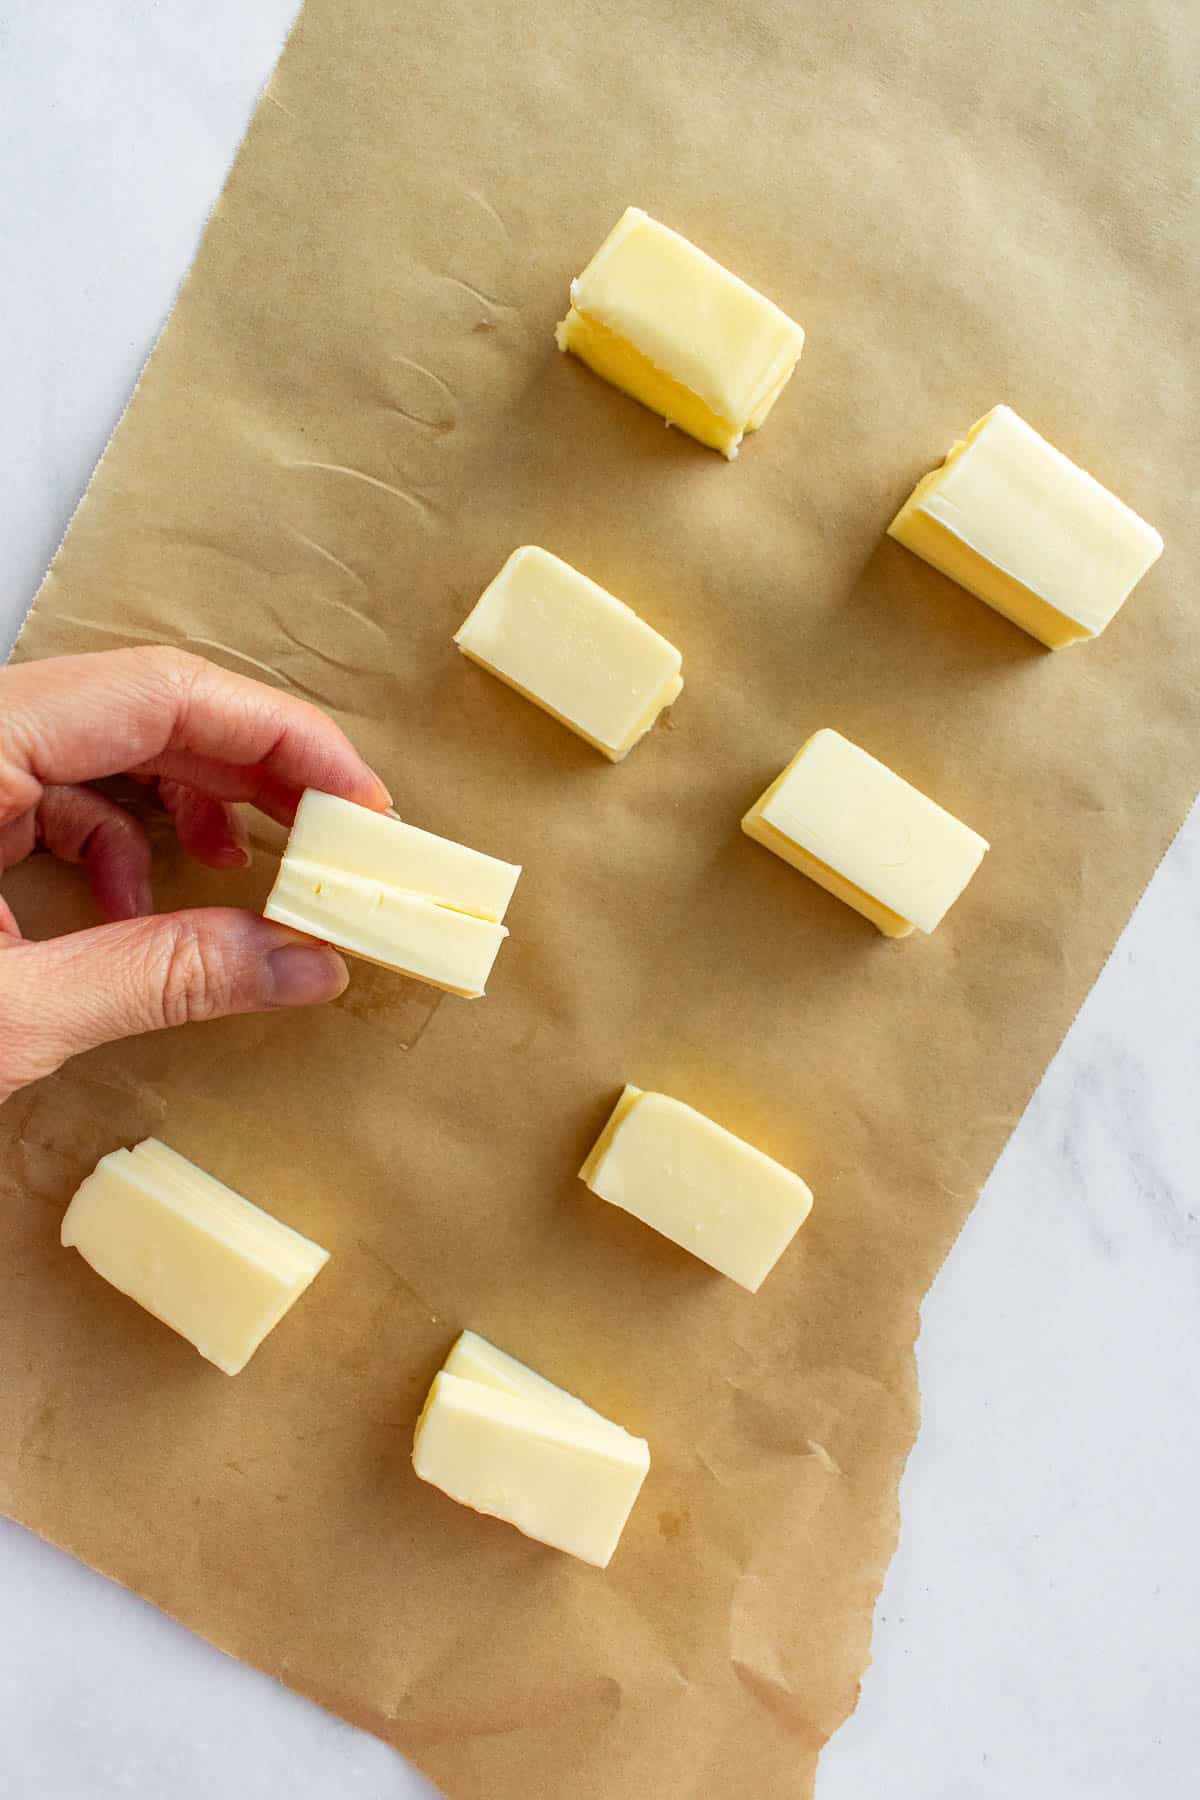
- While the dough rises, cut the stick of butter into 8 equal pieces. Keep them cold in the fridge.
Shape the Dough Buns
- Line a rimmed baking sheet with parchment paper & set aside. (It's important to use a baking sheet with walls, to catch any butter that pools out of the buns as they bake.)
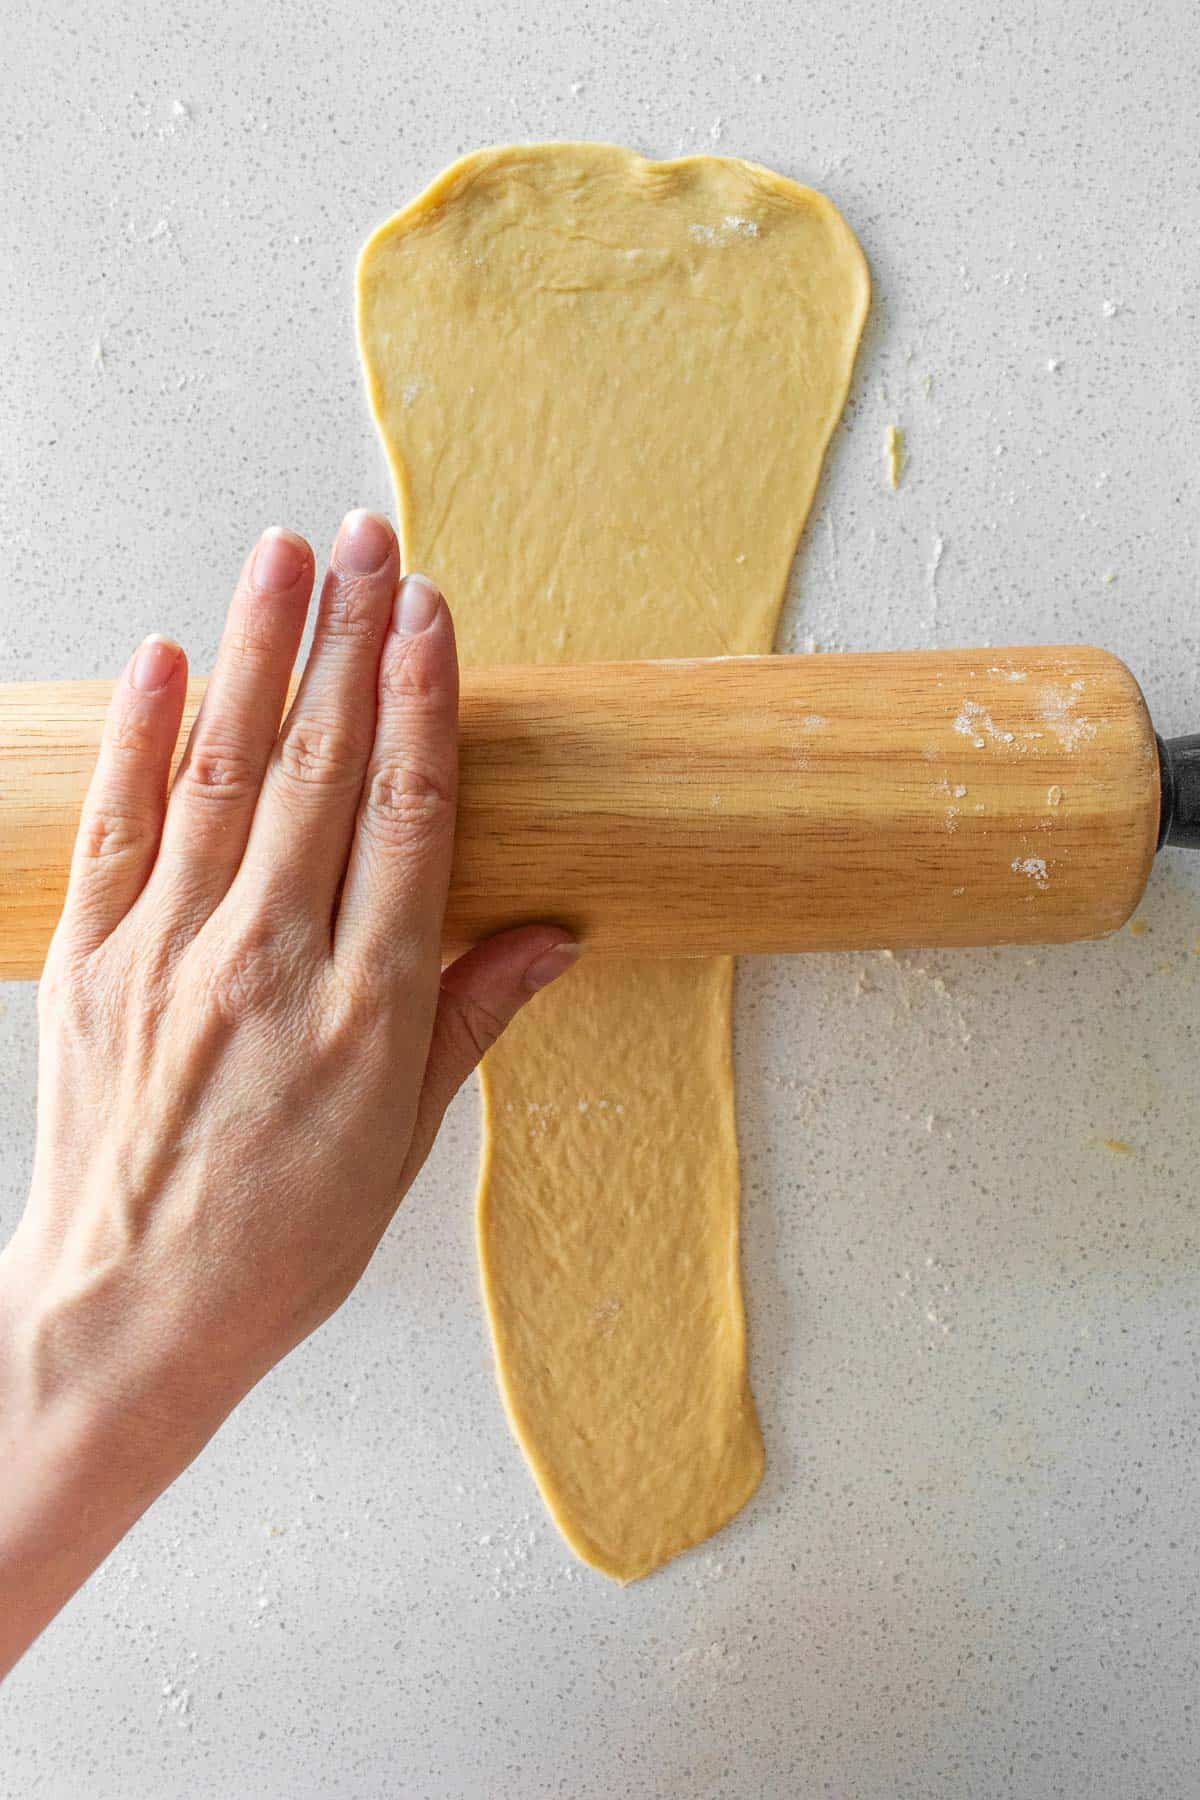
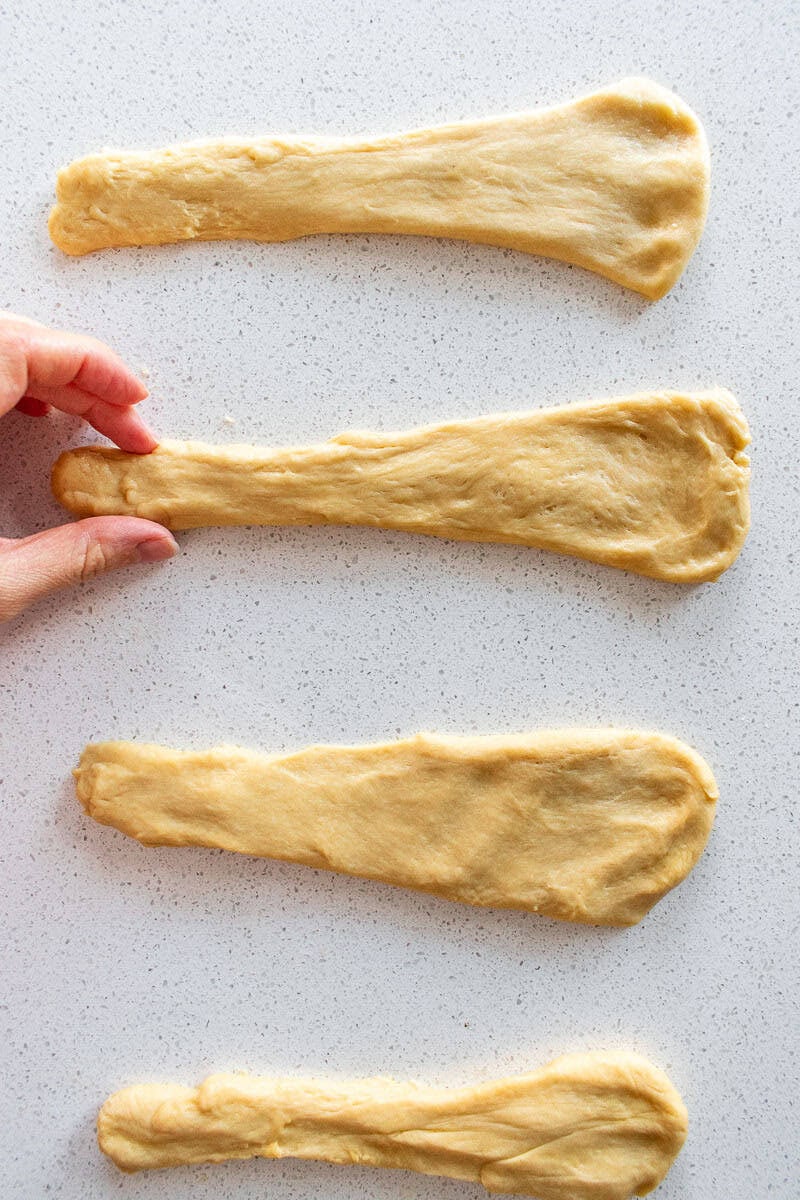
- On a lightly floured surface, divide the dough into 8 equal-sized pieces. Shape each piece into a cone with a thicker end and a thinner end, each about 8-inches (20cm) long. Cover with a clean kitchen towel and let them rest for 20 minutes.
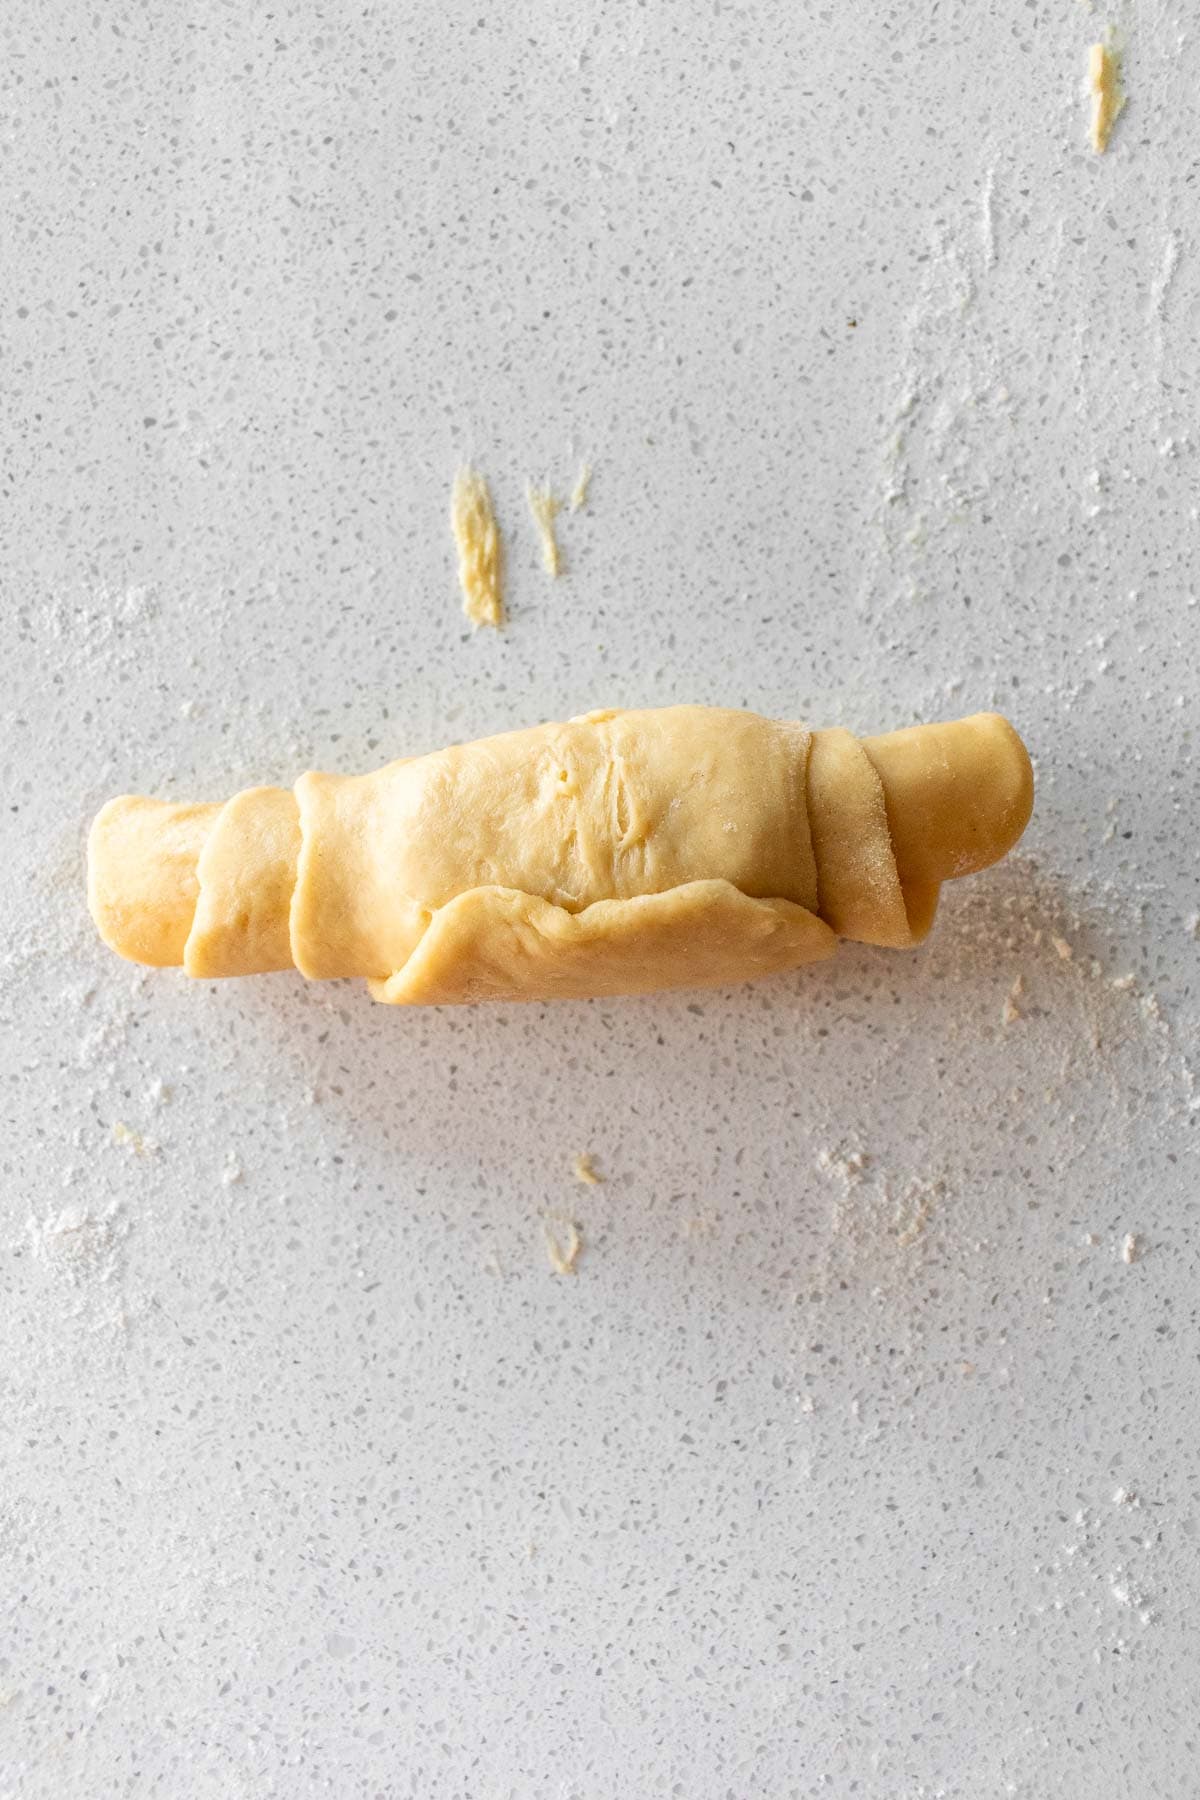
- Keep the dough covered to prevent them from drying out and shape one bun at a time. Roll out one cone of dough with a rolling pin until it's about 16-inches (40cm) long, maintaining the wider end and tapered end shape.
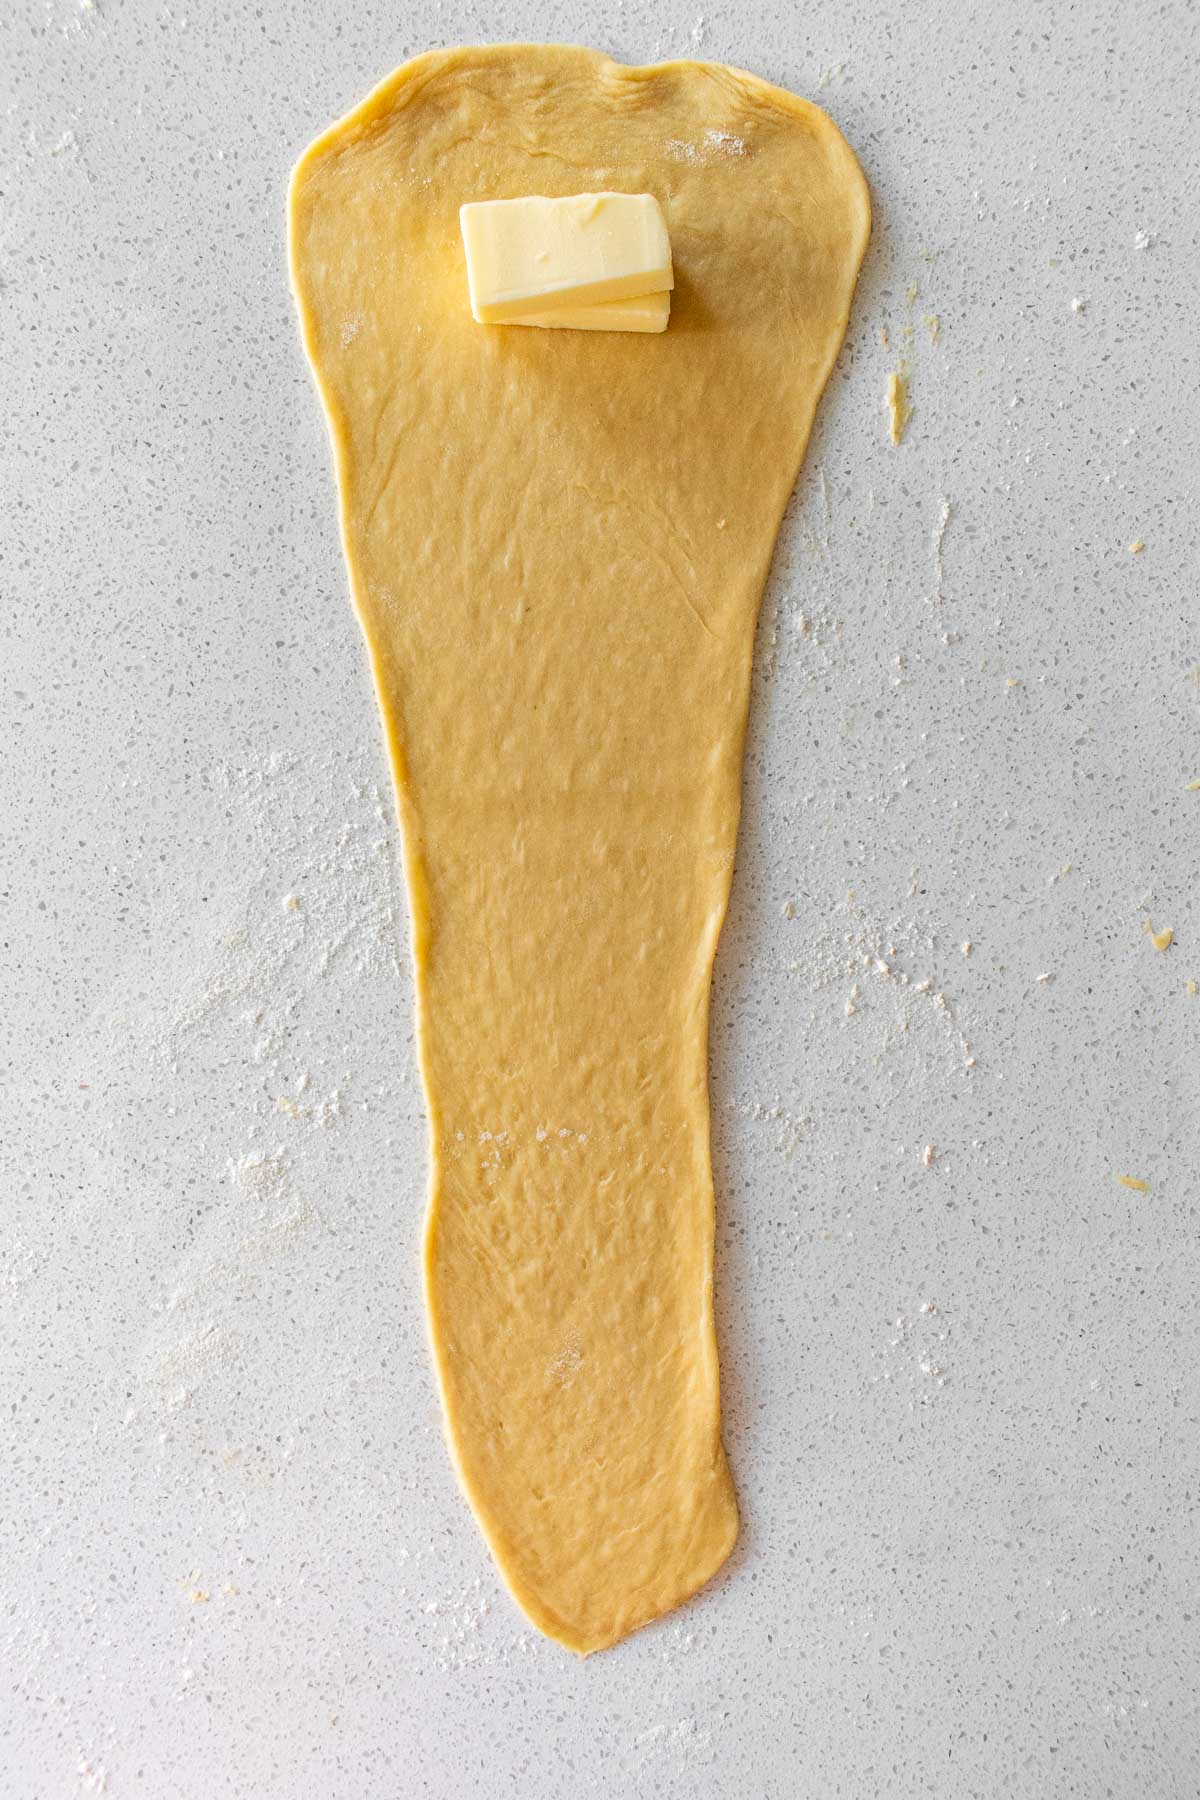
- Place one piece of the prepared cold butter filling on the wider end of the dough, about 1 inch (2.5cm) from the edge. Fold the edge of the dough over the butter and continue rolling the dough all the way to the tapered end, so the butter is fully enclosed in the rolled-up dough and it looks kind of like a mini croissant.Place it seam-side-down on your prepared baking sheet. Repeat with the rest of the dough.
- Cover the shaped dough with a kitchen towel & let them rest & proof at room temperature for 1 to 2 hours, until they double in size. (Be careful not to place your dough anywhere that's too warm, otherwise your butter filling will soften & begin to melt.)
Bake the Salt Bread
- Preheat the oven to 400°F (200°C).
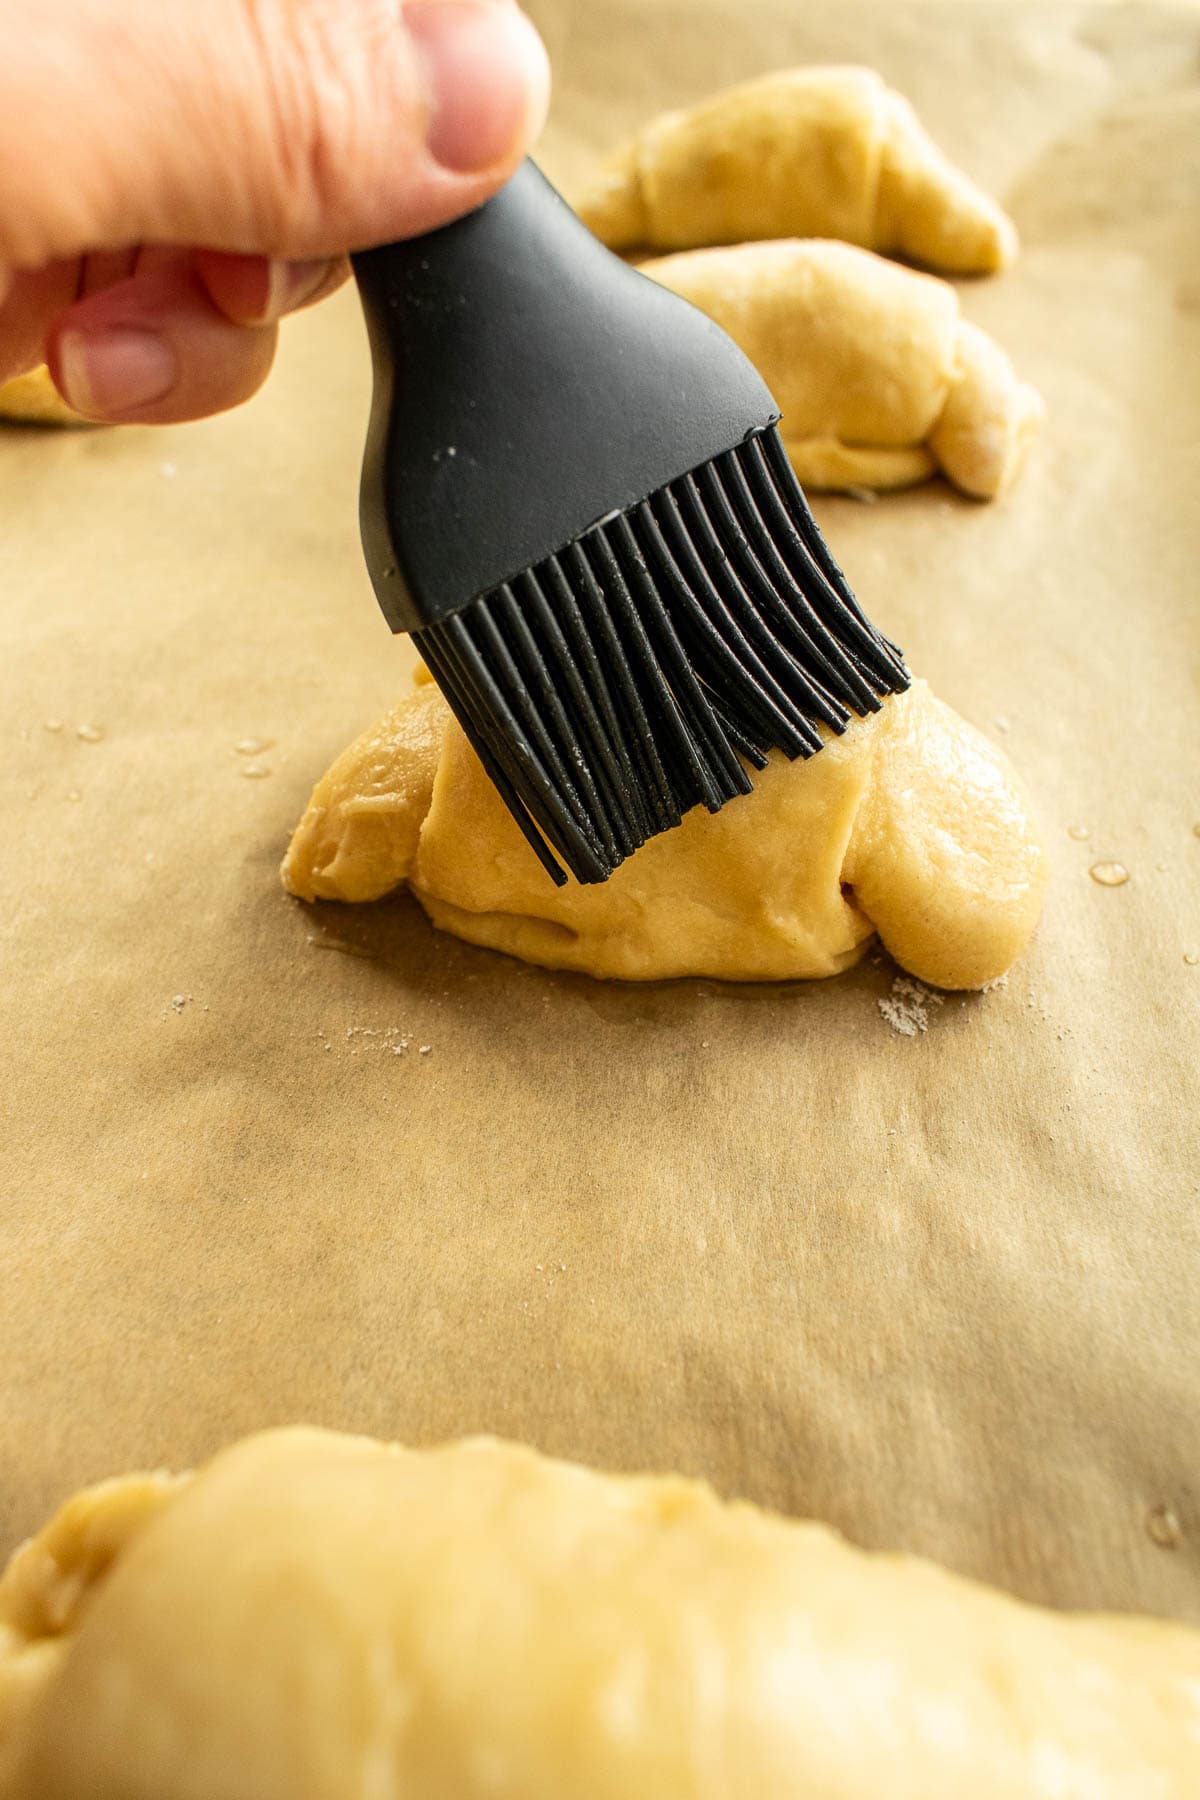
- Spray or brush a generous amount of cold water onto your dough buns. Sprinkle a pinch of flaky salt on top of each bun.
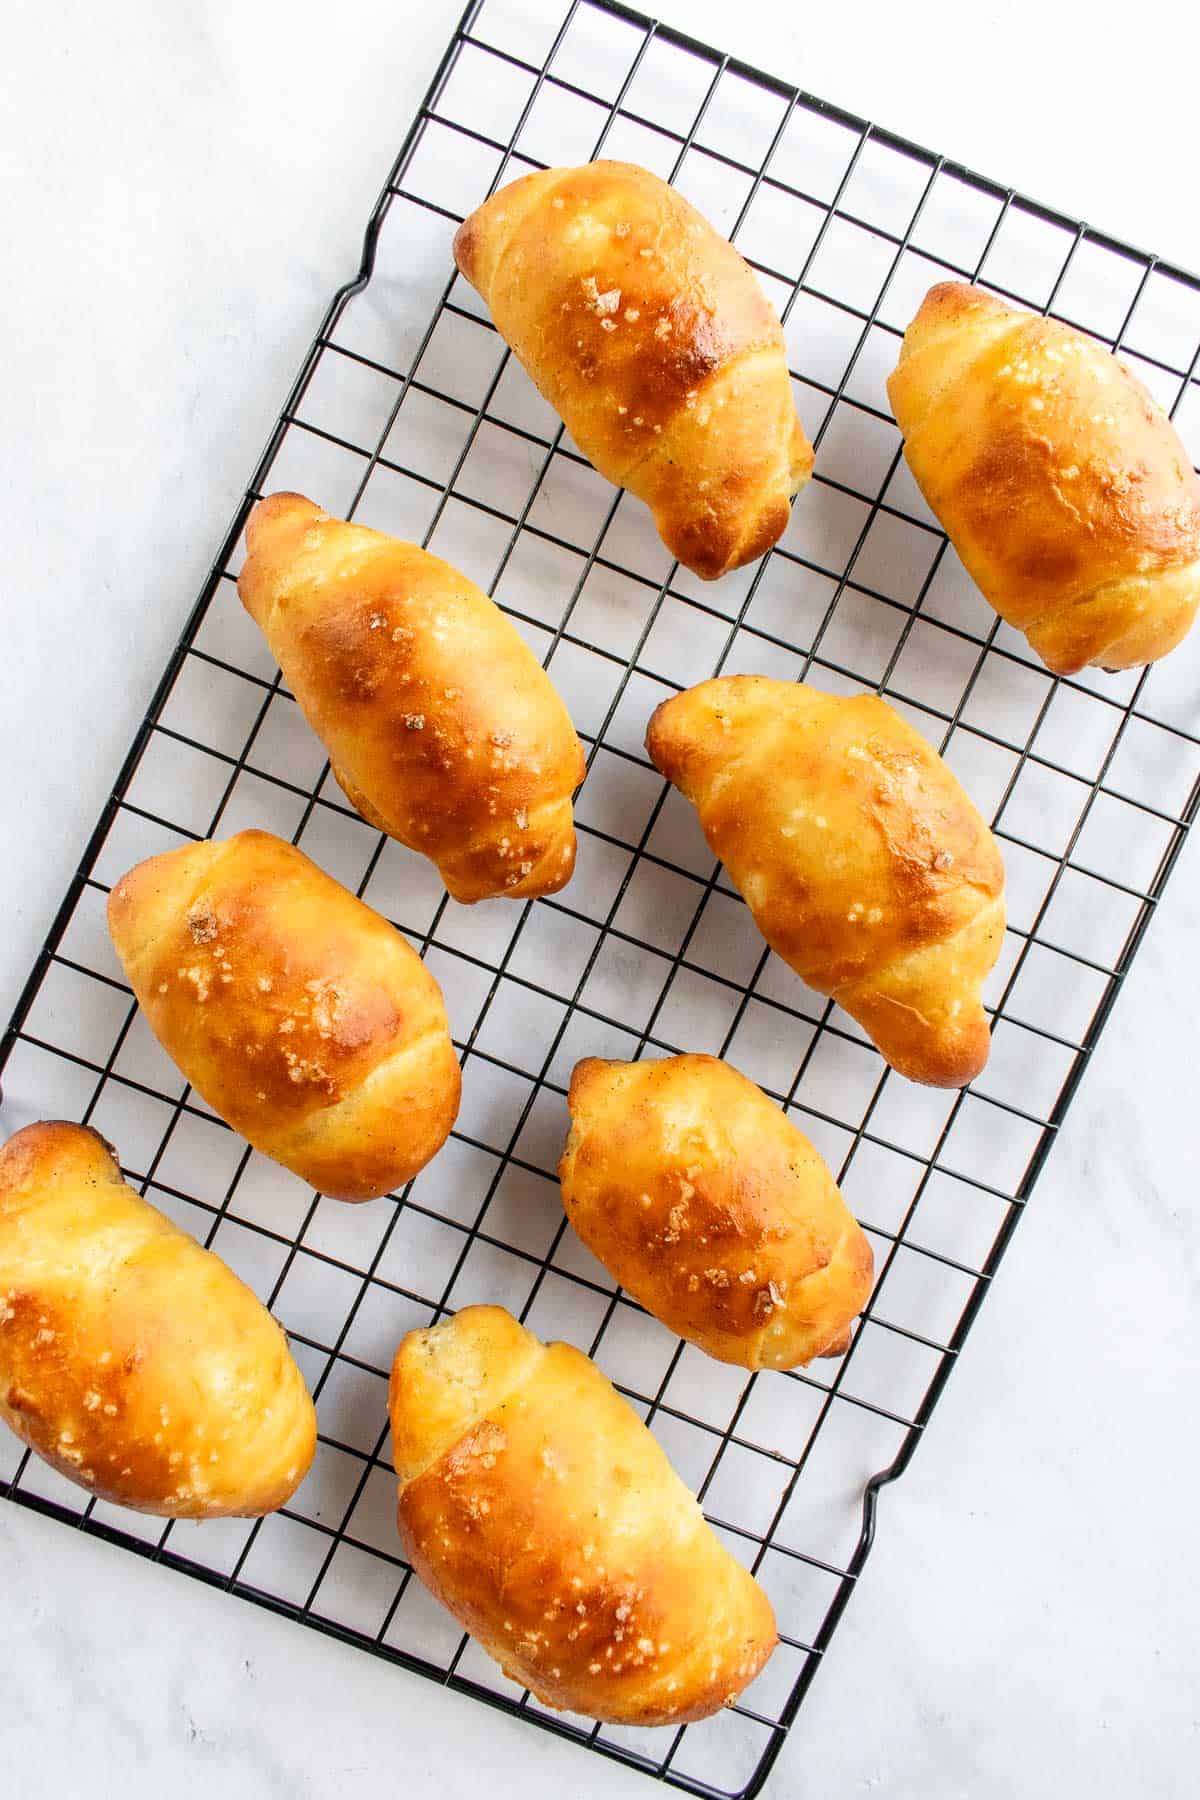
- Bake for 15 minutes, or until they're golden brown.
- Immediately brush the melted butter from your baking sheet onto the tops and sides of the buns. Then transfer them to a wire cooling rack with a spatula to cool.
Notes
- Tacky Dough: This dough feels really tacky even when it's done kneading, so to shape it in a ball, wet your hands with cold water. It sounds counterintuitive, but it really does prevent the dough from sticking to your hands!
- Shaping: If you have a bench scraper, I find that helps to shape the buns. I gently scrape the dough off the counter as I roll it with the butter inside, to prevent it from sticking.
- Reheat: I reheat my leftover buns in the microwave for 15 seconds, which warms them and makes them really soft.
- More Flavor: I like to splurge on high quality salted butter, like a high fat European butter (such as Kerrygold) for the best flavor.
Nutrition
This website uses affiliate links which may earn commission for purchases made at no additional cost to you.


I'm eggcited to hear from you :)