

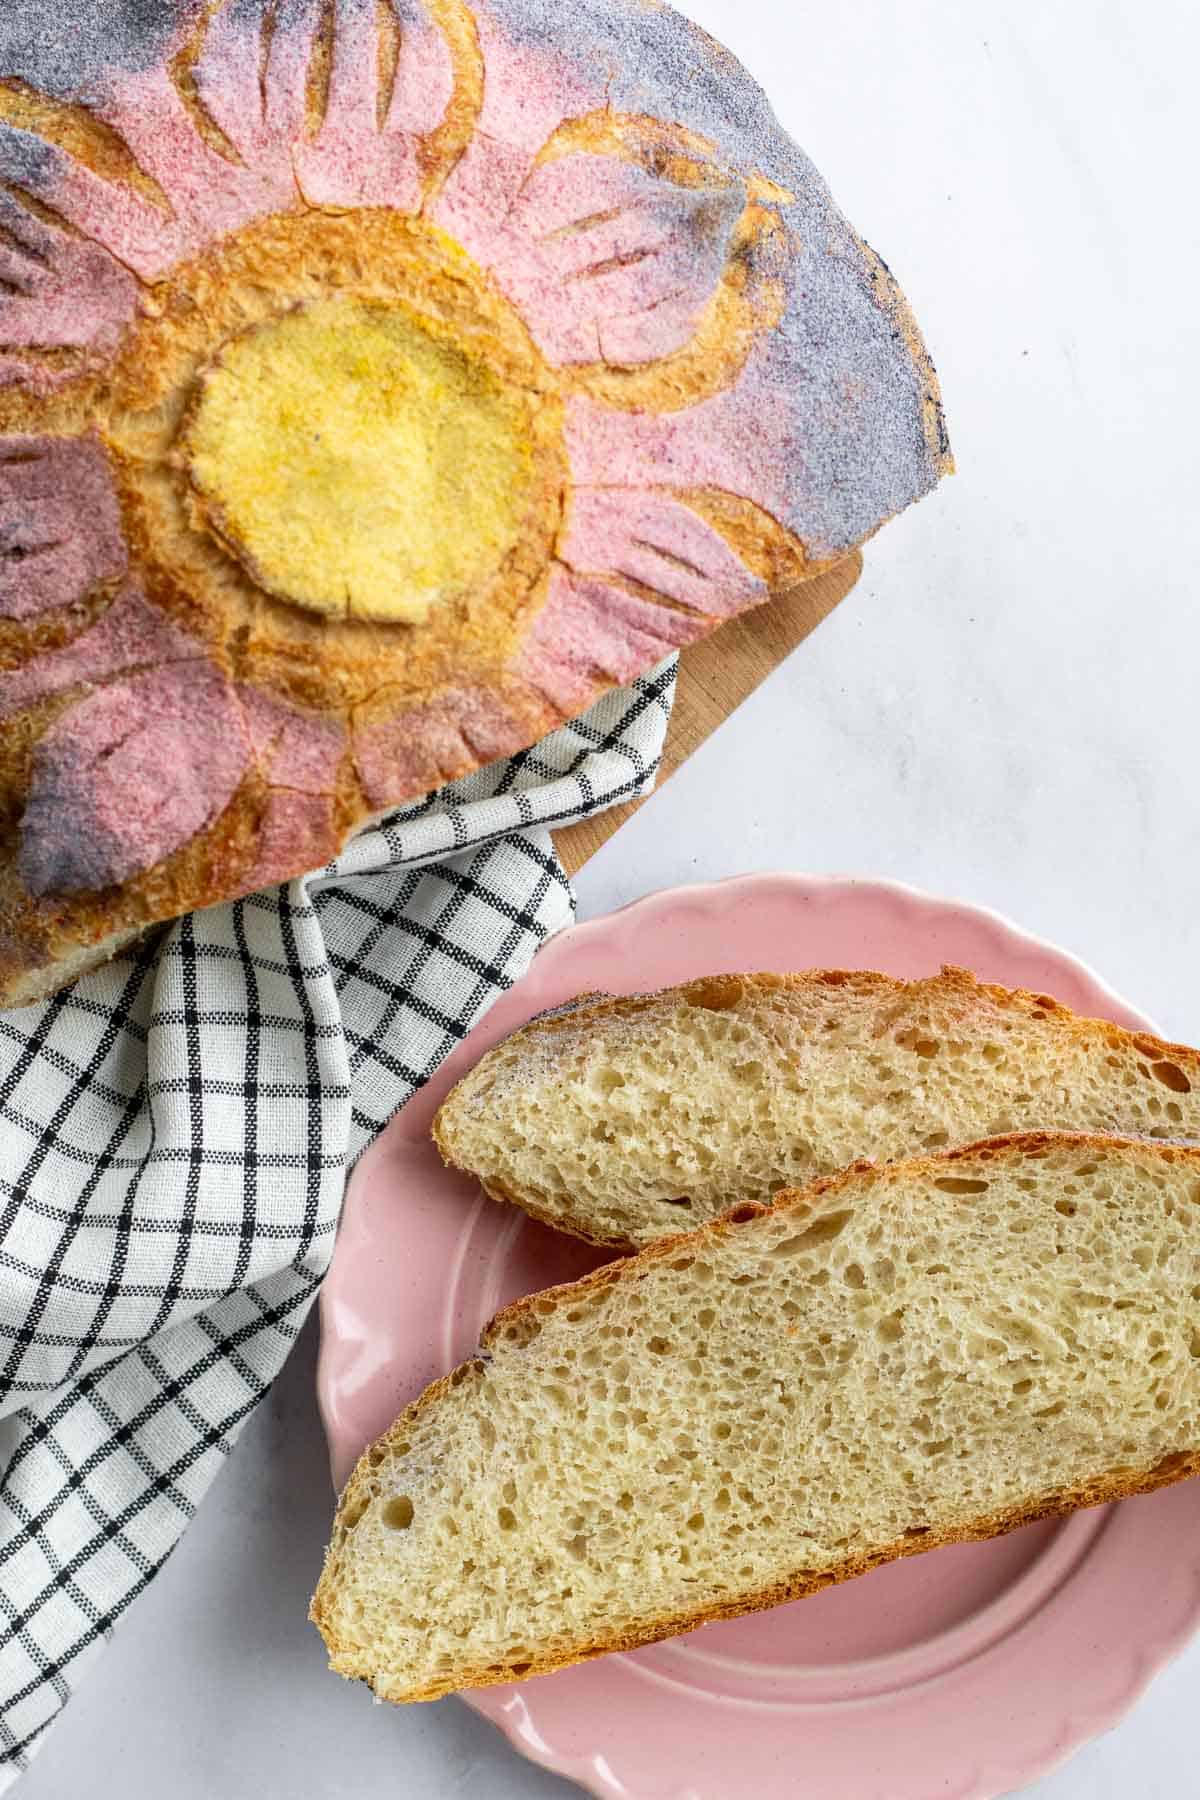
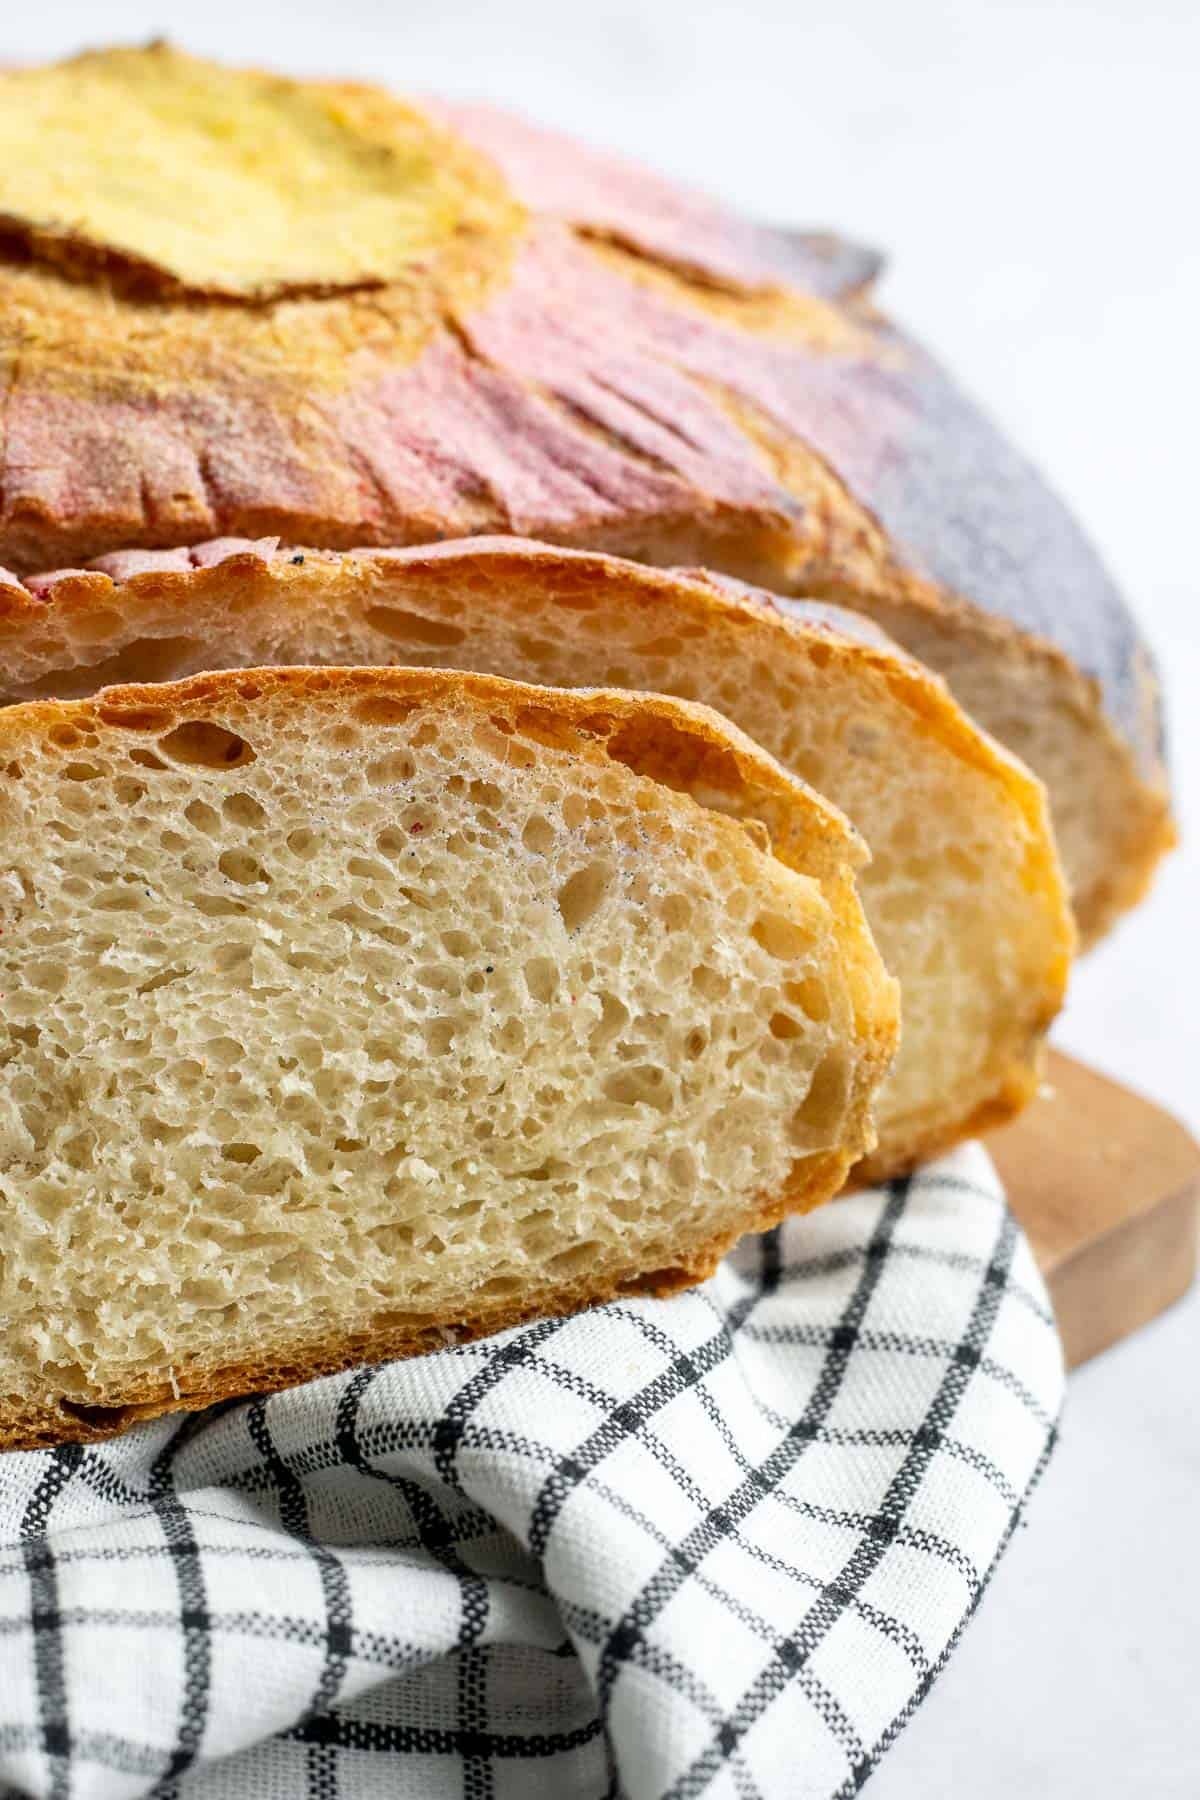
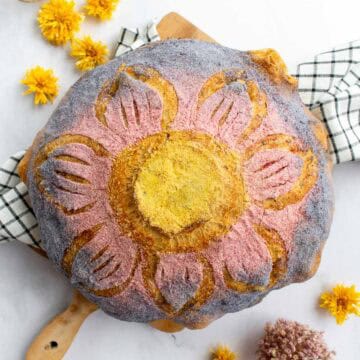
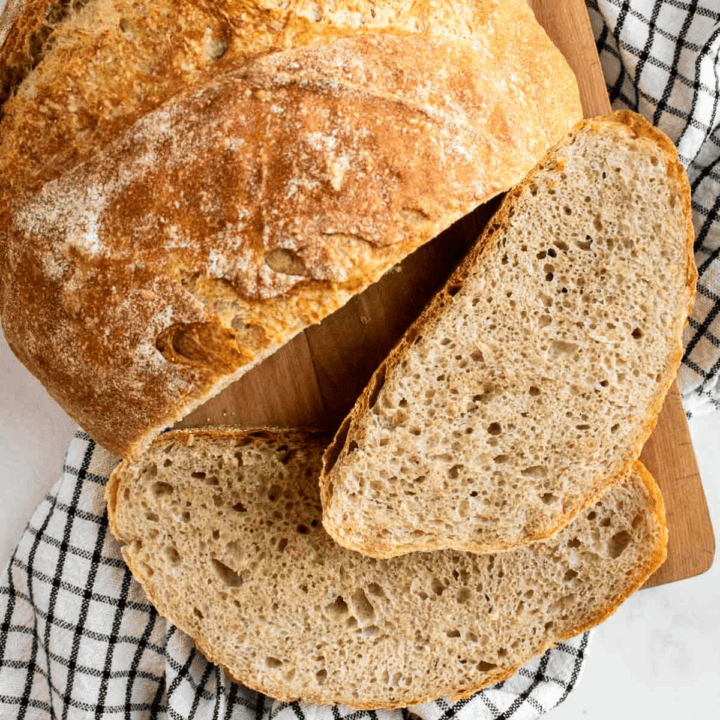
This Dutch oven flower bread bakes up with a crisp, crackly crust and a soft, airy interior. You can keep it plain and rustic with the simple score pattern that takes 2 minutes, or dust the top with colored rice flour to create a beautiful ombre floral design!

The Flower Scored Bread I Bake Every Spring
This aesthetic flower bread started as a little bread-meets-creativity experiment and instantly turned into one of my favorite spring bakes. I adapted my scored heart bread recipe, but instead of adding color to the whole loaf, I sifted yellow, purple, and pink rice flour on top to create the soft ombre pattern. This makes it look like it came out of a European bakery shop, but in reality it takes less than 10 extra minutes to decorate!
Of course it has that signature crispy crust of a Dutch oven loaf. And I found that a quick spray with water just before scoring it helps the petals bloom as it bakes. So even though it's almost too pretty to eat, I can never resist slicing into it as soon as it cools!
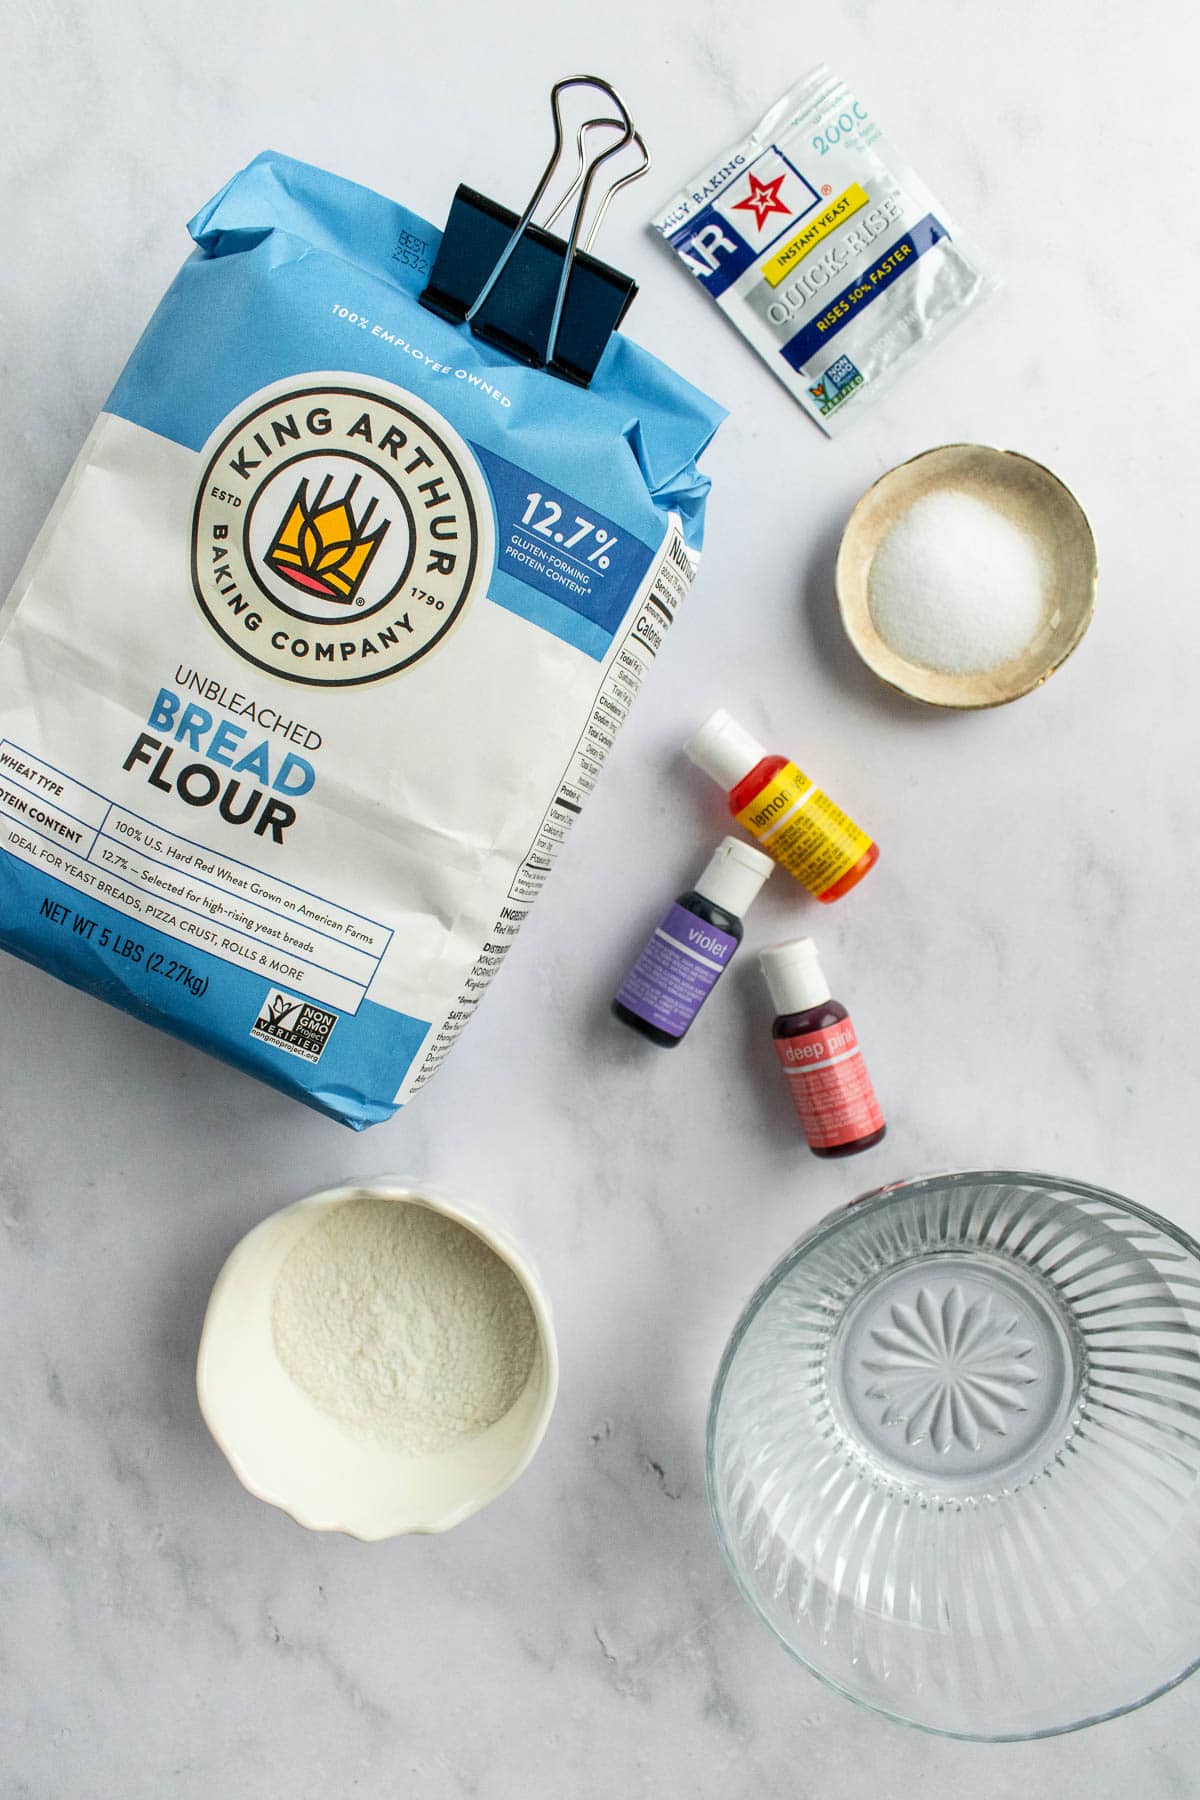
You just need four ingredients (plus optional food coloring + rice flour) to make this loaf!
Welcome to My Kitchen! Let's Bake Flower Bread!
For the full step-by-step directions, scroll down to the recipe card.
How I Color My Bread
Sometimes I paint bread dough, but for this one, dry color works better to create the ombre effect.
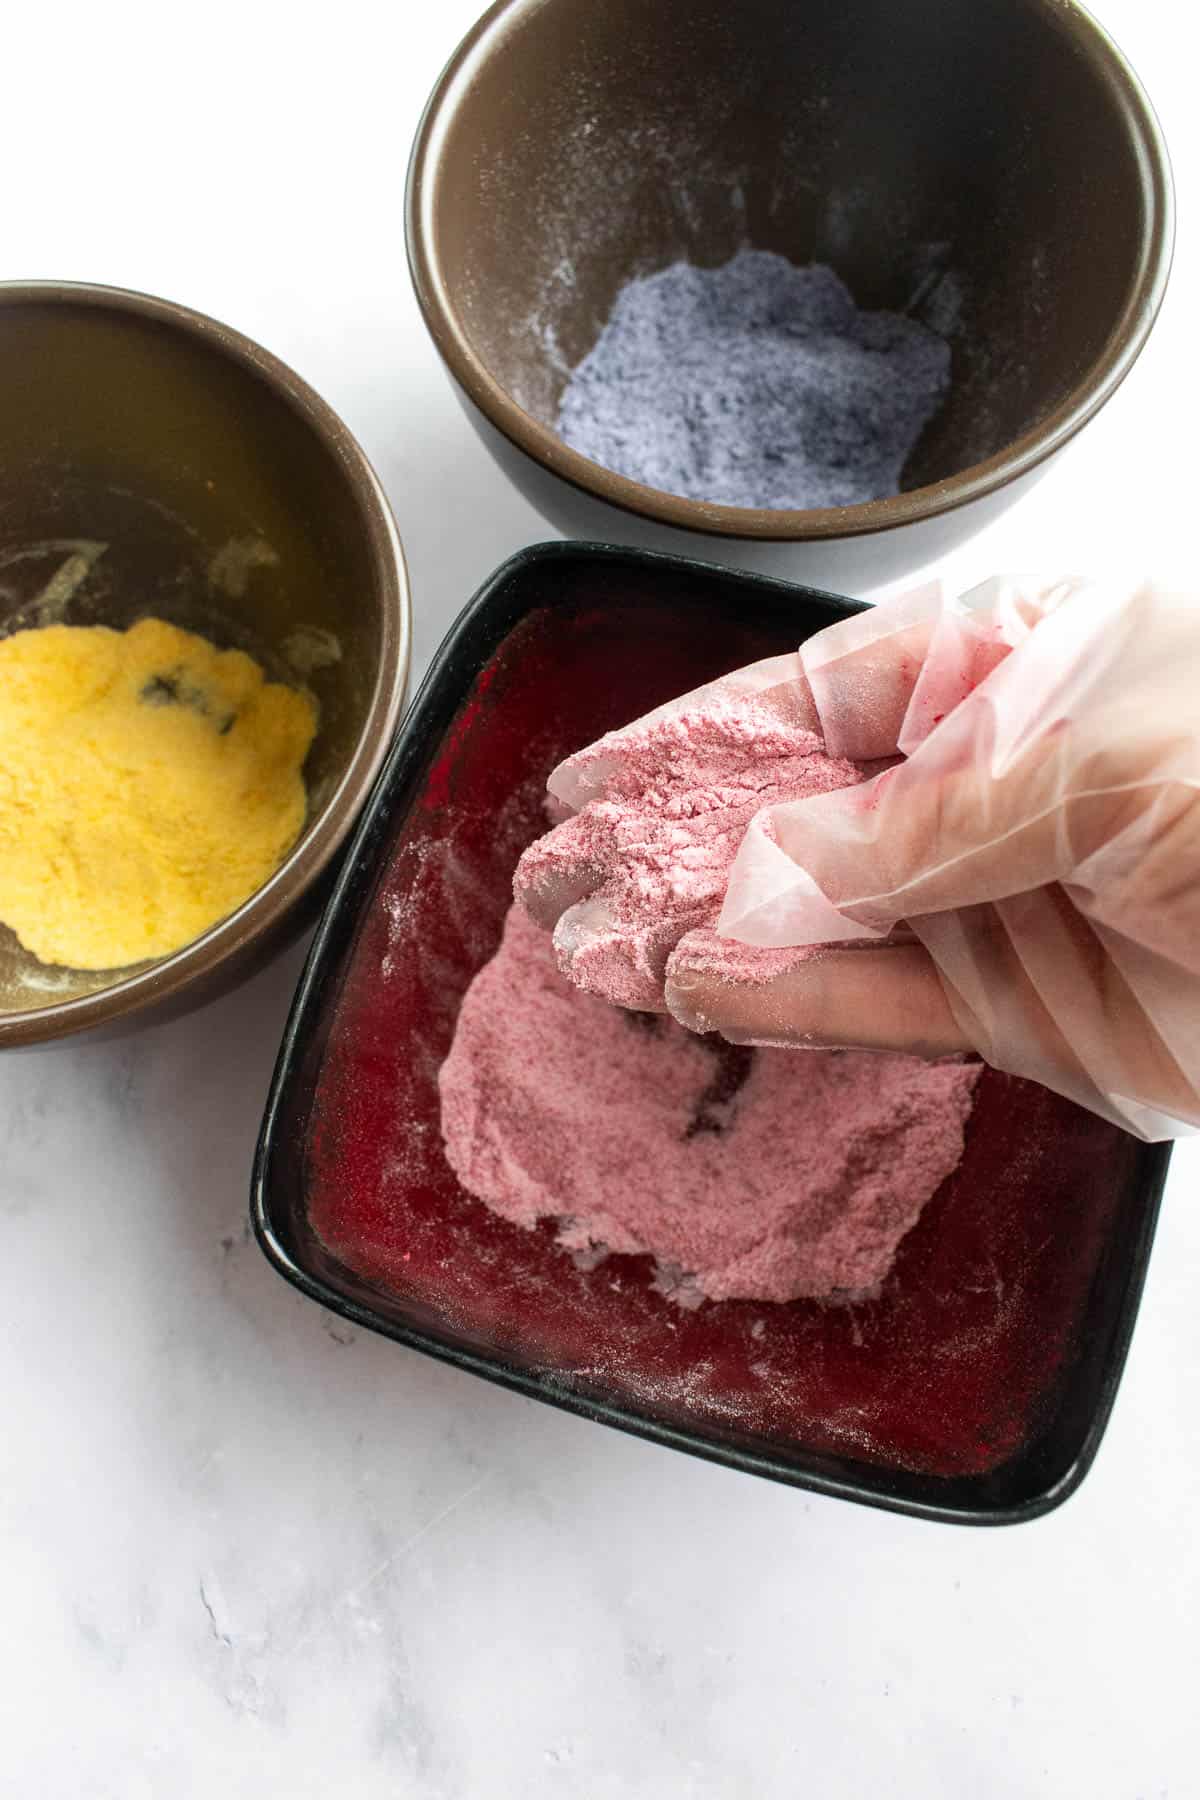
I mix a few drops of gel-based food coloring into ¼ cup of rice flour until it's evenly mixed. You can also use natural dye powders, like I do for my pink pie crust with dragon fruit powder.
My Tips for Bakery-Style Scoring
- Prevent Overproofing: I like to prep all my colored rice flour ahead of time in separate bowls. But if I forget & I'm worried my dough will overproof, I pop it in the freezer for 10 to 15 minutes before I score it, to ensure it doesn't deflate.
- Score Properly: To get the flower distinguished on the baked loaf, I use a sharp bread lame to get the inner circle ½ inch deep for the main expansion score. Then I score the petals ¼ to ½ inch deep, since shallower scores will cause the design to disappear into the dough.
- Flower Design: I freehand the petals, so I recommend drawing your flower at-scale a few times, to get the hang of it before committing to scoring it on your loaf. You only get one chance at that!
Scored Flower Bread
developed & tested by:
Equipment
Ingredients
- 4½ cups bread flour
- 2¼ teaspoons instant yeast (one packet)
- 2 teaspoons salt
- 1 cup plus 2 Tablespoons warm water (between 105°F-115°F or 41°C-46°C)
- 1 cup rice flour, divided
- gel food dye (yellow, pink, and purple)
Instructions
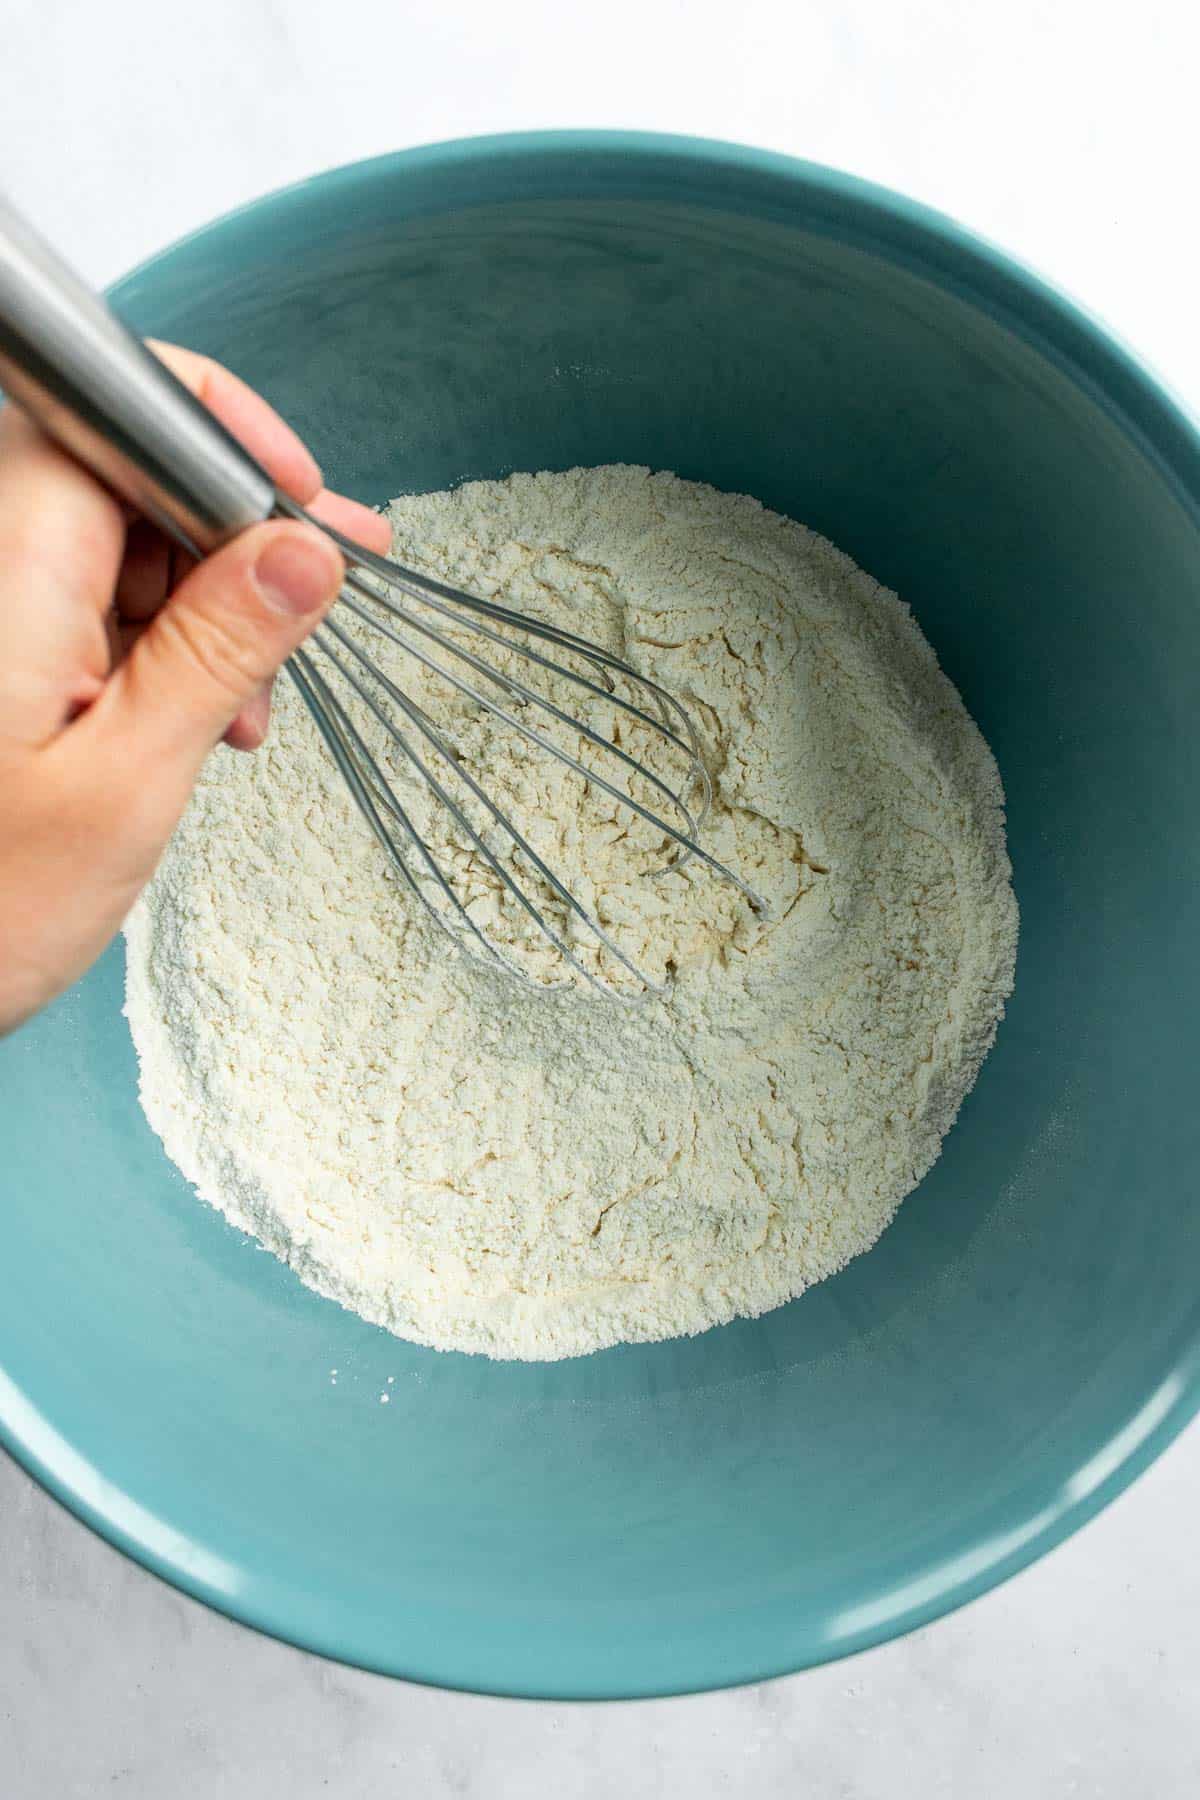
- In a mixing bowl, whisk the flour, instant yeast, and salt.
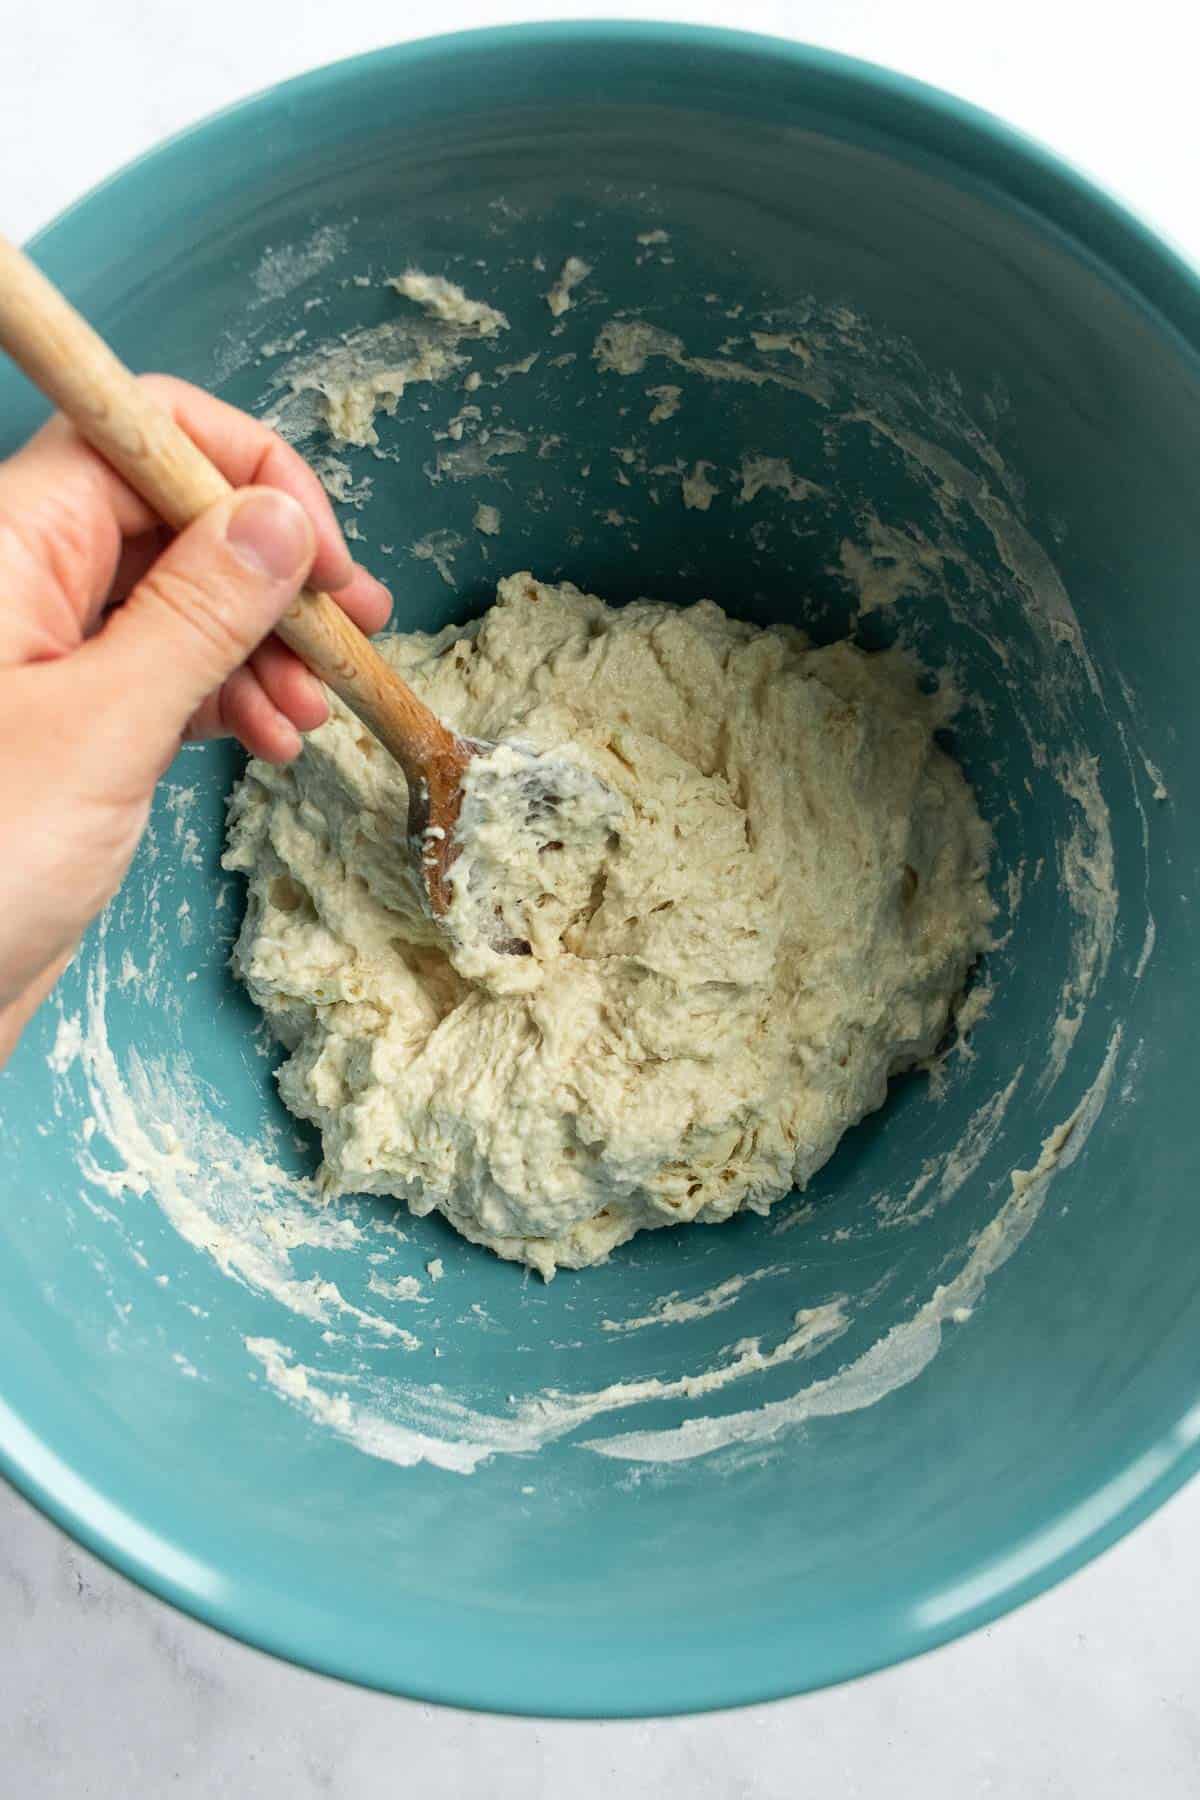
- Add the warm water to the dry ingredients, and mix everything with a large wooden spoon until it's combined.
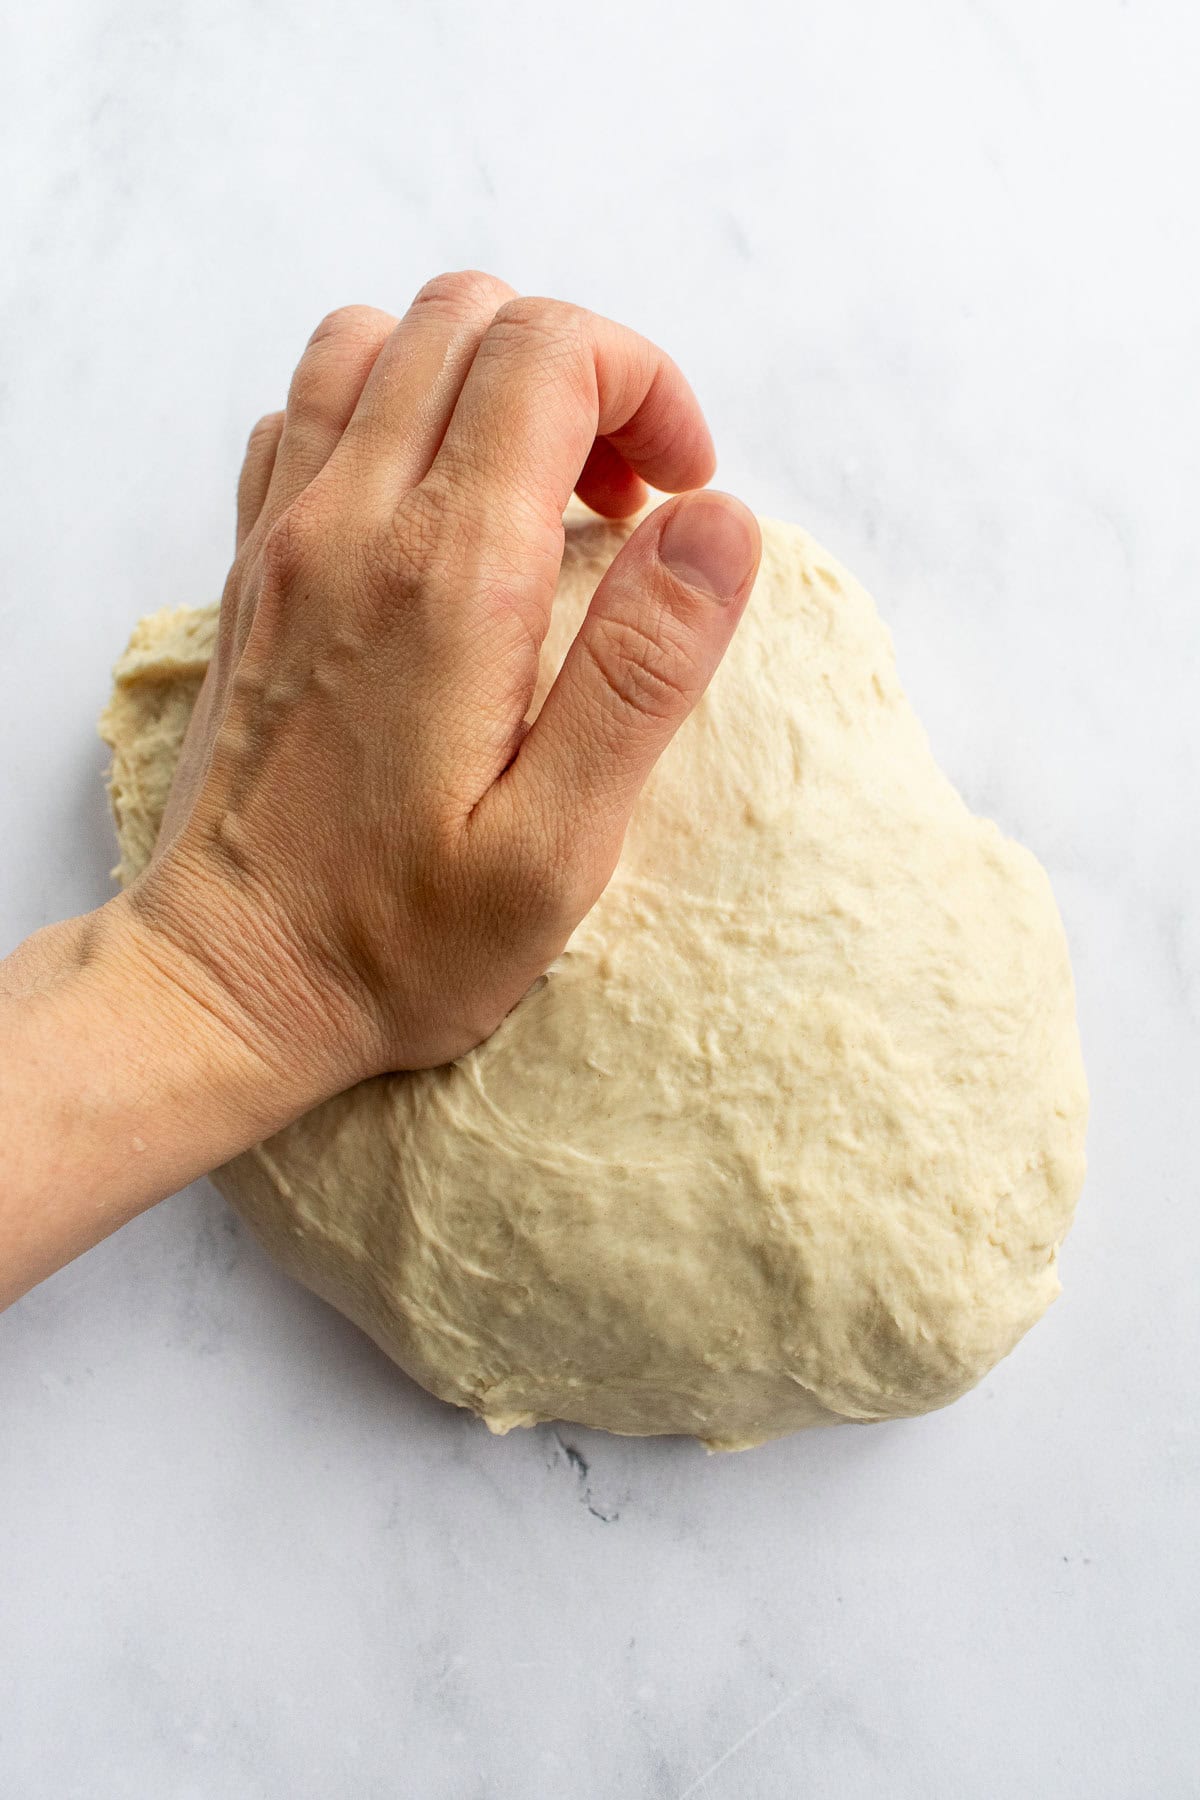
- On a lightly floured surface, knead the dough for 5-7 minutes by hand (or 4-5 minutes in a stand mixer with a hook attachment), until the dough is smooth and elastic. Sprinkle a teaspoon of bread flour onto your counter (not directly on the bread) as you knead it (as needed) to prevent it from sticking to your hands and the counter. Bread flour takes a little longer to hydrate than white flour, but the longer you knead the dough, the more elastic it'll become.
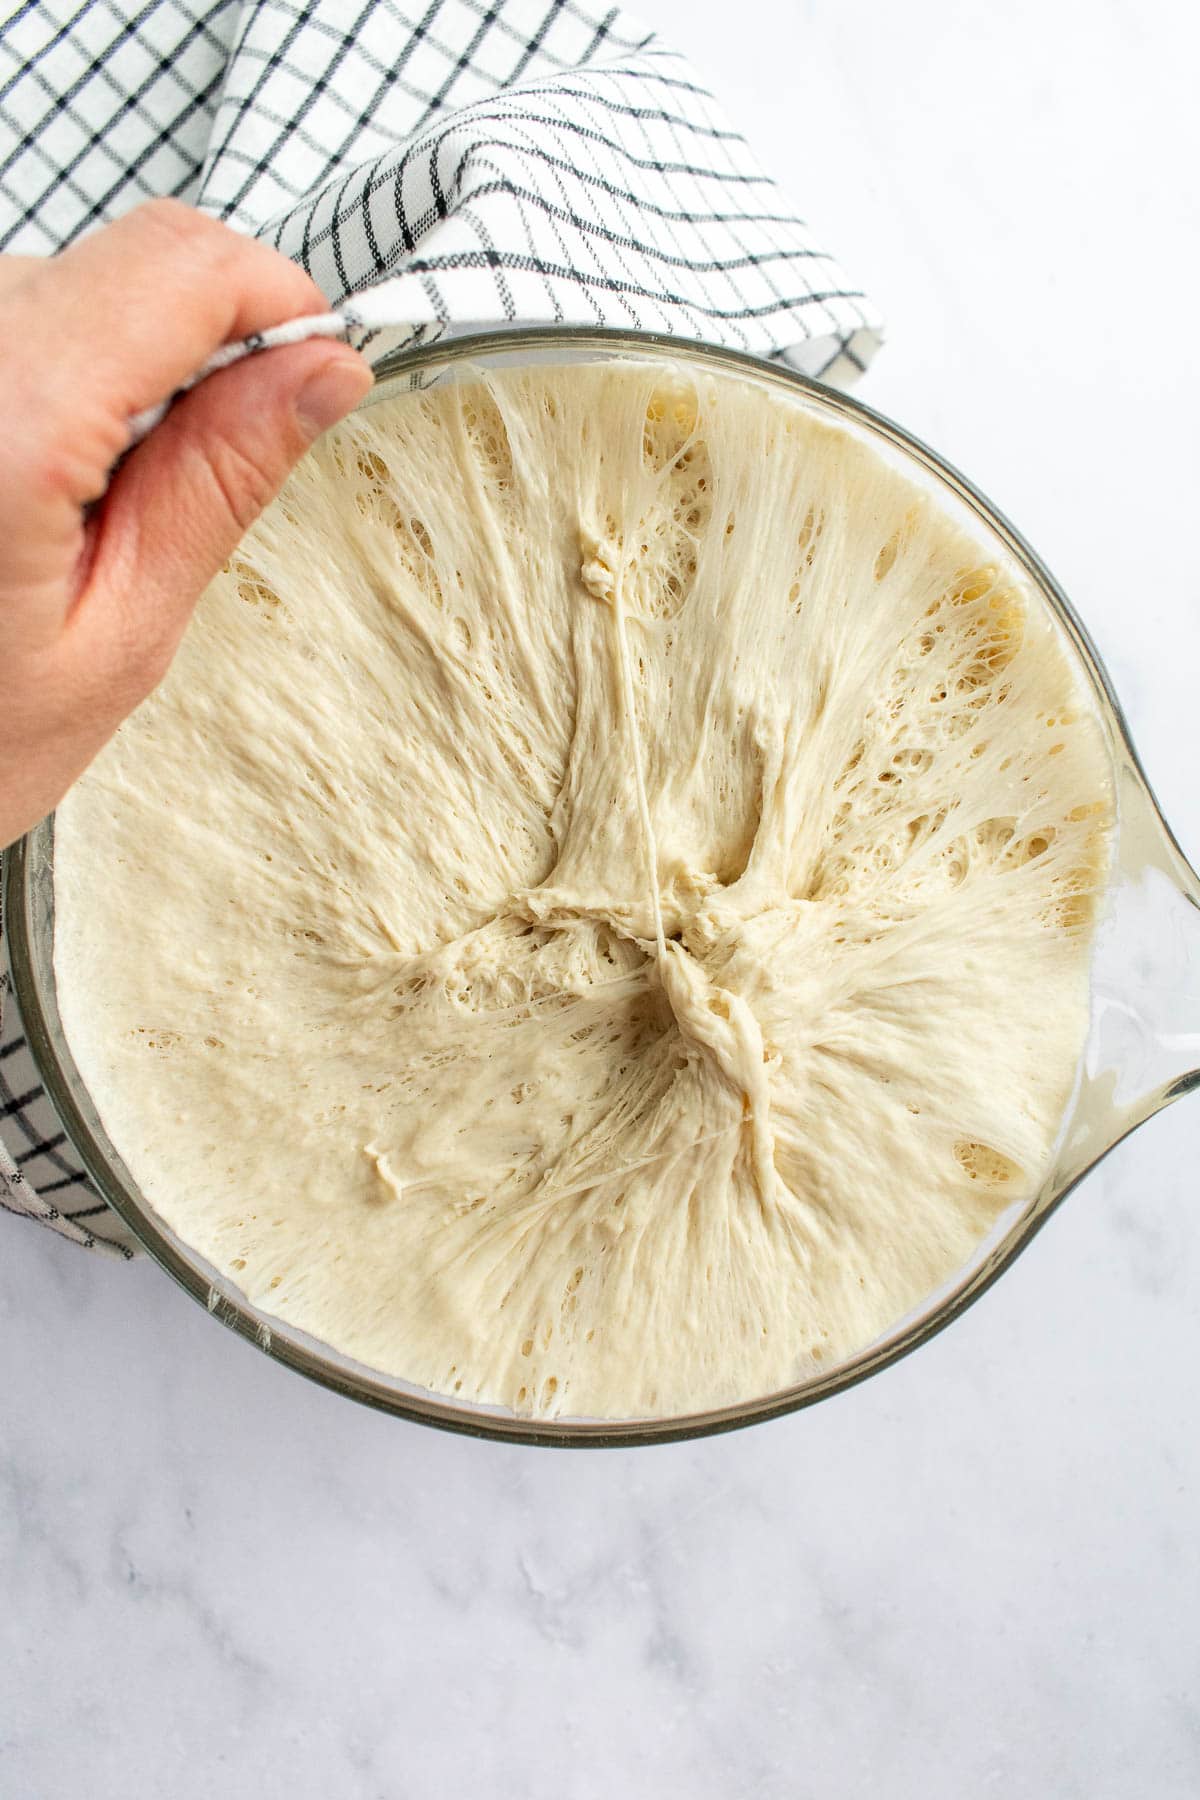
- Shape the dough into a ball and place it in a clean mixing bowl. Cover with a clean kitchen towel or a dinner plate, and set in a warm draft-free place to rise and double in size, after about 1.5 to 2 hours. (I like rising my dough in the oven, turned off, with the oven light on.)
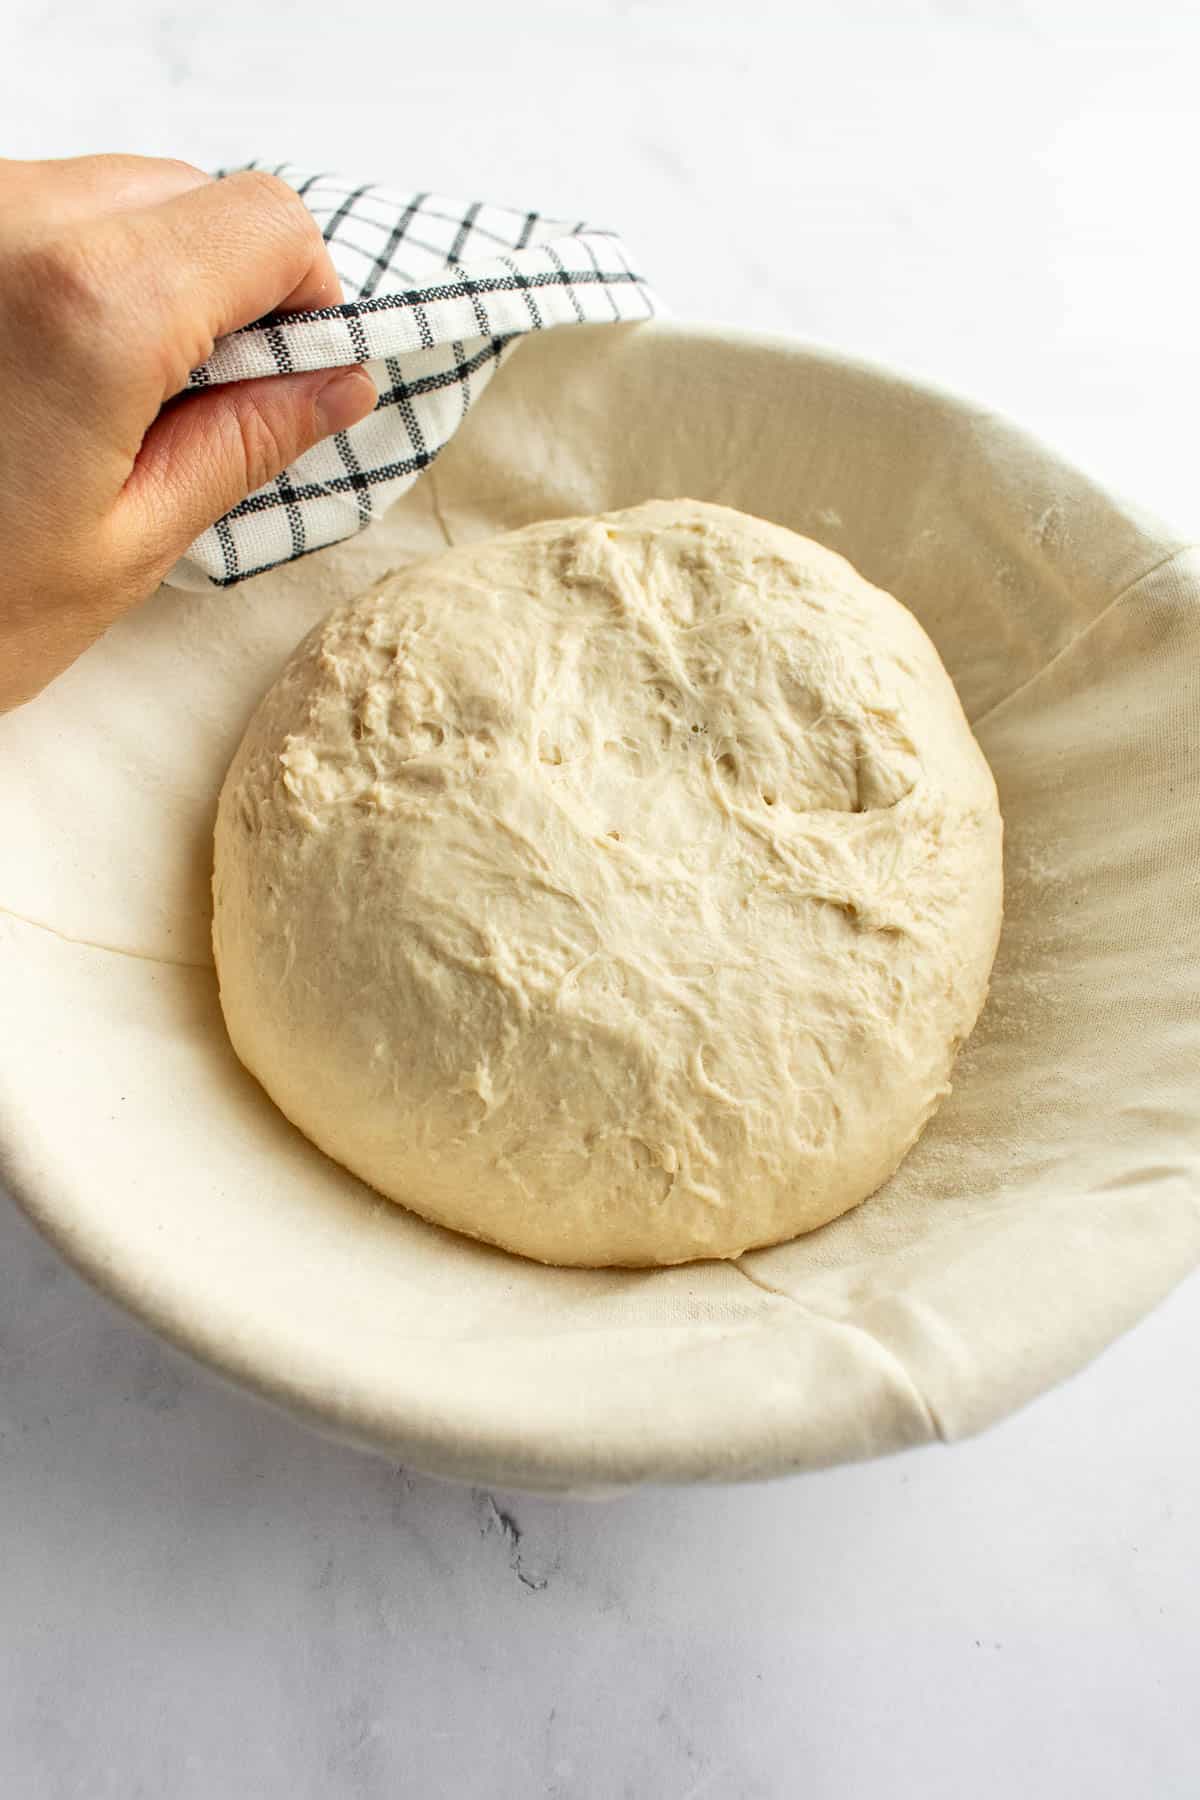
- On a clean surface, shape the dough into a round shape. Create tension on the surface of the dough by using your hands to gently pull the bottom of the bread along the counter towards you. Tuck all the seams underneath.
- Place the dough seam-side-up either in a round proofing basket or in a wide, shallow bowl lined with a kitchen towel dusted with a little flour. Cover the dough with a towel and allow it to proof in a warm spot for 30 minutes, or until an indentation made with your finger springs back to its original shape after 2-3 seconds.
- While the dough proofs, divide the rice flour into three separate bowls. Add a few drops of gel food dye at a time to each bowl and mix it with your hands until it reaches your desired color.
- Preheat your oven to 450°F (235°C). Place a Dutch oven with the lid in the oven to become hot as the oven preheats.
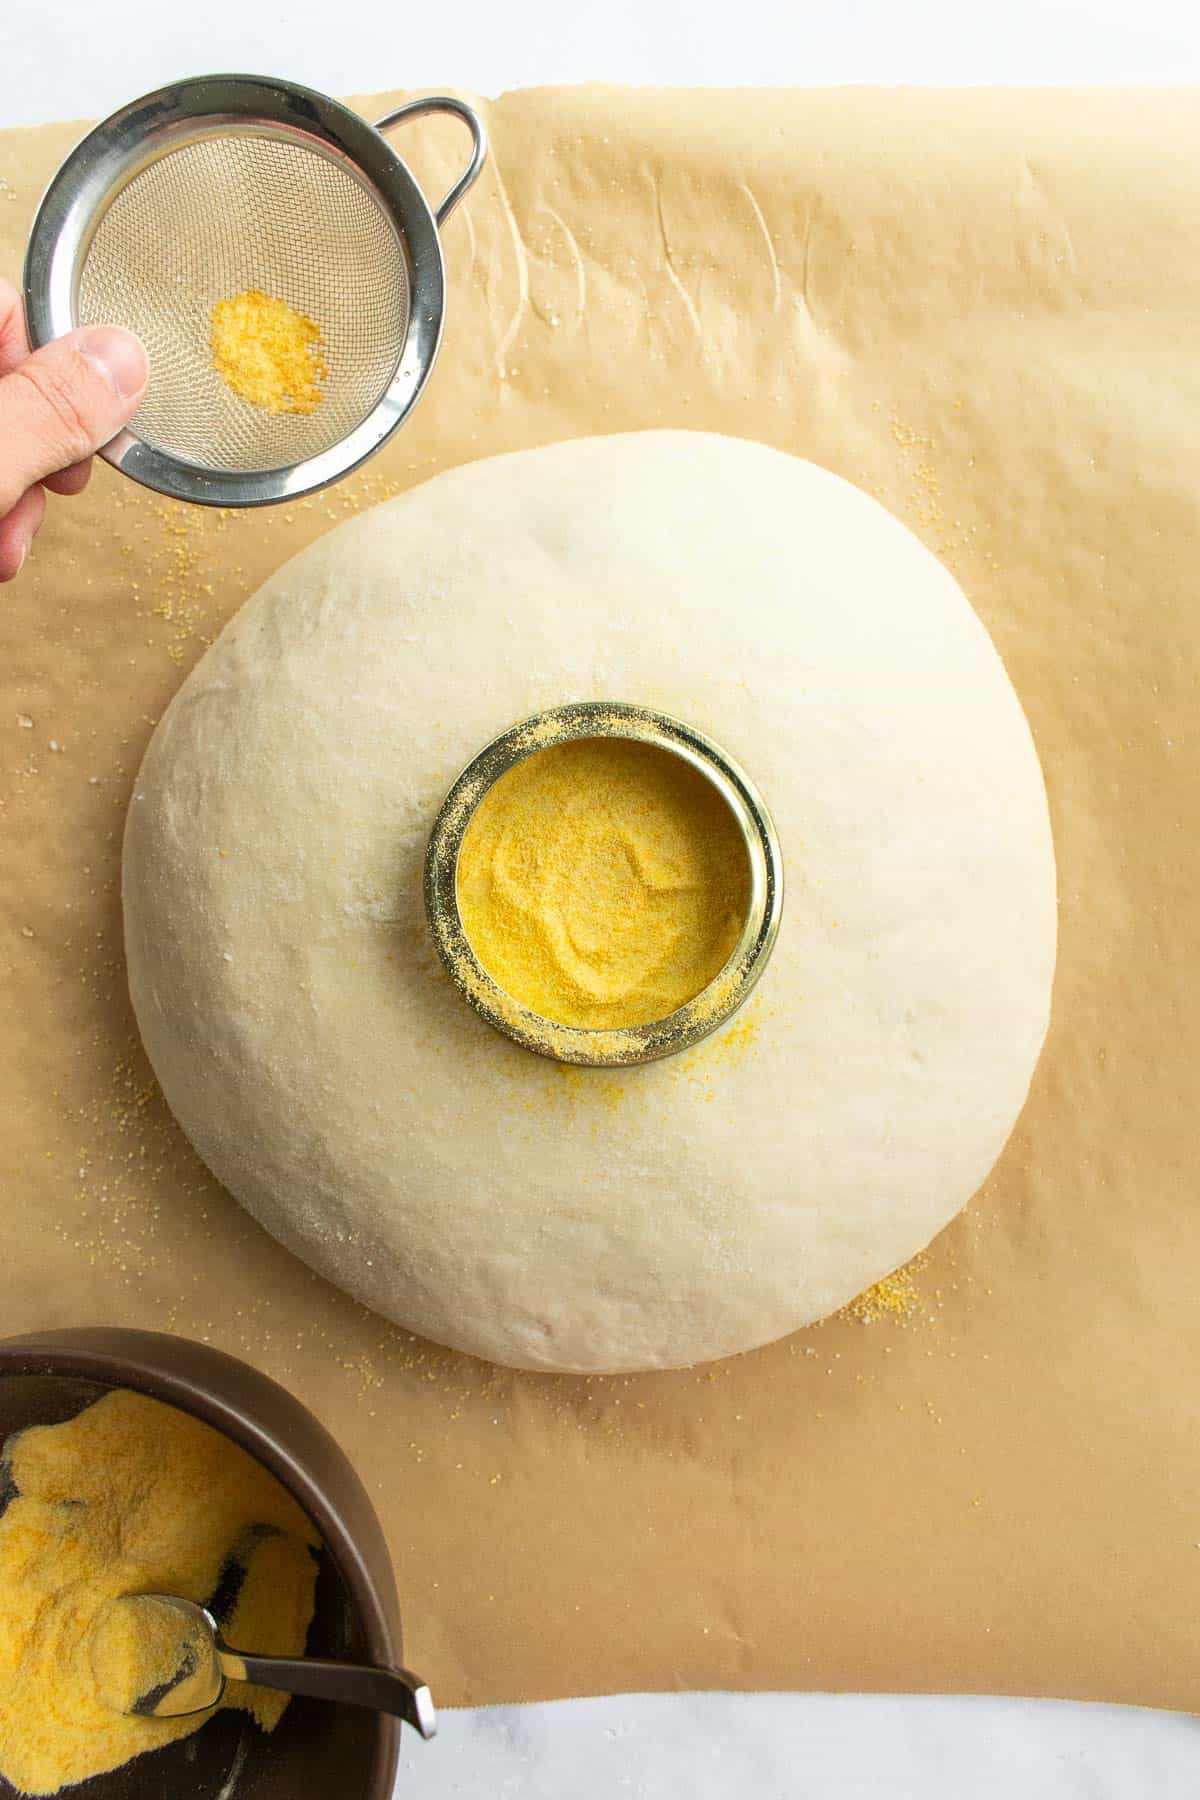
- Once the dough is proofed, sprinkle a little flour or cornmeal on a large piece of parchment paper or a silicone bread sling, and place the dough seam-side-down on top.
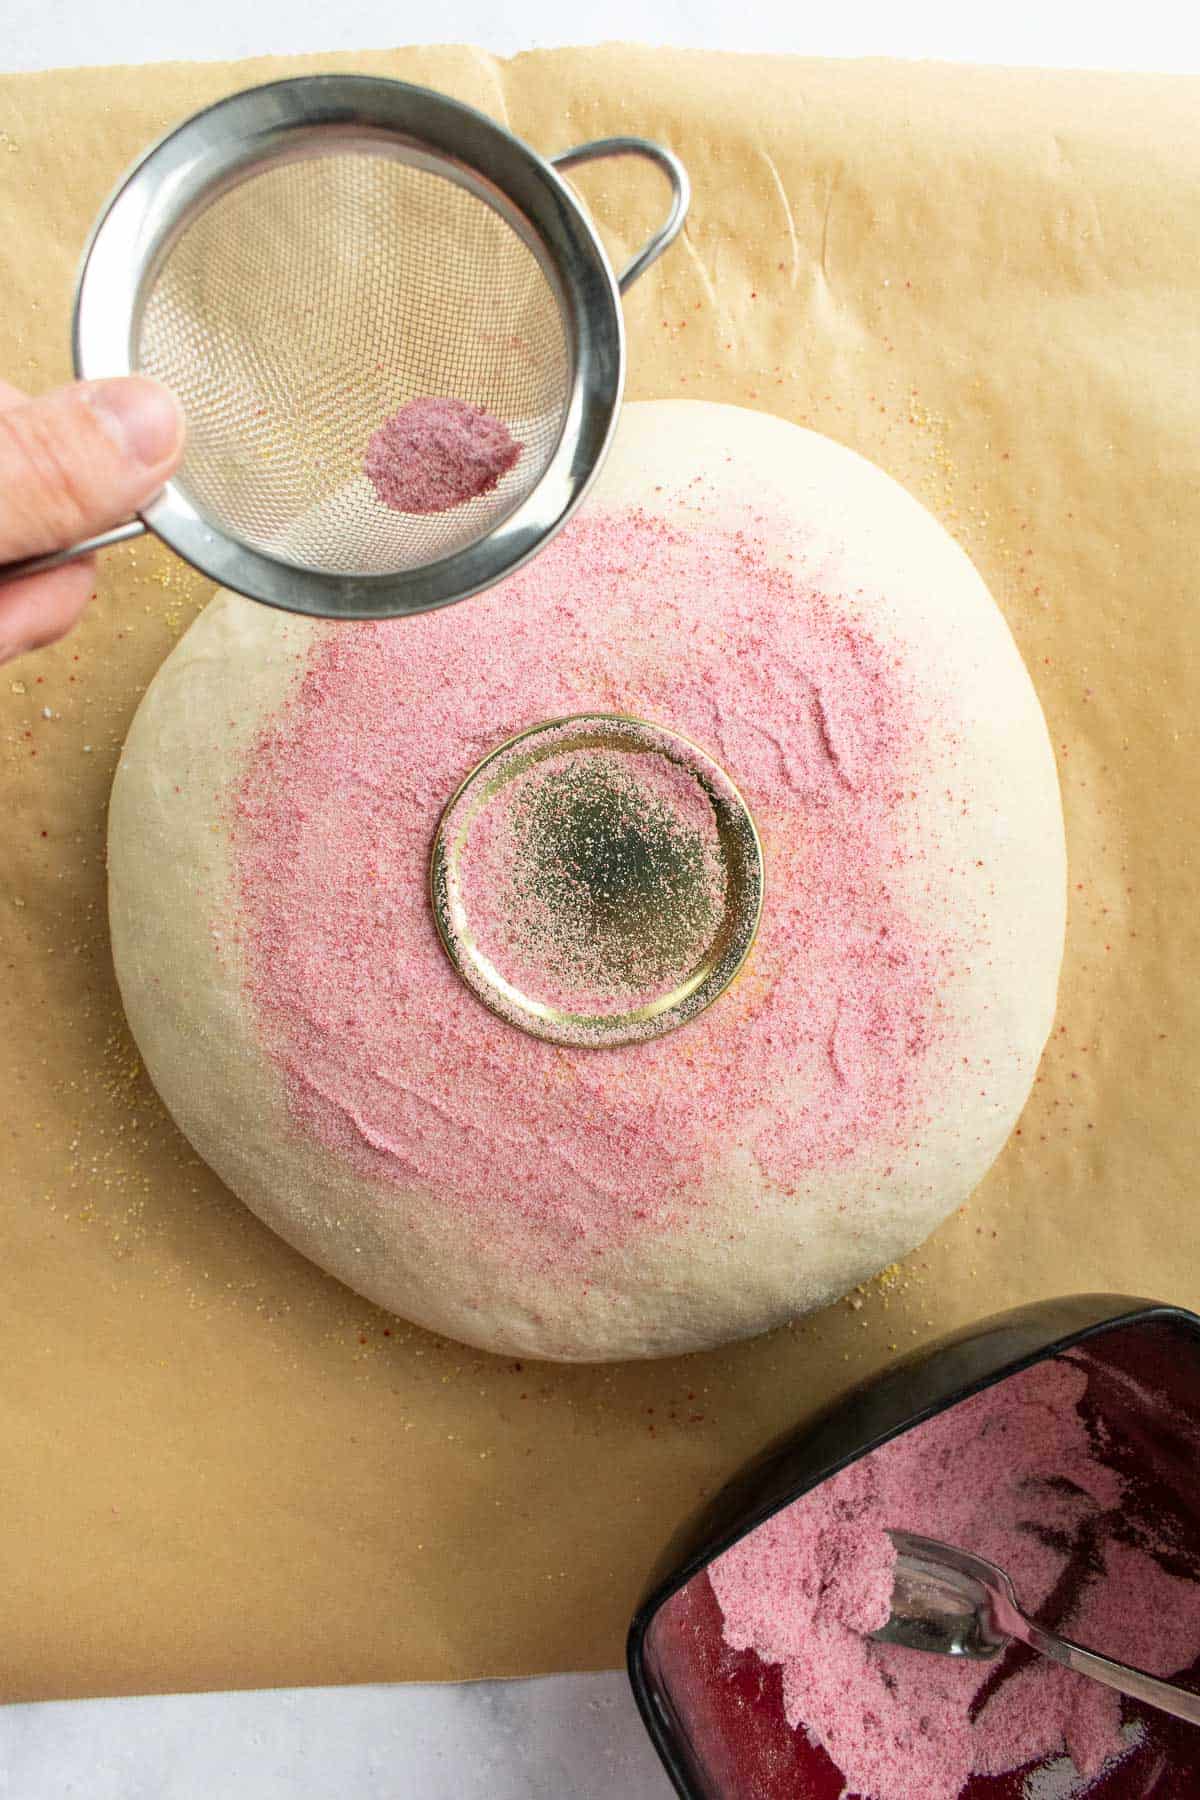
- Spray the surface of your loaf with water from a mister or spray bottle. (This helps the color adhere to the loaf better & create more steam in the Dutch oven as it bakes.)
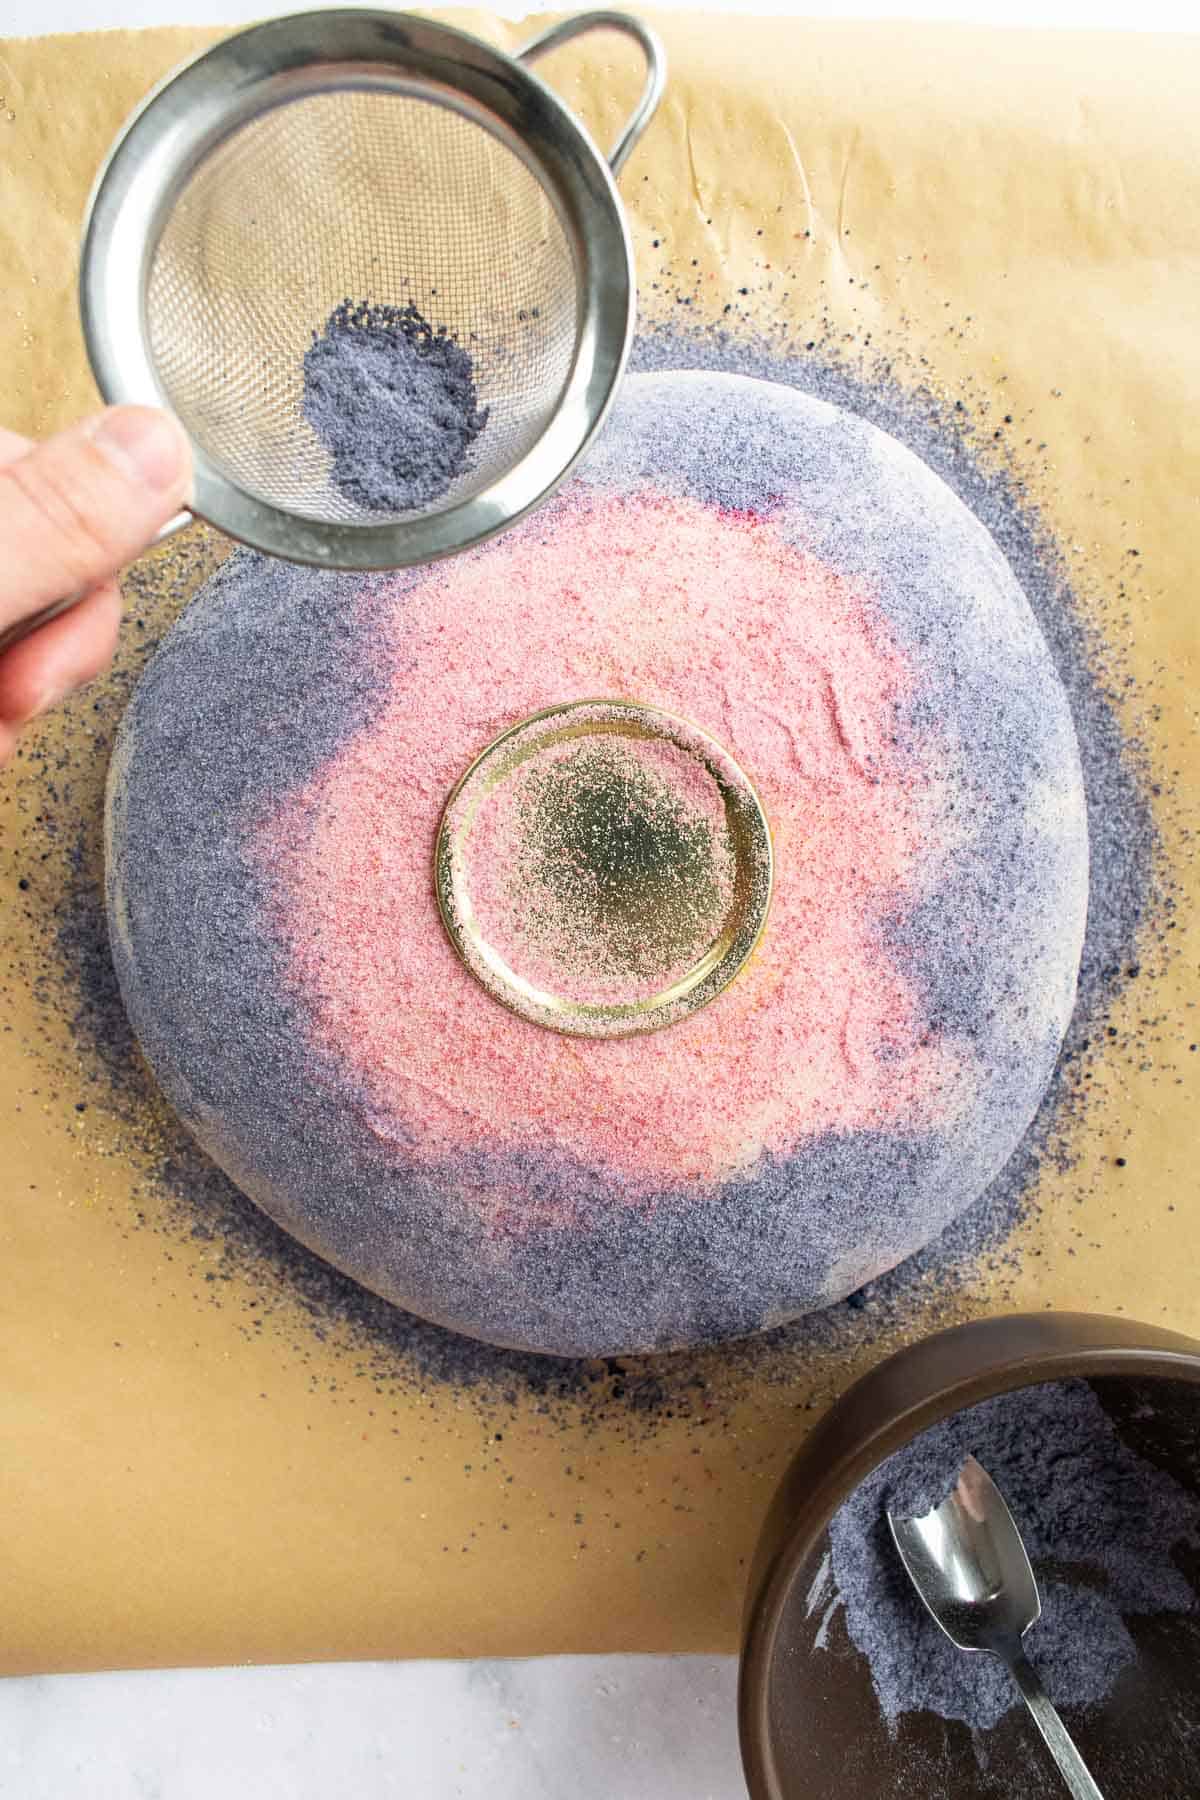
- Ombre Color: Place just the outer ring of a mason jar lid in the center of the loaf. Sift yellow-dyed rice flour or turmeric into the lid, to create a circle of color. Remove the lid and smooth out the powder as needed.Place the inner circle of a mason jar lid over the circle of color to protect it. Sift pink-dyed rice flour or dragon fruit powder in a ring around the lid. Then sift purple-dyed rice flour or indigo blueberry powder around the outer edges. Remove the mason jar lid. Use your hands again to gently smooth out any excess powder and blend the edges of the colors a bit.
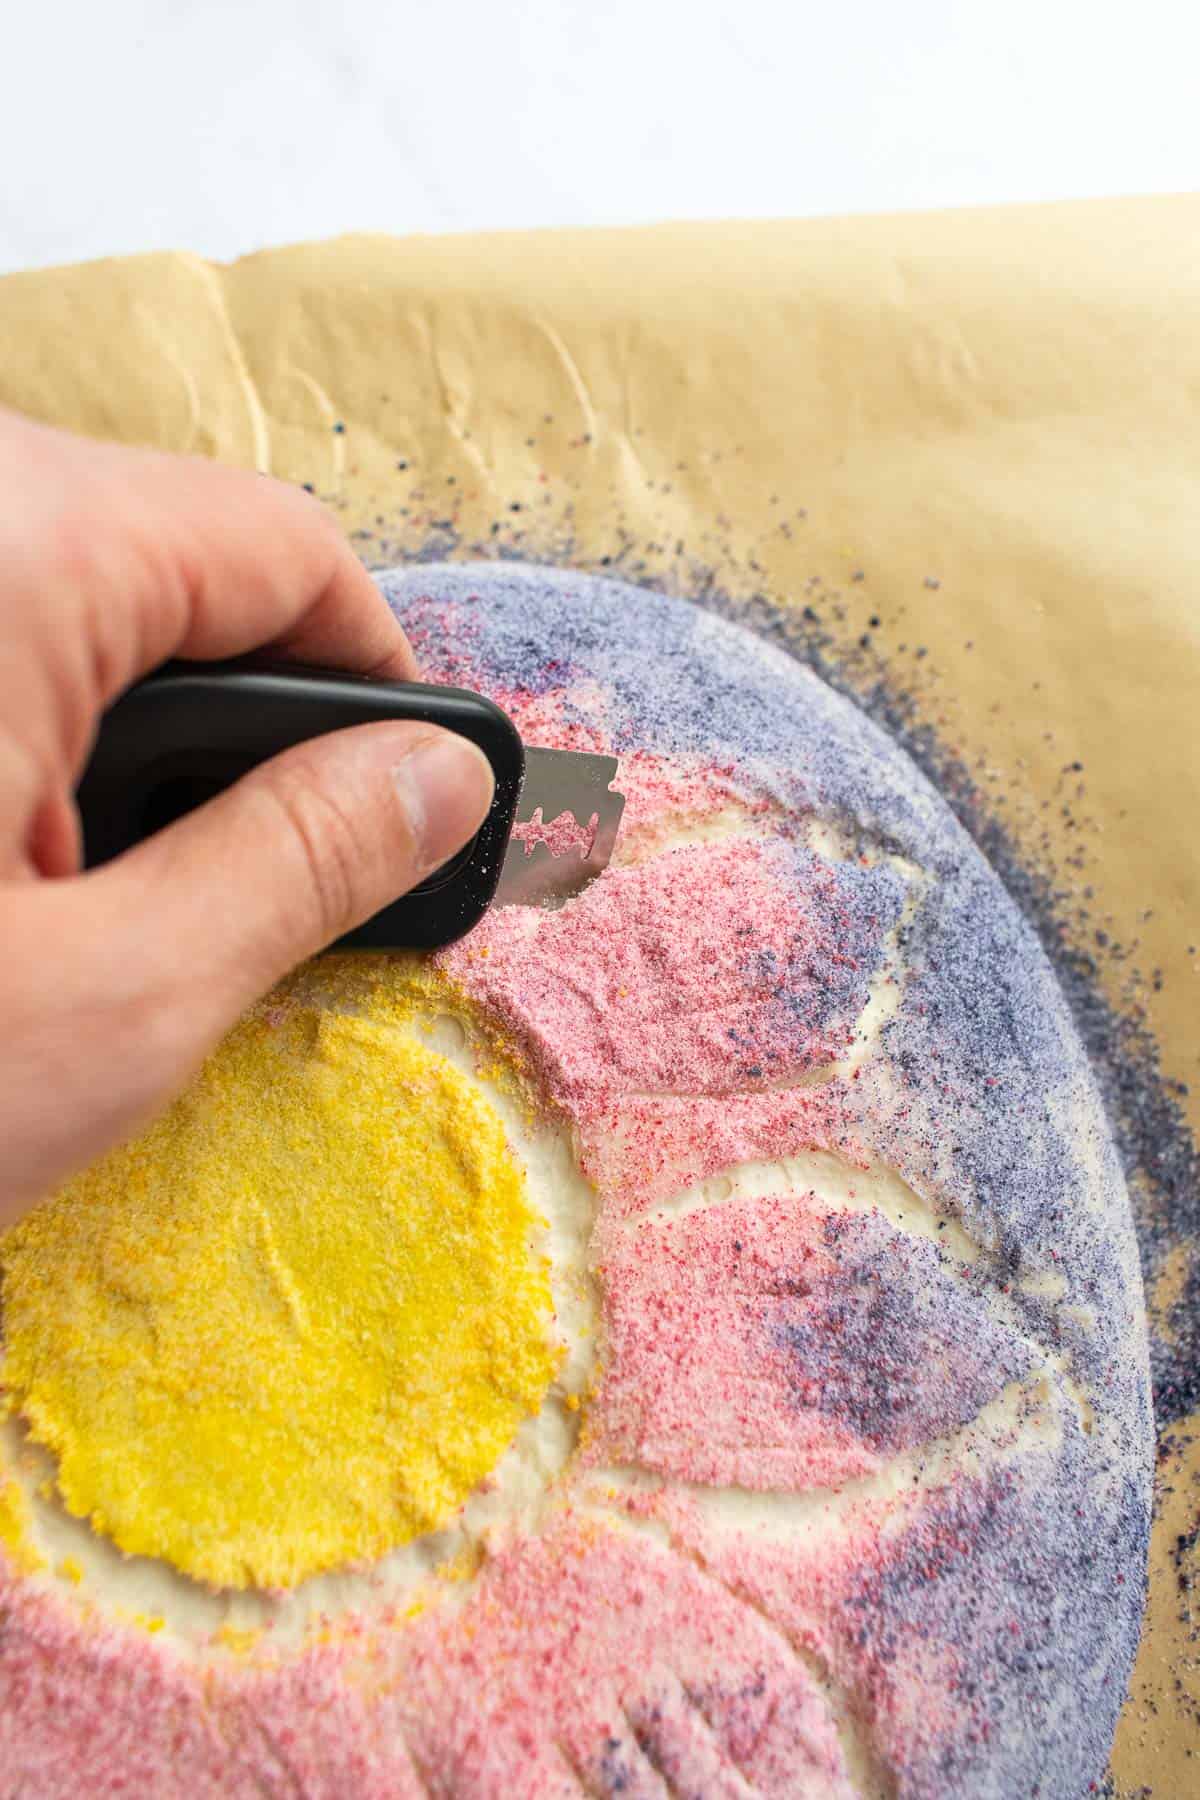
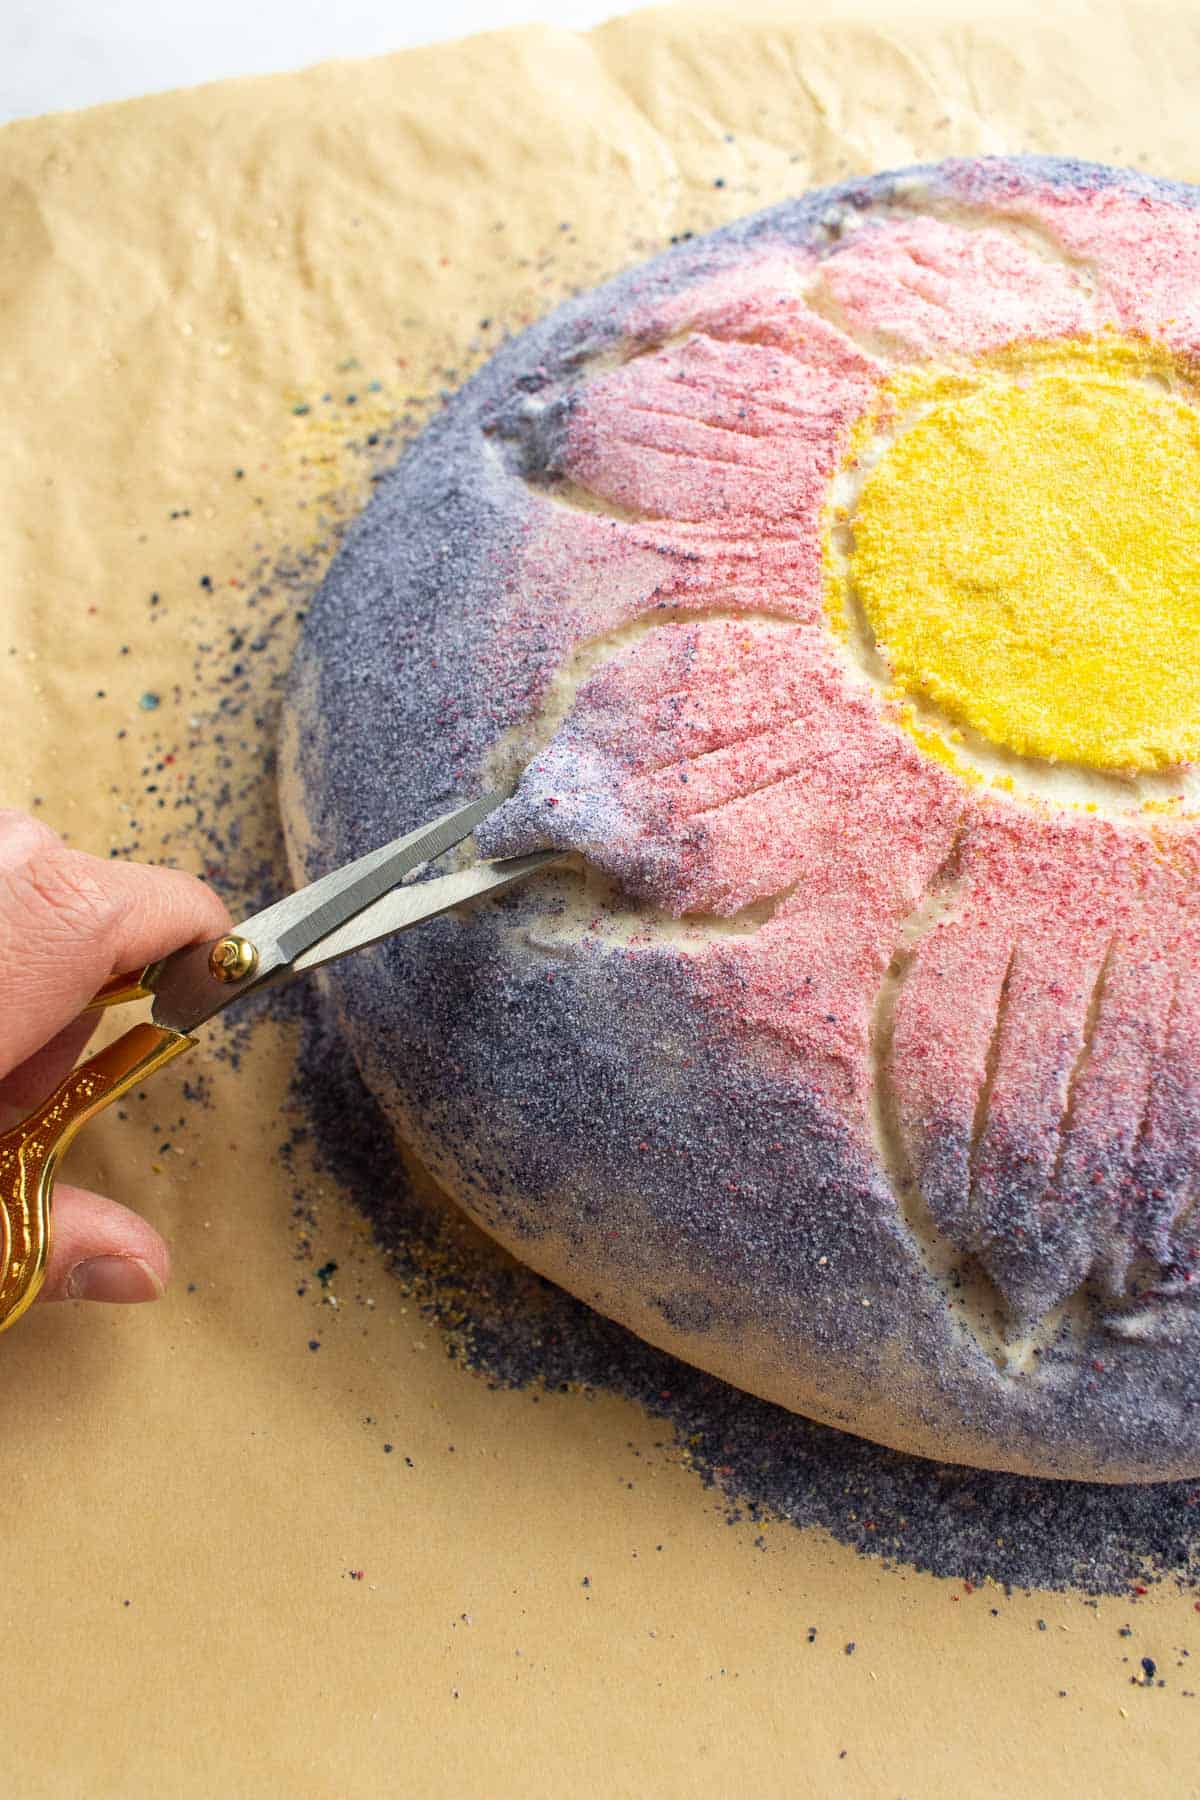
- Flower Design: Use a bread scoring lame to score ½-inch (1.25cm) deep around the inner yellow circle to form the inner circle of the flower. Score ¼-inch (0.6 cm) to ½-inch (1.25cm) deep oblong petals around the inner circle. Score three ¼-inch (0.6 cm) deep long lines along each petal. Use sharp kitchen scissors to cut the outer points of each petal, so they are more pronounced & separate from the rest of the loaf.
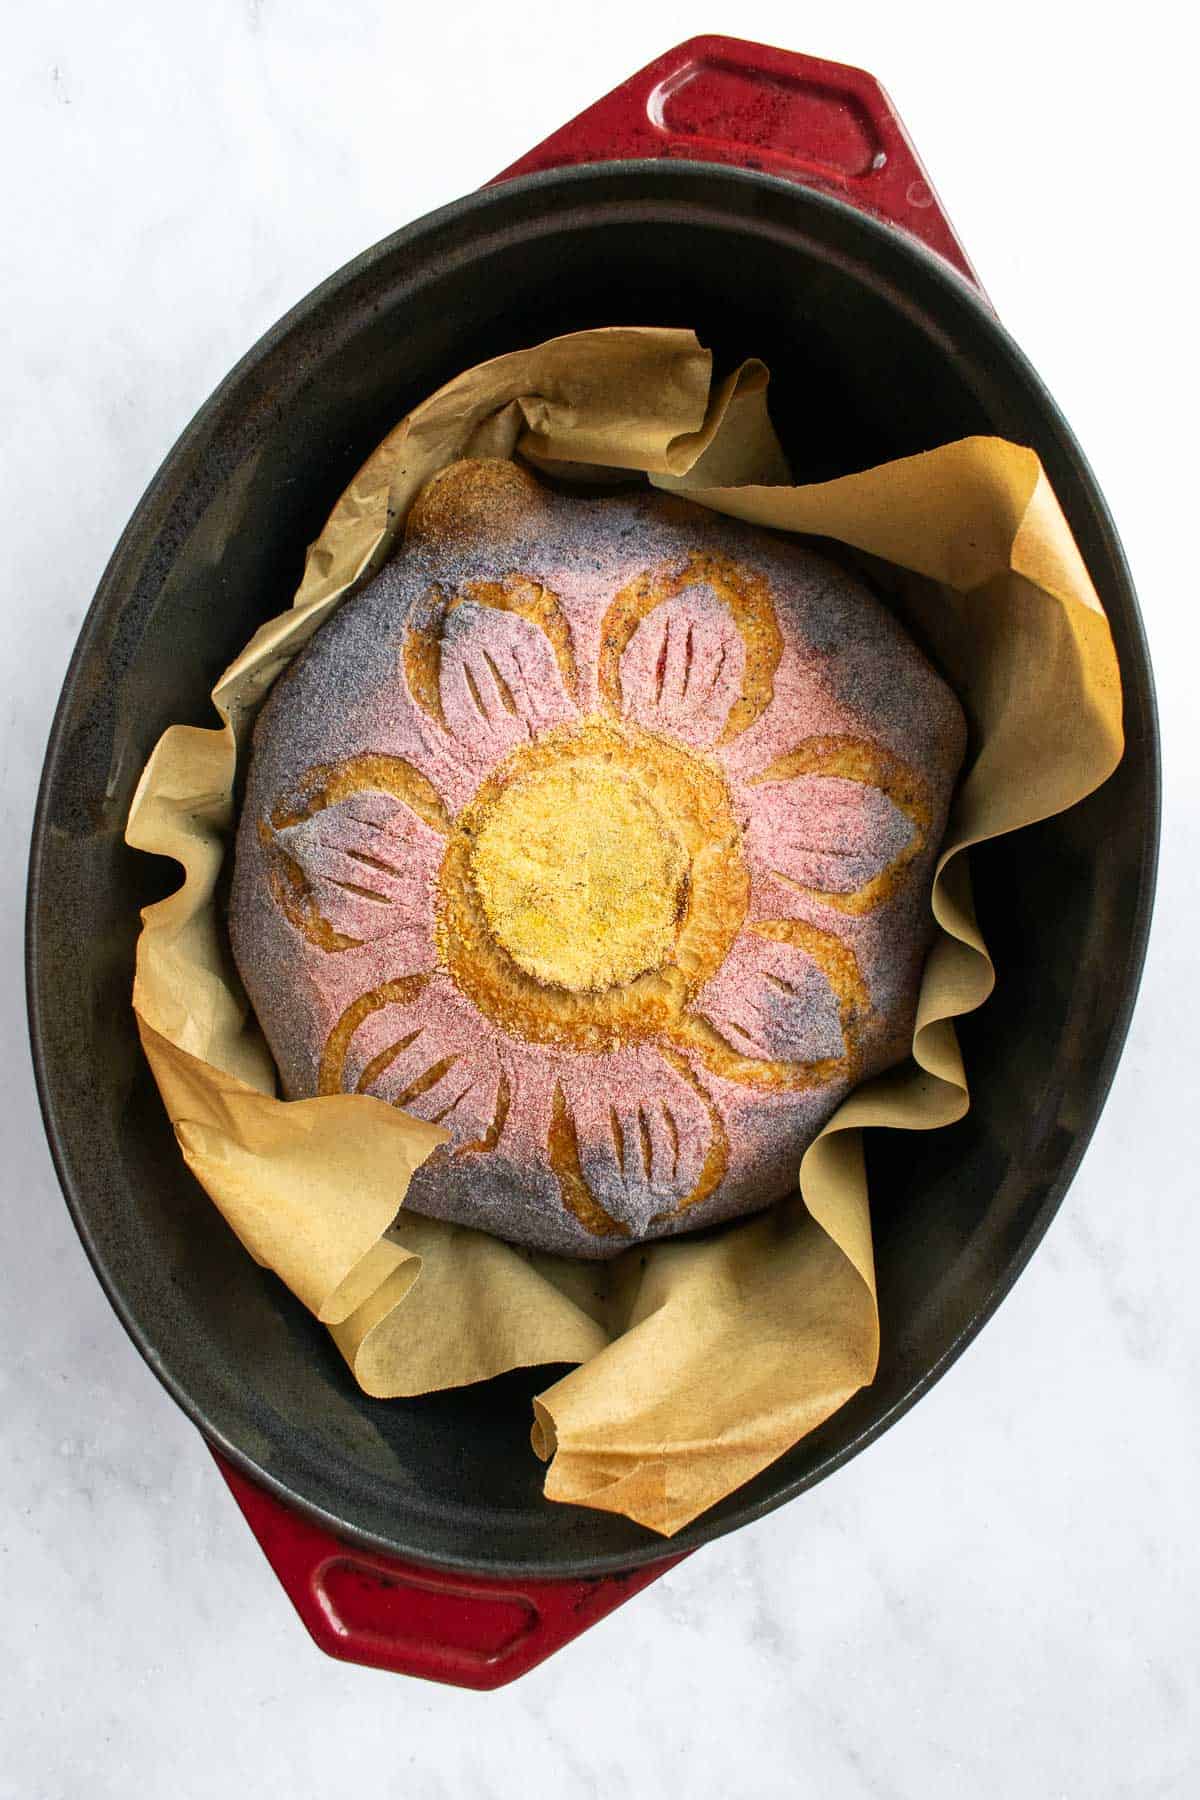
- Remove the hot Dutch oven from your oven and remove the lid. Pick up the bread by holding the corners of the parchment paper, and carefully place it in the hot Dutch oven.
- Cover with the lid and place it in the oven. Bake covered for 30 minutes, then remove the lid, and bake for an additional 10-15 minutes uncovered, until the crust is crispy and the bread has an internal temperature of at least 205°F. Allow the loaf to cool on a cooling rack for at least 1 hour before slicing. Enjoy!
Notes
- Hydration: I know it seems like a weird measurement for the water, but 1½ cups made the dough too dry and 1¾ cups made it too wet and sticky.
- Spray Bottle: If you don't have a spray bottle, you can flick a little water onto the loaf and spread it around with your hand. This step isn't totally necessary, but I find that it helps the color powders stick to the loaf better & create a crisper crust.
- Storing: Allow the bread to cool completely then store it in a paper or cloth bag. To freeze, wrap the loaf tightly in plastic wrap then aluminum foil.
- Food Dye: I prefer using gel-based food dye that I mix into rice flour with my hands, because I can control the vibrancy and hue of each color. If you want to avoid artificial dyes though, you can use natural food dye powders like turmeric, beet or dragon fruit powder, and purple sweet potato or indigo blueberry powder, noting that your colors will be darker and more vibrant. And I included the colors I used in the instructions, but feel free to use whatever colors you like!
Nutrition
This website uses affiliate links which may earn commission for purchases made at no additional cost to you.
I'm eggcited to hear from you :)