

This simple 3 ingredient pie crust is made with just flour, butter, and water. It's made by hand without a food processor or mixer, so you get chunks of cold butter that create steam in the oven, resulting in extra-flaky crust.

The Easiest Pie Crust I Make Again and Again
For years, I settled for storebought pie crust, you know the kind that gets the job done but never wows anyone. It wasn't until I started working from home and suddenly had the time to actually stand in my kitchen and make a batch from scratch that everything changed. One bite of that first homemade crust with all its buttery, flaky glory, and I was hooked, and I haven't bought the premade stuff since.
Here's what I learned after testing dozens of methods and recipes: an all-butter crust, made completely by hand, is worlds better than anything you'll find in a box or even in many other recipes online. No shortening. No food processor. Just flour, water, and cold cubed butter, worked together briefly with your own two hands. Other recipes I tried either have you mix everything into a food processor (which can quickly overwork the dough and leaves you with a mealy, chewy crust) or grate frozen butter into shreds, which takes forever and still doesn't create the big steam pockets that give you those gorgeous, flaky layers. Cubing cold butter and working it in by hand gives you control that no machine can, and it's the difference between a crust that's good and one that's unforgettable.
The other non-negotiable? Good-quality salted butter. I always reach for a high-fat, salted European-style butter (like Kerrygold) because the extra fat content makes a noticeably richer, flakier, more flavorful crust than standard American butter. It's a small swap that makes a huge difference, and once you taste it, you won't go back either.
My Oma has been making crust like this, by hand, in her kitchen for years, without any fancy kitchen tools. This 3 ingredient pie crust recipe is my ode to that, and it's proof that the simplest version is often the best one. Once you've got the basics down, feel free to whisk in dry flavorings with the flour. I love adding cinnamon to the crust for my mixed frozen berry pie (which you definitely should try next!) Or keep this pie dough leaning savory and turn it into my roasted carrot galette, baked free-form on a sheet pan.
Step-by-Step: How to Make Homemade Pie Crust


My Tips for Foolproof Pie Dough
- Roll your dough out to about ⅛-inch thick. Any thicker and the center won't fully cook through; any thinner and it'll tear before you can get it into the pan.
- Dough that's too warm will tear as you roll it, and the butter can start to melt, which means it seeps out during baking and leaves you with a puddle in your oven that can set off your smoke alarm. (Don't ask me how I know...)
- Dough that's too cold will crumble instead of rolling smoothly, so I always let it sit at room temperature for about 15 minutes after pulling it from the fridge before rolling.
- Baking in a hot kitchen? In the summer, I roll my dough out on a frozen cookie sheet to keep everything cool. And as soon as I notice the butter starting to soften, I pop the dough back in the fridge for 15 to 20 minutes.
- I always use all-butter in my pie crust, because I found it always produces a noticeably richer, flakier crust than shortening ever could. However, shortening is more stable at room temperature, so if you're baking somewhere hot without AC, swapping in shortening for a quarter to half of your butter can save your crust from melting into a mess. This is exactly how I made four batches of hand pies for a friend's summer wedding without a single one falling apart in the heat.


3 Ingredient Pie Crust (without shortening)
developed & tested by:

Ingredients
- 4 cups all purpose flour
- 1 cup salted butter, cubed and kept cold in the fridge (2 sticks)
- ½ cup ice cold water
Instructions
- In a large mixing bowl, toss the cold butter cubes in the flour.
- Squish the butter cubes in between your fingers and thumbs to flatten them and break them into smaller pieces. The butter pieces should end up looking like small, thick cornflakes or roughly the size of almonds
- One tablespoon at a time, add the ice cold water. Mix the dough with a fork after each addition of water until it comes together.
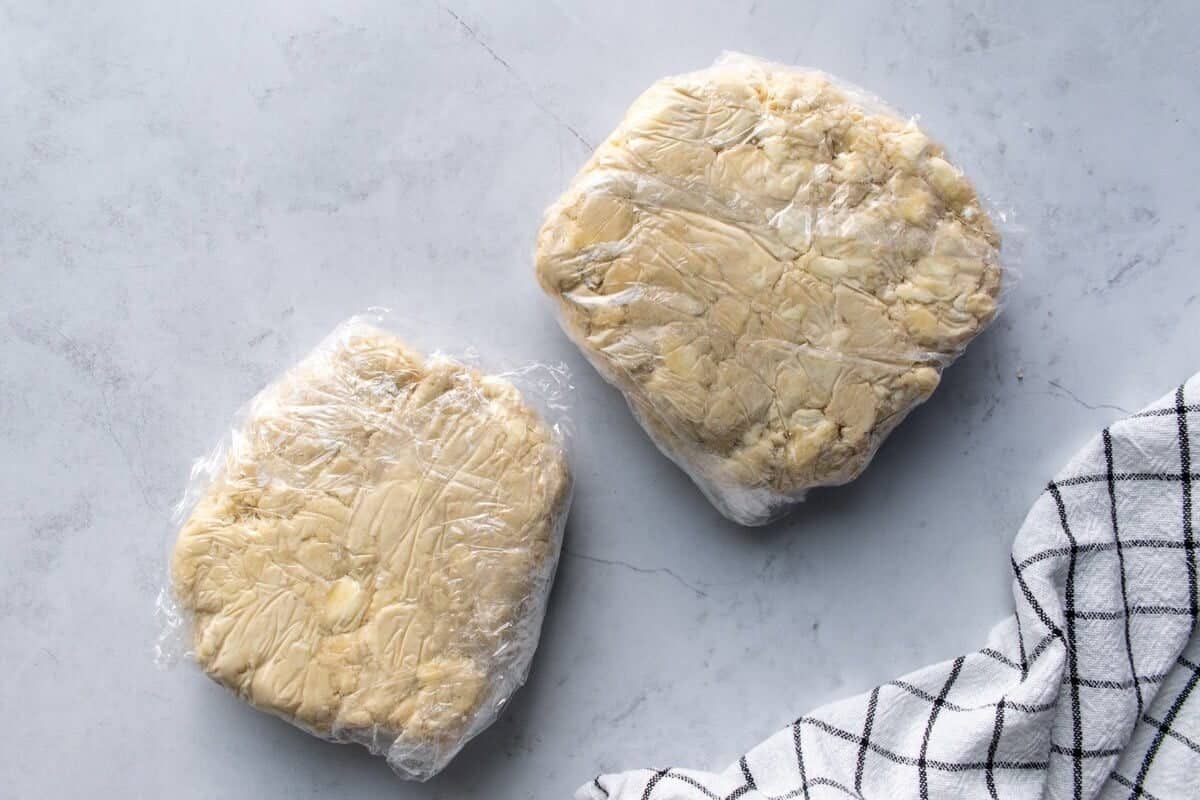
- Shape the dough into two thick discs and wrap them individually in plastic wrap. Chill in the fridge for at least 1 hour or store in the fridge for up to 3 days.
- On a lightly floured work surface, roll out your pie dough until it's about ¼ inch thick. Use the pie crust in your desired recipe.
Notes
- Butter: Cut your butter into cubes and store it in the fridge until you're ready to use it. And while American butter works well, I recommend splurging on a high-fat European butter for even more flavor.
- Water: To get your water as cold as it needs to be, place cold water in a bowl with some ice cubes. Store it in the fridge until you're ready to use it.
- Storing: Store pie dough wrapped tightly in plastic wrap in the fridge for up to 3 days. Or store wrapped tightly in two layers of plastic wrap in the freezer for up to 3 months.
- My recipe makes two dough discs, so you can use one for a double-crust pie, or bake a pie with just the bottom crust and freeze the second disc for your next baking project within a few months.


Shanon says
Thank you for sharing this recipe
flora says
Thank you for sharing this recipe
Carissa Erzen says
Thanks for stopping by!